Indoor Wall Preparation Remove Wallpaper. What Pros Say
Preparing your indoor walls for a fresh new look can be exciting and intimidating, especially when removing the existing wallpaper. But worry not! With the right approach and some helpful tips, you can tackle this project like a pro, ensuring a smooth, clean surface for your next design adventure.
Indoor wall preparation: remove wallpaper:
To prepare indoor walls and remove wallpaper, gather necessary tools and materials, protect your workspace, mix a wallpaper remover solution, score the wallpaper, apply the solution, remove the damp wallpaper, clean the walls, sand and repair any damage, and finally, remove protection and prep for the next step.

Eager to revamp your space with fresh, sleek walls? Discover the most effective and efficient techniques to remove old wallpaper and prepare your indoor walls for a flawless finish. Read on for expert tips and tricks that will make this home improvement project a breeze!
Contents
- 1 Preparing Interior Walls: Wallpaper Removal Process
- 1.1 • Step 1: Gather Necessary Tools and Materials
- 1.2 • Step 2: Protect Your Workspace
- 1.3 • Step 3: Mix Wallpaper Remover Solution
- 1.4 • Step 4: Score the Wallpaper
- 1.5 • Step 5: Apply the Wallpaper Remover Solution
- 1.6 • Step 6: Remove the Wallpaper
- 1.7 • Step 7: Clean the Walls
- 1.8 • Step 8: Sand and Repair
- 1.9 • Step 9: Remove Protection and Prepare for the Next Step
- 2 Post-Wallpaper Removal: Wall Preparation Guide
- 3 Eliminate Wallpaper and Ready Walls for Paint
- 3.1 • Step 1: Gather Necessary Tools and Materials
- 3.2 • Step 2: Prepare the Room
- 3.3 • Step 3: Score the Wallpaper
- 3.4 • Step 4: Apply the Wallpaper Stripper Solution
- 3.5 • Step 5: Scrape Off the Wallpaper
- 3.6 • Step 6: Remove Residue and Clean the Walls
- 3.7 • Step 7: Repair Wall Damage
- 3.8 • Step 8: Prime the Walls
- 3.9 • Step 9: Paint the Walls
- 4 Quickest Techniques for Wallpaper Elimination from Walls
- 5 Drywall Treatment after Wallpaper Extraction
Preparing Interior Walls: Wallpaper Removal Process
Whether you are looking to update outdated wallpaper or prepare for a fresh coat of paint, one thing is certain: proper wall preparation is crucial. This guide will show you how to remove wallpaper and prepare your indoor walls for your next project.
• Step 1: Gather Necessary Tools and Materials
To get started with the removal process, ensure that you have the following items on hand:
- Drop cloths or plastic sheeting
- Painter’s tape
- Bucket
- Large sponge
- Wallpaper remover solution or DIY alternative (white vinegar and water mix)
- Perforator tool or scoring tool
- Wallpaper scraper
- Trash bags
- Sandpaper
- Clean cloth
Having all the required materials and tools will make the process smoother and help ensure a successful outcome.
• Step 2: Protect Your Workspace
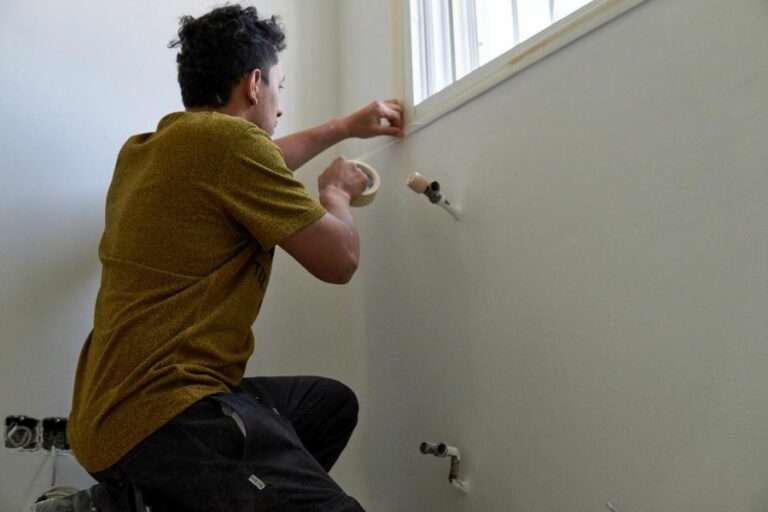
Before getting started, it is essential to protect your workspace. Spread drop cloths or plastic sheeting across the floor to catch any debris, and use painter’s tape to secure it in place.
This will also protect your flooring from any stray wallpaper remover solution. Move any furniture or items out of the way, or cover them with a drop cloth.
• Step 3: Mix Wallpaper Remover Solution
There are commercial wallpaper remover solutions available at hardware stores, or you can make your own by mixing equal parts white vinegar and water. Fill a bucket with the solution, then soak a large sponge to begin the wallpaper removal process.
• Step 4: Score the Wallpaper
Using a perforator or scoring tool, score the wallpaper to help the remover solution penetrate the wallpaper more effectively. Be careful not to apply too much pressure, as it may damage the underlying wall surface. Aim for small punctures evenly spaced across the entire area.
• Step 5: Apply the Wallpaper Remover Solution
Dampen the wallpaper with the sponge soaked in the wallpaper remover solution. Start at the top of the wall and work your way down in small sections, ensuring that each area is well-saturated. Wait around 10-15 minutes for the solution to take effect.
If you encounter wallpaper that is difficult to remove, consider placing a wet cloth over that area for an extended period or carefully using a steamer to soften the adhesive underneath.
• Step 6: Remove the Wallpaper
After your walls have had time to soak, use your wallpaper scraper to gently remove the damp wallpaper. Start at a loose corner or edge and work your way across, being careful not to damage the wall surface. Use your scraper at a low angle to avoid digging into the wall.
If you encounter problems removing some sections of wallpaper, reapply the remover solution and let it sit for another 10-15 minutes before trying again.
Remember to place the removed wallpaper in trash bags to keep your workspace clean.
• Step 7: Clean the Walls
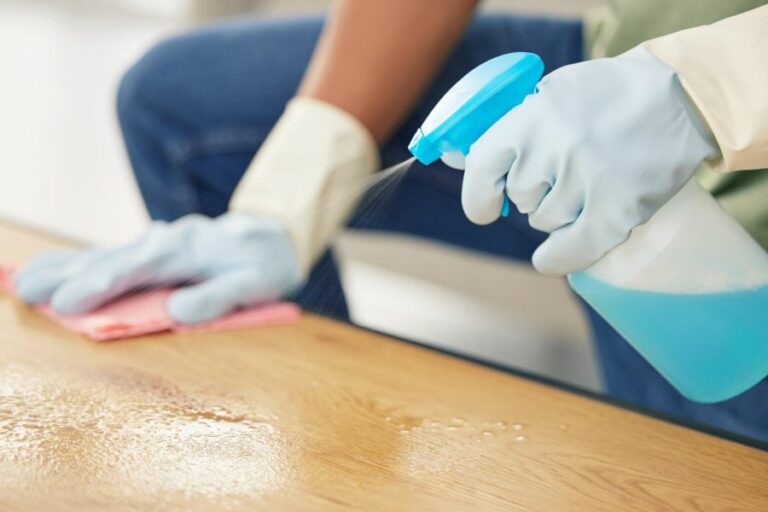
Once all the wallpaper has been removed, use a sponge and clean water to wash any remaining paste or residue off the walls. Be sure to wring out the sponge frequently to avoid spreading the paste further. Then, use a clean cloth to dry the walls before moving on to the next step.
• Step 8: Sand and Repair
Inspect your walls for any damage or imperfections. Use sandpaper to smooth rough areas or uneven surfaces. If necessary, fill any holes or cracks with an appropriate compound, following the manufacturer’s instructions.
Once repairs are complete, sand the areas again to ensure a smooth and even surface. Any remaining imperfections may show through if you plan on painting or applying new wallpaper.
• Step 9: Remove Protection and Prepare for the Next Step
Once the walls are completely dry and you are satisfied with their condition, remove the drop cloths and painter’s tape. Be sure to properly dispose of any trash or debris.
At this point, your walls are properly prepared for a fresh coat of paint or new wallpaper. For more information on wall preparation, visit the Paint Quality Institute for expert tips and advice.
By following these steps, you will have successfully completed the task of removing wallpaper and prepping your walls for their next transformation. Take pride in your accomplishment, and enjoy the results of your hard work.
Post-Wallpaper Removal: Wall Preparation Guide
Prepping your walls after removing wallpaper is an essential step towards achieving a flawless finished result.
• Tools and Materials Required
To effectively prep your walls, you will need the following tools and materials:
- Wallpaper scraper or putty knife
- Sandpaper or sanding block (120-150 grit)
- TSP (Trisodium Phosphate) or other cleaning solution
- Bucket
- Warm water
- Sponge and cloth
- Primer (oil-based or acrylic)
- Drop cloths or plastic sheeting
- Painter’s tape
Once you have gathered these tools and materials, you are ready to begin.
• Remove Wallpaper Adhesive Residue
The first step in prepping your walls is removing any leftover adhesive residue. Improperly removing adhesive can cause issues later on when applying paint or new wallpaper.
Good to know: If the adhesive is particularly stubborn, a wallpaper steamer or adhesive remover may be necessary. However, I recommend trying the following steps first to avoid potential damage to your walls.
- Mix the TSP or cleaning solution with warm water according to the manufacturer’s instructions.
- Soak a sponge in the cleaning solution and gently scrub the walls to remove any remaining adhesive. A putty knife or scraper can be used to carefully lift away any sticky residue.
- Rinse the walls thoroughly with clean water and allow them to dry completely.
• Inspect and Repair Wall Damage
After the adhesive is fully removed, inspect your walls for any damage or imperfections. Common issues include holes, cracks, and peeled drywall. These problems should be addressed before proceeding to ensure a smooth final result.
- Fill any holes or cracks with a patching compound or joint compound, using a putty knife to smooth the surface. Allow the compound to dry as per the manufacturer’s instructions.
- Sand the repaired areas with 120-150 grit sandpaper, making sure the surface is flush with the surrounding wall.
- Wipe down the walls with a clean, damp cloth to remove any dust.
• Sand and Clean the Walls
Sanding the walls helps to create a more even surface, allowing for better adhesion of primer and paint. Follow the steps below for optimal results.
- Use a sanding block or sandpaper to gently sand the entire wall surface. Be cautious not to apply too much pressure or sand too deeply, as this can damage the wall.
- Wipe down the walls with a clean, damp cloth to remove any dust.
- Allow the walls to dry completely before moving on to the next step.
• Apply Primer
Applying a primer is crucial to ensure optimal adhesion of paint or new wallpaper. It also helps to create a uniform surface, resulting in a more professional-looking finish.
- Cover the floors and any nearby furniture with drop cloths or plastic sheeting to protect them from paint splatters.
- Apply painter’s tape along the edges of the walls, windows, and any other areas you wish to protect from the primer.
- Use a brush or roller to apply a coat of primer to the walls. Be sure to follow the manufacturer’s instructions for best results, and allow the primer to dry completely.
Note: If your walls have any severe stains or damage, a stain-blocking primer is recommended. This type of primer will help to cover any imperfections and create a more even surface for painting.
• Conclusion: You’re Ready for Your New Wall Treatment
Once the primer is dry, your walls are fully prepped and ready for a new coat of paint or wallpaper. By carefully following the steps outlined above, you can achieve a beautiful and professional result in your own home.
Step | Description |
|---|---|
1 | Remove any remaining wallpaper adhesive using a scraper or putty knife. |
2 | Wipe down the walls with a sponge and warm water to remove any remaining residue. |
3 | Allow the walls to dry completely. |
4 | Inspect the walls for any damage, such as holes, cracks, or scratches. |
5 | Repair any damage using spackling paste or joint compound. |
6 | Sand the walls using fine-grit sandpaper to smooth out any rough areas. |
7 | Wipe down the walls again with a damp cloth to remove any dust from the sanding. |
8 | Apply a high-quality primer to the walls to ensure a good surface for painting or applying new wallpaper. |
Eliminate Wallpaper and Ready Walls for Paint
• Step 1: Gather Necessary Tools and Materials
Before starting the project, gather all the necessary tools and materials to ensure a smooth and efficient process. Some essential items include:
- Drop cloths or plastic sheeting
- Wide and narrow putty knives
- Ladder
- Wallpaper scorer
- Bucket
- Sponge
- Wallpaper stripper solution
- Trash bags
- Painter’s tape
• Step 2: Prepare the Room
Before removing the wallpaper, it’s essential to prepare the room. Begin by:
- Removing all furniture and wall decorations.
- Placing drop cloths or plastic sheeting on the floor and over any furniture that couldn’t be removed.
- Taping over all electrical outlets and light switches to prevent water damage.
• Step 3: Score the Wallpaper
Use a wallpaper scorer to create small holes in the wallpaper’s surface. This step will make it easier for the wallpaper stripper solution to penetrate the material and loosen the adhesive.
Note: Be careful not to press too hard while scoring, as this may damage the walls beneath the wallpaper.
• Step 4: Apply the Wallpaper Stripper Solution
Prepare the wallpaper stripper solution according to the manufacturer’s instructions. Many experts recommend using a 20% vinegar and 80% hot water mixture as a cost-effective and natural alternative to chemical strippers.
Once the solution is ready, use a sponge or a spray bottle to saturate the wallpaper. Allow the solution to soak in for several minutes before proceeding to the next step.
• Step 5: Scrape Off the Wallpaper
Using a putty knife, carefully begin to scrape away the wallpaper from the top down in small sections. Start with the edge of the wallpaper and work your way across the wall, maintaining a 45-degree angle to avoid gouging the wall.
Tip: If the wallpaper doesn’t come off easily, apply more stripper solution and allow it to sit for a few more minutes.
• Step 6: Remove Residue and Clean the Walls
Once all the wallpaper has been removed, there may still be some adhesive residue on the walls. Use a sponge and warm, soapy water to remove this residue. Be patient and thorough during this step, as any remaining residue can cause issues when painting later.
Wipe down the walls with clean water to remove any soap or remaining adhesive residue. Allow the walls to dry completely before proceeding to the next step.
• Step 7: Repair Wall Damage
Inspect the walls for any damage, such as holes, cracks, or dents. To fix these imperfections:
- Apply a thin layer of joint compound using a putty knife.
- Allow the joint compound to dry.
- Sand the repaired area smooth with a fine-grit sandpaper.
- Wipe away any dust with a damp cloth and allow the area to dry.
• Step 8: Prime the Walls
Applying a coat of primer is important to create a uniform surface for painting and ensure better adhesion of the paint. Use a high-quality acrylic primer designed for the specific wall surface (e.g., plaster or drywall).
- Start by cutting in around the edges with a brush.
- Roll the primer onto the walls using a roller.
- Allow the primer to dry for the recommended time, usually 2-4 hours.
• Step 9: Paint the Walls
Finally, it’s time to paint the walls. Choose high-quality, latex-based paint for the best results, and follow these steps:
- Tape off any trim, outlets, and light switches using painter’s tape.
- Cut in around the edges using a brush.
- Roll paint onto the walls using a roller.
- Allow the first coat to dry for the recommended time before applying a second coat.
In conclusion, while removing wallpaper and prepping walls for painting is a time-consuming process, proper preparation and a systematic approach are key to achieving a professional finish.
Follow these steps and utilize the provided recommendations to ensure success in your next painting project.
| How to remove wallpaper and prep walls for painting | |
|---|---|
| 1. Gather tools and materials | Drop cloth, utility knife, wallpaper scraper, bucket, sponge, dishwashing liquid, wallpaper stripper or fabric softener, ladder |
| 2. Prep work area | Place a drop cloth on the floor to protect it from water and debris. Remove any outlet covers, vents, or wall decorations. |
| 3. Score the wallpaper | Use a utility knife to make small, diagonal cuts into the wallpaper without damaging the wall underneath. |
| 4. Apply wallpaper stripper solution | Mix a solution of wallpaper stripper or a 50/50 mixture of water and fabric softener in a bucket. Apply the solution to the wallpaper with a sponge, let it soak for 15-20 minutes. |
| 5. Scrape off wallpaper | Use a wallpaper scraper to gently lift and remove the wallpaper from the wall, starting at an edge or seam where the wallpaper is already loose. Reapply the solution as needed. |
| 6. Clean the remaining adhesive | Use a sponge and warm water with a few drops of dishwashing liquid to remove any remaining adhesive residue from the wall. Rinse with clean water and a clean sponge. |
| 7. Repair wall surface | Fill any gouges, cracks, or holes with a spackling compound. Sand and smooth the patched areas once dry. Apply a primer to the entire wall to ensure good paint adhesion and even color. |
| 8. Paint walls | Choose high-quality paint and apply it with a roller or brush according to the manufacturer’s instructions. Allow the paint to dry completely before installing outlets or hanging decorations. |
Quickest Techniques for Wallpaper Elimination from Walls
Removing old wallpaper from a wall can be a time-consuming and frustrating task, but with the right tools and techniques, you can achieve a smooth, clean surface in no time.
• Assessing the Wall and Wallpaper Type
Before you begin, it’s essential to assess the wall and wallpaper type, as this will determine your removal approach. First, determine if your wallpaper is strippable or non-strippable by lifting a corner with a utility knife, then gently pulling it away from the wall.
If it comes off quickly and leaves little residue, you have strippable wallpaper, which is easier to remove. If the wallpaper is non-strippable, or if it tears when pulled, you’ll need to use additional removal techniques.
When assessing the wall, check if it’s plaster or drywall. Plaster is more resilient and can withstand moisture, while drywall is more delicate and can be easily damaged by excess water.
• Gather Your Wallpaper Removal Tools
The right tools can make a significant difference when removing wallpaper, speeding up the process, and minimizing damage to your walls. Here’s a list of essential items you’ll need:
- Utility knife – for scoring and trimming wallpaper edges
- Wallpaper scorer – a tool with sharp wheels that create holes in wallpaper, allowing steam or liquid to penetrate more effectively
- Wallpaper steamer – a device that uses steam to soften the adhesive, making wallpaper easier to remove
- Wallpaper stripping liquid – a chemical solution that dissolves wallpaper adhesive when mixed with water
- Spray bottle, pump sprayer, or paint roller – for applying the wallpaper stripping liquid
- Wide putty knife or wallpaper scraper – for gently scraping off wallpaper without damaging walls
- Protective gloves, goggles, and mask – for safety while working with chemicals and steam
- Towels or drop cloths – for protecting floors and surfaces from water damage
• Strippable Wallpaper Removal
If you have strippable wallpaper, you’re in luck, as the process is relatively quick and straightforward. Follow these steps:
– Score the Wallpaper
Use your utility knife to carefully score the wallpaper in horizontal and vertical lines, creating a grid pattern. This will help you peel off larger sections, making the process faster.
– Peel and Scrape
Starting at the top corner, slowly peel back the wallpaper with your fingers, holding it at a shallow angle to minimize tearing. For stubborn spots or tight seams, use your wide putty knife to gently scrape the wallpaper away from the wall.
• Non-Strippable Wallpaper Removal
For non-strippable wallpaper, you have two main options: steam and chemical removal. Both methods have their advantages and are effective in different situations. I’ll outline each approach below so you can choose the best one for your project.
– Steam Wallpaper Removal
A wallpaper steamer is an excellent tool for removing stubborn, non-strippable wallpaper, especially on plaster walls. Here’s how to use it:
- Score the Wallpaper: Use your wallpaper scorer or utility knife to create a grid pattern on the wallpaper, allowing steam to penetrate the adhesive.
- Heat the Steamer: Fill the steamer’s reservoir with water, plug it in, and allow it to heat up according to the manufacturer’s instructions.
- Apply Steam: Hold the steamer’s plate against the wallpaper for 30-60 seconds, depending on the thickness and type of wallpaper. Start at the top corner and work your way down in sections.
- Scrape: Use your wide putty knife to gently scrape away the wallpaper, starting at the seams, and working in parallel with the steam.
– Chemical Wallpaper Removal
A wallpaper stripping liquid can be an effective alternative to steam, particularly on drywall or for those without access to a steamer. Follow these steps:
- Score the Wallpaper: As with steam removal, use your wallpaper scorer or utility knife to create a grid pattern on the wallpaper.
- Prepare the Solution: Mix the wallpaper stripping liquid with water according to the manufacturer’s instructions. Apply it using a spray bottle, pump sprayer, or paint roller.
- Wait: Allow the solution to soak into the wallpaper for 15-30 minutes or as directed by the product’s instructions.
- Scrape: Use your wide putty knife to gently remove the wallpaper. Start at the seams and work your way across each section. Reapply the solution as needed to stubborn areas.
- Clean: Wipe down the walls with a damp sponge or cloth to remove any remaining adhesive residue.
– Additional Tips for Faster Wallpaper Removal
To speed up the removal process and ensure smooth walls, consider the following tips:
- Work in small sections rather than attempting to remove an entire wall at once.
- Be patient and gentle when scraping wallpaper, as excessive force can damage walls.
- Use gloves, goggles, and masks when working with steam or chemicals for added safety.
- Protect your floors and surfaces with drop cloths or towels to avoid damage.
• Conclusion
Armed with the right tools, techniques, and a little perseverance, you can quickly and efficiently remove wallpaper from your walls, preparing them for a fresh coat of paint or new wallpaper.
By understanding your wall and wallpaper type, choosing the appropriate removal method, and following the steps outlined in this article, you’ll be well on your way to a cleaner, more beautiful space.
For additional resources, visit the United States Environmental Protection Agency to learn more about safe and effective wallpaper removal practices.
Drywall Treatment after Wallpaper Extraction
Removing wallpaper can be a tedious task, but once it’s done, what should you do with the exposed drywall?
• Repairing Damages to Drywall After Wallpaper Removal
Before moving on to refinishing, it’s essential to first assess and repair any damage that may have occurred to the drywall during wallpaper removal.
– Assess the Surface
Start by inspecting the drywall for any damages, such as gouges, scratches, or tears. If the drywall is relatively undamaged, skip to the “Prepping the Surface” section.
– Fill Holes and Gouges with Joint Compound
If there are damages in the drywall, you’ll need to apply a joint compound to fill in any holes or gouges. Apply the compound using a putty knife and make sure it’s smooth and level with the surrounding surface.
– Sand the Repaired Areas
Once the joint compound is dry, use a fine-grit sandpaper (150-220 grit) to sand the repaired areas smooth. Wipe away any dust with a damp cloth and allow the surface to dry completely before proceeding.
• Prepping the Surface Before Refinishing
For a high-quality refinishing job, you need to properly prepare the drywall surface.
– Cleaning the Surface
Begin by thoroughly cleaning the drywall to remove any residual wallpaper adhesive, dust, or dirt. Use a solution of warm water and a mild detergent, then rinse with clean water. Allow the surface to dry completely.
– Applying Primer
Next, apply a high-quality primer to the drywall surface. I recommend using a primer specifically designed for drywall, which helps provide a uniform surface for the chosen finish. Allow the primer to dry according to the manufacturer’s instructions.
• Choosing the Right Finish for Your Drywall
With the surface prepped and ready, it’s time to choose the type of finish that suits your needs and style.
– Painting
Painting is the most common finish applied to drywall after removing wallpaper. It offers a wide range of color options and is relatively easy to do yourself. Choose a good-quality paint and use a roller for even and smooth application.
– Texturing
Texturing is an excellent option if you want to give your walls a unique, custom look. There are many types of textures to choose from, such as knockdown, orange peel, and skip trowel.
You can create these textures using a combination of joint compound and specialized texturing tools or purchase pre-mixed texture compounds.
– Installing New Wallpaper
If you prefer the look and feel of the wallpaper, you can opt to install new wallpaper on the drywall after removing the old one. Make sure to choose a durable, high-quality wallpaper, and follow the manufacturer’s installation instructions for the best results.
– Applying a Decorative Plaster Finish
A decorative plaster finish can give your walls a luxurious and sophisticated look. This option typically requires a skilled professional to apply the finish, as it involves a multi-step process and specialized techniques.
• Tips and Tricks for Successful Drywall Refinishing
Here are some helpful tips from industry professionals to achieve the best results when refinishing your drywall:
- Use high-quality tools and materials for the best outcomes. Investing in good equipment will save you time, money, and effort in the long run.
- Always allow enough drying time between each step of the refinishing process. Rushing through can result in imperfections and a low-quality finish.
- Keep a consistent hand pressure and use even strokes when applying joint compound, paint, or texture, to ensure a uniform finish.
- When painting, use a high-quality paintbrush for cutting in edges and a roller for the main wall area.
In conclusion, refinishing drywall after removing wallpaper requires a series of steps, including repairing any damages, prepping the surface, and choosing the right finish.
By following the recommended procedures and tips, you can transform your walls into a clean, fresh, and attractive canvas for your home.
Step | Description |
|---|---|
1. Clean and repair the surface | Remove any remaining adhesive, patch any holes or cracks, and sand the surface until smooth. |
2. Apply a primer | Applying a high-quality primer will help seal the drywall and create a smooth surface for paint or new wallpaper. |
3. Choose paint or new wallpaper | Decide whether you want to paint the wall or apply new wallpaper, considering factors such as room style, durability, and personal preference. |
4. Apply paint or wallpaper | For paint, choose a high-quality interior paint and apply two coats; for wallpaper, follow the manufacturer’s instructions for application. |
5. Add finishing touches | Replace wall fixtures and trim, touch up any areas if needed, and clean the room to complete the project. |

