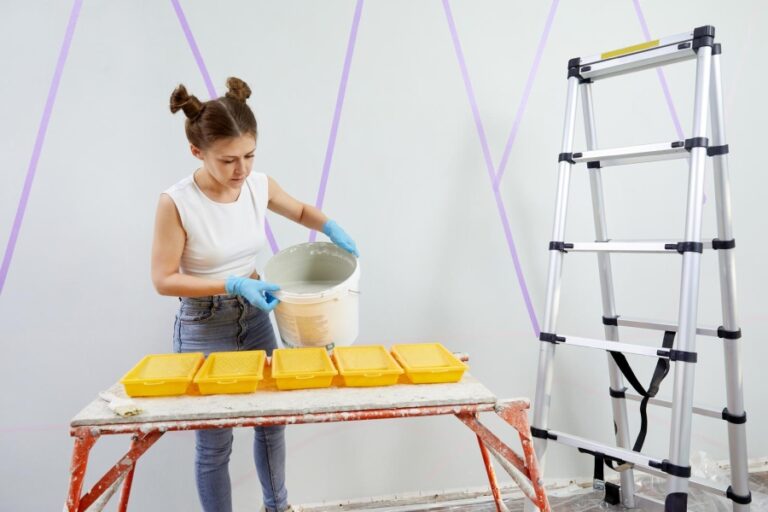
Indoor Textured Wall Finishes – Design Focused
Are you looking to transform your indoor walls into a piece of art while adding a touch of elegance to your living space? Look no further. Indoor textured wall finishes are the perfect solution for those seeking a design-focused interior decoration approach.
Indoor textured wall finishes – design focused:
Indoor textured wall finishes add depth and visual interest to interior spaces. Available in various styles and materials, they provide design flexibility and enhance aesthetics. Popular options include lime-based plaster, wood paneling, wallpaper, paint techniques, and faux finishes. Consider factors like space dimensions, natural lighting, and maintenance requirements when choosing the right finish.

Discover the world of indoor textured wall finishes and elevate your home’s design with unique, eye-catching styles. Explore various techniques, materials, and application tips to achieve your ideal aesthetic. Read on to uncover the perfect design-focused finish for your walls!
Contents
- 1 Interior Textured Wall Designs: Aesthetic Finishes
- 2 Top Textured Wall Finishes: Choosing the Best
- 3 Current Trends in Wall Texture Designs
- 3.1 • The Rise of Natural Materials and Eco-Friendly Wall Textures
- 3.2 • Discovering the Beauty of Geometric Wall Textures
- 3.3 • The Return of Elegant Plaster and Venetian Finishes
- 3.4 • Harnessing the Power of Metallic Accents
- 3.5 • Embracing Bold, Hand-Painted Patterns
- 3.6 • Final Thoughts and Recommendations
- 4 Enhancing the Appearance of Textured Walls
- 4.1 • Select the Right Paint
- 4.2 • Proper Preparation is Key
- 4.3 • Use the Correct Painting Technique
- 4.4 • Add Decorative Elements to Enhance the Texture
- 4.5 • Balance with Smooth Surfaces
- 4.6 • Choose the Right Lighting
- 4.7 • Use Color Intelligently
- 4.8 • Incorporate Texture in the Furnishings
- 4.9 • Embrace the Imperfections
- 5 Three Techniques for Textured Interior Wall Finishes
Interior Textured Wall Designs: Aesthetic Finishes
Indoor textured wall finishes can inject depth, dimension, and visual interest into any space. Available in various styles and materials, they offer design flexibility, allowing you to create an ambiance that matches your taste, style, and interior design concept.
• Types of Indoor Textured Wall Finishes
1. Lime-based Plaster
Lime-based plaster is a classic and eco-friendly wall finish made from a mixture of water, sand, and lime. This natural material is ideal for those who appreciate a traditional and raw aesthetic, as it exudes old-world charm while providing a non-toxic and breathable surface.
A popular technique to apply lime-based plaster is known as Venetian plaster or polished plaster. This method entails burnishing multiple thin layers of the plaster with a trowel, resulting in a smooth, glossy, and marble-like appearance.
2. Wood Paneling
For a warm and cozy atmosphere, consider wood paneling. This versatile finish can be customized in various ways to suit your design preferences. From traditional beadboard and shiplap to modern slatted panels, wood paneling can bring texture and richness to any space.
Moreover, reclaimed wood paneling can add a rustic touch, emphasizing sustainability and promoting environmentally-friendly practices.
3. Wallpaper
Wallpaper is an easy way to incorporate a variety of textures into your space without investing in more labor-intensive techniques. With countless patterns, colors, and textures available, it can mimic the appearance of materials such as wood, brick, stone, and fabric.
Furthermore, it can create bold statements through large-scale prints or subtle elegance with understated designs.
4. Paint Techniques
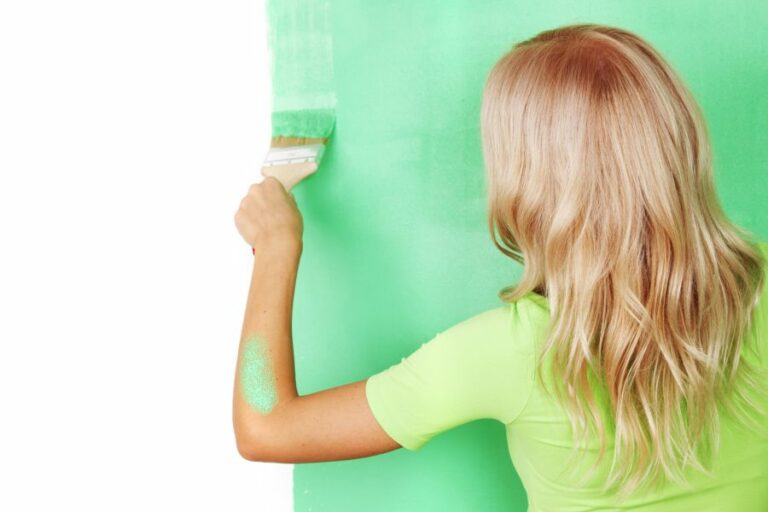
A simple yet effective method to develop texture on walls is through paint techniques. By applying paint in different ways, you can create a multitude of effects, from subtle to dramatic. Some popular textured paint techniques include:
- Sponging: Dabbing a sponge on wet paint to create a mottled effect.
- Dragging: Using a stiff-bristled brush or a drag scraper to comb through wet paint for a textured strip look.
- Rag rolling: Rolling a wadded-up cloth across the wet paint, leaving irregular patterns and textures.
5. Faux Finish
Faux finish techniques employ paint or plaster applications to imitate the appearance of other materials. This approach allows you to introduce texture while staying within budget, as you can replicate luxurious materials like marble, stone, or wood at a fraction of the price.
Some popular faux finish methods include:
- Sgraffito: Etching a design into a wet, contrasting-colored plaster finish.
- Trompe l’oeil: Creating detailed, photorealistic images that deceive the eye into believing a flat surface is three-dimensional.
• Design Tips and Recommendations
1. Consider Your Space
Before selecting a textured wall finish, consider the dimensions and natural light of your space. Lighter textures and colors can make small rooms appear larger, while darker, bolder finishes might create a sense of confinement in tight areas.
Additionally, spaces with ample natural light can enhance the impact of textured wall finishes, casting shadows and revealing dimensionality.
2. Visual Balance
Incorporating too many different textures within a single space might appear chaotic and visually cluttered. Strike a balance by selecting one or two primary finishes and pairing them with understated accents. This ensures your walls’ textural details shine without overwhelming the space.
3. Accent Walls
Experiment with textured wall finishes by designating an accent wall to serve as a focal point. This approach allows you to introduce texture and drama without overwhelming the entire room.
Not only does it add visual interest, but it also provides an opportunity to showcase artwork, display shelves, or unique architectural elements.
4. Maintenance
Consider the upkeep and durability of your preferred textural finish. Some finishes, such as lime-based plaster, may require regular maintenance and are more susceptible to damage than others. Meanwhile, materials like wood paneling and wallpaper might need to be replaced after several years.
5. Hiring Professionals
While some textured wall finishes can be a DIY project, others demand specialized knowledge and experience. When deciding on a wall treatment, assess whether the technique requires professional assistance or if you’re comfortable attempting it on your own.
• Final Thoughts
Textured wall finishes are a fantastic way to incorporate character and style into your interior spaces. They invite creativity and provide depth to an otherwise flat surface.
By considering your space’s dimensions, natural light, and desired ambiance, you can select a textured wall finish that elevates your design scheme and leaves a lasting impression.
For further inspiration and information on various wall textures, browsing resources like Fine Homebuilding or visiting museums with elaborate interior finishes may be beneficial.
These resources can deepen your understanding of the techniques and styles available, empowering you to make informed design decisions.
Top Textured Wall Finishes: Choosing the Best
Every building and homes feature walls with various textures meant to give an interior depth, character, and distinction. To provide the best possible quality and appearance, it’s vital to identify the best finish for textured walls.
• Selecting the Appropriate Finish
As every interior space has its unique characteristics and requirements, there isn’t a one-size-fits-all answer to this question.
However, there are a few finishes that have proven to be popular and effective choices for textured walls. These include paints, plasters, and decorative finishes. Here, we will provide an in-depth analysis of each to help you make an informed decision.
– Paints: Durable and Versatile for Textured Walls
Paint is one of the most common finishes for textured walls due to its durability, versatility, and ease of application. Typically, textured walls can be painted with two main types of paint: latex (water-based) and oil-based.
- Latex Paint: Latex paint is the popular choice for textured walls, as it provides an even, durable finish that dries quickly and has a low odor. Furthermore, it is easy to clean up and can be applied using either a roller or a brush.
- Oil-Based Paint: While oil-based paint is less common for textured walls, it offers a tough, long-lasting finish. It takes longer to dry, and the application process can be more challenging. However, the final appearance is smooth and elegant, making it suitable for certain specific settings, especially for historical restoration projects.
When choosing a paint finish, it’s essential to consider the sheen or glossiness, which impacts the overall appearance and performance. Experts often recommend the following paint sheens for textured walls:
- Flat Finish: It has a non-reflective appearance, excellent at hiding minor imperfections and is perfect for achieving an even, subtle look on textured walls. However, it is less durable and harder to clean compared to other finishes.
- Eggshell Finish: Offering a slight sheen, eggshell finish provides better durability and washability compared to flat finishes. This makes it a popular choice for living rooms, dining rooms, and other frequently-used areas.
- Satin Finish: With a higher sheen, satin finishes provide excellent durability and washability, making them ideal for high-traffic areas, such as hallways, kitchens, and bathrooms. Although it’s slightly more reflective than an eggshell finish, it still helps hide minor imperfections on textured walls.
– Plasters: Traditional and Elegant for Textured Walls
Plaster finishes have been popular for centuries, providing a timeless look and feel to a space. There are many types of plaster finishes available, including Venetian plaster, lime plaster, and clay plaster, each with unique features and benefits.
- Venetian Plaster: An elegant choice for textured walls, Venetian plaster consists of finely ground marble and slaked lime. Its smooth and polished finish creates a sophisticated ambiance in any room. While it takes skill to apply, it offers excellent durability and a stunning appearance.
- Lime Plaster: Eco-friendly and breathable, lime plaster is an excellent choice for those concerned with indoor air quality. It provides a matte finish that lends a natural and earthy feel to the space. Although the application process can be challenging, the final result is worth the effort.
- Clay Plaster: Similar to lime plaster, clay plaster is an eco-friendly option with a natural matte appearance. Available in a wide range of colors, it can be customized to match your design preferences. However, it tends to be less durable than other plaster options and may require more frequent maintenance.
– Decorative Finishes: Unique and Customizable for Textured Walls
For those seeking a one-of-a-kind wall finish, decorative finishes offer endless possibilities. These custom finishes can be created using various techniques, including glazing, metallics, stencil work, and faux finishing.
Keep in mind that these finishes often require a skilled professional to achieve the desired result.
• Conclusion
In summary, the best finish for textured walls depends on your personal preferences, the room’s purpose, and the wall texture itself. Paint is a versatile, durable, and relatively easy-to-apply option, while plaster provides a timeless and elegant appearance.
Custom decorative finishes allow for the creation of unique, personalized spaces that truly reflect your style.
By taking the time to understand the various finishes and their features, you’ll be well-equipped to choose the perfect finish for your textured walls, creating a beautiful and long-lasting space.
Type of Texture | Best Finish | Reason |
|---|---|---|
Knockdown | Flat or Eggshell | These finishes hide imperfections and highlight the texture itself. |
Orange Peel | Flat or Satin | They can help reduce the visibility of the texture and provide a smoother appearance. |
Popcorn | Flat | This finish can effectively hide the bumps and dimples of the popcorn texture. |
Swirl | Eggshell or Satin | These finishes complement the elegant pattern of the swirl texture without making it too shiny. |
Sand | Flat or Eggshell | They can help diffuse light and hide any imperfections in the texture. |
Current Trends in Wall Texture Designs
When it comes to home design and improvements, the focus is often on color schemes, furniture, and accessories, but the walls play a crucial role in setting the tone and creating a unique atmosphere in a space.
Wall textures, in particular, are gaining popularity as homeowners and interior designers look for creative ways to add depth and character to a room.
• The Rise of Natural Materials and Eco-Friendly Wall Textures
One of the most significant trends in wall texture is the use of natural materials that not only bring a sense of warmth and comfort to a space but also promote sustainability and eco-friendliness.
Materials like cork, bamboo, grasscloth, and reclaimed wood are gaining popularity thanks to their unique textures and environmental benefits.
When incorporating these materials into your design, consider working with professionals who specialize in sustainable wall treatments or find DIY tutorials that teach environmentally friendly installation methods.
• Discovering the Beauty of Geometric Wall Textures
Another trend in wall texture is the use of geometric patterns, which can create a sense of depth, movement, and energy in a room. Geometric textures, such as chevron, herringbone, or grid patterns, can be achieved using various materials and techniques, including wallpaper, 3D panels, or painting.
When incorporating geometric wall textures, it’s essential to strike a balance between the pattern’s boldness and the room’s overall design. Start with a small accent wall to see how the pattern works with the space before committing to a larger-scale project.
• The Return of Elegant Plaster and Venetian Finishes
Plaster and Venetian finishes are making a comeback in the world of wall textures, offering a touch of sophistication, refinement, and Old World charm. These finishes can be smooth or textured, matte, or glossy, depending on your preference and the desired effect.
For those interested in achieving this look, it is advisable to work with a professional applicator who is experienced in creating plaster and Venetian finishes. This type of wall treatment is not only time-consuming but also requires specialized tools and techniques.
• Harnessing the Power of Metallic Accents
Metallic finishes are taking the wall texture scene by storm, adding a touch of glamour, luxury, and modernity to homes. Whether it’s a subtle shimmer or a bold, statement-making metallic surface, this trend can be seen in wallpapers, paint finishes, and even wall sculptures.
When incorporating metallic wall textures, pay attention to the type of metal such as gold, silver, or copper, and consider how it will work with the room’s existing color palette and decor. A little goes a long way, so start with a small accent wall or a few metallic accessories and see how they enhance the space.
• Embracing Bold, Hand-Painted Patterns
Bold, hand-painted patterns are trending as a way to add artistic flair and personality to a room. Large-scale murals, intricate stencils, or colorful abstract designs can all be used to create eye-catching wall textures that make a statement.
When considering a hand-painted wall treatment, think about the room’s purpose, the color scheme, and the overall design style. In addition, it’s essential to use high-quality paints and finishing materials to ensure longevity and durability.
• Final Thoughts and Recommendations
The world of wall textures offers a plethora of options to enhance your living spaces and make them truly unique. As an experienced professional, I recommend the following:
- Experiment with samples or small-scale projects to see how a texture, pattern, or finish impacts the room
- Work with a professional, particularly for intricate or specialized wall treatments that require specific tools and techniques
- Look for eco-friendly, sustainable options when selecting materials and products
Incorporating these new wall texture trends into your home can transform your living spaces and create a captivating, welcoming atmosphere. Happy decorating!
Enhancing the Appearance of Textured Walls
Textured walls can add character and depth to any room, enhancing the overall interior design. However, it can be challenging to achieve a refined and polished look when working with such surfaces.
• Select the Right Paint
When it comes to textured walls, the choice of paint is crucial. The most suitable paint for these kinds of walls is either a flat or eggshell finish. Flat paint will help disguise any imperfections, while an eggshell finish adds a subtle sheen that enhances the texture.
Avoid high-gloss or semi-gloss paints, as they tend to highlight imperfections and make the walls appear excessively rough.
• Proper Preparation is Key
Proper preparation is essential for achieving a great look with textured walls. Make sure the walls are clean and free of dust particles before painting. If there are cracks or other flaws, use a high-quality filler or plaster to smooth out the surface.
When dealing with popcorn texture, remove loose particles by scraping gently with a putty knife.
• Use the Correct Painting Technique
When painting textured walls, it’s crucial to use the appropriate technique to ensure even coverage and minimize streaks or imperfections. Use a high-quality, thick nap roller to apply the paint, as the fibers help push the paint into the recesses of the texture.
Always paint in a “W” pattern, working from the top to the bottom of the wall. This approach prevents paint buildup and minimizes the appearance of roller marks.
• Add Decorative Elements to Enhance the Texture
Complement your textured walls by adding decorative elements such as framed artwork, mirrors, or wall sculptures. These additions not only provide visual interest but also enhance the room’s overall aesthetic.
When selecting decor, consider the scale of the texture; small, intricate pieces may be lost on a heavily textured wall, whereas large, bold items may overpower a subtler texture.
• Balance with Smooth Surfaces
To create harmony in a room with textured walls, balance the roughness with smoother surfaces such as sleek furniture, polished metal accents, or glass decor. This mix of textures creates visual balance and prevents the room from appearing overly rough or clumsy.
• Choose the Right Lighting
Lighting can significantly impact the appearance of textured walls. When lit correctly, the texture casts interesting shadows and adds depth to the room. Opt for soft, ambient lighting to highlight the texture and create a warm, inviting atmosphere.
Avoid harsh, direct light, which can emphasize imperfections and create an unflattering appearance.
• Use Color Intelligently
Carefully consider the color of your textured walls, as it can greatly affect the room’s overall look. Lighter shades can make the texture more pronounced, whereas darker colors can make it recede into the background, creating a more subtle effect. If you want the texture to be the focal point of a room, opt for a lighter shade; if you’d prefer the texture to blend with the overall design, go for a darker hue.
• Incorporate Texture in the Furnishings
Another way to enhance textured walls is to incorporate similar textures in the room’s furnishings. This could include throw pillows, upholstered furniture, or textured rugs that complement the wall’s texture.
When doing this, be mindful not to overdo it; too much texture in a room can be overwhelming and create a cluttered appearance.
• Embrace the Imperfections
Finally, remember that one of the appeals of textured walls is their imperfect nature. It lends a sense of warmth and charm that can rarely be achieved with smooth surfaces. Embrace these imperfections and view them as part of the room’s character, contributing to a unique and inviting space.
In conclusion, making textured walls look good requires careful consideration of paint choice, technique, and overall room design.
By following the tips provided in this article, you can create a visually appealing and harmonious space that showcases the beauty and character of textured walls while avoiding an overly rough or unpolished appearance.
Step | Instructions |
|---|---|
1 | Clean the wall surface from dust, dirt, and any loose particles. |
2 | Choose the right paint color and finish that complements the texture style and surrounding decor. |
3 | Apply a high-quality primer to prepare the wall surface for painting. |
4 | Paint the textured walls using a roller brush designed for textured surfaces. Use multiple thin coats instead of heavy, thick ones. |
5 | For patterns or designs, try using stencils or freehand designs with different paint colors or glazes. |
6 | Apply a protective topcoat or varnish, if necessary, to protect the wall from wear and tear. |
7 | Decorate the room with appropriate furniture and accessories to enhance the textured wall’s visual appeal. |
Three Techniques for Textured Interior Wall Finishes
Creating unique, textured finishes for interior walls can set a room apart from the others, add character, and enhance the overall design aesthetic.
• 1. Applying Textured Paint Compound
Textured paint compounds, also known as pre-mixed texture products, offer a convenient way to add texture to interior walls. These compounds can be found at most home improvement stores and come in different varieties, such as sand texture, popcorn texture, and knockdown texture.
– Recommended Prep Work
Before applying the textured paint compound, it’s essential to prepare the wall surface properly. Here’s a quick overview of the recommended steps:
- Remove any existing wallpaper, paint, or loose debris.
- Repair any holes, cracks, and surface imperfections.
- Clean the wall with a damp cloth and let it dry completely.
- Apply a layer of primer to ensure better adhesion of the texture compound.
– How to Apply the Textured Paint Compound
Choose the right texture compound for the desired finish, and follow these steps for application:
- Mix the textured paint compound according to the manufacturer’s instructions. It’s crucial to achieve a smooth, lump-free consistency.
- Apply the compound to the wall using a trowel or paint roller, depending on the preferred texture effect. Work in small sections to ensure even coverage.
- Use specialized tools or methods to create various texture patterns. For example, a sponge or a brush can produce unique effects when dabbed, swirled, or dragged over the wet compound.
- Allow the textured paint compound to dry as per the manufacturer’s recommendations.
- After the texture is completely dry, you can paint over it with the desired color to enhance and protect the new surface.
• 2. Venetian Plaster: An Ancient Technique for a Modern Look
Venetian plaster is an elegant, smooth finish that mimics the appearance of polished marble or natural stone. It’s achieved by applying multiple layers of plaster mixed with marble dust, which provides depth and texture to the wall.
– Recommended Prep Work
Follow these steps to ensure the best results for Venetian plaster application:
- Repair and clean the wall as described earlier in this article.
- Apply a coat of primer specifically designed for use with Venetian plaster.
– How to Apply Venetian Plaster
- Tint the plaster to the desired color, following the manufacturer’s instructions.
- Apply the first coat of Venetian plaster using a stainless steel trowel, working in small sections and spreading the plaster thinly and consistently.
- Allow the first coat to dry for at least 4 hours.
- Apply a second, and possibly even a third, layer of Venetian plaster, ensuring that each layer is thinner than the previous one.
- After the final coat has dried completely (usually 24-48 hours), burnish the surface with a trowel or other burnishing tool to achieve the desired gloss level and smoothness.
This technique involves a more in-depth process but can create stunning, luxurious wall finishes.
• 3. Decorative Stencils for Creative and Customizable Textures
Stencils offer an affordable and versatile way to add texture and pattern to interior walls. They come in a wide variety of designs and can be combined with different paint or plaster types to achieve unique effects.
– Recommended Prep Work
The preparation steps for using stencils are similar to those already mentioned:
- Repair and clean the wall as needed.
- Apply a coat of primer if desired, especially if the wall color is very dark or uneven.
– How to Apply Decorative Stencils
- Choose the desired stencil design and tape it to the wall using painter’s tape, ensuring that it’s aligned correctly and sits flat against the wall.
- Apply a thin, even layer of paint or plaster over the stencil using a stenciling brush or small foam roller.
- Carefully remove the stencil while the paint or plaster is still wet, taking care not to smudge the design.
- Continue applying the stencil and paint or plaster to create the desired pattern across the entire wall.
- After the paint or plaster has dried completely, you may want to seal the surface with a clear coat, depending on the type of material used.
Experimenting with these three methods of achieving textured interior wall finishes can help you create stunning, eye-catching rooms. Each technique may require practice, so consider testing the process on a small, inconspicuous area before tackling larger wall surfaces.
No. | Method |
|---|---|
1 | Applying joint compound with a trowel or a drywall hawk and creating various patterns using a trowel or a putty knife. |
2 | Using a paint roller to apply textured paint, available in various finishes and consistencies such as sand and stone textures. |
3 | Applying a layer of wallpaper or fabric with a textured pattern or finish to the wall. |

