The Basics Of Indoor Painting For Novices, 25 Things You Should Know
Are you planning to freshen up a room with a new coat of paint but feeling overwhelmed by the idea of taking on the task yourself? Fear not, because I am here to guide you through the basics of indoor painting for novices. You can quickly transform your space with a little patience, some helpful tips, and a step-by-step approach.
The basics of indoor painting for novices:
Indoor painting basics for beginners involve planning the project, selecting colors and finishes, gathering materials, preparing the space, choosing the right paint and primer, and applying proper painting techniques. Key steps include cleaning walls, repairing damages, applying painter’s tape, using primer, and painting with overlapping strokes.

Step into the colorful world of interior painting! Learn the essentials, explore various techniques, and master the art of transforming your living space. Unleash your creativity and continue reading to enhance your skills, whether you’re a beginner or a DIY enthusiast!
Contents
- 1 Indoor Painting Fundamentals for Beginners
- 2 Essential Steps for Interior Painting Projects
- 3 Mastering the Art of Painting: A Guide for Newbies
- 4 Proper Sequence for Room Painting: A Guide
- 5 Acrylic Art Techniques for Novice Painters
Indoor Painting Fundamentals for Beginners
• Preparing for Your Indoor Painting Project
– Make a Plan
Before starting any indoor painting project, decide on the colors and finishes you want to use. Consider factors like room size, natural light, and the room’s purpose when selecting colors.
Visit a local paint store or browse online resources, such as the ColorSnap Visualizer from Sherwin-Williams, to help you decide on the perfect color scheme.
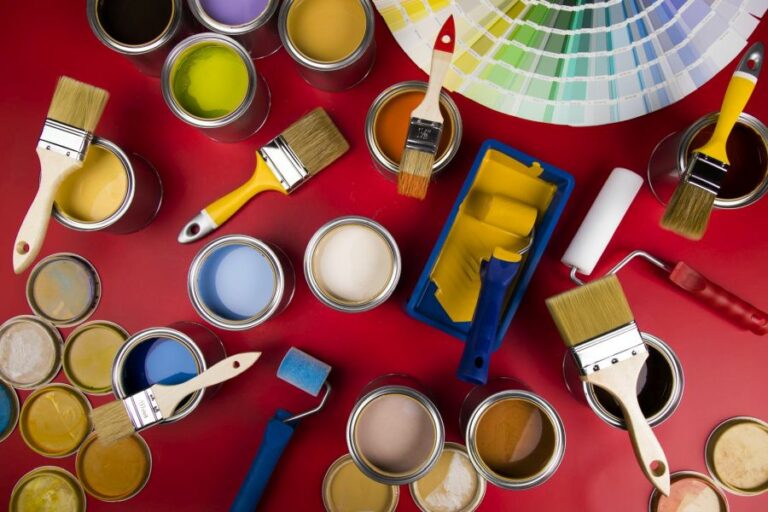
– Gather the Necessary Materials
To complete your indoor painting project successfully, gather the following essential materials:
- Interior paint
- Primer
- Paint rollers and covers
- Paintbrushes
- Paint trays
- Painter’s tape
- Drop cloths or plastic sheeting
- Ladder or step stool
- Sandpaper
- Spackle and putty knife
- Paint stir stick
- Screwdriver
- Cleaning supplies (clean rags, mild detergent)
• Prepping Your Space
– Remove Furniture and Wall Decorations
Clear as much furniture as possible from the room before you begin painting. If you cannot fully remove some pieces, move them to the center of the room and cover them with plastic sheeting or drop cloths to protect them.
Take down any wall decorations, such as artwork or mirrors, and remove the light switch and outlet covers. Use a screwdriver to carefully remove these items and store them in a safe location.
– Clean the Walls and Repair Minor Damage
Before you paint, it is important to clean the walls thoroughly. Use a clean, damp cloth and mild detergent to scrub away dirt, grime, and dust gently. This will help ensure the paint adheres evenly and smoothly to the surface.
Next, inspect the walls for minor damage like small holes, cracks, or dents. Repair these imperfections with a spackle and a putty knife. Allow the spackle to dry completely before sanding it down to create a smooth surface.
– Apply Painter’s Tape and Protect Your Floors
To create crisp, clean lines and protect areas you don’t want to paint, apply painter’s tape to door and window trim, baseboards, and outlets. Be sure the edges of the tape are firmly pressed down to prevent paint from seeping underneath.
Finally, cover the entire floor surface with drop cloths or plastic sheeting to protect it from paint splatter and spills.
• Choosing the Right Paint and Primer
– Selecting a Primer
A primer is a valuable and, in many situations, a necessary layer that serves as a base for the paint. Primers cover imperfections and ensure a more uniform paint finish. Choose a primer based on your wall’s condition and the type of paint you plan to use.
- If your walls are heavily stained or you’re painting over dark colors, choose a stain-blocking primer.
- If you’re painting new drywall or applying a lighter color over a darker one, choose a high-build primer.
- For walls with minor imperfections, an all-purpose primer should suffice.
– Picking the Right Paint
Interior paints come in various finishes, including flat, eggshell, satin, semi-gloss, and high-gloss. The finish you select will depend on factors such as room size, purpose, and natural light.
- Flat and eggshell finishes are ideal for low-traffic areas and walls with more imperfections.
- Satin and semi-gloss finishes have a slight sheen and are more durable, making them suitable for high-traffic areas.
- High-gloss finishes are the most durable and easiest to clean, but they also highlight flaws on your walls. Reserve this finish for smaller surfaces like trim and doors.
• Painting Techniques and Tips
– Apply a Primer Coat
Using a roller or brush, apply your chosen primer to the walls in even, overlapping strokes. After covering the entire surface, allow the primer to dry completely as suggested by the manufacturer’s instructions. Drying times can vary based on factors like temperature and humidity.
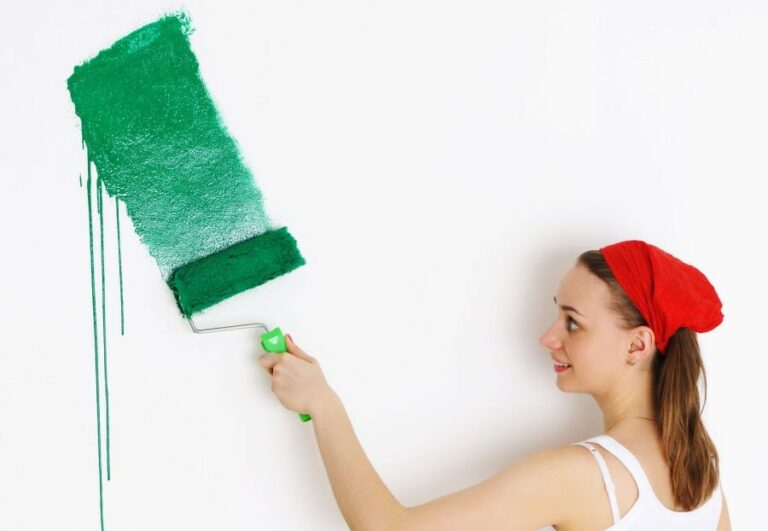
– Paint the Walls
Begin by cutting in the edges of the wall with a brush, painting the corners and areas around the ceiling, baseboards, and trim. Then, use a paint roller to apply paint from the top of the wall to the bottom in a “W” pattern.
Fill in the gaps created by this pattern as you work your way across the wall. Apply a second coat, if necessary, after the first one has dried completely.
– Remove the Painter’s Tape and Clean Up
Once the paint has dried, carefully remove the painter’s tape at a 45-degree angle, pulling it away from the freshly painted surface. Be sure not to let the tape linger on the walls or trim, as it could cause peeling or chipping.
Finally, clean up any paint spills or splatters with water and a mild detergent. If the paint has dried, you may need to use a paint-specific cleaning product to remove it.
• Final Thoughts
Indoor painting can be a challenging but rewarding task for novices. By taking the time to plan your project, prep your space, and follow proper painting techniques, you can transform any room in your home. Remember to be patient and take pride in the results of your efforts.
Essential Steps for Interior Painting Projects
Interior painting is a great way to breathe new life into your home, whether you’re tackling a single room or the entire house. In this comprehensive guide, we will walk you through the steps involved in interior painting, share expert tips, and help you achieve a smooth, professional finish.
• Step 1: Planning and Preparation
Before you pick up a paintbrush, it’s essential to plan your project and prepare the space.
– Choose Your Paint Colors
Selecting the right color scheme can make or break your interior painting project. Consider the size of the room, the amount of natural light it receives, and your desired ambiance.
You can find inspiration from design blogs and magazines, or even visit Behr to explore a wide range of colors and the latest trends.
– Calculate the Amount of Paint
Estimate the amount of paint you will need by measuring the square footage of the surfaces you’ll be painting. Most paint cans list the coverage per gallon, typically around 350 square feet. Remember to factor in multiple coats for proper coverage.
– Gather Your Supplies
- Paint
- Primer
- Drop cloth
- Painter’s tape
- Roller and roller covers
- Paintbrushes
- Paint tray and liners
- Ladder or step stool
- Flathead screwdriver
- Putty knife
- Sandpaper or sanding sponge
- Cleaning supplies
Having the right tools is essential for a smooth and efficient painting project. Here’s a list of recommended supplies:
• Step 2: Preparing the Room
A crucial aspect of achieving professional-quality results is properly preparing the room before you start painting.
– Remove Furniture and Wall Decor
Take out all furniture, or move it to the center of the room and cover it with a drop cloth. Remove any wall decor, light switch covers, outlet plates, and window treatments. Keep screws and other small hardware in labeled bags for easy reassembly.
– Cover the Floors and Fixtures
Protect your floors and any remaining fixtures (e.g., ceiling lights) with drop cloths. Secure them in place with painter’s tape.
– Clean the Walls and Trim
Clean surfaces thoroughly with a damp sponge or cloth to remove dust, dirt, and grease. If there are any mildew spots, use a solution of one part bleach to three parts water. Allow the walls and trim to dry completely before proceeding.
– Repair Blemishes and Imperfections
Inspect the walls and trim for cracks, holes, or other imperfections. Fill these areas with a suitable patching compound, then use a putty knife to smooth the surface. Allow the filler to dry, then sand it smooth with fine-grit sandpaper. Wipe away dust with a damp cloth.
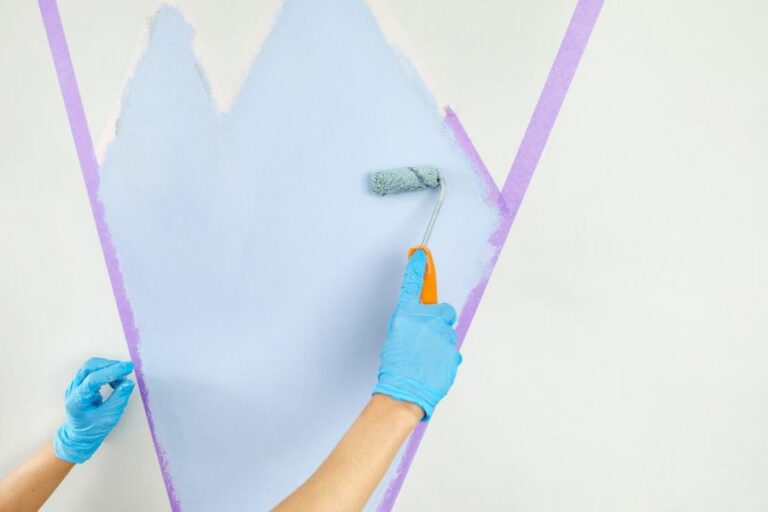
– Apply Painter’s Tape
Apply painter’s tape along the edges of baseboards, door and window trim, and ceilings to protect adjacent surfaces and create clean lines. Press the tape down with a putty knife to ensure a tight seal.
• Step 3: Priming
Priming the walls is essential for achieving the best possible finish, especially when painting over a darker color or covering up repairs.
– Selecting the Right Primer
Choose a primer based on your wall’s surface type and the type of paint you plan to use. For example, use a latex primer with latex paint or an oil-based primer with oil-based paint. A stain-blocking primer can help prevent stains or discoloration from bleeding through the new paint.
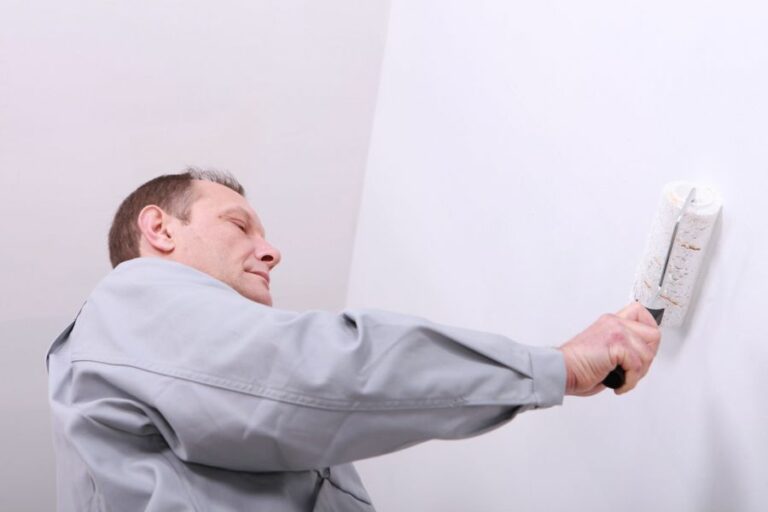
– Apply the Primer
Using a paint roller, evenly apply the primer across the walls, starting at the top and working your way down. Use a paintbrush for edges and corners. Allow the primer to dry completely, usually 1 to 2 hours, before moving on to the next step.
• Step 4: Painting
Once the primer is dry and your surfaces are prepped, it’s time to paint.
– Use the “W” Technique
Start by loading your roller with paint and applying it to the wall in a “W” pattern. Then, fill in the remaining areas with horizontal and vertical strokes, ensuring even coverage. This technique helps to minimize visible roller marks and streaking.
– Cut In Around Trim, Corners, and Ceilings
Before painting the main sections of the wall, use a paintbrush to “cut in” around trim, corners, and ceilings. This involves painting a narrow strip along the edges of your surface, which allows for a seamless connection between the brushed and rolled paint.
– Apply Multiple Coats
For the best results, apply multiple coats of paint, allowing each coat to dry completely before moving on to the next. This ensures even coverage and a uniform finish. Most paints require 1-2 coats but be prepared to apply additional coats depending on the color and finish.
– Remove Painter’s Tape
Once the paint is dry, carefully remove the painter’s tape. To minimize the chance of peeling paint, pull the tape back against itself at a 45-degree angle.
• Step 5: Clean Up and Reassemble
With your painting complete, it’s time to clean up and put your room back together.
– Dispose of Paint and Supplies
Seal and store any leftover paint for touch-ups or future projects. Dispose of used rollers, brushes, and other supplies following local guidelines.
– Clean Brushes and Rollers
If you plan to reuse your brushes and rollers, clean them thoroughly with soap and water (for latex paint) or mineral spirits (for oil-based paint). Let them dry completely before storing.
– Reassemble the Room
Reinstall light switch covers, outlet plates, and window treatments. Move furniture and decor back into place, and enjoy your freshly painted room.
In conclusion, interior painting can be a rewarding project that significantly enhances the appearance and atmosphere of your home. By following these steps and tips, you will be equipped to achieve a smooth, professional finish that you can be proud of.
Step | Task |
|---|---|
1 | Choose the paint color and finish. |
2 | Gather tools and materials such as brushes, rollers, paint trays, drop cloths, and ladder. |
3 | Clear the room and cover furniture and floors with drop cloths to protect them from paint splatters. |
4 | Clean the surfaces to be painted, removing dirt, grease, and any loose paint. |
5 | Fill any cracks, holes, or imperfections with appropriate filler and let dry. |
6 | Sand the surfaces and clean off any dust. |
7 | Apply painter’s tape to trim, baseboards, and other areas you want to protect from paint. |
8 | Start by cutting in or painting the edges with a brush. |
9 | Roll paint onto larger surfaces, such as walls and ceilings, using a roller in a “W” pattern. |
10 | Allow the first coat of paint to dry, and apply additional coats if necessary. |
11 | Remove painter’s tape, clean up, and move furniture back into place. |
Mastering the Art of Painting: A Guide for Newbies
Learning to paint is an exciting and rewarding endeavor for individuals of any age. With the right guidance and resources, beginners can develop the skills necessary to create beautiful works of art.
• Supplies: Selecting Quality Materials to Support Your Artistic Goals
To embark on your painting journey, it’s essential to gather the necessary tools and materials so you can effectively practice and hone your skills.
– Paint
As a beginner, you have a choice of three main types of paint, oil, acrylic, and watercolor, each with its own unique properties and techniques. For those just starting out, I recommend acrylic paint, as it is water-soluble, easy to clean, dries quickly, and offers a wide range of vivid colors.
– Brushes
A variety of brush sizes and shapes are key to developing your technique and style. Purchase a selection of brushes, including round, flat, and filbert, which are versatile and suitable for different aspects of your work.
– Canvas or Paper
Acrylic paint can be applied to various surfaces, such as canvas, paper, or wood. For beginners, it’s advisable to start with canvas or heavy watercolor paper, which is more affordable and easier to manage.
– Palette
A palette is essential for mixing and organizing your colors. You can use a simple disposable paper or plastic palette or invest in a wooden or glass one for long-term use.
– Easel
Though not mandatory, an easel provides comfort and stability while allowing you to paint upright, which promotes good posture and a better perspective of your work.
– Additional Items
Some other supplies you may find helpful include a palette knife for mixing colors, a container for water (to clean your brushes), a rag or paper towel, and a drop cloth for protecting your work area.
• Techniques: Building a Foundation of Skills
Before diving into your first painting project, it’s valuable to familiarize yourself with fundamental painting techniques that will help you build a solid foundation for your art.
– Color Theory
Understanding color theory is essential to creating harmonious and visually appealing artwork. Familiarize yourself with the color wheel, which illustrates the relationships between primary, secondary, and tertiary colors.
This knowledge will ultimately enable you to make informed decisions about color choices and combinations in your work.
– Painting Techniques
Experiment with various brushstrokes, such as dabbing, stippling, and scumbling, to create diverse textures and effects. Practice blending and layering colors together, as well as incorporating transparency and opacity in your painting.
– Composition
Knowing how to arrange the elements in your painting is crucial to creating a strong visual impact. Study the rules of composition, such as the rule of thirds, balance, and contrast, to help guide the organization of your work.
– Perspective
Accurately capturing perspective is a key component of creating realistic and convincing artwork. Learn the basics of linear and atmospheric perspective to bring depth and dimension to your paintings.
• Practice Makes Progress: Developing Your Skills Through Consistent Effort
To become proficient in painting, it’s crucial to practice consistently and approach your artistic journey with an open mind.
– Experimentation
Don’t be afraid to try new techniques or work with unfamiliar materials. This willingness to explore will help you discover your unique strengths and preferences while refining your craft.
– Persistence
Accept that not every painting will be a masterpiece. Recognize that mistakes are part of the learning process and embrace the opportunity to grow from them.
– Patience
Developing your painting skills takes time and dedication. Celebrate your progress and be patient with yourself as you continue to advance in your artistic journey.
• Seeking Inspiration and Guidance: Embracing the Support of Others
As a beginner, it’s essential to seek out inspiration from experienced painters and leverage available resources to further your artistic growth.
– Online Tutorials
Explore free tutorials on platforms like YouTube that offer expert advice and demonstrations of various techniques.
– Art Classes and Workshops
Participating in local art classes or workshops is a great way to receive hands-on instruction from experienced teachers while connecting with like-minded individuals.
– Museums and Galleries
Visit museums and galleries to study and appreciate the work of talented artists who have honed their craft. Learn from their techniques and seek inspiration from their creations.
– Art Books and Magazines
Utilize art books or subscribe to magazines, such as Artist’s Magazine, to stay informed about the latest trends, techniques, and industry news.
In conclusion, learning to paint is a fulfilling and enriching pursuit. As a beginner, it’s important to invest in quality materials, develop a strong foundation in fundamental techniques, practice consistently, and seek inspiration and guidance from experienced artists.
Follow these steps, and you’ll be well on your way to becoming a confident and skilled painter.
Proper Sequence for Room Painting: A Guide
Painting a room can be daunting, but knowing the correct order in which to paint can simplify the process and lead to professional results.
• Preparation: The Key to Success
Before you start painting, ensure you have all the necessary tools and materials, such as:
- Paint
- Brushes and/or rollers
- Painter’s tape
- Drop cloths
- Sandpaper
- Ladder
- Paint tray
- Extension pole (optional)
– Remove Furniture and Protect the Floor
Begin by removing all furniture and decorations from the room. If this is not possible, move items to the center and cover them with a drop cloth. Place additional drop cloths or tarps on the floor to protect it from paint spills.
– Clean and Repair Walls
Wipe down the walls with a damp cloth to remove any dirt, dust, or cobwebs. Next, inspect the walls for holes, cracks, and other imperfections.
You can use a patching compound or spackle to make small repairs. Once the repairs are dry, sand the surface using fine-grit sandpaper to create a smooth surface for the paint to adhere to.
Wipe down the walls again to remove any dust caused by sanding. For more information on repairing walls, the Bob Vila website is an excellent resource.
– Apply Painter’s Tape
Apply painter’s tape to the trim, baseboards, and any adjacent surfaces that you don’t want to accidentally paint. Make sure the tape is firmly pressed down to prevent paint seepage.
• Painting Process: The Correct Order
Now that the room is prepped, it’s time to start painting. Following this order will lead to professional results:
- Ceiling
- Walls
- Trim
- Doors and Windows
- Baseboards
– Paint the Ceiling
Start at the top and work your way down to avoid paint drips on finished surfaces. Make sure you have a stable platform, like a ladder, to help you reach the ceiling. Use a brush to cut in around the edges of the ceiling where it meets the walls.
Then, fill in the remaining surface with a roller. Apply at least two coats, allowing one to dry before applying the next. For more tips on painting a ceiling, check out this Family Handyman article.
– Paint the Walls
Beginning at the corner of one wall, use a brush to cut in around the edges, close to the trim, and around any outlets or switches. Once the edges have been covered, switch to a roller for greater coverage.
Apply the paint in a “W” or “M” pattern, working from the top to the bottom. This helps distribute the paint evenly on the surface. Allow the first coat to dry before applying additional coats.
– Paint the Trim
Carefully remove the painter’s tape from the trim, and apply new tape around the edges to protect the freshly painted walls. Use a high-quality brush, and paint the trim carefully, being mindful of any dripping paint.
Start at the top of the room, with crown molding, and work your way down to any chair rails or wainscoting. If possible, use a semi-gloss or gloss finish on the trim, as these finishes are more durable and easier to clean.
– Paint Doors and Windows
Now it’s time to tackle the doors and windows. Remove any hardware, such as doorknobs and hinges. Use a brush to paint the edges of the doors and windows, then fill in the remaining surface with a roller or larger brush. Focus on applying thin, even coats to avoid visible brushstroke marks.
– Paint the Baseboards
Last but not least, paint the baseboards. First, remove the painter’s tape from the baseboards and apply new tape to protect the freshly painted walls. Use a brush to carefully apply the paint to the baseboards, making sure not to get any on the walls or floor.
Consider using a semi-gloss or gloss finish, as these finishes provide durability and are easier to clean.
• Cleanup and Reassembly
After all the surfaces have been painted and are completely dry, carefully remove the painter’s tape. Take down any remaining drop cloths and clean your painting tools. Reattach hardware and return furniture and decorations to the room. Stand back and admire your freshly painted room.
By following this comprehensive guide, you will be well on your way to achieving professional results in the correct and efficient order for painting a room.
Acrylic Art Techniques for Novice Painters
• Getting Started with Acrylic Painting
As a beginner, acrylic painting is a versatile and forgiving medium to start with. The fast drying time and easy clean-up process make learning enjoyable and less daunting. Here are some essential steps and recommendations to kickstart your acrylic painting journey.
– Acquiring the Necessary Materials
When starting with acrylics, it’s crucial to invest in quality art materials that will enhance your painting experience. Some basic supplies include:
- Acrylic paints
- Brushes
- Canvas or other painting surfaces
- Palette
- Water container
- Paper towels or rags
- Easel (optional)
I recommend visiting an art supply store or researching online to find a reputable brand that produces high-quality acrylic paint. Do not compromise on the quality of brushes, as it impacts the overall experience and outcome of your paintings.
– Setting Up Your Workspace
Choose a well-lit area with plenty of natural light to set up your painting workspace. Ensure you have a comfortable chair and a flat surface to work on, whether you’re using an easel, a table, or a drawing board. Keep your supplies organized and accessible, as this will help you stay focused on your painting.
• Mastering Basic Acrylic Painting Techniques
Familiarize yourself with a variety of techniques to create different textures, blending, and effects in your paintings.
– Wet-on-Wet Technique
By applying wet paint to a wet surface, you can create a smooth blend between two colors. To execute this technique, mix the first color on the canvas, then apply the second color immediately, using a brush or a palette knife. Gently blend the two colors together for a seamless transition.
– Dry Brush Technique
With a dry brush and undiluted paint, you can create rough, textured brushstrokes. Load your brush with paint and gently swipe it across the surface of the canvas, allowing the texture of the canvas to show through.
This technique adds depth to your artwork and works well for creating the appearance of grass, fur, or foliage.
– Glazing
Glazing involves adding a transparent layer of color over a dry paint layer to create a luminous effect. Mix acrylic paint with a glazing medium and apply it using a soft brush. Experiment with multiple layers of glazing to achieve the desired depth and vibrancy.
– Impasto
Impasto is a technique where paint is applied thickly to create a textured, three-dimensional surface. Use a palette knife or a heavily loaded brush to apply the paint directly onto the canvas. This technique is ideal for creating expressive, bold strokes and capturing the movement in your art.
• Strengthening Your Painting Skills
Practice a few essential skills to improve your ability to accurately depict objects, colors, and light in your acrylic paintings.
– Color Mixing
Understanding color theory and how to mix colors accurately is crucial for creating realistic and harmonious paintings.
Start by experimenting with primary colors (red, blue, and yellow), and mix them to create secondary and tertiary colors. Familiarize yourself with warm, cool, and neutral colors, practice creating shades and tints, and learn how to mix complementary colors as well.
Colorado State University provides valuable information on color mixing principles and techniques.
– Value and Tone
Developing a good eye for value (light and dark) and tone (color richness) is essential for depicting three-dimensionality and form in your paintings.
One way to improve your understanding of value and tone is by working in grayscale, limiting your color palette to black, white, and various shades of gray, allowing you to focus on light, shadow, and form.
– Composition
Pay attention to the overall arrangement of elements within your painting. A well-balanced composition engages the viewer and directs their eye across the artwork.
Study the basic principles of composition, such as the rule of thirds, leading lines, focal points, and negative space, and apply them to your paintings.
• Embracing Creativity and Enjoying the Process
Painting can be an immensely rewarding and therapeutic activity. Stay open to learning, experimenting, and pushing your creative boundaries. Don’t be afraid to make mistakes, and remember that each painting is an opportunity for growth.
As a beginner, you may face challenges, but with patience and dedication, you will quickly see improvements in your acrylic painting skills. Enjoy the journey, and let your creativity flourish.
Step | Description |
|---|---|
1 | Gather materials: acrylic paints, brushes, canvas, palette, water container, and a cloth or paper towel. |
2 | Choose a subject or idea to paint. |
3 | Sketch the outline of the subject lightly on the canvas using a pencil. |
4 | Choose your colors and squeeze them onto your palette. |
5 | Begin by painting larger areas and shapes with a larger brush. |
6 | Use a smaller brush to add details and refined areas. |
7 | Allow the paint to dry for a few minutes between layers and colors to avoid unwanted mixing of colors. |
8 | Continue building layers and adding details until you are satisfied with your painting. |
9 | Let the painting dry completely before displaying it or applying any protective varnish. |