DIY Chalk Paint Transform Your Indoor Furniture, What Pros Say
Are you tired of that old, dull furniture in your home? In search of a creative and cost-effective way to give your indoor decor a fresh makeover? Look no further – DIY chalk paint is here to save the day! Get ready for a fun and transformative experience! I will guide you on how to create your own chalk paint, providing expert tips and techniques.
Diy chalk paint: transform your indoor furniture:
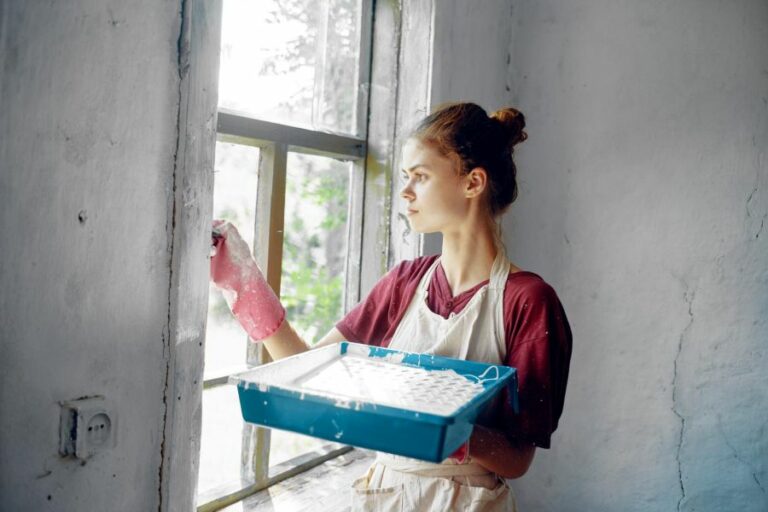
Chalk paint is a versatile and cost-effective solution for revitalizing old furniture with various finishes. It is easy to use, adheres well to various surfaces, and dries quickly. Mix flat latex paint with calcium carbonate in a 2:1 ratio to create custom chalk paint. Prepare the furniture by cleaning, repairing, and protecting the surface. Choose a painting technique, apply it, seal it with wax, and maintain proper care for long-lasting results.
Discover the wonders of DIY chalk paint and unleash your creativity! Learn how to mix your own chalk paint, pick the perfect colors, and apply it to transform your indoor furniture into beautiful, eye-catching pieces. Read on for step-by-step guidance and helpful tips!
Contents
- 1 Chalk Paint DIY: Revamp Your Interior Furnishings
- 2 Is Chalk Painting Indoor Furniture Possible?
- 3 Revitalize Your Furniture Using Chalk Paint
- 4 Tips for Achieving a Great Finish with Chalk Paint
- 5 Creating a Contemporary Look Using Chalk Paint
- 5.1 • Choosing the Right Chalk Paint Colors
- 5.2 • The Power of Two-Tone and Ombre Effects
- 5.3 • Use Stencils for Geometric Patterns
- 5.4 • Opt for Contemporary Hardware
- 5.5 • Experiment with Layering and Distressing Techniques
- 5.6 • Finish with the Right Topcoat
- 5.7 • Utilize Modern Decor to Enhance Your Chalk-Painted Pieces
Chalk Paint DIY: Revamp Your Interior Furnishings
• Discover the World of Chalk Paint
Chalk paint has become increasingly popular in recent years, and with good reason: it’s a versatile and cost-effective way to revitalize old furniture, giving it a new lease on life.
From creating a distressed look to vintage-style finishes, chalk paint can be the answer to giving your indoor furniture a fresh and modernized appearance.
• The Benefits of Chalk Paint
There are many reasons why chalk paint is a go-to choice for DIY enthusiasts. Here are just a few of its many advantages:
- Easy to Use: Chalk paint is user-friendly, making it ideal for beginners and seasoned DIYers alike. With no need for sanding or priming, it saves time and effort.
- Adherence: The paint adheres well to a variety of surfaces, including wood, metal, glass, and even fabric.
- Versatility: Its texture and finish can be easily adjusted depending on the desired effect, be it rustic or smooth.
- Quick Drying Time: Chalk paint dries considerably faster than other types of paint, allowing for faster project completion.
- Environmentally Friendly: Many chalk paints on the market are water-based and low in VOCs (volatile organic compounds), making them eco-friendly options.
• Choosing the Right Chalk Paint
While various brands of chalk paint are available for purchase, you can also make your own at home. By creating your own, you can customize the paint color to match your existing decor Annie Sloan, a well-known chalk paint expert, shares her recipe for homemade chalk paint:
- Mix flat latex paint with calcium carbonate, available at most health food stores.
- Use a 2:1 ratio of paint to calcium carbonate*, mixing until smooth with no lumps.
*Note: Some homemade chalk paint recipes also include a small amount of water or use Plaster of Paris instead of calcium carbonate.
• Preparation Makes Perfect
Although one of the benefits of chalk paint is that it requires minimal surface preparation, there are still a few key steps to ensure your furniture is ready for its transformation:
- Clean the Surface: Remove dirt, dust, and grime from the furniture piece using a mild soap and water mixture. Be sure to rinse away any soap residue and dry the surface thoroughly.
- Make Repairs: If necessary, fix any damage – such as broken knobs, missing screws, or wobbly legs – before applying the paint.
- Protect: Lay down a drop cloth or tarp to protect your workspace from paint spills and drips.
• Painting Techniques: Create Your Desired Look
The application technique you choose will determine the final appearance of your piece. Here are some popular chalk paint techniques:
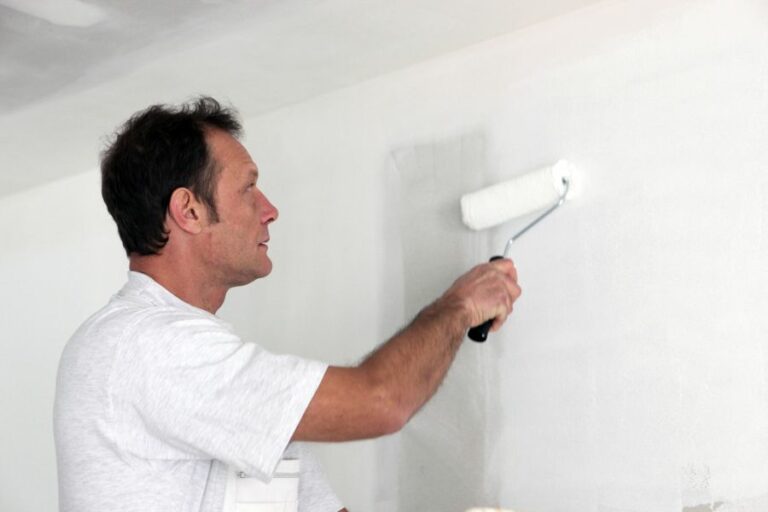
- Smooth Finish: For a smooth, full-coverage finish, apply the paint using a good-quality brush, working in the direction of the wood grain. Allow the first coat to dry fully before applying a second coat.
- Distressed Look: To achieve a distressed, aged appearance, apply a single coat of paint and use a fine-grit sandpaper to gently remove paint from areas that would naturally wear over time (for example, corners and edges).
- Two-Tone: For a two-tone effect, apply a base color and let it dry thoroughly. Next, apply a second color, focusing on highlighting specific areas, such as raised details or beveled edges.
• Finishing Touches: Seal and Protect
To ensure your newly transformed furniture stands the test of time, it’s essential to seal and protect the surface using wax or sealant:
- Choose Your Finish: You can select a clear wax for a matte finish or use a dark wax for an antique or aged appearance.
- Apply the Wax: Working in small sections, apply the wax using a lint-free cloth, or use a wax brush to ensure even coverage. It’s vital to work the wax into the paint to create a durable finish. After applying the wax, allow it to sit for a few minutes before using a clean cloth to buff away any excess, creating a polished look. The wax should cure for at least 24 hours to ensure proper protection.
• The Importance of Proper Care
To prolong the life of your furniture, it’s essential to maintain it regularly:
- Dust with a soft cloth, avoiding harsh chemicals.
- Use coasters or placemats to protect surfaces from heat, moisture, and scratching.
- Reapply wax as needed, generally every 6 to 12 months, depending on the wear and use of the piece.
• Conclusion
Transforming your indoor furniture with chalk paint can be a simple and rewarding DIY project. From the ease of use to the various techniques that can be used to create stunning finishes, chalk paint is the perfect way to redecorate your space without breaking the bank.
Enjoy the process, and take pride in your newly revamped furniture!
Is Chalk Painting Indoor Furniture Possible?
Chalk paint is a popular choice for updating and transforming furniture, giving old and tired pieces new life without the need for extensive preparation or priming. One question that often arises is whether or not you can chalk-paint furniture indoors.
The answer is yes, you can chalk paint furniture indoors, but there are certain precautions you should take to ensure a successful and safe project.
• Proper Ventilation
When working with any paint, it’s important to have proper ventilation in your work area. Chalk paint is no exception, as it can produce fumes that may be harmful if inhaled in large quantities.
To ensure safe indoor painting, make sure you work in a well-ventilated area, such as a room with open windows or a garage with the door open.
If this is not possible, you could consider placing a fan near your work area to help circulate the air and disperse fumes.
• Preparing the Work Area
Before you start your chalk paint project, it’s essential to set up your work area correctly to avoid any accidents or damage to your home.
Since chalk paint is water-based, it’s less likely to cause damage to surfaces if accidentally spilled, but it’s still good practice to lay out a drop cloth or plastic sheeting to protect your floors and any nearby items.
Ensure you have all the necessary materials and tools readily available, including the chalk paint, a brush or roller, and any additional finishing products like wax or sealer. You may also want to keep a damp cloth nearby to quickly clean up any spills or drips during the painting process.
• Choosing the Right Chalk Paint
When selecting chalk paint for your indoor furniture project, consider looking for low-VOC (volatile organic compounds) or zero-VOC options. These types of paint have low or no toxic emissions, making them a safer choice for indoor use.
Here are some popular low-VOC chalk paint brands that could work well for your indoor furniture project:
- Annie Sloan Chalk Paint
- Rust-Oleum Chalked Ultra Matte Paint
- Valspar Chalky Finish Paint
- Americana Decor Chalky Finish Paint
Each brand may have different application methods and finishing products, so be sure to read the instructions carefully before beginning your project.
• Proper Application Techniques
One of the advantages of using chalk paint is that it requires minimal surface preparation before application. However, it’s still essential to make sure your furniture piece is clean and free of any loose debris, as these can affect your paint’s appearance and adherence.
When applying the chalk paint, use smooth, even strokes, taking care not to overload your brush or roller, as this can lead to drips and uneven coverage. Allow each coat to dry fully (following the manufacturer’s recommendations) before moving on to the next.
• Finishing Touches
Once your chalk paint has dried and you are satisfied with the coverage, it’s time to apply your finishing products. Many chalk paint projects use wax or sealer to seal the paint and provide added protection to the surface.
Follow the manufacturer’s instructions for applying the chosen product and allow it to dry completely before using your newly updated furniture piece.
In some cases, you may want to add a distressed or aged effect to your furniture, which can be achieved using fine-grit sandpaper or a sanding block. Lightly sand the areas you want to distress, exposing the original finish or bare wood beneath. Apply your finishing product afterward to seal the paint.
• Cleaning Up
As with any painting project, it’s crucial to clean up your work area and tools properly when you’re done. Chalk paint is water-soluble, making for easy clean-up with soap and warm water. Make sure to wash your brushes and rollers thoroughly, as any residual paint can damage them if left to dry.
With proper techniques, materials, and precautions, chalk painting furniture indoors can serve as an excellent method for updating and revitalizing your home decor.
For additional information on chalk paint and painting techniques, you may find this article from The University of Florida helpful.
Question | Answer |
|---|---|
Can you chalk paint furniture indoors? | Yes, chalk paint can be used on furniture indoors as it has low VOCs (volatile organic compounds) and minimal odor, making it safe for indoor use. However, it’s essential to ensure proper ventilation during the painting process. |
Revitalize Your Furniture Using Chalk Paint
Chalk paint is an exceptional medium for repurposing furniture due to its unique properties. It adheres to most surfaces without the need for priming or sanding, and it creates a stunning, vintage-style finish.
• What You’ll Need
To repurpose your furniture with chalk paint, you’ll need the following items:
- Chalk paint
- Paintbrushes
- Wax or another protective finish (optional)
- Sandpaper
- A clean, lint-free cloth
- Drop cloth or other protection for your workspace
Once you’ve gathered your supplies, you can begin the process of repurposing your furniture.
• Preparing Your Workspace
First, it’s essential to prepare your workspace adequately to avoid any mess or mishaps. Lay a drop cloth or other protective material on the floor and ensure that the area has adequate ventilation. Ensure that you have plenty of space to work, both for painting and for allowing the furniture to dry.
• Cleaning Your Furniture
Before you begin painting, clean your furniture thoroughly. Wipe down the entire piece with a damp cloth to remove any dirt and grime. For stubborn stains, you can use a mild detergent or soap to help break down the debris. After cleaning, let the furniture dry completely before moving on to the painting process.
• Choosing Your Chalk Paint
When it comes to chalk paint, there are numerous brands and colors available. You’ll want to choose a high-quality brand to ensure even coverage and a long-lasting finish. Some popular chalk paint brands include Annie Sloan and Rust-Oleum.
You can also mix your colors if you prefer, following the manufacturer’s instructions for blending ratios.
• Applying the Paint
Once your furniture is clean and dry, it’s time to apply the chalk paint. Start by shaking or stirring the paint well to ensure it’s thoroughly mixed. Then, using a high-quality paintbrush, apply the paint in smooth, even strokes.
Depending on the look you want to achieve, you can use a more free-handed brushstroke or a more measured, even application.
Allow the first coat of paint to dry completely before applying a second coat if needed. Chalk paint dries relatively quickly, but it’s essential to check the label for the recommended drying time.
• Distressing the Furniture (Optional)
If you want to add a distressed or aged look to your furniture, you can do so by lightly sanding the edges and corners of the piece after the paint has dried. Be sure to start with a light touch, as you can always increase the level of distressing if desired.
Using fine-grit sandpaper, gently rub along the edges, corners, and any raised details on the furniture. After sanding, ensure you’ve achieved the desired effect before moving on.
• Applying a Protective Finish
To protect your repurposed furniture and prolong the life of the chalk paint, apply wax or another protective finish. This step is optional and depends on your preference and the intended use of the furniture.
Using a clean, lint-free cloth, apply the wax or finish following the manufacturer’s instructions. Allow the protective finish to dry and cure according to the label’s recommended time frame.
• Final Touches
Once your protective finish has dried and cured, you can enjoy your newly repurposed furniture! Be sure to clean the piece with a damp cloth rather than harsh chemicals, as this can strip the paint and protective finish.
– Additional Resources
For more information and ideas on repurposing furniture with chalk paint, Annie Sloan offers a wealth of resources, including step-by-step tutorials and inspiration for different techniques.
In conclusion, chalk paint is an excellent medium for repurposing furniture and offers versatility, ease of use, and a distinctive finish. By following the steps outlined in this guide, you can breathe new life into your furniture and create unique, personalized pieces for your home.
Step | Description |
|---|---|
1. Choose your furniture | Select a piece of furniture that you want to repurpose and give a new life. |
2. Clean the surface | Clean the furniture thoroughly by removing any dirt, oils, and grime that could negatively affect the paint adhesion. |
3. Sand the surface | Lightly sand the surface of the furniture to remove any rough spots and create a smooth surface for painting. |
4. Prepare the chalk paint | Choose a chalk paint color that suits your desired look, and stir or shake the paint to ensure a smooth consistency. |
5. Apply the paint | Use a brush or roller to apply thin, even coats of chalk paint on the furniture. Let each coat dry before applying the next one, usually for 1-2 hours. |
6. Distress the furniture (optional) | If desired, gently sand along the edges and corners of the furniture to create a distressed or antiqued look. |
7. Seal the paint | Apply a clear wax or sealant to protect and enhance the chalk paint finish. Allow the wax to dry completely before using the furniture. |
Tips for Achieving a Great Finish with Chalk Paint
Chalk paint is a popular go-to option for furniture makeovers, offering a unique and charming rustic look.
• Proper Preparation
Before starting the painting process, it’s crucial to clean and prepare the furniture. Remove any dirt, grime, and loose paint to ensure the best possible results. It’s also recommended to sand any rough surfaces, making sure to wipe the surface clean after sanding.
For an in-depth guide on furniture preparation, check out this tutorial from the Furniture Restoration experts.
• Quality Chalk Paint and Supplies
Investing in high-quality chalk paint is a must. Cheap alternatives might not give the desired results and could affect the overall finish. Additionally, gather essential supplies such as brushes, rollers, painter’s tape, and drop cloths to protect your workspace.
• Choosing the Right Colors
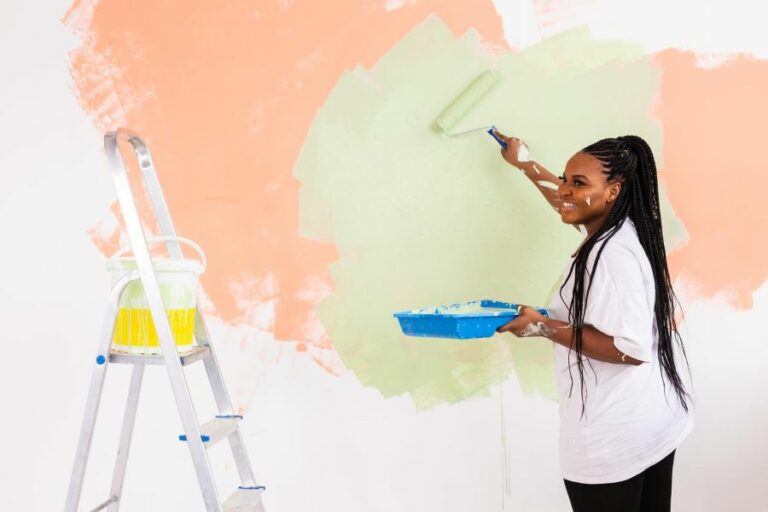
Selecting the appropriate color is a significant step in creating the perfect chalk paint finish. Consider the room’s ambiance, the theme of other furniture pieces, and personal preference when deciding on a color. You can also create custom colors by mixing different shades of chalk paint to match your vision.
Tip: Lighter colors tend to emphasize furniture’s unique details, while darker colors can conceal imperfections.
• Paint Application Techniques
There are different techniques to apply chalk paint, and each creates a distinct finish. Here are some popular methods:
– Smooth Finish
Achieve a smooth finish using a good-quality brush or roller. Apply thin coats of chalk paint and allow each layer to dry before applying the next. Sanding between coats will create a polished look. A fine-grit sanding sponge or sandpaper works best for this purpose.
– Distressed Finish
For a distressed, vintage look, apply multiple colors, followed by sanding to create a worn appearance. This technique allows the underlying layers of paint to show through, adding depth and character.
– Stippling Technique
To create a unique texture with subtle variation in color, mix two shades of chalk paint and randomly dab it onto the furniture using a stippling brush.
• Proper Sanding Techniques
Sanding is a critical step in achieving a beautiful chalk paint finish. Sanding between coats ensures a smoother result, while distressing techniques require strategic sanding to reveal the underlying layers.
Be careful not to sand too aggressively, as it can cause unwanted damage to the furniture. Use a gentle touch when sanding to achieve the desired look.
• Seal and Protect the Chalk Paint
To ensure the longevity of your chalk paint finish, it’s essential to seal and protect the surface. A clear furniture wax or water-based polyurethane does the job. Apply a thin coat of sealer using a lint-free cloth or brush, and allow adequate drying time before using the piece.
If the furniture is exposed to heavy traffic or potential spills, two or three coats will provide added protection.
Tip: Use distressing techniques before applying the sealer to maintain the intended finish.
• Choosing the Right Hardware and Accessories
To complete the furniture makeover, consider updating the hardware and accessories, such as knobs and handles. Choose pieces that complement the chalk paint finish and enhance the overall look.
• Final Thoughts
Creating a stunning chalk paint finish on furniture requires careful preparation, quality materials, proper application techniques, and attention to detail. With careful planning and execution, you can transform ordinary furniture into a beautiful statement piece.
Steps | Description |
|---|---|
1. Choose the right paint | Choose a high-quality chalk paint that adheres well to furniture surfaces. |
2. Clean the furniture | Thoroughly clean the furniture to remove any dirt, dust, and grease. |
3. Sand the furniture (optional) | If the furniture has a glossy finish, lightly sand the surface to help the paint adhere better. |
4. Apply the paint | Apply the chalk paint in thin, even coats, following the wood grain for a smoother finish. Allow each coat to dry before applying the next one. |
5. Distress the furniture (optional) | Use fine-grit sandpaper to gently rub off the paint on the edges and details for a vintage, distressed look. |
6. Seal the paint | Apply a wax or clear sealer to protect the paint and give the furniture a slightly glossy finish. |
7. Reassemble the furniture | Put the hardware back on and reassemble the furniture, if necessary. |
Creating a Contemporary Look Using Chalk Paint
Chalk paint is a versatile, eco-friendly, and cost-effective option for transforming your furniture and interior spaces. Despite its vintage appearance, chalk paint can be used to create a modern and contemporary look in your home.
• Choosing the Right Chalk Paint Colors
To create a modern look, it’s crucial to select the right chalk paint colors. Opt for neutral shades like white, gray, or charcoal or bold statement colors like navy blue, black, or deep green. These hues will provide a sophisticated and sleek appearance in your space, reflecting contemporary design elements.
I recommend using Annie Sloan’s Chalk Paint as it comes in numerous shades that are perfect for creating a modern style.
• The Power of Two-Tone and Ombre Effects
With your chosen chalk paint colors, experiment with two-tone or ombre effects on your furniture pieces. Two-tone involves painting parts of your furniture, such as the legs, in contrasting colors. This creates a striking visual impact and enhances the modern feel.
Ombre is a gradient effect involving blending different shades of the same color. For an easy-to-follow guide on creating the ombre effect, visit this tutorial from Better Homes & Gardens.
• Use Stencils for Geometric Patterns
Adding geometric patterns to your chalk-painted furniture or walls is another excellent way to create a modern and stylish look. Stencils are a simple and effective solution for achieving intricate designs without the hassle of hand painting.
Use stencils in symmetrical or asymmetrical patterns for added visual interest. Check out stencil designs on websites like Cutting Edge Stencils for inspiration.
• Opt for Contemporary Hardware
To further enhance the modern look of your chalk-painted furniture, update the hardware. Use sleek and minimalist handles or knobs, such as metal or glass, to create a refined and contemporary style.
Replacing outdated hardware with modern designs will elevate the overall look of your pieces and contribute to a cohesive and contemporary interior design.
• Experiment with Layering and Distressing Techniques
While distressing techniques often create a rustic or vintage effect, they can also be used to achieve a modern look. Opt for subtle distressing, like sanding the edges of furniture, to make your pieces appear worn yet elegant.
Layering different shades of chalk paint and strategically distressing to reveal the underlying colors can add depth and dimension to your furniture, resulting in a stylish and modern appearance.
• Finish with the Right Topcoat
After painting your furniture or walls, apply a high-quality topcoat to protect your surfaces and ensure longevity. For a modern look, choose a matte or satin finish rather than high-gloss options. This will provide a clean and minimalist appearance that aligns with contemporary design.
Wax or polyurethane topcoats are popular choices, but I recommend using water-based products as they are more eco-friendly, produce fewer odors, and offer easier cleanup.
• Utilize Modern Decor to Enhance Your Chalk-Painted Pieces
Finally, complement your chalk-painted furniture or walls with modern decor elements. Incorporate clean lines, a restrained color palette, and minimalist decorative pieces to create a cohesive and on-trend interior design.
Incorporate the following elements for a balanced and modern space:
- A statement piece of art or lighting.
- Geometric or abstract patterns in textiles like cushions, rugs, or curtains.
- Metallic accents for that touch of glamour.
- Natural elements such as potted plants or succulents.
- Simple and understated table or shelf decor.
By incorporating these techniques and design elements, you can transform your furniture and interior spaces with chalk paint, achieving a modern and contemporary look that is both stylish and functional.
Step | Description |
|---|---|
1 | Choose a piece of furniture to paint with a simple design and clean lines. |
2 | Lightly sand the surface of the furniture to remove any gloss and clean it properly. |
3 | Select a chalk paint color in a neutral tone, such as white, gray, or black, for a modern look. |
4 | Apply the chalk paint to the furniture using a brush or roller with smooth, even strokes. |
5 | Allow the first coat of paint to dry completely before applying a second coat for full coverage and an even finish. |
6 | Use fine-grit sandpaper to lightly distress the edges and details of the furniture piece for a subtle aged effect. |
7 | Seal the painted surface with wax or another protective finish to protect the paint and maintain the modern look. |
8 | Accessorize the furniture with modern hardware, such as sleek handles or knobs, to complete the transformation. |