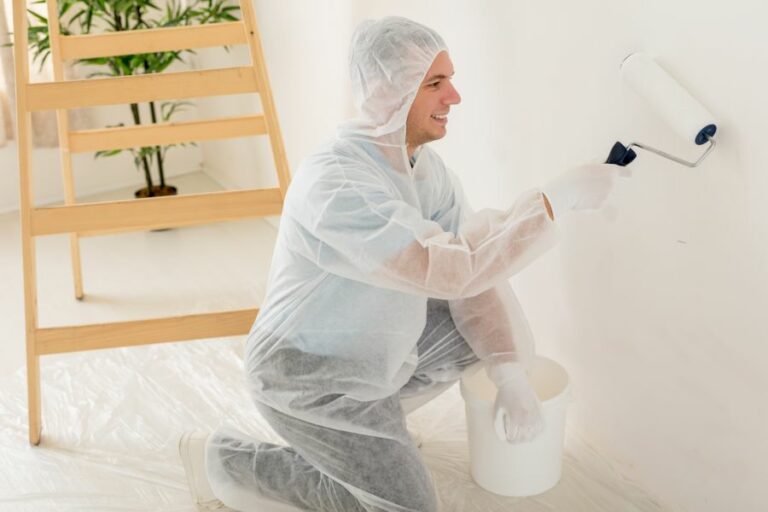
Furniture Upcycling Using Chalk Paint. What Pros Say
Are you tired of your old furniture but don’t want to break the bank by buying new pieces? Upcycling your furniture with chalk paint might just be the perfect solution for you! Not only is it an affordable and eco-friendly way to revamp your furniture, but it’s also a fun and creative DIY project to experiment with.
Furniture upcycling using chalk paint:
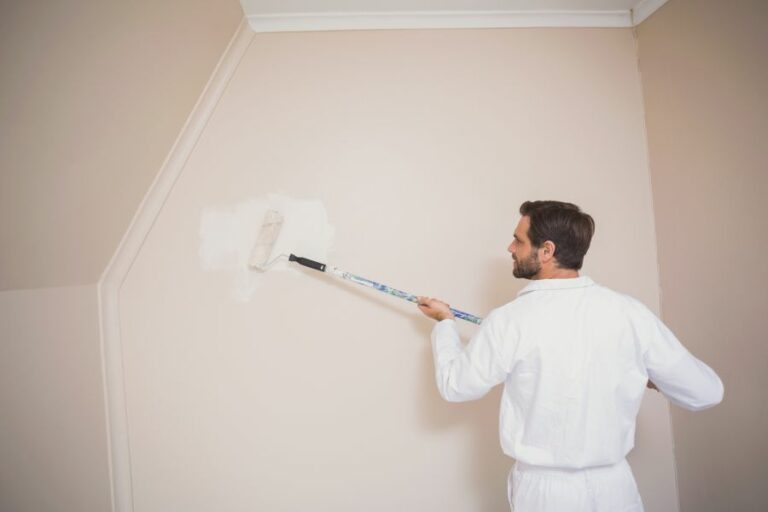
Furniture upcycling using chalk paint involves cleaning and prepping the piece, applying 2-3 coats of paint, and sealing it with wax. Chalk paint is popular for its ease of application, quick drying time, and ability to create various textures. It adheres to most surfaces without sanding or priming, offers environmentally-friendly benefits, and results in a matte, chalky finish.

Ready to give your old furniture a new lease of life? Discover the world of upcycling with chalk paint! Read on to unearth tips, tricks, and step-by-step guides for transforming your pieces into unique, stylish treasures. Your home makeover awaits!
Contents
- 1 Revamping Furniture with Chalk Paint Techniques
- 2 Transforming Old Furniture with Chalk Paint
- 3 Prepping Furniture for Chalk Paint: Is Sanding Necessary?
- 4 Drawbacks of Chalk Paint for Furniture Makeovers
- 5 Sealing Furniture After Chalk Paint: A Comprehensive Guide
Revamping Furniture with Chalk Paint Techniques
Upcycling furniture can bring new life to old pieces, save you money, and contribute to a sustainable lifestyle. One of the most popular methods of upcycling furniture is using chalk paint.
• What is Chalk Paint, and Why Use It for Upcycling?
Chalk paint is a versatile decorative paint that has a matte, chalky finish. Its unique formulation allows it to adhere to most surfaces without the need for sanding or priming.
The ease of application, quick drying time, and ability to create various textures make chalk paint a popular choice for transforming furniture pieces. Moreover, chalk paint is generally water-based, making it safer for the environment and the user.
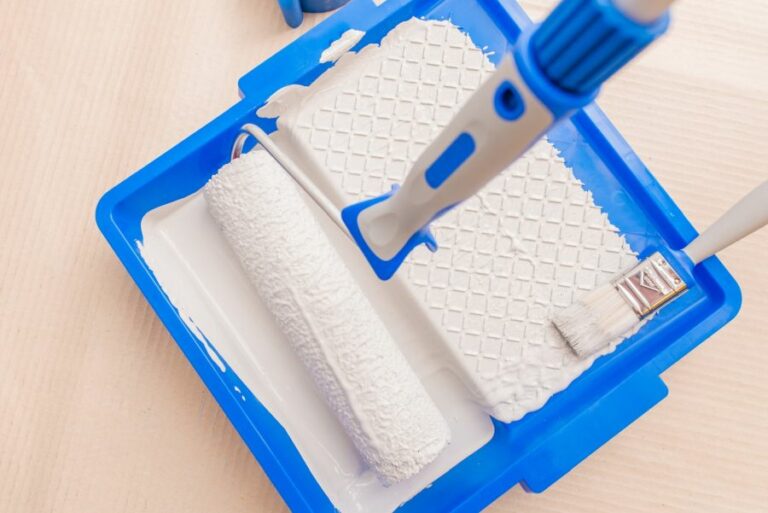
• Essential Tools and Materials
Before beginning your project, gather the necessary tools and materials for successful upcycling. These include:
- Chalk paint
- Paintbrushes (a combination of natural and synthetic brushes is recommended)
- Clean, lint-free cloths
- Sandpaper (both medium and fine grit)
- Painter’s tape
- Drop cloth or old sheets to protect the workspace
- Screwdriver to remove hardware (if applicable)
- Wax or sealant to protect the finished piece
• Preparing Your Furniture for Chalk Paint
Even though chalk paint adheres well to various surfaces, it’s essential to prep your furniture properly for the best results. The following steps will help ensure a smooth and long-lasting upcycling project:
– Step 1: Clean the Surface
Remove any dirt, grime, or dust from the furniture. Use a cloth to wipe down the entire piece and make sure it is free of any debris.
– Step 2: Remove Hardware and Fixtures
Detaching any hardware, such as knobs, handles, and hinges, will make the painting process more manageable. Plus, it allows for a more professional finish.
– Step 3: Repair and Fill Damaged Areas
Take the time to fix any scratches, dents, or holes in your furniture using wood filler. Make sure to let it dry completely before moving on to the next step.
– Step 4: Light Sanding (Optional)
Although chalk paint doesn’t usually require sanding, lightly sanding the furniture can help provide a better surface for the paint to adhere to. Use medium-grit sandpaper and sand in the direction of the wood grain. Wipe down with a damp cloth afterward to remove any dust.
• Painting Your Furniture with Chalk Paint
Now that your furniture is prepped and ready for paint, follow these steps:
– Step 1: Apply the First Coat
Use a quality chalk paint brush and apply the first coat of chalk paint to the furniture. Start with thin layers and use long, smooth strokes to minimize brush marks.
– Step 2: Allow to Dry
Chalk paint dries relatively quickly compared to other paints. However, it is essential to allow adequate drying time between coats (usually between 30 minutes to 2 hours).
– Step 3: Apply Additional Coats as Necessary
Depending on the desired coverage, apply additional coats of chalk paint, ensuring each layer is dry before proceeding. Two to three coats should suffice for most projects, but more may be needed for darker furniture or lighter colors.
• Creating Distressed Effects and Enhancing Texture
One of the most appealing aspects of chalk paint is its ability to create distressed and vintage effects on furniture. Here are a few techniques to achieve these looks:
– Technique 1: Sanding
For a distressed look, sand the furniture after the last coat of paint has dried completely. Use fine-grit sandpaper and sand lightly in areas where natural wear and tear occurs, such as edges, corners, and raised details.
– Technique 2: Layering Paint
To achieve a layered look or to add depth to the piece’s color, apply two different colors of chalk paint. After the first color dries, lightly apply a second color on top. Once this layer is dry, gently sand areas to reveal the underlying color.
– Technique 3: Wax and Paint
To create a subtle texture, apply a layer of wax between two different colors of chalk paint. The wax will resist the second paint color, leaving a variation in the finish.
• Protecting and Sealing Your Upcycled Furniture
To ensure your upcycled furniture lasts and surfaces are protected, seal the piece with wax or another sealant. Here’s how:
– Step 1: Apply Wax
Using a lint-free cloth or a wax brush, apply a thin coat of wax to the painted surface. Make sure to work in sections and remove any excess wax with a clean cloth as you go.
– Step 2: Buff the Wax
Once the wax is dry (generally within 24 hours), buff the surface with a clean cloth to achieve a subtle sheen.
– Step 3: Reassemble and Enjoy
After the wax has fully cured (typically after 72 hours), carefully reattach any hardware or fixtures and place your newly-upcycled furniture in its designated spot.
Chalk paint offers infinite possibilities to transform old furniture into updated, unique pieces. By following these steps and adding your personal touch, you can upcycle furniture using chalk paint and enjoy its renewed beauty for years.
Transforming Old Furniture with Chalk Paint
Chalk paint is a versatile and easy-to-use medium that can breathe new life into old furniture, enabling you to repurpose items you already have or find new treasures at thrift stores and garage sales.
• The Magic of Chalk Paint
Chalk paint has become increasingly popular in recent years due to its ease of use and unique matte finish. One of the primary reasons for its popularity is that you can create a “shabby chic” finish without the need for extensive sanding or priming.
Unlike traditional latex or oil-based paints, chalk paint adheres to a wide range of surfaces, including wood, metal, glass, and more.
• Essential Chalk Paint Supplies
To get started with your chalk paint project, you will need the following supplies:
- Chalk paint: There are many brands available, such as Annie Sloan, Rust-Oleum, and DecoArt. Consider the color and finish you desire, as well as your budget, when selecting a chalk paint.
- Brushes: Choose high-quality synthetic bristle brushes for a smoother finish or natural bristle brushes for a more textured look. It’s helpful to have a variety of sizes on hand for different areas of your project.
- Wax or sealer: After your paint has dried, you will need to protect your piece with wax or clear sealer. Choose from various finishes, including clear, dark, or tinted, to achieve the desired look.
- Sandpaper: A 220-grit sandpaper is ideal for distressing your piece and smoothing any rough spots. In some cases, you may need a coarser grit if there is significant damage or paint buildup on the existing piece.
- Rags and/or tack cloth: To clean your piece and remove dust after sanding.
- Drop cloth or tarp: Protect your work area from paint spills and splatters.
Optional supplies include:
- Foam roller: Helpful for applying paint to larger, flat surfaces.
- Artists’ brushes: Useful for detailing and intricate work.
Now that you have gathered your supplies, it’s time to start repurposing your furniture with chalk paint.
• Step-by-Step Guide to Repurpose Furniture with Chalk Paint
– Step 1: Prep the Furniture
Before you begin painting, take the time to clean and inspect your furniture. Remove any dirt or grime with a damp cloth, followed by thorough drying. If there are any repairs needed or hardware to remove, address those issues now.
– Step 2: Light Sanding (Optional)
While chalk paint adheres well to most surfaces, if your furniture has a glossy finish, it may be necessary to do a light sanding with 220-grit sandpaper to help the paint adhere better.
This step is not needed for pieces with a flat or matte finish. After sanding, be sure to use a tack cloth or clean, damp cloth to remove any dust before moving forward.
– Step 3: Apply the First Coat
Using your chosen brush or foam roller, begin applying the first coat of chalk paint to your furniture piece. Remember to work in thin, even layers and move in the direction of the wood grain.
It’s important to note that the first layer will likely appear streaky, don’t worry, as subsequent coats will provide better coverage.
– Step 4: Apply Additional Coats
Allow the first coat of paint to dry according to the manufacturer’s instructions (usually about 1-2 hours) before applying subsequent coats as needed. Most pieces will require 2-3 coats for full coverage.
If desired, use a lighter touch and less paint on your brush for more texture, or smooth out brushstrokes by lightly sanding between coats.
– Step 5: Distressing (Optional)
If you prefer a shabby-chic or distressed look, use your 220-grit sandpaper to gently remove some paint from the edges and high points of your piece. This step should be done once the final coat of chalk paint is dry to the touch but not fully cured.
– Step 6: Apply Wax or Sealer
Protect your newly painted furniture with a wax or clear sealer. Using a clean, lint-free rag or brush, apply the wax or sealer in thin, even layers. Make sure to work in the same direction as your paint strokes.
Allow the wax or sealer to dry based on the manufacturer’s instructions, and buff gently with a clean rag if desired.
– Step 7: Reattach Hardware and Enjoy
Now that your piece is fully transformed reattach any hardware and enjoy the results of your repurposed furniture.
Chalk paint is an excellent choice for repurposing furniture, allowing you to create unique, customized pieces for your home without extensive preparation or experience. With a little time and effort, you can transform furniture and elevate your space with personal touches and creative flair.
Step | Description |
|---|---|
1. Choose furniture | Select a furniture piece that you want to repurpose with chalk paint. |
2. Clean furniture | Clean the furniture thoroughly using a damp cloth to remove any dirt, dust, or debris. |
3. Remove hardware | Take off any hardware, such as handles or knobs, from the furniture. |
4. Sand surface | Lightly sand the surface of the furniture to create a smooth finish and help the paint adhere. |
5. Choose chalk paint color | Purchase chalk paint in the desired color or mix your own from latex paint and calcium carbonate or plaster of Paris. |
6. Apply chalk paint | Use a paintbrush or roller to apply a thin, even coat of chalk paint to the furniture. Allow it to dry for at least 1-2 hours before applying a second coat, if necessary. |
7. Distress finish (optional) | If you want a distressed or aged look, use a fine-grit sandpaper to lightly sand areas where natural wear would occur, such as edges and corners. Be sure to do this before applying a protective finish. |
8. Apply protective finish | After the paint is completely dry, apply a clear wax, matte polycrylic, or other protective finish to seal and protect the chalk paint. Follow the manufacturer’s instructions on the label for proper application. |
9. Reattach hardware | Reattach the hardware to the furniture once the protective finish is dry. |
10. Admire your repurposed furniture | Enjoy the fresh, new look of your repurposed furniture with chalk paint. |
Prepping Furniture for Chalk Paint: Is Sanding Necessary?
• The Benefits of Sanding Furniture
Sanding furniture before painting can be considered an essential step in creating a high-quality finish. By sanding your furniture, you provide a smooth and even surface for the paint to adhere to, which improves the overall appearance.
Though sanding can be time-consuming and somewhat labor-intensive, the benefits it offers include:
- Evening out any rough spots, scratches, or dings, giving you a smooth surface to work with
- Opening up the pores of the wood, allowing paint to penetrate and adhere better
- Removing any previous finish, stain, or paint that may interfere with paint adhesion
• Chalk Paint: A Different Approach
Chalk paint is a popular choice among DIY enthusiasts, professional painters, and furniture restorers thanks to its versatility, ease of use, and beautiful matte finish.
What sets chalk paint apart from other types of paint is its unique ability to adhere well to various surfaces, including wood, metal, and glass, without the need for extensive prep work such as sanding or priming.
– No Sanding is Required
In most cases, chalk paint users can skip the sanding process altogether. If the furniture piece is in good condition without any rough patches or uneven surfaces, chalk paint should adhere to the surface quite well. However, there are some instances when a light sanding might be necessary:
- When the furniture has a glossy, laminate, or heavily varnished finish, sanding can help create a better bond for the paint.
- If there are noticeable scratches, gouges, or rough patches, a quick sanding will provide a smoother finish for your final product.
- When painting over a previously painted surface, sanding can help remove any loose or flaking paint.
In such cases, a light sanding using a fine-grit sandpaper (around 180 to 220 grit) should be sufficient. This will create a bit of “tooth” for the chalk paint to grip onto, without damaging the underlying material.
– Prep Work for Chalk Paint
While sanding may not be a strict requirement when using chalk paint, it’s still essential to clean your furniture thoroughly before painting. Any dirt, dust, or debris can impede paint adhesion, compromising the final result.
To clean your furniture effectively, follow these steps:
- Remove any hardware, such as knobs or hinges, to clean and paint more efficiently.
- Use a mild detergent, such as dishwashing soap, mixed with water to wipe down your furniture. Avoid using harsh chemicals, as they can damage the furniture or leave behind residue that could affect the paint.
- Rinse the furniture with clean water to remove any soap residue.
- Allow the furniture to dry completely before painting. This may take anywhere from a few hours to overnight, depending on the humidity and temperature.
• Chalk Paint Application
Once the furniture is clean and dry, you’re ready to apply the chalk paint. Remember that chalk paint typically dries quickly, so work in small sections and use a quality brush or roller for optimal coverage. Apply at least two coats of chalk paint for a full, even finish, allowing the paint to dry between coats.
• Finishing Touches
To seal and protect your freshly painted furniture, apply a wax or protective topcoat designed for chalk paint after the paint has fully dried. This will not only create a durable finish but also enhance the rich color and texture of the chalk paint.
For added character or an antique effect, consider using a dark wax or glaze to add depth and dimension to your piece. Finally, buff the waxed finish with a lint-free cloth for a smooth, professional look.
• Conclusion
Chalk paint offers a refreshing alternative for those who wish to avoid sanding their furniture before painting. With proper preparation, including thorough cleaning and possible light sanding when necessary, chalk paint can provide a stunning and durable finish.
For tips and tricks on chalk paint techniques, check out Annie Sloan’s website; the creator of chalk paint and a respected resource in the field.
| Do you have to sand furniture before using chalk paint? | |
|---|---|
| Answer | No, it is not necessary to sand furniture before applying chalk paint. Chalk paint adheres well to most surfaces without any preparation. However, it is recommended to clean the furniture thoroughly before painting to ensure proper adhesion. |
Drawbacks of Chalk Paint for Furniture Makeovers
Chalk paint has become increasingly popular for its unique distressed look and easy application process. Although many consider chalk paint an excellent option for updating old furniture, it is also important to know its disadvantages.
• Limited Color Choices
One of the considerable drawbacks of chalk paint is the limited number of available colors. Many brands of chalk paint only offer a few basic color options, which may not align with the desired aesthetic for a furniture project.
Recommendation: To achieve the desired color, some crafters will mix multiple chalk paint colors together. However, this solution can be time-consuming and may not result in the perfect shade. For more color options, consider using latex or acrylic paint instead, as both types offer a broader color palette.
• More Expensive Than Other Paint Options
Chalk paint is often priced higher than alternative paint types, such as latex or acrylic. Although this premium price can be justified by its unique properties and ease of use, it can also deter DIY enthusiasts on a tight budget.
Recommendation: If cost is a significant concern, explore more affordable paint options like acrylic paint or latex paint, both of which can be easily found at local paint or craft stores.
• Not Durable on High-Usage Furniture Pieces
Chalk paint’s porous nature makes it prone to chipping and scratching, especially on surfaces exposed to frequent use. This can be problematic when painting high-usage furniture pieces such as kitchen tables, chairs, or dressers.
Recommendation: Applying a protective topcoat of wax or polyurethane can help increase the durability of chalk paint. However, for extremely high-usage pieces of furniture, opt for a more durable paint option such as enamel paint, which is specifically designed to withstand heavy use.
• May Require Extensive Prep Work
Some DIY enthusiasts are drawn to chalk paint because of the claim that it requires minimal surface preparation. However, depending on the condition of the furniture, additional prep work like sanding, cleaning, or primer application may be needed to ensure a smooth, long-lasting finish.
Recommendation: For furniture pieces made of wood with visible stains or rough texture, it’s better to use a primer before applying chalk paint. This approach will help to create an even, solid base for the paint and improve the final result.
• Time-Consuming Distressing Process
Although the process of applying chalk paint can be relatively simple, achieving the desired distressed finish may require a significant amount of time and effort spent on sanding and sealing.
Recommendation: For those looking for a quicker, more efficient paint option, consider using a paint-and-primer-in-one, such as latex or acrylic paint. These products can provide complete coverage in fewer coats, cutting down on the overall time spent on a project.
• Less Suitable for Outdoor Use
Chalk paint is not designed for outdoor furniture, as it is not capable of withstanding various weather elements such as rain, sun, and temperature fluctuations. Exposure to outdoor conditions can cause chalk paint to chip and fade faster, requiring more frequent touch-ups.
Recommendation: For outdoor furniture, choose a more weather-resistant paint option, like exterior paint or specialty outdoor spray paint. These paints are explicitly designed for outdoor use and offer better protection against weather elements.
• Not User-friendly for Complex Designs
Chalk paint’s thick consistency can make it challenging to create intricate patterns or designs. Achieving clean, crisp lines can be difficult, which can be limiting for those hoping to create complex designs on furniture pieces.
Recommendation: For projects involving intricate designs, opt for a smoother consistency, like acrylic paint, which is better suited for detailed work.
In conclusion, while chalk paint is a popular option for creating a distressed look on furniture, it is important to consider its disadvantages before committing to a project.
Be mindful of the potential drawbacks, such as limited color options, higher cost, and durability concerns, and explore alternative paint types that may better suit the needs of the specific furniture piece in question.
Always remember that the right paint choice can make all the difference in having a successful and enjoyable DIY experience.
| Cons of Chalk Paint for Furniture Makeovers |
|---|
| Expensive |
| Limited color selection |
| Requires sealing with wax or a topcoat |
| Textured finish may not be suitable for all furniture styles |
| Can be time-consuming to apply multiple layers and sealant |
| May require frequent maintenance due to chipping or fading |
Sealing Furniture After Chalk Paint: A Comprehensive Guide
Chalk paint is a popular choice for DIY enthusiasts and professional furniture restorers alike. Its matte finish and easy application make it a go-to for transforming furniture. However, sealing your project is a crucial step for durability and long-lasting results. So, how do you seal furniture after chalk paint?
• Choosing the Right Sealant
There are multiple options available for sealing chalk-painted furniture. The three most common and recommended sealants are wax, polyurethane, and polycrylic. Each offers different benefits and drawbacks, which we’ll explore below.
– Wax
Chalk paint wax is widely known and used for sealing painted furniture. It offers a protective layer against moisture, stains, and wear. Here are some pros and cons of using wax:
Pros:
- Enhances the color of chalk paint
- Requires minimal tools for application
- Easy to reapply if necessary
Cons:
- Requires more frequent reapplication than other sealants
- Not suitable for surfaces exposed to heat or extensive use
- May darken the paint color
I recommend using wax for smaller pieces or decorative accents. Clear wax is available, as well as various colors to add depth and character to the piece.
– Polyurethane
Polyurethane is a more durable option for sealing chalk-painted furniture. It provides a stronger and longer-lasting protective layer. Here are some pros and cons of using polyurethane:
Pros:
- Strong and durable protection
- Available in various sheens (matte to glossy)
- Suitable for heavily used furniture pieces
Cons:
- May become yellow over time, particularly on lighter paint colors
- Can be difficult to apply without visible brush strokes
- Longer drying time than wax or polycrylic
For high-traffic pieces or those exposed to heat, such as kitchen tables, consider using polyurethane. Always opt for water-based polyurethane, as oil-based versions can yellow over time.
– Polycrylic
Polycrylic is another water-based sealant option known for its durability and ease of use. It is similar to polyurethane; however, it won’t turn yellow over time, making it a popular choice for lighter-colored chalk-painted furniture. Here are some pros and cons of using polycrylic:
Pros:
- Durable and long-lasting protection
- Won’t yellow over time
- Easy to apply and clean up
Cons:
- Can be more expensive than other sealants
- Longer drying time than wax
- Limited sheen options
For light-colored or white chalk-painted pieces, I recommend opting for polycrylic, as it won’t yellow over time and provides excellent protection.
• Application Techniques
Each sealant requires a slightly different application technique for optimal results. Here’s a breakdown of methods for each option.
– Applying Wax
- First, make sure your chalk paint is fully dry.
- Using a clean, lint-free cloth or a natural-bristle brush, apply the wax in a thin, even layer.
- Remove any excess wax with a clean cloth in the direction of the wood grain.
- Allow the wax to dry for at least 24 hours before adding another coat if desired.
- Buff the waxed surface with a clean cloth for a smooth, polished finish.
Wax tip: If using a dark wax, apply clear wax first to avoid over-darkening the paint color.
– Applying Polyurethane
- Ensure your chalk paint is thoroughly dry.
- Use a high-quality synthetic-bristle brush or foam brush to apply a thin, even coat of polyurethane.
- Allow the polyurethane to dry according to the manufacturer’s instructions, usually 2-4 hours.
- Lightly sand the surface with fine-grit sandpaper (220-320 grit) for a smooth finish.
- Apply additional coats for added protection, remembering to sand between coats.
- Allow the final coat to dry for at least 24 hours before using the furniture piece.
Polyurethane tip: Opt for a matte or satin sheen to maintain the chalk paint’s intended appearance.
– Applying Polycrylic
- Make sure your chalk paint is completely dry.
- Use a high-quality synthetic-bristle brush, roller, or spray applicator to apply a thin, even coat of polycrylic.
- Allow the polycrylic to dry for 1-2 hours.
- Lightly sand the surface with fine-grit sandpaper (220-320 grit) for a smooth finish.
- Apply additional coats as needed, sanding between coats for an even finish.
- Let the final coat dry for at least 24 hours before using the furniture piece.
Polycrylic tip: Use long, smooth brush strokes or a spray applicator to avoid visible brush marks.
• Caring for Sealed Furniture
Once your furniture piece is sealed, it’s important to follow proper care to maintain its appearance and durability. Avoid abrasive cleaners or harsh chemicals, opting for a mild soap and water solution or a damp cloth for cleaning.
Additionally, protect surfaces from heavy or hot items by using coasters or trivets.
In conclusion, sealing chalk-painted furniture is an essential step for long-lasting results. Choose the appropriate sealant for your project, follow the proper application techniques, and maintain your furniture with care.
With these steps, your chalk-painted furniture will maintain its beauty and functionality for years to come.
Step | Description |
|---|---|
1. Allow the chalk paint to dry | Let the painted furniture dry completely, following the manufacturer’s recommended drying time. |
2. Clean the surface | Wipe the chalk painted surface with a lint-free cloth to remove any dust or debris. |
3. Choose a sealer | Select a sealer that is compatible with chalk paint, such as wax, polyurethane, or polycrylic. |
4. Apply the sealer | Follow the manufacturer’s instructions for applying the chosen sealer, using a high-quality brush or a lint-free cloth. |
5. Allow the sealer to dry | Let the sealer dry according to the manufacturer’s recommended drying time. Apply additional coats if necessary. |
6. Buff the surface (if using wax) | If you used a wax sealer, buff the surface with a clean, lint-free cloth to create a smooth finish. |
7. Allow the sealer to cure | Let the sealed furniture cure for the recommended time before using it. This ensures that the sealer has fully hardened and will provide optimal protection. |