Rustic Charm Chalk-Painted Indoor Furniture. What Pros Say
Imagine walking into a warm, inviting space where every piece of furniture embodies a unique and timeless rustic charm, where the deceptively simple elegance of chalk-painted furniture transforms your home into a cozy haven. If this sounds like your vision of beautiful indoor living, you’re in the right place.
Rustic charm: chalk-painted indoor furniture:
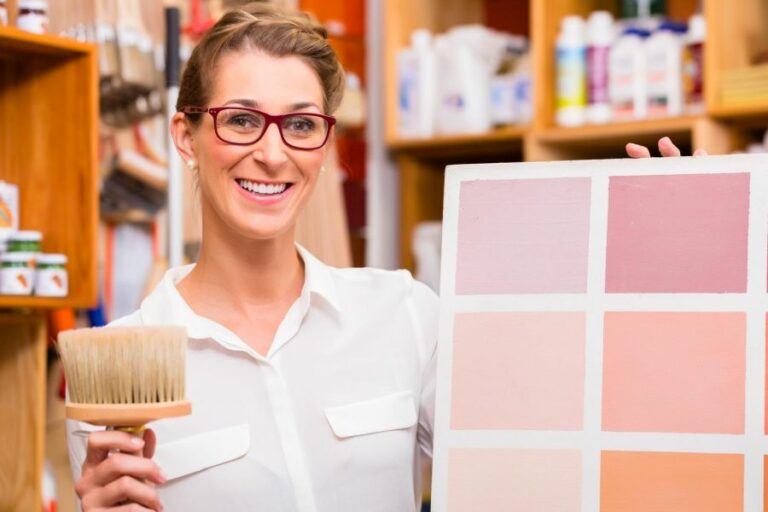
Chalk paint is a water-based paint known for its matte, chalky appearance, making it ideal for creating a rustic, distressed look on indoor furniture. Its high adhesion, quick-drying properties, and ease of use make it a popular choice for transforming furniture without the need for primer or sanding. Techniques such as layering, sanding, and waxing can enhance the rustic appeal of chalk-painted furniture.

Unlock the secrets to transforming your indoor furniture with chalk paint and embrace that rustic charm you’ve always admired. Continue reading for expert tips, techniques, and inspirations to create your own stunning chalk-painted masterpieces!
Contents
- 1 Chalk Paint: Enhancing Indoor Furniture with Rustic Appeal
- 2 Achieving Rustic Aesthetics with Chalk Painted Furniture
- 3 Downsides of Using Chalk Paint on Furniture: What to Know
- 4 Comparing Chalk Paint and Furniture Paint: Key Differences
- 5 Sanding Furniture Prior to Chalk Painting: Is It Necessary?
Chalk Paint: Enhancing Indoor Furniture with Rustic Appeal
Rustic charm is a popular trend in home decor, and a key component of achieving this look is chalk-painted furniture. Chalk paint is a versatile and easy-to-use medium that can transform your indoor furniture, giving it a vintage or distressed appearance.
• What is Chalk Paint?
Chalk paint is a water-based paint that is designed to adhere to surfaces without the need for primer or sanding. It’s known for its matte, chalky appearance, which contributes to the rustic and distressed look of the furniture.
Unlike regular latex paints, chalk paint dries quickly and has a thick consistency, making it easy to achieve a variety of textures and finishes.
Benefits of Chalk Paint for Furniture
- No need for primer or sanding
- High adhesion to various surfaces
- Quick-drying
- Creates a unique, rustic finish
- Easy to mix custom colors
• Tips for a Successful Chalk Paint Furniture Makeover
Before embarking on your chalk paint journey, consider these tips to ensure a successful transformation of your indoor furniture.
1. Choose the Right Piece of Furniture
Chalk paint works best on furniture with interesting details, such as carved wood, ornate knobs, or turned legs. The texture and finish of chalk paint will highlight these elements and enhance their visual appeal in a rustic room.
2. Prep Your Workspace
As with any painting project, it’s essential to set up a clean, well-ventilated workspace. Lay down drop cloths or plastic sheets to protect the surrounding area and work on a stable surface.
3. Clean the Furniture
Remove any dust or dirt from the furniture using a damp cloth and a mild cleaner. Rinse thoroughly and let the piece dry completely before starting to paint.
4. Use High-Quality Brushes
Invest in high-quality brushes that will provide a smooth, even application of the chalk paint. Synthetic bristle brushes are recommended for water-based paints, as they do not absorb water and lose their shape like natural bristle brushes.
5. Begin with a Base Coat
Apply a base coat of chalk paint to the entire piece of furniture, using brush strokes in the direction of the wood grain. This will help create a smoother finish and ensure better adhesion of the paint. Allow the base coat to dry before applying additional layers.
6. Play with Layers and Textures
To create a distressed, weathered look, apply multiple layers of chalk paint in varying shades. Experiment with different brush techniques, such as using a dry brush or rubbing the paint with a cloth, to achieve unique textures.
7. Sand and Distress
Once the paint has dried, use 80 to 120-grit sandpaper to lightly distress the furniture by sanding along the edges and areas where natural wear would occur. This will reveal the wood beneath and create an aged appearance.
8. Protect with a Wax or Sealer
To protect the chalk paint finish and create a more durable surface, apply a wax or sealer with a lint-free cloth or wax brush. This will also deepen the color and add a slight sheen to the piece. Allow the wax or sealer to dry, and buff with a soft cloth for a smooth finish.
• Advanced Techniques for Chalk Painted Furniture
For those looking to take their chalk paint skills to the next level, consider incorporating these advanced techniques to make your furniture truly stand out.
1. Stenciling and Embellishments
Add visual interest to your furniture by incorporating stencils or hand-painted designs. Choose a complementary color or contrasting bold shade to create a striking effect on the chalk paint finish.
2. Custom Color Blends
Chalk paint can be easily mixed to create a custom color palette. Experiment with combining shades, adding water to lighten the consistency, or mixing with a tinted wax for a unique finish.
3. Layered Finishes
Achieve depth and dimension by layering textured paint finishes – such as crackle, glaze, or wax – on top of the chalk paint. Visit The Purple Painted Lady’s website for detailed tutorials on a variety of layered finishes.
4. Darker Wax Accents
Create depth by applying a darker tinted wax to the recessed or carved areas of the furniture. This will add contrast and emphasize the unique details of your piece.
• Conclusion
Chalk-painted indoor furniture is an excellent way to infuse your living spaces with rustic charm. By following the tips, techniques, and advanced methods outlined in this article, you can transform your furniture into one-of-a-kind pieces that enhance the overall aesthetic of your home. Happy painting!
Achieving Rustic Aesthetics with Chalk Painted Furniture
Chalk paint is a versatile and easy-to-use finish that can be used to add character and age to your furniture, mimicking the look of antique and vintage pieces.
• Choosing the Right Chalk Paint
To achieve a rustic look, it is important to choose the correct type of chalk paint. The ideal paint should have a matte finish and be easily distressed to give the furniture that weathered worn appearance.
There are many brands available on the market, such as Annie Sloan and Rust-Oleum, but it is also possible to create your own custom mix using latex paint and Plaster of Paris.
• Preparing the Furniture
Before starting the painting process, it is crucial to prepare the piece of furniture properly. Follow these steps to ensure a smooth and successful transformation:
- Clean the surface: Remove any dirt, dust, and grime using a mild soap and water mixture. A damp cloth can be used to gently wipe down the surface, ensuring all dirt is removed.
- Sand the surface: Lightly sand the surface using medium-grit sandpaper (between 100 and 200 grit). This will help the paint adhere better to the furniture and make the distressing process easier.
- Wipe away dust: After sanding, use a clean, dry cloth to remove any dust and debris from the surface.
- Repair any damage: Fill in any dents, cracks, and holes with wood filler, then sand again once it has dried.
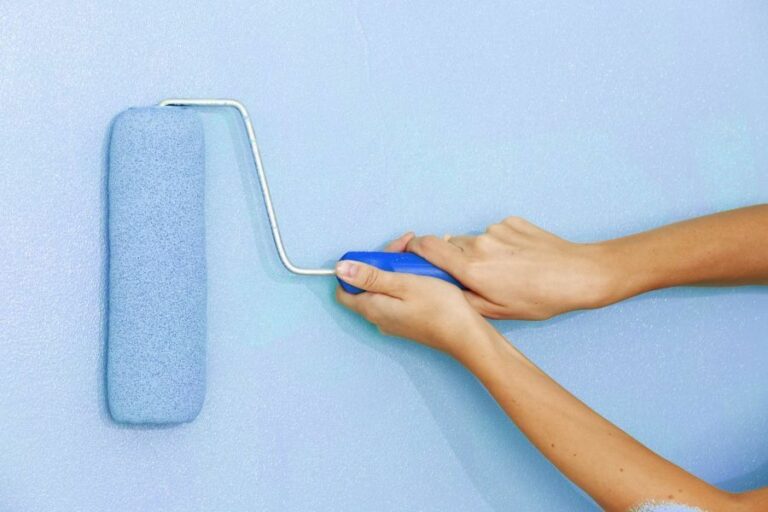
• Applying the Chalk Paint
Now that the furniture is prepped, it’s time to apply the chalk paint. Follow these simple steps for an even, seamless application:
- Stir the paint: Ensure the paint is well mixed before starting. This will prevent any inconsistencies in the finish.
- Use the right brush: A high-quality natural bristle or synthetic brush will provide the best results.
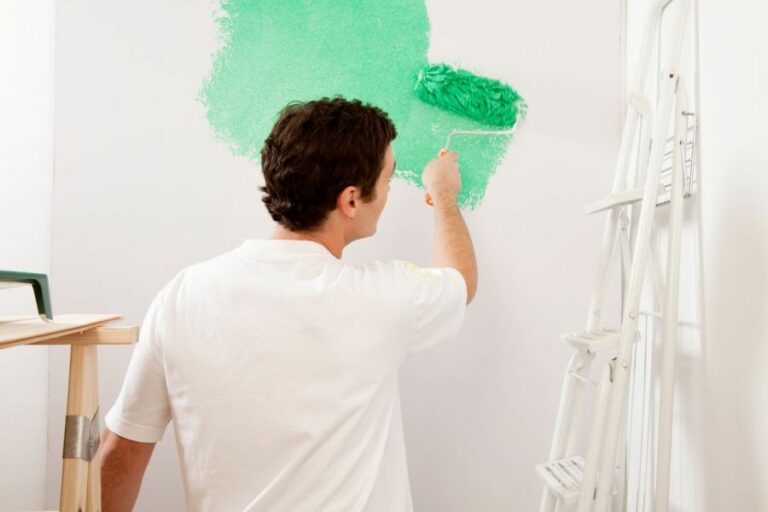
- Apply the paint: Begin the painting in long, even strokes, following the grain of the wood for a smooth application.
- Apply multiple coats: As chalk paint tends to dry quickly, it is important to apply multiple thin coats to build up the desired coverage. Allow each coat roughly one to two hours to dry before applying the next.
• Distressing the Furniture
After the paint has dried completely, it’s time to add the desired rustic look. There are a few different techniques that can be employed:
- Sandpaper distressing: Using fine-grit sandpaper, gently sand away the paint on areas that would naturally see wear, such as edges, corners, and raised details. Be sure to do this gradually and avoid over-distressing to maintain the authenticity of the rustic look.
- Wet distressing: A damp cloth can be used to gently rub away paint. This can provide more control and requires less effort compared to using sandpaper.
- Adding a dark wax: Dark wax can be applied over the painted surface to add depth, texture, and an aged appearance. Buffing the wax with a soft cloth will create a subtle sheen while still maintaining the matte look.
• Finishing and Protecting Your Rustic Furniture
Finally, it’s important to finish and protect your newly updated furniture with a clear wax or topcoat. This will seal the painted surface, prevent further distressing, and make cleaning and maintenance easier. Let the wax or topcoat dry per the manufacturer’s recommendations before using the piece.
There are a variety of online resources that offer further guidance and inspiration for creating that perfect rustic look with chalk paint. Annie Sloan’s official website is an excellent source of information, tutorials, and expert tips.
In conclusion, transforming a piece of furniture into a rustic masterpiece with chalk paint is a simple and rewarding process. By following the steps outlined above and taking the time to prepare and finish your piece properly, you can create a beautiful, unique addition to your home.
Step | Description |
|---|---|
1. Clean the furniture | Remove any dirt and grime from the furniture piece by cleaning it thoroughly with a gentle cleaner and a damp cloth. |
2. Sand the furniture | Lightly sand the furniture piece using medium-grit sandpaper to remove any loose paint or rough patches, ensuring a smooth surface for applying chalk paint. |
3. Apply chalk paint | Choose a chalk paint color and apply two or three thin coats using a brush or roller, allowing each coat to dry before applying the next. Chalk paint creates a matte, vintage finish that is perfect for a rustic look. |
4. Distress the furniture | Using fine-grit sandpaper, lightly sand the edges, corners, and other areas of the furniture where natural wear would occur. This will expose the wood or underlying paint color and create a distressed, aged appearance. |
5. Apply a protective finish | Optional: apply a clear wax or other protective finish to seal the paint and protect the furniture. This will also give the piece a softer, slightly aged appearance. Buff the wax using a clean, lint-free cloth to achieve your desired look. |
6. Decorate | Add additional rustic touches to the furniture piece, such as vintage hardware or decorative elements, to enhance the overall appearance and style. |
Downsides of Using Chalk Paint on Furniture: What to Know
When it comes to furniture makeovers, one of the trendiest options that have taken the DIY community by storm in recent years is chalk paint. Raved about for its easy application and a seamless blend, decorators everywhere find themselves drawn to the allure of chalk paint.
However, as an experienced furniture restorer and painter, I feel it’s essential to highlight the reasons why chalk paint might not be the best choice for everyone.
• Compromised Durability
When investing time and money into refinishing a piece of furniture, you want your handiwork to stand up to everyday wear and tear. Unfortunately, one of the main issues with chalk paint is its lack of durability as compared to other paint options.
This matte finish paint is prone to easily chipping, scratching, and showing stains, making it a less-than-ideal choice for pieces that receive heavy use or are in high-traffic areas.
I recommend opting for a more durable paint, such as a high-quality water-based latex paint, which boasts increased longevity and damage resistance.
• Wax Application Woes
Chalk paint typically requires a protective coat of wax to seal and protect the painted surface. However, this extra step can prove to be a headache for DIY enthusiasts, as the wax application can be labor-intensive and unforgiving.
Achieving an even coat takes time and patience, and if not applied correctly, the wax can result in a streaky and uneven finish.
Additionally, the wax needs regular reapplication in order to maintain the furniture’s protection. This additional maintenance can prove burdensome over time, especially when compared to alternative paint options that do not require such upkeep.
Consider using a paint with a built-in sealant, like enamel or semi-gloss latex paint, to avoid the hassle of wax application.
• Limited Options for a Professional Finish
Though chalk paint can give the furniture an appealingly rustic and distressed look, it may prove challenging for those seeking a more refined and polished aesthetic.
Achieving a professional-looking finish with chalk paint often requires expert finesse and additional sanding, buffing, or glazing techniques.
When seeking a high-quality, professional finish on furniture, I advise opting for a paint type that offers higher consistency, such as water-based alkyd paint, which is known for delivering a smooth, leveling finish, perfect for those wanting that polished look.
• Environmental Concerns
While chalk paint may be touted as eco-friendly due to its low VOC (volatile organic compound) content, the process of sealing the paint with wax may bring about new environmental concerns.
Many waxes used for sealing contain petroleum by-products, chemicals, and other synthetic ingredients that can release harmful VOCs.
To minimize your environmental impact while still achieving a stunning result, I suggest considering a low VOC water-based paint with a built-in sealant, avoiding the need for potentially harmful wax applications.
• The High Cost
One major deterrent to using chalk paint on furniture is the cost. Chalk paint can be significantly more expensive than other paint alternatives. This can make large-scale furniture projects considerably less budget-friendly for those looking to beautify their living spaces without breaking the bank.
For those on a budget, I recommend exploring less expensive paint options, such as standard latex paint, which can often deliver similar results without the hefty price tag.
• Weighing Your Options
Before jumping on the chalk paint bandwagon, carefully consider the limitations and challenges that may arise.
While it’s true that chalk paint can deliver a distinct and appealing aesthetic, the potential issues related to durability, wax application, finish quality, environmental concerns, and cost should not be overlooked.
As someone with experience in painting and restoring furniture, I recommend researching and considering all paint options available to you, ensuring you make the best decision for your specific furniture piece and desired result.
Comparing Chalk Paint and Furniture Paint: Key Differences
When it comes to upcycling and restoring furniture, it’s essential to choose the right type of paint in order to achieve the desired finish and ensure the durability of the project.
Two popular options that often come up in these situations are chalk paint and furniture paint. While they share some similarities, they also possess distinct differences which set them apart.
• What is Chalk Paint?
Chalk paint is a type of water-based decorative paint that originated in the 1990s by renowned British artist Annie Sloan. The distinctive feature of chalk paint is its ultra-matte, chalky finish that gives a beautiful, antique look to furniture and other decorative items.
The formulation of chalk paint has a high concentration of calcium carbonate (chalk), which gives it its signature texture and appearance.
Key features of chalk paint:
- Ultra-matte, chalky finish
- Excellent adherence to various surfaces
- Minimal prep work needed
- Easy to distress for a vintage look
– Chalk Paint Advantages
One of the main advantages of chalk paint is its ability to adhere to a wide range of surfaces without the need for intensive prep work, such as sanding or priming. This makes it an excellent option for those looking for a quick and easy solution for updating their furniture.
Moreover, the unique texture of chalk paint lends itself well to distressing techniques, which can create a beautiful, vintage appearance. Its versatility also allows for the use of various finishing techniques, such as waxing or glazing, to achieve a bespoke look.
– Chalk Paint Disadvantages
On the downside, the ultra-matte finish of chalk paint can make it more susceptible to damage and wear, particularly in high-traffic areas or on frequently used surfaces. It often requires a protective topcoat, such as a clear wax or polyurethane sealer, to increase its durability.
Another disadvantage is that chalk paint can be more expensive compared to other types of paint, making it a less budget-friendly option for larger projects.
• What is Furniture Paint?
Furniture paint, also known as enamel or alkyd paint, is oil-based paint specifically designed for furniture and other decorative items. Formulated to provide a smooth and durable finish, furniture paint is an excellent choice for projects that require long-lasting beauty and protection.
Key features of furniture paint:
- Smooth, semi-gloss to high-gloss finish
- Excellent durability and protection
- Longer drying time than water-based paints
- Requires proper surface preparation
– Furniture Paint Advantages
The main advantage of using furniture paint is its durability. The finish it provides is resistant to chipping, scratches, and general wear, making it an ideal choice for high-traffic areas or frequently used furniture pieces.
In addition, the smooth and glossy finish achieved with furniture paint imparts a clean and polished look that can elevate the appearance of any piece.
Additionally, with a wide range of colors available, furniture paint allows for greater creativity when it comes to designing your project. You can also choose a paint with a specific sheen level, such as satin, semi-gloss, or high-gloss, thereby further tailoring the final look of your piece.
– Furniture Paint Disadvantages
One major drawback of furniture paint is that it requires proper surface preparation, such as sanding and priming, to ensure optimal adherence and a smooth finish. This can result in a more time-consuming and labor-intensive process compared to using chalk paint.
Furthermore, furniture paint has a longer drying time than water-based paints, which can lead to an extended wait before your project is complete.
Lastly, it’s worth noting that since it’s oil-based, furniture paint has a stronger odor and requires solvents for cleanup, both factors that may not be ideal for all users.
• Making the Right Choice: Chalk Paint vs. Furniture Paint
To help you make the best decision for your project, consider the following factors:
- Project goals: If you’re aiming for a vintage, distressed look with minimal preparation, chalk paint is an excellent choice. However, if you require a more durable and polished finish, furniture paint may be the better option.
- Budget: Chalk paint can be more expensive than furniture paint, so consider your budget when deciding which paint is best for your project.
- Personal preference: Ultimately, the choice between chalk paint and furniture paint comes down to personal preference and the specific look and feel you want to achieve.
In conclusion, both chalk paint and furniture paint have their unique set of advantages and disadvantages. It’s important to assess your project goals, budget, and personal preferences when making your decision.
Armed with the right knowledge and tools, you can create a beautiful and long-lasting result for your furniture project.
Aspect | Chalk Paint | Furniture Paint |
|---|---|---|
Finish | Matte, chalky appearance | Various finishes, including satin and glossy |
Priming | No priming is required in most cases | Often requires priming or sanding |
Application | Easy to apply, quick drying | Application may vary, can take longer to dry |
Distressed Look | Ideal for creating a distressed or vintage look | Not as suitable for a distressed finish |
Sealing | Requires a wax or topcoat for protection | Some types have built-in topcoats, others require a separate topcoat |
Uses | Best for furniture, home decor, and art projects | Can be used for furniture, cabinetry, and other surfaces |
Sanding Furniture Prior to Chalk Painting: Is It Necessary?
A common question that arises when using chalk paint is whether one should sand the furniture before painting it. In this article, we will discuss the pros and cons of sanding furniture before using chalk paint and provide expert recommendations for getting the best results.
• Understanding the Chalk Paint Phenomenon
Chalk paint is a popular choice for DIY enthusiasts thanks to its unique properties. It adheres well to a variety of surfaces, requires minimal preparation, and creates a charming, vintage look. However, despite these advantages, many wonder if sanding furniture is necessary prior to using chalk paint.
• The Debate: To Sand or Not to Sand
There are two main schools of thought when it comes to sanding furniture before using chalk paint. We will explore each perspective and offer suggestions based on personal experience and industry knowledge.
– The “No Sanding Required” Argument
A key selling point of chalk paint is its ability to adhere to surfaces without the need for extensive preparation, such as sanding. Proponents of this view argue that sanding is unnecessary and even counterproductive, as it may create an uneven surface that the chalk paint cannot adequately cover.
Moreover, skipping the sanding process can save time and effort, making chalk paint an attractive option for DIYers seeking a quick and simple solution.
– The “Sanding is Essential” Argument
On the other hand, many experts believe that sanding furniture before using chalk paint is crucial to achieving a professional, long-lasting result. Sanding removes any dirt, grease, or previous finishes that may impede the paint’s adhesion and creates a smooth, even surface for the paint to bond.
Additionally, sanding can help to highlight and enhance the natural grain and texture of the wood, ultimately complementing the matte finish of chalk paint.
• Expert Recommendations: Finding the Balance
Based on our experience and industry knowledge, we recommend a balanced approach when it comes to sanding furniture before using chalk paint. Here are some tips to help you achieve the best results:
– Assess the Surface
Not all furniture surfaces are created equal. Before deciding whether to sand a piece, consider factors such as the material, previous finishes, and the overall condition of the piece. For example, a heavily varnished or damaged surface may require more preparation than a relatively clean and smooth one.
– Light Sanding is Key
If sanding is deemed necessary, it is vital to avoid aggressive sanding, as it can damage the surface and create an uneven finish. Instead, opt for a light sanding with fine-grit sandpaper (150-220 grit) to gently remove any surface imperfections and promote better paint adhesion.
– Clean the Surface
Regardless of whether you choose to sand or not, it is imperative to clean the furniture before applying the chalk paint. Use a damp cloth to remove any dust, dirt, or grease from the surface, ensuring a clean and smooth base for the paint to adhere.
– Test a Small Area
As with any painting project, it is always wise to test a small, inconspicuous area before committing to the entire piece. Apply a small amount of chalk paint to the surface and assess its coverage and adhesion.
If necessary, make adjustments to your sanding and cleaning methods to achieve the desired result.
• In Conclusion
Ultimately, whether or not to sand furniture before using chalk paint is a subjective decision that depends on the specific project at hand.
By considering factors such as the material, finish, and condition of the piece, and following expert recommendations, it is possible to achieve beautiful, long-lasting results with chalk paint, even if some light sanding is required.
Question | Answer |
|---|---|
Do you have to sand furniture before using chalk paint? | No, you do not have to sand furniture before using chalk paint. Although sanding can help create a smooth surface, it is not necessary, as chalk paint adheres well to most materials. |