Essential Indoor Painting Tips For Starters, What Pros Say
You’ve finally decided to take on that indoor painting project and refresh your living space. But where do you start? Fear not. As a beginner, you’re in the right place to discover some essential indoor painting tips to set you up for success. With my guidance, you’ll confidently turn your vision into reality, and your space will be the envy of all your friends!
Essential indoor painting tips for starters:
Essential indoor painting tips for beginners include choosing high-quality paint, gathering necessary supplies, preparing the workspace, applying painter’s tape, testing the color, priming if necessary, using proper painting techniques, and cleaning and storing supplies after completion. Following these guidelines ensures a professional finish, even for first-time painters.

Ready to transform your living space with a fresh coat of paint? Don’t worry if you’re a beginner; I’ve got you covered! Read on for essential tips and tricks that will have you painting like a pro in no time. Unleash your inner artist and get started today!
Contents
- 1 Key Interior Painting Guidelines for Beginners
- 2 Ideal Sequence for Painting a Room’s Interior
- 3 Necessary Supplies to Begin House Painting
- 4 Crucial Steps to Take Before Beginning to Paint
- 5 Preparing Your Room for an Interior Paint Job
- 5.1 • Step 1: Choose the Right Paint
- 5.2 • Step 2: Gather Essential Tools and Materials
- 5.3 • Step 3: Remove Loose Items and Cover Furniture
- 5.4 • Step 4: Clean the Walls and Baseboards
- 5.5 • Step 5: Repair Damages and Imperfections
- 5.6 • Step 6: Tape Off and Protect Surfaces
- 5.7 • Step 7: Apply Primer
- 5.8 • Step 8: Make a Plan for Painting
- 5.9 • In Conclusion
Key Interior Painting Guidelines for Beginners
• Choose High-Quality Paint
Selecting high-quality paint is crucial for achieving professional-looking results. While it may be tempting to save a few dollars by choosing cheap paint, investing in a premium brand will ensure better coverage, durability, and overall appearance.
Check the label for information about the paint’s contents, such as the percentage of solids and coverage rate. According to the Paint Quality Institute, higher-quality paints contain more solids and require fewer coats for full coverage.
• Gather the Necessary Painting Supplies
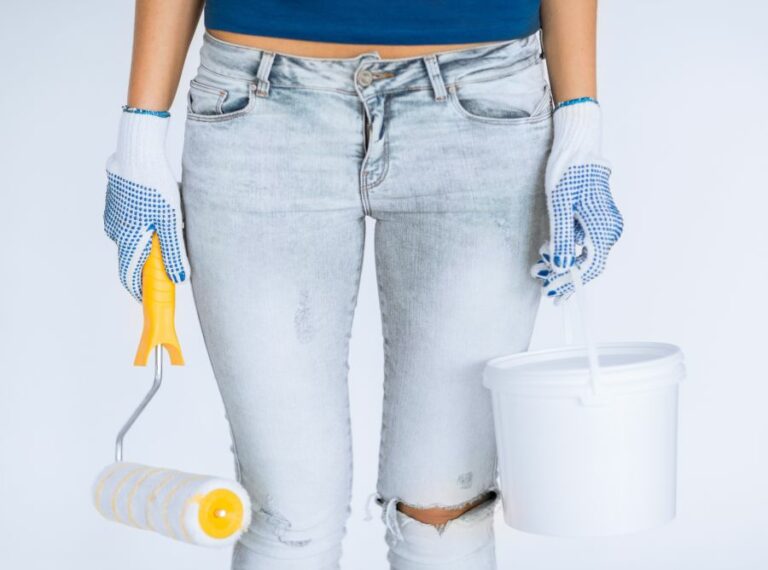
Before starting any painting project, ensure all the necessary supplies are within reach. Items you will need include:
- Paint
- Primer (if necessary)
- Paintbrushes
- Paint rollers
- Paint tray
- Painter’s tape
- Drop cloths
- Ladder (if necessary)
- Stir stick
- Paint can opener
Having all of these supplies ready will save you time and help ensure a smooth painting process.
• Prepare the Workspace
To prepare your workspace for painting, ensure the room is well-ventilated and well-lit. Open windows or install a window fan to provide adequate airflow. Remove any furniture or decor from the room or cover items you cannot move with drop cloths to protect them from paint splatters.
Clean the surfaces you plan to paint by wiping them with a damp cloth and allowing them to dry. This step will remove dust, dirt, and other debris that could leave an uneven finish.
• Apply Painter’s Tape
To keep your painting job looking professional, it’s crucial to apply painter’s tape along the areas where you don’t want the paint to bleed. Carefully press the tape along the edges of baseboards, crown molding, window frames, and door frames.
Also, place tape on any electrical outlets or switches to prevent accidental paint coverage.
• Test the Color
Before diving into painting, it’s essential to test the paint color on a small, inconspicuous area of the wall. This step will help confirm that the color meets your expectations and avoid any surprises once the entire room is painted.
Allow the test patch to dry completely to see how the color appears in different lighting conditions.
• Prime If Necessary
Priming is important, especially when painting over dark colors or stains or when covering bare wood or drywall. Primer creates a smooth, even base for the paint to adhere to and improves the overall appearance and durability of the final paint job.
Choose a primer that is compatible with your paint type, and apply one coat using a paintbrush or roller.
• Use the Right Painting Techniques
To achieve a professional finish, use the appropriate techniques when applying your paint:
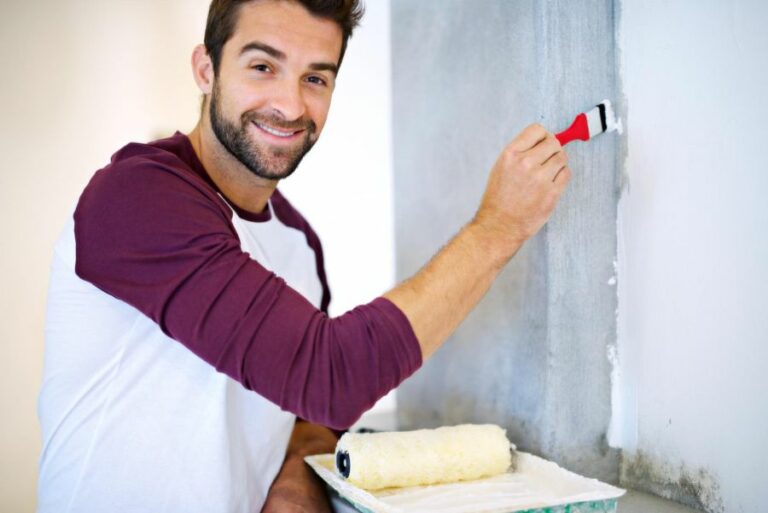
- Cut-In First: Use a small angled paintbrush to paint along the edges of the room where the roller cannot reach. This technique, called “cutting in,” prepares the room for the larger roller application.
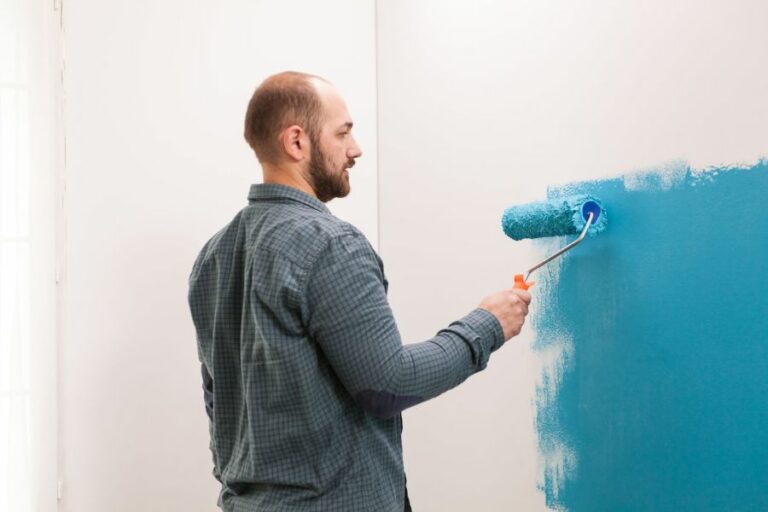
- Roller Application: Using the paint roller, work in a “W” pattern, making sure to overlap each stroke slightly. This method helps ensure even coverage while preventing paint buildup that can cause roller marks.
- Multiple Coats: Depending on the paint quality and color, you may need more than one coat to achieve the desired finish. Allow the first coat to dry completely, then apply additional coats as necessary.
• Clean and Store Supplies
After completing your painting project, clean brushes, rollers, and trays with warm soapy water. If you use oil-based paint, follow the manufacturer’s recommendations for cleaning solvents. Properly storing your supplies will ensure they are ready for future projects.
• Wrap-Up
Indoor painting can be an impactful and cost-effective way to refresh the look of your home. By following these essential tips, even first-time painters can achieve professional-looking results.
Take the time to properly prepare, invest in high-quality paint, and use appropriate techniques for a job well done.
Ideal Sequence for Painting a Room’s Interior
As a professional painter, it’s crucial to have a systematic plan in place when tackling an interior painting project. Knowing what to paint first in a room can significantly improve the efficiency and quality of the job.
• Preparing the Room for Painting
Before starting any painting project, it’s essential to prepare the room. This process includes:
- Removing Furniture and Covering Floors: Clear out the room as much as possible or place items in the center of the room and cover them with drop cloths or plastic sheets. Don’t forget to cover the floors to protect them from paint spills.
- Cleaning the Walls and Trim: Ensure that surfaces are clean and free of dirt, dust, and grime by wiping them down with a damp cloth. This will help the paint adhere better to the surface.
- Repairing Surface Damage: Examine the walls and trim for any cracks, holes, or other imperfections. Patch and sand these areas before painting to achieve a smooth finish.
- Taping Off Areas: Use painter’s tape to protect areas that should not be painted, such as baseboards, window and door frames, and fixtures. This ensures clean lines and prevents the paint from bleeding into unwanted areas.
Now that the room is ready for painting let’s dive into the proper order of painting a room.
• Painting the Trim
It’s generally recommended to start the interior painting process by painting the trim. This includes baseboards, window and door frames, crown molding, and any other woodwork in the room.
By painting the trim first, you can achieve cleaner edges and eliminate the need to tape off the trim when painting walls and ceilings.
Here’s how to paint the trim effectively:
- Sanding: Lightly sand the trim with fine-grit sandpaper to ensure proper paint adhesion.
- Priming: Apply a high-quality primer to the trim, particularly if you’re painting over stained wood or applying a lighter color over a darker one.
- Painting: Choose a durable, high-gloss, or semi-gloss paint for the trim, as this type of paint holds up well to wear and tear. Use a high-quality brush to apply the paint in smooth, even strokes.
Allow the trim to dry completely before moving on to the next steps.
• Painting the Walls
Once the trim has dried, it’s time to paint the walls. The key to achieving professional-looking results when painting the walls lies in proper cutting-in and rolling techniques.
- Cutting-In: Use a high-quality angled brush to paint along the edges and corners of the room, where the walls meet the trim and ceiling. This creates a clean, well-defined line and makes it easier to roll paint onto the walls without getting it on the trim or ceiling.
- Rolling: Using a paint roller with an extension pole, apply the chosen wall paint in a W-pattern, filling in the gaps and smoothing the paint out until the entire wall is covered.
- Second Coat: If necessary, apply a second coat of paint to the walls to ensure complete and even coverage.
Be sure to let the walls dry thoroughly between coats and before painting adjacent walls.
• Painting the Ceiling
The final step in the interior painting process is painting the ceiling. Ceilings should be painted last to minimize the risk of drips or splatter landing on freshly painted walls and trim.
To paint the ceiling, follow these steps:
- Preparation: Apply painter’s tape along the edge where the ceiling meets the walls. This protects your freshly painted walls and creates a clean line between the ceiling and the walls.
- Cutting-In: Use a high-quality angled brush to cut in along the edges of the room, similar to the technique used for painting walls.
- Rolling: Using a paint roller with an extension pole, apply the ceiling paint in straight, overlapping strokes to cover the entire surface.
- Second Coat: If necessary, apply a second coat of paint to the ceiling to ensure complete coverage.
Allow the ceiling paint to dry completely, then carefully remove any painter’s tape from the room.
In conclusion, by following these expert tips and painting the room in the correct order: trim, walls, then ceiling, you can achieve professional results and a beautifully painted interior space. For more information on interior painting, the Paint Quality Institute is a valuable resource.
Necessary Supplies to Begin House Painting
Painting your house can seem daunting, but with the right tools and knowledge, you can make your home look brand new.
• Preparing Your Home for Painting
Before you can begin painting, you need to ensure your home is ready for a fresh coat. Here are some essential steps to prepare your home for painting:
– Cleaning the Walls
It is crucial to clean your walls to remove any dirt, dust, or grease. This will help your paint adhere better to the surface, resulting in a smoother, professional-looking finish. Use a sponge and mild detergent (such as dish soap) to clean the walls, and rinse with clean water.
For exterior walls, you can use a pressure washer or garden hose with a scrub brush to remove more stubborn dirt.
– Repairing Wall Imperfections
Inspect your walls for any cracks, holes, or other imperfections. These may need to be filled in with spackling paste or wood filler before you start painting. Once the filler has dried, use fine-grit sandpaper to smooth the surface.
If there are any larger damages, such as water damage, mold, or structural issues, consult a professional before proceeding with your painting project. The Environmental Protection Agency provides helpful information on dealing with mold in your home here.
– Masking and Protecting Furniture
Cover any furniture and flooring with drop cloths or plastic sheeting to protect them from paint splatters. Use painter’s tape to mask off any areas that you don’t want to be painted, such as trim or electrical outlets. This will help ensure crisp, clean lines when you begin painting.
• Selecting the Right Paint and Brushes
Now that your home is prepared for painting, it’s time to choose your paint and brushes. The type of paint and brushes you use will heavily impact the final appearance of your project.
– Types of Paint
There are two main types of paint: water-based (latex) and oil-based (solvent). Water-based paints are the most popular choice for interior projects due to their quick drying time, low odor, and ease of cleanup.
They also tend to be more resistant to fading and yellowing over time, making them an excellent choice for exterior paint jobs as well.
Oil-based paints offer a more durable, smooth finish and are typically better for high-traffic or high-moisture areas, such as kitchens, bathrooms, or exteriors. However, they take longer to dry, have a stronger odor, and require paint thinner for cleanup.
– Paint Sheens
There are various sheens available for both water-based and oil-based paints, including flat (matte), eggshell, satin, semi-gloss, and gloss. Flat sheens offer a soft, non-reflective finish, making them great for hiding imperfections on walls.
However, they tend to be less durable and harder to clean. Glossier sheens, such as semi-gloss or gloss, are more durable and easier to clean, making them ideal for areas with high traffic or moisture.
– Brushes and Rollers
For a professional-looking result, it’s essential to invest in high-quality brushes and rollers. Synthetic bristle brushes are best for water-based paints, while natural bristle brushes work well with oil-based paints.
Rollers with a 3/8-inch to 1/2-inch nap are ideal for most surfaces. Use a smaller roller or brush for tight spaces and trim work.
• Painting Techniques and Tips
With the right tools and prep work done, it’s time to start painting. Follow these tips to ensure a smooth, professional finish:
– Priming
I recommend applying a primer before painting, especially if you’re painting over dark colors or painting over new drywall. Primers help create a consistent base for your paint and can improve adhesion, resulting in a smoother and more even finish.
– Applying the Paint
When using a roller, always load it fully and evenly with paint. Roll in a “W” pattern, then fill the gaps with horizontal or vertical strokes. This will help evenly distribute the paint and avoid lap marks. When using a brush, paint with light, even strokes, and avoid overloading your brush.
This will help prevent drips and give you better control over your paint application.
– Drying and Recoating
Allow your paint to dry thoroughly between coats, according to the manufacturer’s instructions. Most latex paints will dry to the touch within an hour, but it may take up to four hours or more, depending on the paint’s thickness or humidity.
Oil-based paints may take up to 24 hours to dry fully. Before applying another coat, check your paint for any drips or uneven spots that may need sanding or touch-ups.
– Cleanup and Care
When you have finished painting, clean your brushes and rollers promptly to keep them in good condition. Water-based paints can be cleaned with warm water and dish soap, while oil-based paints will require paint thinner or mineral spirits.
Store leftover paint in a sealed container and label it with the color name and date for future touch-ups or projects.
By following these steps and using the proper tools and techniques, you can successfully paint your home, giving it a fresh, updated look that will last for years to come.
Crucial Steps to Take Before Beginning to Paint
Before you start your painting project, there are several crucial steps you must take to ensure a high-quality result.
• Choose the Right Color and Finish
Before you get started, it’s essential to select the appropriate color and finish for your project. Consider the overall aesthetic of your space and how the color will fit into that design scheme. Also, think about the various qualities of paint finishes:
- Flat or matte: Best for areas with low traffic and surfaces with imperfections, as it helps hide those flaws.
- Eggshell or satin: A versatile choice for most rooms, as it is easy to clean and can withstand moderate traffic.
- Semi-gloss: Often used for kitchens, bathrooms, or other areas with high humidity and traffic, as it is easy to wipe down and maintain.
- Gloss: Provides a heavily reflective finish, making it suitable for trim, doors, and other high-impact areas.
Some great resources for selecting the best color and finish are websites like Behr’s ColorSmart, which allow you to test out different color schemes in your space virtually.
• Inspect and Prep Your Walls
Before you start painting, make sure that your walls are properly prepared. Here’s how:
– Remove Old Wallpaper or Paint
- Gently scrape off any old, cracked, or peeling paint using a putty knife or scraper.
- If your walls have wallpaper, remove it according to the manufacturer’s instructions, often using a wallpaper remover solvent or steamer.
– Repair Wall Damages
- Inspect your walls for any cracks, holes, or other imperfections.
- Spackle any small imperfections and then sand the area smoothly once it’s dry.
- For larger repairs, such as holes, consider using a pre-made patch or joint compound.
– Clean Your Walls
- Dust or vacuum your walls to remove any surface dirt or debris.
- Using a mild soap and water solution, scrub any stubborn spots with a sponge or microfiber cloth.
- Be sure to rinse the walls with clean water to prevent residue buildup, tamp dry, and wait until it’s completely dry before painting.
• Choose the Best Tools for the Job
Selecting the right tools for your painting project will significantly affect your final results.
– Paint Brushes and Rollers
Invest in high-quality brushes and rollers, as better tools will provide a smoother application and will last longer. Consider the following when selecting your painting tools:
- Angled brushes are best for cutting in and detail work.
- Flat brushes work well for filling in larger areas.
- Synthetic bristles are suitable for water-based paint, while natural bristle brushes work best with oil-based paint.
- Foam brushes can provide a smooth application but may not be as durable as other brush types.
– Painting Tapes and Supplies
- Choose a high-quality painter’s tape to create crisp lines and protect adjacent surfaces.
- Drop cloths help to protect your floors and furniture from paint splatters and spills.
- A paint tray and liners will make it easier to manage your paint supply and simplify cleanup.
• Take Safety Precautions
Before beginning your painting project, it’s essential to consider the safety of both yourself and your living space. Follow these recommendations to ensure a safe painting experience:
- Always paint in a well-ventilated area. If possible, open windows and doors to promote airflow.
- Wear appropriate protective gear, such as gloves, goggles, and a dust mask, to protect yourself from any potential hazards.
- Consider using low-VOC (volatile organic compound) paint, which emits fewer harmful fumes than traditional paint.
- Keep children and pets away from your work area to prevent accidents or exposure to potentially harmful substances.
• Prime Your Walls
Using a primer before applying the final coats of paint is key to a successful paint job. Priming helps to:
- Enhance the adhesion of the paint, resulting in improved durability.
- Create an even base for your chosen color, ensuring a uniform finish.
- Conceal any existing stains, preventing them from bleeding through the final coats.
• Develop a Painting Strategy
Lastly, consider the order in which you’ll paint your space to make the process as efficient as possible. Here’s a suggested sequence as recommended by painting professionals:
- Start by painting the ceiling first.
- Next, move on to walls, working one section at a time from top to bottom.
- Then, paint any trim and baseboards.
- Finally, tackle doors and windows if they’re being painted.
Following these crucial steps before diving into your painting project sets you up for success. A well-executed paint job can transform your space, showcase your design vision, and add value to your home. Happy painting!
Preparing Your Room for an Interior Paint Job
A well-prepared room is the key to a successful and professional-looking paint job.
• Step 1: Choose the Right Paint
Selecting the right paint for your interior room is necessary to achieve the desired finish and durability. Opt for a high-quality paint that suits your room’s requirements and consider factors such as environment, exposure to sunlight, and the room’s purpose.
For instance, if you are painting a nursery, you might opt for a zero-VOC (volatile organic compounds) paint, which is eco-friendly and free of harmful chemicals. Non-toxic paints are also recommended for spaces frequented by children and pets.
Consumer Reports offers a comprehensive guide to choosing the right paint for your specific needs.
• Step 2: Gather Essential Tools and Materials
Before starting the preparation process, ensure that you have the necessary tools and materials, such as:
- Painter’s tape
- Drop cloths or plastic sheeting
- Ladder
- Screwdriver
- Cleaning supplies (e.g., a vacuum cleaner, microfiber cloth, etc.)
- Sandpaper or a sanding sponge
- Putty knife
- Paint scraper
- Spackle or joint compound
- Primer
• Step 3: Remove Loose Items and Cover Furniture
Begin by removing any loose items, such as wall hangings, window treatments, and outlet covers in the room. If possible, shift the furniture to another room or place it in the center of the room and cover it with drop cloths or plastic sheeting. This will protect your furniture from dust and paint splatters.
• Step 4: Clean the Walls and Baseboards
Clean the walls, baseboards, and trim with mild detergent and a microfiber cloth. Ensure that the surface is free of grease, dust, and dirt, as these can cause the paint to peel or bubble. Use a vacuum cleaner to remove cobwebs, and make sure that the surfaces are dry before proceeding to the next step.
• Step 5: Repair Damages and Imperfections
Inspect the walls and ceiling for cracks, nail holes, or other imperfections. Using a putty knife, fill these in with spackle or joint compound and allow them to dry. For larger holes or cracks, you might need to use mesh tape before applying the compound.
Once the filler is dry, sand the repaired areas with sandpaper or a sanding sponge to create a smooth, even surface. A good-quality sanding sponge is recommended for this step, as it conforms to the shape of the surface and does not leave unsightly sanding marks.
• Step 6: Tape Off and Protect Surfaces
Use painter’s tape to cover baseboards, trim, and other surfaces you do not want to paint, such as window sills, doorframes, and light switches. This will prevent paint from accidentally bleeding onto these surfaces and make the painting process easier and more efficient.
Also, cover the floor with drop cloths or plastic sheeting to protect it from paint splatters.
• Step 7: Apply Primer
A primer is essential to ensure the paint adheres well to the surface and achieves a uniform finish. Use a brush or roller to apply the primer, covering the entire wall and ceiling. Allow the primer to dry according to the manufacturer’s instructions before proceeding to the painting stage.
The U.S. Department of Energy explains the benefits of primer and how it can help improve home energy efficiency.
• Step 8: Make a Plan for Painting
Once your room is prepared, create a plan for painting that includes a sequence of operations, such as starting with the ceiling, then moving on to the walls, and finally finishing with the trim. This ensures an orderly painting process and guarantees a neat, professional-looking finish.
• In Conclusion
A well-prepared room is crucial for a successful paint job. By following these steps and recommendations, you can ensure that your interior room is ready for painting, providing a smooth and even surface that will enhance the paint’s durability, appearance, and overall performance.