Boost Your Spray Paints Lifespan Essential Tips. What Pros Say
If you’ve ever been frustrated by how quickly spray paint seems to chip and fade, you’re in the right place. We know how important it is to make sure your creative projects look their best for as long as possible, and we have the essential tips you need to boost your spray paint’s lifespan.
Boost your spray paint’s lifespan: essential tips:
To boost the lifespan of spray paint projects, choose the right spray paint for your surface, properly prepare the surface by cleaning, degreasing, sanding, and priming, apply thin, even layers using correct distance and motion, and protect the finished project with a clear coat or sealer and appropriate storage and maintenance.

Want to make your spray paint last longer? We have essential tips just for you! Our guide provides valuable advice on storage, usage, and proper care. Keep reading to unlock the secrets of boosting your spray paint’s lifespan. Don’t waste another can!
Contents
- 1 Enhance Your Spray Paint’s Durability: Crucial Advice
- 2 Strategies for Extending Spray Paint Longevity
- 3 Optimizing Your Spray Paint Results: Techniques
- 4 Accelerating Spray Paint Curing Process: Methods
- 5 Quickening Rustoleum Drying Time: Tips & Tricks
Enhance Your Spray Paint’s Durability: Crucial Advice
Spray paint is a versatile and easy-to-use medium that can transform almost any surface. However, if not properly applied and maintained, your spray paint projects may not hold up or last as long as you’d like.
To help you get the most out of your spray painting efforts, consider these essential tips for boosting the lifespan of your spray paint.
• Choose the Right Spray Paint
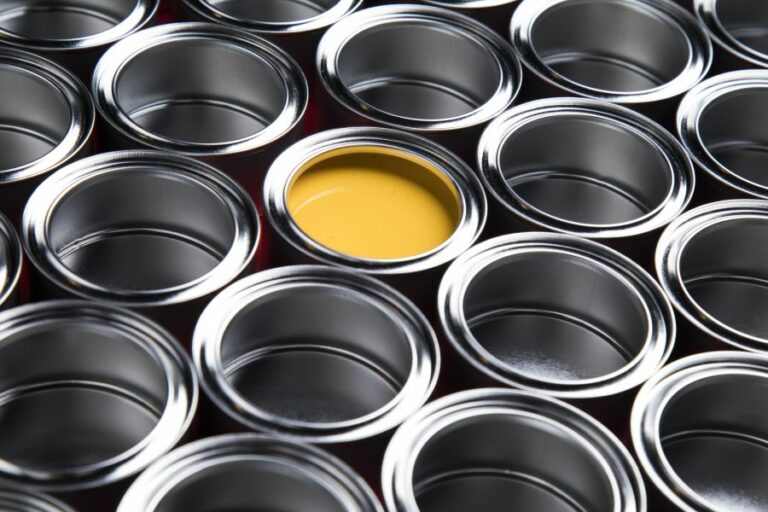
The first and most critical step in achieving long-lasting results with spray paint is selecting the right product. Different projects will require specific spray paint types and finishes.
For instance, painting metal surfaces requires a different product than painting plastics. Do some research before purchasing your paint, and make sure it’s specifically designed for your intended application.
• Proper Surface Preparation
Preparing your surfaces correctly is crucial for achieving a long-lasting and durable finish. Here’s how to do it:
– Cleaning and Degreasing
Remove any dirt, dust, grease, and grime from the surface you plan to paint. Clean the surface using a mild detergent and water, and ensure it’s entirely dry before painting. Neglecting this step can result in poor paint adhesion, leading to peeling and chipping.
– Sanding and Priming
Depending on the material you’re working with, sanding the surface may be necessary. Sanding creates a rougher texture that improves paint adhesion. Be sure not to over-sand, as it may cause damage to the surface.
If your project requires a primer, choose one that’s appropriate for your surface type. Primer helps the paint adhere better and provides a smoother finish.
• Proper Application Techniques
– Shake Your Spray Paint Can
Before using your spray paint, give it a thorough shake for at least one minute. This ensures the pigment and solvents inside are well mixed and helps you achieve a consistent, even spray pattern.
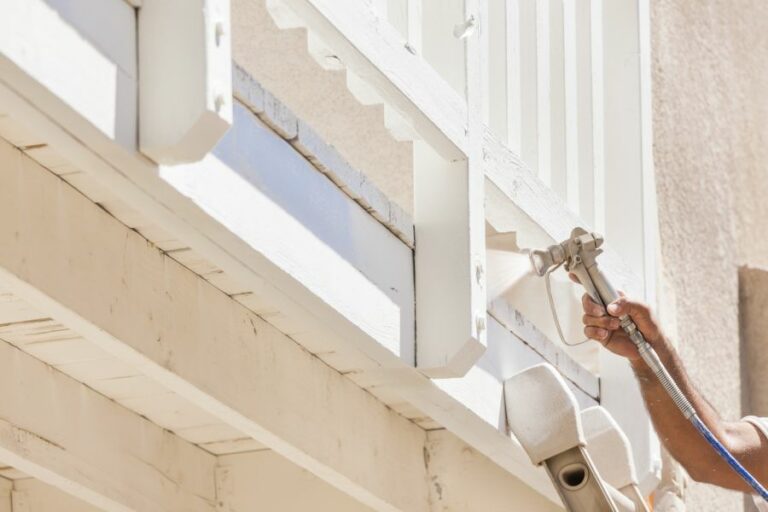
– Distance and Motion
Maintain a consistent distance of 8-12 inches when spraying to avoid paint pooling or getting an uneven finish. Use steady side-to-side motion while spraying and release the nozzle at the end of each pass to prevent buildup.
– Thin, Even Layers
Apply thin, even layers of paint, allowing each coat to dry before adding the next. Rushing the process and attempting to cover your surface with a single thick coat may result in runs, sags, and poor adhesion. Refer to the manufacturer’s instructions for recommended dry times between coats.
• Protecting Your Finished Project
– Clear Coat or Sealer
To further increase the durability of your spray paint, consider applying a clear coat or sealer after the paint has dried. This provides an extra layer of protection against scratches, wear, and fading. Make sure to choose a clear coat that’s compatible with your spray paint.
– Proper Storage and Maintenance
Take care when storing your finished spray-painted items. Ideally, store them in a dry, cool, and well-ventilated area, safe from moisture and direct sunlight. If your project is exposed to the elements or heavy use, it’s essential to clean and maintain the surface periodically.
• Conclusion
By taking the time to choose the right spray paint, properly prepare your surfaces, employ correct application techniques, and use the proper protection and maintenance, you can significantly boost the lifespan of your spray paint projects.
Now get out there and create something beautiful and long-lasting!
Strategies for Extending Spray Paint Longevity
Spray paint is a versatile and convenient tool for various DIY projects and artistic endeavors. However, the longevity of spray-painted surfaces has often been a concern for many users.
• Choosing the Right Type of Spray Paint
First and foremost, selecting the appropriate spray paint for your specific project is integral for longevity. There are numerous spray paint varieties available in the market, each formulated for specific uses and materials.
For instance, acrylic and enamel-based spray paints are better suited for outdoor applications due to their UV resistance and durability. Additionally, specialized spray paints are available for plastics, metal, and even fabrics.
It is essential to carefully read the product labels and opt for a suitable type for your project.
• Surface Preparation and Cleaning
Proper surface preparation is crucial for spray paint adhesion and long-lasting results. Any dust, dirt, or oily residues on the surface will impede the paint’s bond and cause premature peeling or chipping. Follow these steps for effective surface preparation:
- Clean the surface: Use a damp cloth or sponge to remove dust and dirt. For oily or greasy surfaces, use mild soap or a specialized degreaser. Ensure the surface is completely dry before proceeding.
- Remove rust, loose paint, or corrosion: If the surface is rusty or peeling, use a wire brush or sandpaper to remove any loose material.
- Sand the surface: Lightly sanding the surface will create a rough texture that promotes paint adhesion. Use fine-grit sandpaper (180 to 220 grit) for a smooth finish.
- Wipe down the surface: After sanding, wipe the surface again with a damp cloth to remove any dust or debris.
• Prime the Surface
Priming the surface is necessary to ensure optimal paint adhesion, coverage, and durability. Primers seal porous surfaces, provide a uniform base, and prevent the absorption of paint into the substrate, thus preventing the risk of flaking or peeling. Follow these steps to apply primer:
- Select the appropriate primer: As with spray paint, choose a primer specifically designed for the material you are working on.
- Apply the primer: Shake the primer can well before use, and spray using a back-and-forth motion. Maintain a consistent distance of approximately 12 inches from the surface.
- Allow drying time: Follow the manufacturer’s instructions for drying time; usually, it takes around 30 minutes to an hour.
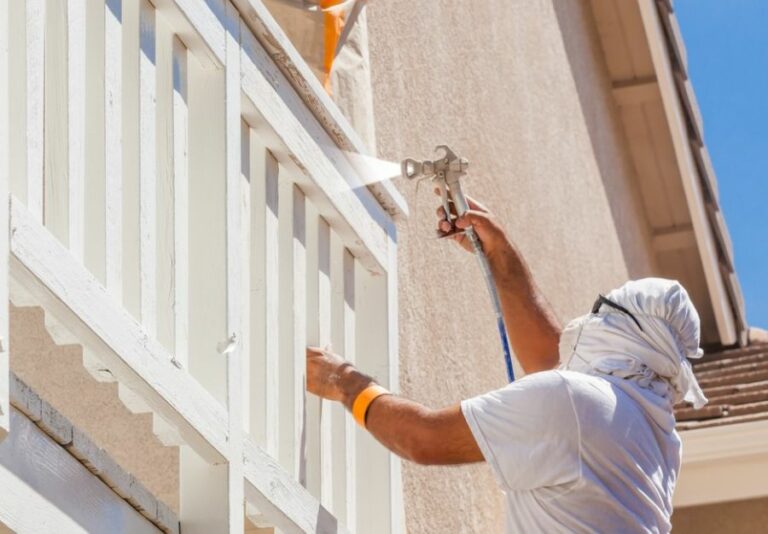
• Proper Spray Painting Technique
Using the correct spray-painting technique will not only result in an even and smooth finish but also help in paint longevity. Here are a few tips to achieve a professional-looking spray paint finish:
- Shake the can well: Prior to spraying, shake the can vigorously for at least one minute to ensure a well-mixed paint.
- Maintain the right distance: Keep the spray can 8-12 inches away from the surface while spraying.
- Apply thin, even coats: Lightly spraying multiple thin coats results in better paint adhesion and durability. Allow each coat to dry for a few minutes before applying the next layer.
- Move the can in a controlled, steady motion: Use horizontal back-and-forth motions while spraying, slightly overlapping each pass to prevent drips or uneven application.
- Rotate the object: If possible, turn the object being spray painted to ensure even coverage from all angles.
• Using a Clear Coat
To protect the paint from the elements and general wear and tear, apply a clear coat. Clear coats add a protective layer and boost the spray paint’s durability. Select a clear coat that is compatible with the type of spray paint used on your project.
• Proper Storage of Spray Paint Cans
To extend the shelf life of your spray paint, it is vital to store the cans properly:
- Store them in a cool and dry area: Avoid places with high humidity, direct sunlight, or drastic temperature changes.
- Keep the cans upright: This will prevent leakage or damage to the nozzle.
- Clean the nozzle: After use, remove the nozzle and rinse it with warm water to prevent clogging.
By following these guidelines and recommendations, you will not only achieve an impressive and professional-looking finish but also ensure the longevity of your spray-painted projects.
Step | Description |
|---|---|
1. Prepare the surface | Clean the surface to be painted, removing dirt, grease, and dust. Sand the area if necessary for better adhesion. |
2. Apply a primer | Use a suitable primer on the surface before applying the spray paint, which helps the paint bond better and last longer. |
3. Shake the spray can well | Shake the spray paint can for at least a minute to mix the paint and ensure consistent results. |
4. Apply multiple thin coats | Instead of one thick coat, apply multiple thin coats of spray paint, allowing each coat to dry before applying the next. This helps prevent drips and runs. |
5. Use proper spraying technique | Spray the paint evenly from a consistent distance, using smooth side-to-side motions. Overlap each pass slightly for better coverage. |
6. Allow the paint to dry fully | Let the paint dry completely according to the manufacturer’s instructions before handling or using the painted item. |
7. Apply a clear coat | Apply a clear protective sealer over the paint to protect it from the elements, UV rays, and general wear and tear. |
8. Store spray paint properly | Keep unused spray paint cans in a cool, dry place and store them away from direct sunlight and heat sources. |
Optimizing Your Spray Paint Results: Techniques
Spray painting can be a quick and efficient way to cover large surfaces or create unique designs. However, mastering the technique takes time and practice. If you’re looking to improve your spray paint skills, here are some tips and tricks to help you achieve a more professional finish.
• Choose the Right Equipment
– Quality Spray Paint
To get started, invest in quality spray paint. The better the spray paint, the better the results. I recommend brands like Montana, Rust-Oleum, and Krylon, as they offer a wide range of colors and finishes.
Consider the surface you’ll be spray painting on; choose the appropriate formula (e.g., plastic, metal, wood) to ensure proper adhesion and coverage.
– Spray Can Grip
A spray can grip, like the CanGun1 or Montana’s SpraySmart, is a useful attachment that allows you to hold and control the spray can more comfortably. It helps minimize finger stress and increases precision, resulting in a more professional finish.
• Proper Surface Preparation
– Clean the Surface
Before you start spray painting, ensure your surface is clean, free of dust, dirt, and grease. Use a mild detergent and water to clean the area, and then wipe it down with a lint-free cloth. Allow the surface to dry completely before moving on to the next step.
– Sand the Surface
For an even and smooth finish, sand the surface with fine-grit sandpaper (approximately 220-grit). Sanding removes any imperfections and creates a better surface for the paint to adhere to. Be sure to clean the surface again after sanding to remove any dust particles.
– Apply Primer
Applying a primer is crucial for proper paint adhesion and sealing the surface. Choose a primer designed for the specific material you’ll be painting (e.g., metal, wood, plastic).
Apply the primer in thin, even coats and allow it to dry thoroughly, as per the manufacturer’s instructions. You can lightly sand the primer using fine-grit sandpaper to achieve a smoother surface.
• Master the Technique
– Shake the Can
Before use, shake the spray paint can for at least one minute. This action helps mix the paint properly, ensuring consistency in color and finish. Remember to shake the can periodically while painting to maintain an even flow of paint.
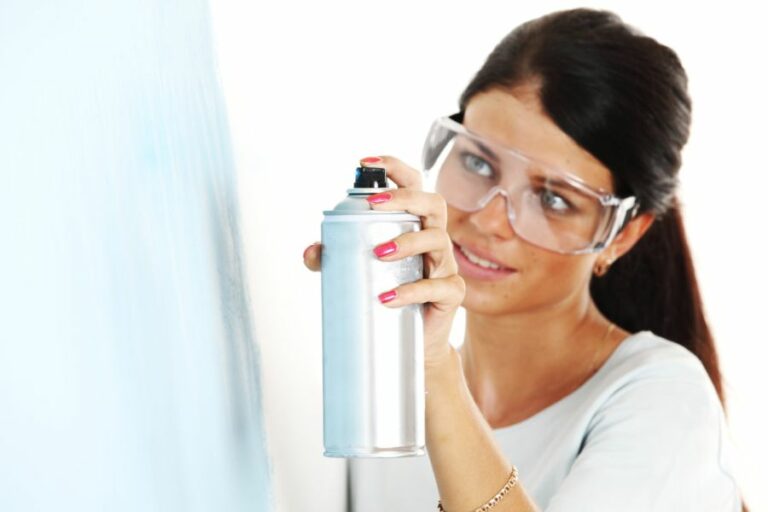
– Test Your Spray
Before spray painting your project, test the spray on a scrap piece of material or cardboard. This testing process allows you to familiarize yourself with the spray nozzle, adjust the flow if necessary, and fine-tune your technique.
– Maintain Proper Distance
Hold the spray can about 8-12 inches away from the surface you’re painting. Too close, and the paint will pool or drip; too far, and you’ll get an uneven, spotty finish. Maintaining proper distance ensures adequate coverage and a smooth finish.
– Use a Sweeping Motion
When spray painting, use a sweeping motion, starting slightly off the surface and ending off of it. Maintain a consistent speed to prevent excess paint buildup or uneven coverage. Overlap each pass by about 50% to ensure ample coverage and avoid leaving “stripes” on the surface.
– Apply Multiple Thin Coats
Rather than applying one thick coat of paint, opt for multiple thin coats. This method ensures proper adhesion, reduces the chances of drips or runs, and provides a more even, professional-looking finish.
Allow each coat to dry thoroughly, according to the manufacturer’s instructions, before applying the next coat.
• Don’t Rush the Process
One of the keys to a successful spray paint job is patience. Don’t rush the process! Allow the paint to dry fully between coats or before handling your project. Neglecting to do so may result in fingerprints, smudges, or damage to the still-tacky paint.
Follow the manufacturer’s recommendations for dry times, and always give it ample time to cure fully.
• Keep Learning and Practicing
Finally, don’t be disheartened if you don’t achieve the perfect spray paint finish on your first try. Like any skill, practice makes perfect. Keep learning from your mistakes and refining your technique.
By applying these tips and tricks, you’ll be well on your way to improving your spray paint skills and achieving a more professional finish in your projects. Happy painting!
Accelerating Spray Paint Curing Process: Methods
Spray paint curing is an essential step in achieving a professional and long-lasting finish. It refers to the process of hardening and drying the paint after it has been applied to a surface. Proper curing ensures that the paint is less likely to chip or peel and will produce a smooth and glossy appearance.
However, waiting for the paint to cure can be time-consuming, often taking days or even weeks to fully cure. Fortunately, there are methods to speed up this process.
• Choose The Right Environment
The environment in which you paint plays a significant role in the curing process. As you may already know, temperature and humidity levels can greatly affect drying time. It is crucial to choose the right conditions when spraying to help speed up the curing process.
– Ideal Temperature
When spray painting, aim to work in an environment with a temperature range of 65-75F (18-24C). At these temperatures, the paint will cure at a faster rate, allowing you to move on to the next stages of your project.
If possible, avoid working in excessively hot, cold, or damp conditions, as this can prolong curing time and potentially compromise the paint’s integrity.
– Maintaining Proper Humidity
Relative humidity also plays an essential role in the curing process. Optimal humidity levels to achieve a faster curing time are 40-50%. High humidity can lead to longer drying times and potentially cause the paint to become cloudy or develop a milky appearance.
Conversely, low humidity levels may cause the paint to become brittle and crack. Using a dehumidifier or humidifier, depending on your environment, can help maintain ideal conditions for efficient spray paint curing.
• Use Quality Spray Paint
The type of spray paint you use heavily influences the curing time. High-quality paints are formulated to cure quickly and evenly, resulting in a smoother and more durable finish. Investing in a reputable brand can save you time and provide better overall results.
– Look For Fast-Drying Formulas
Some spray paints are specifically designed to dry faster than standard ones. Look for products labeled as “fast-drying” or “quick-drying” to expedite the curing process. These paints often have built-in additives that help accelerate the drying time without compromising the quality of the finish.
• Apply Multiple Thin Coats
Rather than applying a single, thick coat of paint, it is more effective to apply multiple thin coats. This allows each layer to dry faster and encourages even curing across the surface. To achieve this, simply:
- Shake the spray paint can thoroughly for at least one minute before using it.
- Hold the can approximately 10-12 inches away from the surface.
- Spray in a consistent sweeping motion, overlapping each pass by 50%.
- Allow each coat to dry for a few minutes before applying the next.
- Repeat the process until you achieve the desired coverage and finish.
• Utilize Air Circulation and Fans
Promoting air circulation around the painted surface can help remove moisture and aid the curing process. Using fans, either ceiling or freestanding, can significantly speed up the drying time of your spray paint.
Be sure to keep a consistent distance between the fan and the painted object to avoid causing any unevenness in the finish. For the best results, position the fans to blow air across the surface rather than directly at it.
• Use a Curing Machine or Heat
In some cases, you may want to invest in specialized equipment to accelerate the curing process. Curing machines, such as infrared heat lamps, can safely and effectively speed up the drying time of your paint.
However, this equipment can be expensive and may not be practical for smaller projects or those on a budget.
Alternatively, you can use a heat gun or hairdryer to gently warm the surface and encourage faster curing. Be cautious when using these methods, as applying excessive heat can cause the paint to bubble or crack.
Always follow the manufacturer’s recommended guidelines when using heat to assist in spray paint curing.
• Conclusion
Speeding up spray paint curing can save you time and help you achieve a professional finish in a more efficient manner.
By selecting the right environmental conditions, using quality paint, applying multiple thin coats, and utilizing proper air circulation and heat, you can effectively decrease curing time without sacrificing the quality of the final result.
Quickening Rustoleum Drying Time: Tips & Tricks
Rustoleum is a popular choice for protective coatings and paints due to its durable nature and wide range of colors. However, one drawback of Rustoleum is the relatively long drying time, which can be a concern for DIYers and professionals alike.
• The Importance of Temperature and Humidity
The drying time of Rustoleum paints is highly dependent on the temperature and humidity of the environment. To ensure the quickest possible drying time, it is important to work in a space with a temperature between 60-80°F (16-27°C) and a humidity level below 85%.
– Tips for Temperature Control
- Use heaters in colder environments to maintain the recommended temperature.
- Avoid painting during peak sunlight hours in hot conditions; opt for early morning or late afternoon to reduce the temperature.
The U.S. Department of Energy has guidelines on insulating your workspace that can help maintain a constant temperature for optimal Rustoleum drying time.
– Tips for Humidity Control
- Use dehumidifiers to lower humidity levels in damp environments.
- Avoid painting immediately after rainfall, as surfaces will retain moisture.
- Monitor humidity levels using a hygrometer.
• Proper Surface Preparation
Proper surface preparation is crucial in speeding up Rustoleum dry time, as well as ensuring a quality end result. Follow these steps in preparing your surface:
– Cleaning the Surface
- Remove any dust, dirt, oil, or grease on the surface by using a brush, vacuum, or damp cloth.
- Use a mild detergent if necessary, and ensure the surface is fully dry before proceeding.
– Sanding and Priming
- Lightly sand the surface to improve paint adhesion, then wipe away any dust or debris.
- If using a primer, ensure it is compatible with Rustoleum and the surface being painted.
- Allow the primer to dry fully before applying Rustoleum.
• Application Techniques for Faster Drying
The manner in which Rustoleum is applied can greatly impact the drying time. Keep these tips in mind while applying Rustoleum:
– Thin and Even Coats
- Apply thin, even coats rather than thick layers to speed up drying time.
- Use a foam brush, roller, or spray can for consistency
- Allow each coat to dry for at least 30 minutes before applying the next coat.
– Using a Hair Dryer
- For smaller projects, using a hairdryer on the lowest heat setting can help speed up the drying process.
- Hold the hairdryer 6-12 inches (15-30 cm) away from the paint and move it in a sweeping motion.
- Ensure even coverage to avoid over-drying certain areas.
• Curing Rustoleum for Longevity
While it is important to speed up Rustoleum dry time, it is essential not to compromise the overall cure time, as this will affect the durability and finish of the paint. Rustoleum typically takes seven days to fully cure.
- Avoid touching or handling the painted surface during this time.
- Keep the painted object in a well-ventilated area.
- Protect the drying object from dust and debris.
• Accelerating Rustoleum Dry Time Safely
By ensuring proper temperature and humidity levels, preparing surfaces adequately, and applying thin, even coats of Rustoleum, you can safely and effectively reduce the drying time.
It is crucial to balance speed with the need for a fully cured, durable finish for the best results. Utilizing these tips will help you achieve the desired outcome for your Rustoleum project.