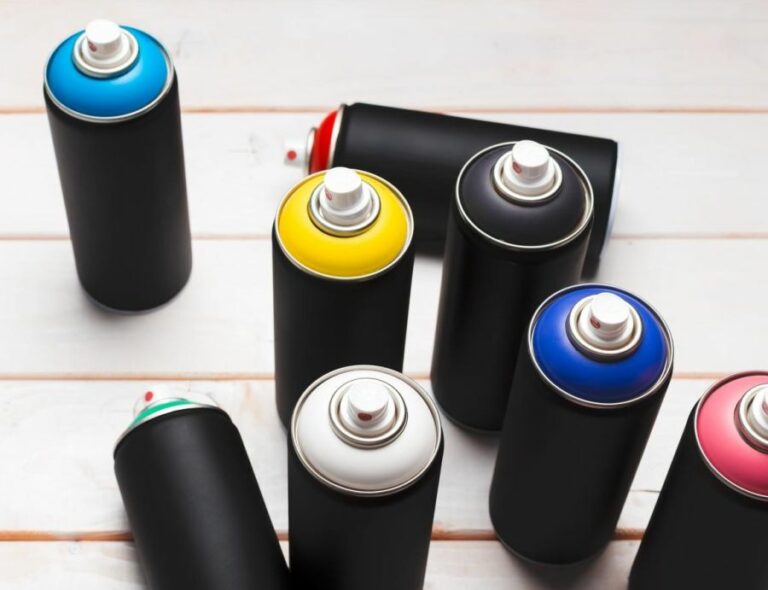
How To Achieve Flawless Spray Paint On Plastic
Achieving a flawless spray paint finish on plastic can be quite challenging if you don’t have the right guidance. But worry not! We have the perfect tips to help you get that seamless and smooth finish you desire. Let’s dive into discussing those steps and techniques that will make your plastic spray painting experience a breeze, ensuring professional-like results every time.
How to achieve flawless spray paint on plastic:
To achieve flawless spray paint on plastic, choose the right paint specifically designed for plastic, clean and prepare the surface, prime the plastic with a high-quality primer, apply multiple thin, even coats of the spray paint, and seal the painted surface with a protective clear coat. Always work in a well-ventilated area and wear appropriate safety gear.

Ready to achieve that picture-perfect, flawless spray paint finish on your plastic items? We’ve got you covered with all the tips, tricks, and techniques you need. Keep reading and unlock the secrets to transform your plastic pieces into eye-catching masterpieces!
Contents
- 1 Mastering Flawless Spray Painting Techniques on Plastic
- 2 Perfecting Plastic Spray Paint Application: A Guide
- 3 Achieving Smooth Paint Finishes on Plastic Surfaces
- 4 Chip-Free Spray Painting Tips for Plastic Materials
- 5 Secrets to a Perfect Spray Paint Finish: Expert Advice
Mastering Flawless Spray Painting Techniques on Plastic
• Choose the Right Spray Paint for Plastic
Selecting the appropriate spray paint is crucial for a flawless finish on plastic. Not all spray paints adhere well to plastic surfaces, and using the wrong type can result in peeling and chipping. Look for paint specifically designed for plastic, such as Krylon Fusion or Rust-Oleum Specialty Plastic Primer.
These paints are formulated with special polymers that provide excellent adhesion and durability on plastic surfaces.
• Clean and Prepare the Plastic Surface
Before applying spray paint, it is essential to clean and prepare the plastic surface to ensure proper paint adhesion. Follow these steps for optimal results:
- Clean the surface: Use a mild detergent and water to clean off any dirt, grease, or debris. Rinse thoroughly with water and let the plastic dry completely.
- Remove any existing paint or finish: If there is existing paint or finish on the plastic, use sandpaper or a scouring pad to remove it. Be sure to smooth out any rough areas.
- Rinse again and let dry: After sanding and removing any existing finish, rinse the surface again to remove any dust or residue. Allow the plastic to dry completely before proceeding.
• Prime the Plastic Surface
Priming the surface prior to applying spray paint helps ensure better adhesion, coverage, and durability. Use a high-quality plastic primer, such as Rust-Oleum Specialty Plastic Primer or Krylon Fusion. Follow these steps for a successful primer application:
- Shake the primer can: Shake the can vigorously for at least one minute to mix the contents.
- Hold the can about 12 inches from the surface: Maintain a consistent distance between the can and the plastic surface to ensure even coverage.
- Apply a light, even coat: Using sweeping motions, apply a thin coat of primer, overlapping each stroke slightly. Allow the primer to dry according to the manufacturer’s instructions.
• Apply the Spray Paint in Thin, Even Coats
For a professional, flawless finish, apply the spray paint in multiple thin, even coats. This approach allows for better control, reduces the risk of drips and uneven coverage, and results in a more durable finish. Follow these steps for optimal results:
- Shake the paint can: Shake the can vigorously for at least one minute to ensure proper mixing of the paint.
- Hold the can about 12 inches from the surface: Maintaining a consistent distance between the can and the plastic surface is essential for even coverage.
- Apply a thin, even coat: Using sweeping motions, apply the first coat of paint, overlapping each stroke slightly. Allow the paint to dry for the time specified on the can, typically between 10 and 30 minutes.
- Continue with additional coats: Apply additional thin coats until you achieve the desired level of coverage and color intensity. Be sure to allow each coat to dry completely before applying the next one.
• Seal the Painted Surface with a Protective Clear Coat
To provide added durability and protection for your painted plastic, apply a clear coat after allowing the final coat of paint to dry completely.
A clear coat, such as Krylon Fusion Clear Coat or Rust-Oleum Painter’s Touch Clear, will help protect your paint job from scratches, UV exposure, and general wear and tear.
- Shake the clear coat can: Shake the can vigorously for at least one minute to mix the contents.
- Hold the can about 12 inches from the surface: Maintain a consistent distance between the can and the plastic surface to ensure even coverage.
- Apply a thin, even coat: Using sweeping motions, apply a thin coat of the clear protective coating, overlapping each stroke slightly. Allow the clear coat to dry according to the manufacturer’s instructions.
By following these steps, you will achieve a professional, durable, and flawless finish when spray painting plastic. Remember always to work in a well-ventilated area and wear appropriate safety gear, such as gloves and a mask, to protect yourself from fumes and overspray. Happy painting!
Step | Description |
|---|---|
1 | Clean the plastic surface thoroughly using soapy water and a clean cloth. Make sure to remove any dirt, grease, or grime present. |
2 | Rinse the plastic with clean water and dry it completely using a clean, lint-free cloth or let it air-dry. |
3 | Apply a plastic primer to help the paint adhere to the plastic surface. Allow the primer to dry according to the manufacturer’s instructions. |
4 | Shake the spray paint can for about a minute to ensure proper mixing of the paint contents. Hold the can about 10-12 inches away from the plastic surface. |
5 | Apply a thin, even coat of spray paint using smooth, sweeping motions. Let the first coat dry as indicated in the manufacturer’s instructions. |
6 | Apply additional coats of paint as necessary, allowing each coat to dry between applications. Be patient and do not rush the process to achieve a smooth, flawless finish. |
7 | Once the final coat has dried, apply a clear coat to protect the paint and give the surface a glossy finish. Allow the clear coat to dry per the manufacturer’s instructions. |
Perfecting Plastic Spray Paint Application: A Guide
Spray painting plastic is an affordable and straightforward way to achieve a professional-looking finish on various items. Plastic items such as furniture, toys, or household items can benefit from a new lease of life with a vibrant, fresh coat of spray paint.
• Prepare the Surface
Preparing the plastic surface is a critical step, as it ensures the best adhesion of the paint to the object. Follow these steps diligently for a perfect finish.
– Clean the Surface
Begin by cleaning the surface using mild soap and warm water. Remove any dirt, dust, or grime that can contaminate the paint or impair adhesion. Rinse thoroughly and allow the plastic to dry completely.
– Remove the Glossy Finish
If the plastic object has a glossy finish, use a fine-grit sandpaper (220 to 400 grit) source to lightly sand the surface.
Take care not to scratch or gouge the plastic, as this may affect the final appearance. Wipe away any dust or particles with a clean, damp cloth and allow the surface to dry.
– Apply a Primer
To improve adhesion and provide a smooth working surface, apply a primer specially formulated for plastic. These primers are readily available at most home improvement stores. Select a primer that is compatible with the type of paint you plan to use.
Apply a thin, even coat, allowing it to dry according to the manufacturer’s instructions before proceeding.
• Choose the Right Spray Paint
With so many choices available, picking the right spray paint for your project is crucial. Here are some considerations:
– Compatibility
Ensure that the spray paint is designed for use on plastic surfaces. Check the label and look for “plastic” or “plastic-safe” listed among the suitable materials.
– Drying Time
Some spray paints dry faster than others, which can be advantageous when working on time-sensitive projects. Be mindful of the drying time, as it may impact the time between coats or the duration you need to wait before using the item again.
– Finish Options
Spray paints are available in various finishes, such as matte, satin, glossy, or metallic. Picking the right finish will not only enhance the look of your item but may also provide additional protection or durability.
• Spray Painting Techniques
– Shake the Can Well
Before using the spray paint, shake the can vigorously for a full minute. This ensures that the paint is well mixed and prevents any blotches or uneven distribution during the painting process.
– Test the Spray
Test the spray paint on a scrap piece of plastic or cardboard first. This will give you an idea of the spray pattern, the distance required from the object, and the pressure needed to achieve an even coat.
– Hold the Can at a Proper Distance
To ensure a smooth, even coverage, hold the spray can at a distance of approximately 8 to 12 inches from the object. Maintaining a consistent distance will help prevent drips or overspraying.
– Apply Thin, Even Coats
Apply several thin, even coats of paint instead of attempting to cover the object with a single thick layer. This will help to avoid drips, unevenness, and poor adhesion.
Allow the paint to dry between coats according to the manufacturer’s recommendations. Be patient and resist the temptation to apply the next coat too soon, as this can lead to cracking or paint failure.
– Ensure Proper Ventilation
Spray painting should always be done in a well-ventilated area, as the fumes can be harmful if inhaled. In addition, working in a ventilated space helps the paint to dry faster, resulting in a better finish.
• Protecting Your Newly Painted Item
After the final coat, allow the paint to cure for a minimum of 24 hours, or according to the manufacturer’s instructions. This ensures that the paint has fully hardened and bonded to the plastic surface.
– Apply a Clear Coat (Optional)
To further protect the painted plastic, a clear coat can be applied. This is especially useful for items exposed to the elements or frequent handling. Choose a clear coat compatible with the type of spray paint used and follow the manufacturer’s guidelines for the best results.
– Clean and Maintain
Regular cleaning and maintenance will help to preserve the appearance and longevity of your painted plastic items. Avoid abrasive cleaners or scrubbers, as they can damage the paint. Instead, use a mild soap and water solution and a soft cloth, followed by a thorough rinse and pat dry.
Now that you’re armed with expert advice on how to spray paint plastic perfectly, it’s time to tackle that next project with confidence. The key lies in diligent preparation and proper technique, ensuring a professional and long-lasting result.
Enjoy the satisfaction of breathing new life into your plastic items with a stunning, high-quality finish!
Step | Description |
|---|---|
1 | Clean the plastic surface to remove dirt, grease, and other contaminants. |
2 | Scuff the surface lightly with fine-grit sandpaper to create a better surface for the paint to adhere to. |
3 | Apply a coat of primer specifically designed for use on plastic. |
4 | Shake the spray paint can well to ensure even distribution of paint and optimal performance. |
5 | Hold the spray can about 6 to 12 inches away from the surface and apply thin, even coats using a sweeping motion. |
6 | Allow each coat to dry for the recommended time, usually about 10-15 minutes, before applying additional coats. |
7 | After the final coat, allow the paint to dry for at least 24 hours before handling or using the object. |
8 | If desired, apply a clear coat or sealant to protect the paint and add shine. |
Achieving Smooth Paint Finishes on Plastic Surfaces
Painting on plastic can be frustrating because the paint may not adhere well, causing it to peel or chip off.
However, if you follow the proper techniques and use the right materials, achieving a smooth, professional-looking finish on your plastic surfaces becomes a lot easier.
• Preparing the Surface
Before you start the actual painting process, it’s essential to prepare the surface of the plastic. This ensures a smoother finish and better paint adhesion.
– Cleaning the Plastic
The first step is to clean the plastic surface thoroughly, removing any dirt, grease, or dust. You can use warm, soapy water and a sponge or cloth. For stubborn grease stains, you can use a degreaser. Make sure to rinse the plastic well, and then dry it with a clean cloth.
– Sanding the Surface
Sanding is a crucial step for smoothing out the texture of the plastic and ensuring better paint adhesion. Start by using 120 or 180-grit sandpaper to roughen the surface. Sand in circular motions, applying even pressure.
Once you have roughened the entire surface, switch to a finer 220 or 320-grit sandpaper and sand again. This will help smooth out any scratches or rough spots.
– Wiping Off Dust
After you have sanded the plastic, make sure to remove any remaining dust. You can use a soft cloth or tack cloth to wipe the surface clean. If necessary, you can also wash the plastic again to ensure it is entirely dust-free.
• Choosing the Right Paint
Selecting the right paint is crucial for achieving a smooth finish on plastic. Not all paints are suitable for plastic surfaces, so here are some recommendations:
– Use Plastic-Specific Paints
There are paints specifically designed for plastic surfaces. They contain additives that help the paint adhere better and dry to a smooth finish. Make sure to read the label on the paint can to ensure it is suitable for use on plastic.
– Opt for Acrylic Paints
Acrylic paints are generally a good choice for painting plastic. They dry quickly and offer excellent adhesion, even on smooth surfaces like plastic. High-quality artist’s acrylics or hobby acrylics are preferable, as they contain more pigment and offer better coverage.
• Applying Primer
Using a primer on the plastic surface before applying paint will help to achieve a smoother finish and better paint adhesion. Look for a primer specifically designed for plastic surfaces or one that mentions compatibility with plastic.
– Applying the Primer
Shake the primer well before using it. Apply the primer to the plastic surface, using thin, even coats. For spray primers, hold the can about 8-12 inches away from the surface and move in a smooth, steady motion.
For brush-on primers, use a soft-bristle brush and apply in even strokes. Allow the primer to dry fully according to the manufacturer’s instructions.
• Painting the Plastic
With the surface prepared and primed, you’re now ready to paint.
– Applying the Paint
As with the primer, apply thin, even coats of paint to the plastic surface. For spray paints, hold the can at the same distance you did for the primer and move in smooth, steady motions. For brush-on paints, use a soft-bristle brush and apply paint in even strokes.
– Applying Multiple Coats
To achieve a smooth, even finish, it’s essential to apply multiple coats of paint. Make sure to allow each coat to dry according to the manufacturer’s instructions before applying the next coat. In general, 2-3 coats should suffice.
• Finishing the Paint Job
After you’ve applied the last coat of paint, let it dry completely. Then, you can use a 600-grit or finer wet/dry sandpaper to lightly sand the surface for a truly smooth finish. Wipe off any dust with a clean cloth, and then you can apply a clear coat to seal and protect the paint.
– Applying a Clear Coat
A clear coat is particularly important when painting plastic, as it helps to prevent peeling and offers additional protection to the surface. Apply the clear coat in thin, even layers, allowing it to dry according to the manufacturer’s instructions between coats. Two or three coats should suffice.
• Conclusion
Painting plastic can be challenging, but with the right preparation and techniques, you can achieve a smooth, professional finish.
By cleaning and sanding the plastic, using appropriate paint and primer, applying multiple thin coats, and finishing with a clear coat, you can ensure a beautiful and durable result. So, go ahead and give new life to your favorite plastic items!
Step | Description |
|---|---|
1. Clean the plastic surface | Remove any dirt, grease, or residue from the plastic surface using soap and water, then let it dry completely. |
2. Sand the plastic | Use fine-grit sandpaper (220 to 300 grit) to lightly scuff the plastic surface in order to improve paint adhesion. |
3. Apply a primer | Choose a primer that is specifically designed for plastic surfaces, and apply a thin layer using a brush, roller, or spray can. |
4. Apply the paint | Using a brush, roller, or spray can, apply thin, even layers of paint designed for plastic surfaces. Allow each layer to dry before applying the next one. |
5. Sand between layers | Lightly sand between paint layers with fine-grit sandpaper (400 to 600 grit) to remove any imperfections and create a smooth finish. |
6. Apply a clear coat | After the final layer of paint has dried, apply a clear, protective coat to seal and protect the painted surface. |
7. Buff and polish | To achieve an even smoother finish, gently buff and polish the clear coat using a microfiber cloth and a polishing compound after it has dried completely. |
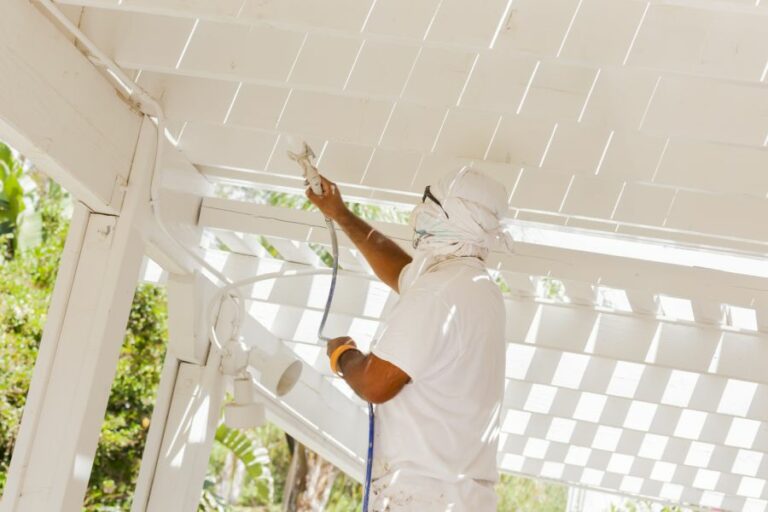
Chip-Free Spray Painting Tips for Plastic Materials
Spray painting plastic can be a meticulous task, but with the right technique, you can achieve a smooth and chip-free finish. Follow these expert guidelines to effectively spray paint plastic without chipping it.
• Step 1: Choose the Right Paint
Select a paint specifically designed for plastic surfaces. This will ensure that the paint adheres well and prevents chipping.
Many spray paint manufacturers offer a range of options specifically for plastics, such as Krylon Fusion or Rust-Oleum Painter’s Touch. I highly recommend these brands, as they are reputable and provide excellent results.
• Step 2: Thoroughly Clean the Surface
Before painting, clean the plastic surface with mild soap and water to remove any dirt or grease. This will ensure that the paint adheres properly and evenly to the plastic. Rinse the surface thoroughly and let it dry completely before proceeding.
• Step 3: Lightly Sand the Surface
To aid the adhesion of paint to the surface, use fine-grit sandpaper (around 220-grit) to lightly scuff the plastic. This will create a textured surface, allowing the paint to grip better. After sanding, wipe the surface with a clean rag to remove any residual dust.
• Step 4: Apply a Plastic Primer
Applying a plastic primer enhances paint adhesion and durability, further preventing chipping. Many times, the plastic paint range offers coordinating primers for optimal results.
Follow the manufacturer’s instructions for application, which typically include spraying in light, even coats, allowing the recommended drying time between layers.
• Step 5: Apply the Spray Paint
Select a well-ventilated area, ideally outdoors or in a garage with open doors and windows, to perform the painting. Make sure to cover nearby surfaces with drop cloths or newspaper to avoid accidental overspray.
Shake the spray paint can for at least a minute to ensure proper color mixing and spray consistency. Maintain a consistent distance of about 10-12 inches from the surface, and apply thin, even coats of paint, starting with a light mist coat.
Allow the first coat to dry for a few minutes, then apply additional coats as needed until achieving the desired coverage. Let the paint completely dry between coats, as rushing this process can cause the paint to chip.
• Step 6: Apply a Clear Coat
Although optional, applying a clear coat can enhance the durability and longevity of the finish. Choose a clear coat compatible with the plastic spray paint used.
Follow the same spray painting technique used for the primer and paint, applying thin, even coats and letting them dry as recommended by the manufacturer.
• Step 7: Allow Paint to Cure
For optimal results, allow the paint to cure for at least 24 hours, or according to the manufacturer’s instructions, before handling or reassembling the plastic item. This will prevent any chipping or damage to the freshly painted surface.
• Step 8: Reassemble Your Plastic Item
Once the paint has fully cured, carefully reassemble the painted plastic item. Remember to handle the freshly painted surface gently to avoid any chips or scratches.
By following these expert tips and using high-quality plastic-specific paint, you can achieve a long-lasting, chip-free finish on your spray-painted plastic item.
Step | Description |
|---|---|
1. Clean the surface | Wash the plastic item with soap and water to remove any dust, dirt, and grease. |
2. Sand the surface | Use fine-grit sandpaper to lightly sand the plastic surface to create a rough texture for the paint to adhere to. |
3. Apply primer | Apply a primer specifically designed for plastic surfaces. Allow it to dry completely before proceeding. |
4. Shake the spray paint can | Shake the can of spray paint thoroughly for at least one minute to ensure proper mixing of the paint. |
5. Apply thin coats | Hold the spray paint can about 12 inches away from the surface and apply thin, even coats. Allow each coat to dry before applying the next one. |
6. Allow the paint to dry | Once the final coat is applied, allow the paint to dry completely for 24 hours. |
7. Apply a clear sealer | To protect the paint and prevent chipping, apply a clear sealer designed for use on plastic surfaces. |
Secrets to a Perfect Spray Paint Finish: Expert Advice
A spray finish is a perfect solution for achieving a professional and even coat on various surfaces like wood, metal, and plastic.
• Choose the Right Spray Paint
The first step in achieving an excellent spray finish is selecting a high-quality paint that is appropriate for your specific surface. Make sure to read the label and ensure that the paint is compatible with the material you plan on spraying.
There are different types of spray paints available on the market, like enamel, acrylic, and latex-based paints. Each type has its own set of characteristics and applications, so make sure to choose the one that best fits your needs.
– Safety Precautions
Always make sure to wear safety equipment like gloves, goggles, and a mask to protect yourself from harmful paint fumes and particles. Additionally, always work in a well-ventilated area to help disperse paint fumes.
• Proper Preparation of the Surface
To achieve a perfect spray finish, you must prepare the surface by following these steps:
- Clean the surface: Ensure that the surface is free of dirt, grease, and any other contaminants. Use a degreaser, detergent, or rubbing alcohol to clean the surface thoroughly.
- Sand the surface: For a smoother finish, sand the surface using progressively finer grits of sandpaper. Sanding not only removes imperfections but also provides better adhesion for the paint. Be sure to remove any dust or particles with a tack cloth or compressed air.
- Apply primer: If the surface absorbs the paint or if it requires better adhesion, apply a suitable primer. Primers help create a proper base for the paint, resulting in an even finish.
- Mask off areas: Use masking tape and sheets to protect sections of the surface that you don’t want to paint. This prevents overspray and results in clean lines.
• Selecting and Setting Up the Spray Gun
Choose the right spray gun that meets your needs and is compatible with your chosen paint. Make sure to follow the paint manufacturer’s guidelines for tip size and pressure recommendations.
Additionally, select the correct air cap, needle, and nozzle size based on the specific paint and finish you need. Some resources, like Spraygunworld, provide helpful tips and guidance in selecting an appropriate spray gun.
– Spray Gun Technique
Using the correct spraying technique is crucial in achieving an impeccable finish. Here are some expert recommendations:
- Maintain distance: Maintain a consistent distance (6-8 inches) between the gun and the surface. This ensures that the paint is applied evenly onto the surface.
- Spray at right angles: The spray gun should be held perpendicular to the surface for even coverage. Avoid tilting the gun, as this might cause uneven paint distribution.
- Overlap strokes: Apply the paint with parallel strokes and overlap each pass by 50%. This ensures an even and consistent finish without any harsh lines.
- Control the trigger: To avoid drips and runs, always fully press and release the trigger when starting and stopping a stroke.
- Adjust spray pattern: Determine the appropriate spray pattern for your project. Some spray guns have adjustable tips that allow you to choose between horizontal, vertical, and circular spray patterns.
• Strain the Paint and Test the Spray Pattern
Before you begin spraying, strain the paint through a paint strainer or cheesecloth to remove any clumps. This ensures a smooth application and prevents clogging in the spray gun.
Always test the spray pattern on a piece of cardboard or scrap surface. Make any necessary adjustments to the spray gun settings and your technique until you’ve achieved the desired finish.
• Apply the Paint in Thin Coats
Applying multiple thin and even coats of paint is the key to a perfect spray finish. Allow each coat to dry thoroughly, as recommended by the paint manufacturer, before applying the next coat. This prevents the paint from dripping, running, or sagging.
• Finishing Touches
Once the final coat of paint has dried, you can remove the masking tape and protective sheets. If necessary, you can now wet sand the surface with fine-grit sandpaper to create a super smooth and polished finish.
In conclusion, achieving the perfect spray finish requires attention to detail, patience, and practice. By following these guidelines, selecting the right equipment, and using proper techniques, you’ll be on your way to a professional-looking spray finish that you can be proud of.
Step | Description |
|---|---|
1 | Choose the right spray equipment for the job, such as a HVLP (High Volume Low Pressure) spray gun. |
2 | Ensure the surface to be sprayed is clean, dry, and free of any contaminants. |
3 | Properly mix and prepare the paint or finish you are going to use. |
4 | Adjust the spray gun settings for optimal performance, including fluid control, spray pattern, and air pressure. |
5 | Practice your spraying technique on a scrap piece of material to ensure consistency and even coverage. |
6 | Apply the finish in light, even coats, allowing each coat to dry before applying the next. |
7 | Maintain a consistent spray distance and speed, overlapping each pass by 50% for a uniform finish. |
8 | Allow the final coat to fully dry according to the manufacturer’s recommendations. |
9 | Lightly sand the surface with a fine-grit sandpaper or buffing pad to smooth any imperfections. |
10 | Apply a final clear coat, if desired, to add extra protection and shine to your finished piece. |