Guide To Using UV-Responsive Spray Paints, What Pros Say
Are you ready to elevate your art game by incorporating UV-responsive spray paints? Look no further, as I’m here to guide you through the process with ease and confidence. With my step-by-step guide, you will soon be the go-to person for creative and mesmerizing UV spray paint projects among your peers. Let’s dive in and explore the world of ultraviolet art together!
Guide to using uv-responsive spray paints:
UV-responsive spray paints, also known as fluorescent or blacklight paints, glow under ultraviolet light and are used for various art, design, and event applications. Select the appropriate paint for your surface, color, and desired fluorescence level. Ensure adequate safety precautions, surface preparation, and proper spraying techniques are followed. Seal your project with a UV-resistant topcoat and properly clean and store materials.

Unleash your creativity with UV-responsive spray paints! Discover various techniques, safety precautions, and project ideas to bring your glowing masterpieces to life. Read on to unlock the full potential of these vibrant paints and light up your world with stunning artwork!
Contents
- 1 Ultimate Guide to Applying UV Reactive Spray Paints
- 2 Mastering the Art of Using UV Spray Paint
- 3 Understanding the Science of UV Reactive Paint
- 4 Discover the Curing Timeframe for UV Paint
- 5 Expert Tips on Using Glow-in-the-Dark Spray Paint
Ultimate Guide to Applying UV Reactive Spray Paints
UV-responsive spray paints, also known as fluorescent or blacklight paints, are a creative way to transform a variety of surfaces by making them glow under ultraviolet light.
With countless applications in art, design, and events, this guide will help you achieve stunning results using UV-responsive spray paints.
• Understanding UV Responsive Paints
UV-responsive spray paints contain pigments that emit visible light when exposed to ultraviolet (UV) radiation, such as from a blacklight. This property makes them ideal for creating vibrant, glowing effects that stand out in low-light or dark environments.
While some UV-reactive paints are available in a pre-mixed form, others come in powder form, which can be mixed with a clear medium such as acrylic paint or spray paint.
• Choose the Right UV Responsive Spray Paint
Selecting the appropriate UV-responsive spray paint for your project is crucial, as it will impact the final result.
– Know Your Surface
Some UV spray paints are specifically designed for certain surfaces, such as fabric, plastic, or metal. It’s essential to choose a paint designed for the material you’ll be working with, as it may not adhere well, or the finish may differ if you match the wrong paint with your surface.
– Select the Correct Color
UV-reactive spray paints typically come in a range of neon colors, which can be either transparent or opaque. Transparent colors allow for the underlying surface to remain visible, while opaque colors provide more coverage. Pick the color that will meet your desired effects and layering needs.
– Understand the Fluorescence Levels
Different UV spray paints emit varying levels of fluorescence under ultraviolet light. Some paints produce a more subtle glow, while others create intense brightness. Consider your desired effect and lighting conditions when choosing the level of fluorescence.
• Prepare Your Workspace and Materials
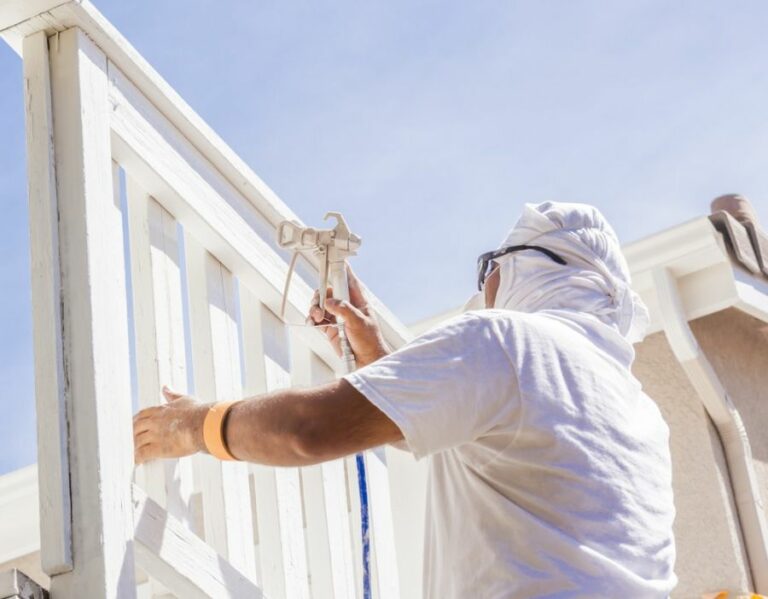
– Safety Preparations
As with any spray paint, it’s crucial to work in a well-ventilated area and wear proper protective equipment, such as gloves and an appropriate respirator.
– Prepping Your Surface
Before painting, ensure your surface is clean, dry, and free of dust, dirt, or any contaminants. For best results, I recommend priming the surface with a compatible primer, which will also boost paint adhesion.
• Applying UV Responsive Spray Paint
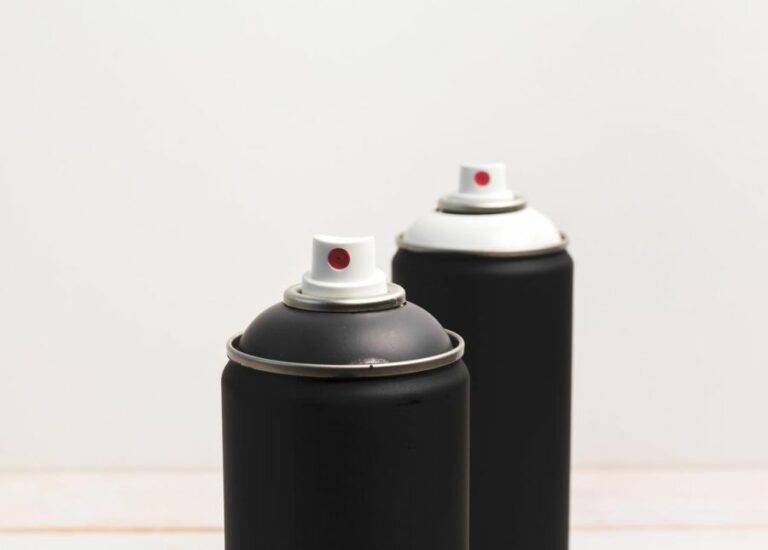
– Shake the Can Well
To achieve consistent results, shake the can of spray paint vigorously for at least two minutes, or until the mixing ball inside starts moving freely. This will ensure the paint and pigments are thoroughly mixed.
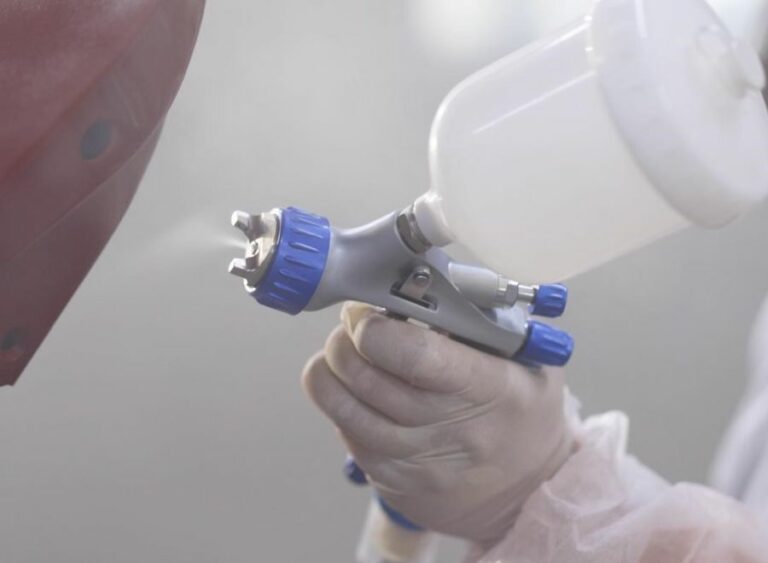
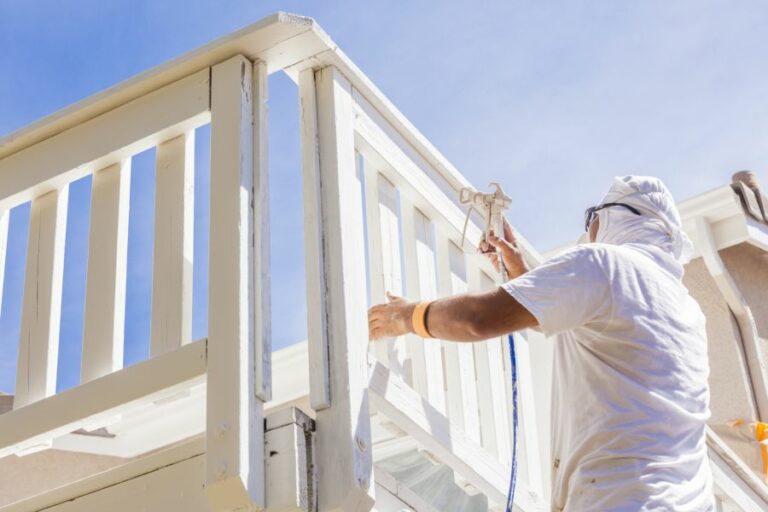
– Spray Techniques
When spraying, I suggest holding the can about 8-12 inches away from the surface and using a consistent side-to-side sweeping motion. Overlap each pass slightly to ensure complete coverage. It’s essential not to spray too close, as this can cause drips or an uneven finish.
In some cases, multiple light coats may be necessary to achieve your desired effect. Allow each coat to dry according to the manufacturer’s instructions before applying another.
– Finishing Touches
Once you’re satisfied with the color and coverage, it’s a good idea to seal your project with a clear, UV-resistant topcoat. This will protect the paint from wear, fading, and minor damage, ensuring the vibrant glow lasts longer.
• Clean Up and Storage
To clean up after you’ve completed your project, follow the manufacturer’s instructions on disposing of empty cans and cleaning your equipment. Be sure to store any leftover spray paints in a cool, dry place, away from direct sunlight and heat sources.
• Unlock Your Creativity with UV Responsive Spray Paints
UV-responsive spray paints offer limitless possibilities for creative projects, from DIY home dcor to large-scale installations.
By understanding how to choose the right paint, preparing your workspace and materials, and applying the paint correctly, you’ll be well on your way to creating unique and luminous designs with UV-responsive spray paints.
Mastering the Art of Using UV Spray Paint
• Understanding UV Spray Paint
UV spray paint, short for ultraviolet spray paint, is a type of paint that reacts under UV or black light, giving it a luminescent, glowing effect. It comes in a variety of colors and can be used on various surfaces – including, but not limited to wood, metal, glass, and plastics.
It’s popular amongst artists, event decorators, and DIY enthusiasts. It can transform a regular object or project into an impressive luminescent piece that stands out in the dark.
– The Science Behind the Glow
UV spray paint contains phosphors, which are substances that can emit visible light after being exposed to UV light.
When exposed to UV light, these phosphors absorb the energy and release it as visible light, causing the paint to glow. This glowing effect is commonly seen in concerts, clubs, and themed environments.
• Assessing the Working Surface and Environment
– Ensuring a Clean Surface
To achieve the best result with UV spray paint, it’s essential to work on a clean, dry, and grease-free surface.
Dirt or debris on the surface will affect paint adhesion, ultimately leading to an uneven and unsatisfactory finish. Using a soft cloth or a cleaning solution to clean the surface thoroughly is recommended.
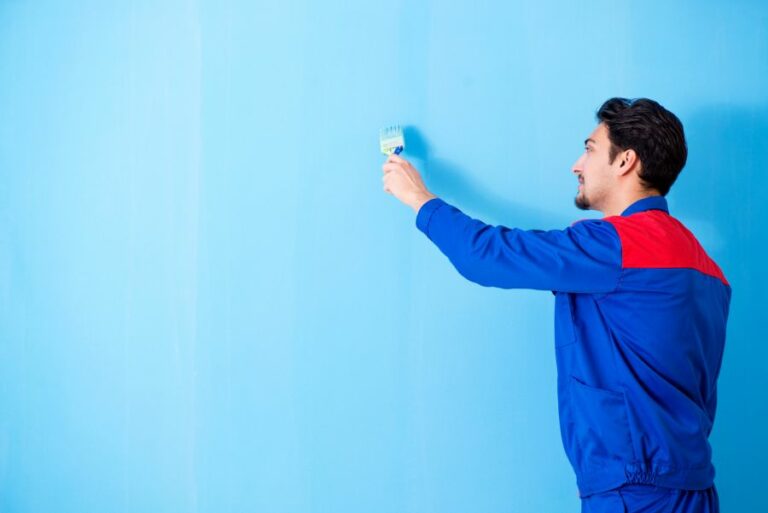
– Primer Application
It is crucial to apply a suitable primer before using UV spray paint, as it will help the paint adhere better, increase durability, and provide a smoother finish. It is advisable to choose a light-colored primer, preferably white, to help the paint’s glowing effect be more prominent.
– Appropriate Environment
Working in a well-ventilated area when using spray paint is essential for safety and health reasons. Furthermore, controlling the environment’s temperature and humidity is vital.
An optimal temperature of more than 50 degrees Fahrenheit and relative humidity should be less than 85%. Extreme temperatures or humidity levels can cause the paint to dry unevenly or crack.
• Applying UV Spray Paint
– A Test Run
Before applying the UV spray paint to the project surface, it’s recommended to do a test spray on a piece of scrap material or a hidden area. This helps users understand the can’s spraying characteristics and ensures that the paint is mixed properly.
– Proper Technique
To achieve a smooth and even layer of UV spray paint, it’s essential to use the right technique:
- Shake the can well before use, typically for 1-2 minutes, to ensure a homogeneous mixture of paint and propellant.
- Maintain an appropriate distance of 10 to 12 inches between the can nozzle and the surface being painted. This helps avoid the potential dripping or pooling of the paint.
- Apply the paint with a sweeping motion, continuously moving the can back and forth parallel to the surface. Make sure not to linger in one spot and adjust the can’s speed accordingly to achieve the desired paint thickness.
- Release the spray nozzle at the end of each pass, and then start again, overlapping the previous stroke slightly. This technique helps prevent inconsistencies in the paint application.
– Applying Multiple Coats
For bolder colors or more durability, apply multiple coats of UV spray paint. Remember to allow enough drying time between each coat, as stated on the paint’s packaging. Typically, this drying time ranges from 10 minutes to an hour, depending on the brand and environmental conditions.
• The Importance of Top Coats
In many cases, it’s wise to apply a top coat or clear coat after the UV spray paint has dried. This additional layer provides a barrier to protect the UV spray paint from damage, such as scratching or UV light degradation.
A clear coat can also enhance the appearance of the paint, giving it a glossy or smooth finish.
• Safety Precautions
– Avoid Inhalation and Contact
Using UV spray paint comes with potential health hazards, including the risk of inhaling toxic fumes and contact with irritants. It’s vital to work in a well-ventilated area, wear a mask or respirator, and protect the skin through the use of gloves.
– Flammability Hazards
UV spray paint, like other aerosol spray paints, is flammable. It is crucial to avoid open flames, sparks, or smoking when using this paint, as doing so could cause ignition and fire.
• Conclusion
UV spray paint offers an opportunity to create striking, luminescent effects for a variety of projects or artworks. By following proper surface preparation, application techniques, and safety precautions, users can achieve impressive glowing results.
Step | Description |
|---|---|
1 | Choose a well-ventilated area to work in, preferably outdoors or in a well-ventilated room. |
2 | Spread newspaper, a drop cloth, or plastic sheeting on the ground to protect the surface from paint. |
3 | Shake the UV spray paint can for at least one minute to ensure proper mixing of paint and chemicals. |
4 | Position the object to be painted on the protected surface or hang it to allow all-around access. |
5 | Apply a thin, even coat of primer (if needed) to the object and let it dry according to manufacturer guidelines. |
6 | Spray the UV paint in thin, even coats, holding the can about 12 inches away from the object. Allow the paint to dry between each coat. Multiple coats may be needed for complete coverage. |
7 | When the final coat is dry, apply a protective sealant (if desired) to help protect and preserve the paint job. |
8 | Wait for the paint and sealant to dry completely before touching or using the object. |
Understanding the Science of UV Reactive Paint
UV reactive paints, also known as fluorescent or glow-in-the-dark paints, have gained immense popularity in various industries due to their unique properties.
These paints emit a bright glow when exposed to ultraviolet (UV) light or blacklight, creating stunning visuals on various surfaces.
• The Science Behind UV Reactive Paints
UV reactive paints owe their distinctive characteristics to specific chemicals and pigments present in their composition. These chemicals are known as phosphors, which possess the ability to convert UV light into visible light.
Phosphors usually consist of rare-earth elements, such as europium, yttrium, and terbium, combined with activator materials like lead or manganese.
When exposed to a UV light source, electrons in the phosphors become energized and subsequently return to their original state, releasing energy in the form of visible light. This phenomenon, known as fluorescence, produces the glow associated with these paints.
• Choosing the Right Paint for Your Project
There are various types of UV reactive paints available in the market, each with its unique properties and applications. These include:
– Water-Based UV Paints
These versatile paints are suitable for multiple surfaces, such as paper, fabric, metal, and wood. They usually dry quickly and are easy to apply. Water-based UV paints are recommended for interior artworks, posters, or murals, due to their non-toxic nature and low odor.
– Solvent-Based UV Paints
Solvent-based UV paints can adhere to a wide range of surfaces and offer high durability. They are resistant to weather, chemicals, and UV degradation, making them suitable for exterior applications, such as signage, vehicles, or outdoor sculptures.
However, solvent-based paints may have stronger fumes and require proper ventilation during use.
– UV Body Paints
These paints are designed specifically for application on human skin, making them ideal for events, performances, or photoshoots. These non-toxic, skin-safe variants provide a vibrant glow on the skin when exposed to UV light.
• Preparing the Surface and Applying UV Reactive Paints
For optimal results, follow these expert recommendations while using UV reactive paints:
– Surface Preparation
- Clean the surface: Remove any dirt, grease, or contaminants from the surface to ensure proper adhesion of the paint.
- Priming: Apply a white primer on the surface to enhance the brightness of the UV-reactive paint. Dark backgrounds may reduce the paint’s visibility and effectiveness.
- Allow to dry: Let the primer dry completely before applying the UV-reactive paint.
– Application Techniques
- Thin layers: Apply thin, even layers of paint to achieve a consistent and smooth finish. Too much paint can result in a clumpy or uneven appearance.
- Multiple coats: Depending on the desired intensity of the glow, you may need to apply multiple coats of paint. Allow each coat to dry fully before applying the next one.
- Drying time: Refer to the manufacturer’s instructions for the recommended drying time. Generally, water-based UV paints dry faster than solvent-based alternatives.
– Using UV Light Sources
- Blacklights: For the best illumination and vibrant glow, use blacklight or UV LED lights, as they emit the appropriate wavelength to activate the phosphors in the paint.
- Distance and Angle: Position the UV light at an appropriate distance and angle from the painted surface to ensure maximum exposure and even illumination.
• Potential Applications of UV Reactive Paints
UV reactive paints possess numerous potential applications across various industries, including:
- Fine art: Artists often incorporate UV reactive paints into their artwork to create visually striking pieces when displayed under UV lights.
- Interior design: These paints can be used for designing murals, accent walls, or in combination with other paints to create captivating interiors under UV lights.
- Theater productions: Props, costumes, or sets for stage performances can utilize UV-reactive paints to create spectacular lighting effects.
- Special events: UV parties or themed events can leverage UV body paints or face paints to heighten the ambiance and excitement.
• Conclusion
UV reactive paints offer an enchanting way to enhance visual elements across multiple domains.
With a thorough understanding of the science behind these paints, selecting the right product, and following expert recommendations, anyone can harness the beauty and vibrancy these paints have to offer.
Discover the Curing Timeframe for UV Paint
UV (ultraviolet) paint, also known as UV-curable paint or UV-reactive paint, is a type of coating that cures or hardens when exposed to UV light.
This advanced paint technology offers a number of benefits over traditional solvent-based and water-based coatings. One of the most notable advantages is the significantly reduced curing time.
• The Impact of UV Light Intensity
The intensity of the UV light source is a crucial factor in determining how long it takes for UV paint to cure. Generally, stronger UV light sources will lead to faster curing times.
It’s important to ensure that the UV light source you’re using is compatible with the specific UV paint you’re working with.
A professional UV curing system is typically the best option, as these have been designed to provide optimal curing conditions for a wide range of UV coatings.
When using a less powerful light source, such as UV lamps or LED lights, extended exposure might be required to ensure proper curing.
It’s always recommended to follow the guidance provided by the UV paint manufacturer for optimal curing conditions.
• The Role of UV Paint Formulation
The specific formulation of the UV paint used will also play a significant role in the curing time. Different types of UV paints have different curing requirements.
For example, some formulations may require higher levels of UV light intensity, while others may be more sensitive to the UV wavelength range. Additionally, the thickness of the applied coating can also impact the curing time.
A thicker coat may require longer exposure to UV light, whereas a thinner coat may cure more quickly.
Understanding the specifications set forth by the paint manufacturer is essential for achieving the correct curing process. This information should be provided on the product label or in the accompanying documentation.
• Environment and Climate Factors
The environment and climate conditions in which the UV paint is applied can also have an impact on the curing time. Temperature and humidity are two critical factors to consider.
Higher temperatures can speed up the curing process, while lower temperatures can slow it down. Moreover, higher levels of humidity can slow down the rate at which the paint cures.
Controlled environments, such as professional paint booths, maximize the efficiency and accuracy of the UV curing process by regulating temperature and humidity levels.
If you’re working in a less controlled environment, make sure to account for these factors and adjust your curing process accordingly.
• Optimal UV Curing Process: Key Recommendations
To ensure that your UV paint cures properly, consider the following recommendations based on our experience with UV paint projects:
- Follow the Manufacturer’s Guidelines: Always refer to the guidelines provided by the UV paint manufacturer for the most accurate information about the curing time and process for each specific product.
- Choose the Right UV Light Source: Select a UV light source that’s compatible with the specific formulation of the UV paint you’re using. Professional UV curing systems are generally the most reliable option, as they are designed to provide the optimal curing conditions for a variety of UV coatings.
- Maintain Proper Environment and Climate Conditions: Ensure that temperature and humidity levels are suitable for the UV curing process based on the manufacturer’s recommendations. Controlled environments, such as professional paint booths, can provide the most accurate and reliable curing conditions.
- Monitor the Process: Carefully monitor the UV curing process and adjust the exposure time if needed. An undercured paint may not provide the desired performance and durability while overcuring can lead to discoloration or other aesthetic issues.
In conclusion, the time it takes for UV paint to cure can vary greatly depending on multiple factors, including the UV light source, paint formulation, and environmental conditions.
Properly understanding and managing these factors is critical to achieving a successful and efficient UV curing process.
Following the manufacturer’s guidelines, selecting the appropriate UV light source, and maintaining proper environmental conditions will help ensure optimal results for your UV paint project.
Factors | Duration |
|---|---|
UV light intensity | May vary from seconds to minutes |
UV paint thickness | Thin layers cure faster than thicker layers |
UV paint type | Different types of UV paints may require different curing times |
Ambient temperature | Higher temperatures can accelerate the curing process |
Ambient humidity | Low humidity can result in faster curing |
Expert Tips on Using Glow-in-the-Dark Spray Paint
Glow-in-the-dark spray paint is a fantastic tool for creating unique art projects, home decorations, and even safety markings.
• Choosing the Right Glow-in-the-Dark Spray Paint
Before starting your project, it is essential to select the appropriate glow-in-the-dark spray paint for your specific needs. Many reputable brands offer quality products, with some of the most popular being Rust-Oleum, Krylon, and Montana Cans.
These brands offer a variety of glow colors (such as green, aqua, and blue) and finishes (glossy, satin, or matte). It’s important to note that each pigment’s glow intensity and duration may vary, so it’s advisable to read product descriptions and customer reviews before making a decision.
• Preparing the Surface for Application
Proper surface preparation is crucial to achieve optimal adhesion and glow performance. Follow the steps below to ensure your surface is ready for painting:
– Cleaning the Surface
Remove any dirt, dust, or grease from the surface using a mild detergent or soap and water. Rinse thoroughly and allow the surface to dry completely before proceeding.
– Sanding the Surface (Optional)
Light sanding with fine-grit sandpaper (e.g., 320 or 400 grit) is recommended for smoother surfaces such as metal or plastic to create a better surface profile for paint adhesion. Always sand in the direction of the grain (if applicable) and remove any dust from the surface with a clean, dry cloth.
– Applying a Base Coat (Recommended)
A white or light-colored base coat (use a primer specific to the surface material) will greatly enhance the glow effect by reflecting the paint’s phosphorescent pigments better. Apply the primer following the manufacturer’s instructions and allow it to dry thoroughly before applying the glow-in-the-dark paint.
• Applying the Glow in the Dark Spray Paint
Once your surface is prepared, follow these steps for successful paint application:
– Shaking the Can
Before using the glow-in-the-dark spray paint, shake the can vigorously for at least two minutes to ensure that the pigments are evenly mixed. You may need to shake the can intermittently during the application process if you notice pigment separation.
– Holding the Can Properly
Hold the can approximately 8 to 12 inches away from the surface. This distance will help ensure even coverage and prevent overspray.
– Applying Even Coats
Start spraying off the edge of the surface and use smooth, sweeping motions to apply the paint. Overlap each spray pass by approximately 50% to ensure even coverage. Moving too slowly or holding the can too close may cause drips or runs.
– Multiple Coats
Allow each coat to dry for at least 15-20 minutes before applying additional coats. Repeat the application process until the desired glow intensity is achieved. Generally, 2-4 coats are needed for optimal results.
– Drying Time
It’s crucial to let the paint dry completely (typically 24 hours) to achieve maximum glow effect and adhesion.
• Achieving the Best Glow Effect
After the paint has completely dried, expose it to a bright light source (natural sunlight or UV blacklight) for at least 30 minutes to “charge” the paint’s glow properties.
Once charged, the paint will emit a vibrant glow for several hours before gradually fading. The glow duration and intensity may vary depending on the specific paint used and the number of coats applied.
• Maintenance and Care
To maintain your glow-in-the-dark painted surface, simply clean it with a soft cloth and mild detergent as needed. Avoid using any abrasive cleaning materials, as they may damage the paint. Periodically recharge the paint by exposing it to a bright light source.
In conclusion, glow-in-the-dark spray paint can be an outstanding way to breathe new life into your art projects, home decorations, and safety markings.
By carefully selecting the right paint, properly preparing your surface, and applying the appropriate techniques, your painted surfaces can create stunning visual effects for years to come!
Step | Description |
|---|---|
1 | Choose the right surface for your project – the surface should be clean, dry, and free of any dirt or debris. |
2 | Apply a primer (if necessary) to help the paint adhere to the surface and to enhance durability. |
3 | Shake the can of glow-in-the-dark spray paint well before using it to ensure proper mixing of the paint’s ingredients. |
4 | Spray the paint onto the surface from a distance of about 10-12 inches, using smooth, even strokes. Apply multiple thin coats instead of a single thick coat to prevent drips and uneven coverage. |
5 | Allow each coat to dry before applying the next one. The paint will usually dry to the touch within a few hours, but wait at least 24 hours before handling the surface. |
6 | Expose the painted surface to a bright light source for several minutes to charge the glow-in-the-dark particles. The glow will fade over time but can be recharged with additional exposure to light. |