Multi-Surface Primer Selection & Usage Guide, What Pros Say
When it comes to achieving a flawless paint job, the first step is selecting and using the right multi-surface primer. With countless options available, it can be quite challenging to pick the ideal one for your project. Fear not, as we’re here to walk you through a comprehensive guide on multi-surface primer selection and usage. With our expertise, you’ll be able to confidently choose the perfect primer and achieve a professional finish on any surface you desire.
Multi-surface primer selection & usage guide:
To choose the right multi-surface primer, consider the material you plan to paint, the surface condition, environmental concerns, and color coverage. Latex-based primers are ideal for porous surfaces, while oil and shellac-based primers work well for stain-blocking. Tinted primers improve color coverage. For application, prepare the surface, use the appropriate applicator, apply thin, even coats, allow sufficient drying time, and sand if needed.

Ready to start painting but not sure which primer is right for your project? Look no further! Dive into this comprehensive guide on multi-surface primer selection and usage with expert tips and tricks to help you achieve a flawless finish. Read on for more insights!
Contents
- 1 Guide to Choosing and Applying Multi-Surface Primers
- 2 Understanding Multi-Surface Primers: Features & Benefits
- 3 Behr Multi-Surface Primer & Sealer: Application Techniques
- 4 Drying Time for Multi-Surface Primers: What to Expect
- 5 Mastering Valspar Multi-Surface Primer & Sealer Usage
Guide to Choosing and Applying Multi-Surface Primers
When it comes to painting, using the right primer can make a world of difference. Primers essentially serve as a foundation for your paint job, adhering to substrate surfaces and promoting paint adhesion.
• Understanding Multi-Surface Primers
Multi-surface primers are versatile primers designed to work with various substrates, such as wood, metal, glass, and plastic. They help create a uniform surface for your topcoat to adhere to, providing a smooth and lasting finish.
Additionally, they can also help seal porous surfaces, prevent paint bleeding, and block stains.
– Types of Multi-Surface Primers
There are different types of multi-surface primers available in the market, each with its own unique set of attributes.
Latex-Based Primers
These water-based primers are ideal for use on porous surfaces such as untreated wood, drywall, or masonry. They dry quickly, have a low odor, and are easy to clean with soap and water. Latex-based primers are usually less expensive than oil-based and shellac-based primers.
Oil-Based Primers
Oil-based primers provide excellent adhesion and stain-blocking capabilities on various surfaces, including wood, metal, and masonry.
These primers create a durable and smooth surface for your topcoat to adhere to, making them particularly well-suited for high-traffic areas or surfaces that may be exposed to moisture. However, they have a strong odor, take longer to dry, and require solvents for cleanup.
Shellac-Based Primers
These fast-drying primers offer unparalleled stain-blocking capabilities on various surfaces, including wood, metal, and plastic. They can effectively block water, smoke, and nicotine stains.
Shellac-based primers are typically more expensive and have a strong odor, but they offer excellent adhesion and durability.
– Tinted Primers
While most primers are available in white or off-white color, you can also purchase tinted primers.
Tinted primers can be particularly useful when working with darker colors, as they help provide better color coverage and often require fewer coats of paint to achieve the desired finish.
• How to Choose the Right Multi-Surface Primer
When selecting a multi-surface primer, consider the following factors:
- The type of surface you’re working on: Different surfaces require different primers, so always choose a primer specified for the material you plan to paint.
- The condition of the surface: If you’re dealing with a severely stained or damaged surface, you might need a stain-blocking primer like shellac or oil-based primer to get the job done effectively.
- Environmental concerns: If you prioritize low-odor and simple cleanup, latex-based primers may be your best option. However, if you require a more durable finish, consider using an oil-based or shellac-based primer.
- Color coverage: If you’re painting a dark color, consider using a tinted primer to help achieve better color coverage and reduce the number of topcoats needed to get the desired result.
• Tips for Applying Multi-Surface Primer
Proper application of multi-surface primer can help you achieve a perfect paint job. Below are some tips to ensure a smooth primer application:
- Prepare the surface: Before applying any primer, clean and sand the surface to remove dirt, grease, and any loose or peeling paint. This will help ensure that the primer adheres well to the substrate.
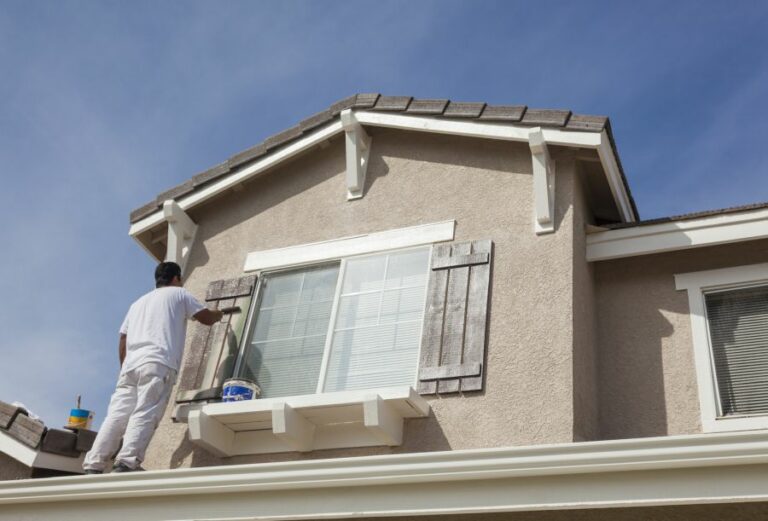
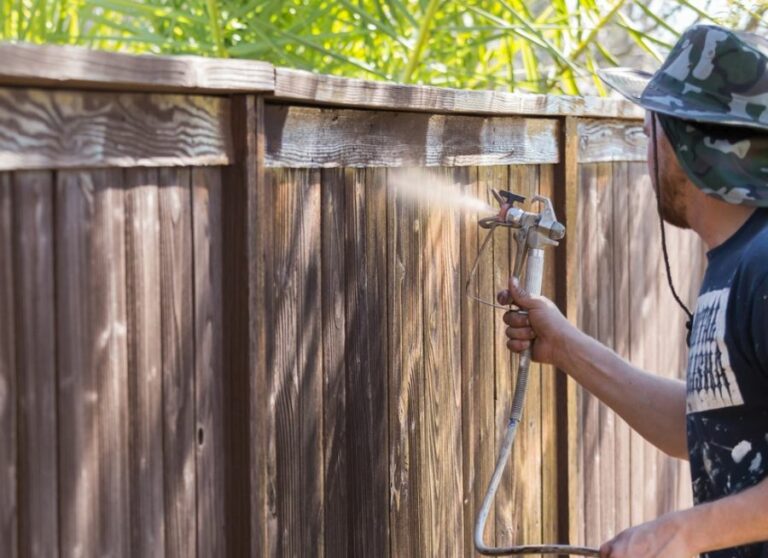
- Choose the right applicator: Depending on the type of primer and the surface you’re working on, use an appropriate applicator such as a brush, roller, or sprayer for optimal results.
- Apply primer in thin, even coats: Applying too much primer at once can lead to drips, runs or an uneven surface. Use thin, even strokes or passes to create a uniform finish.
- Allow sufficient drying time: Follow the manufacturer’s recommendations for drying time before applying your topcoat. This allows the primer to cure and provide a sturdy foundation for the paint.
- Sanding: If needed, lightly sand the primed surface using fine-grit sandpaper (220 or higher) to create a smooth surface for your topcoat. Wipe away any sanding dust before applying paint.
• Additional Resources
For more information on multi-surface primer selection and application, visit the US Environmental Protection Agency’s guide on painting for recommended practices and safety precautions.
In conclusion, selecting the right multi-surface primer and following proper application techniques can lead to a smoother, longer-lasting paint job.
By considering the factors such as surface type, condition, and environmental concerns, you can confidently choose the best primer for your painting project, resulting in a professional and lasting finish.
Understanding Multi-Surface Primers: Features & Benefits
A multi-surface primer is an essential component in any painting project, providing a solid foundation for the paint to adhere to and ensuring its durability. This versatile product is designed to work on a wide variety of surfaces, including wood, metal, plastic, and many others.
• The Importance of Priming
Before diving into the specifics of multi-surface primers, it’s vital to understand the importance of priming in general. Priming serves as an undercoat, creating a uniform, smooth surface for the paint to bond with.
- Enhanced adhesion: Primer helps paint stick to a surface better, reducing the likelihood of peeling and flaking.
- Improved durability: A properly primed surface can prolong the lifespan of the paint, ensuring it looks fresh and vibrant for years to come.
- Uniform appearance: Priming creates a consistent base that helps paint appear even and true in color.
- Reduced number of coats: With a primed surface, fewer coats of paint are often needed to achieve the desired result, which can save time and money.
• Understanding Multi Surface Primers
As the name suggests, multi-surface primers are formulated to work on a variety of different surfaces. These versatile products combine the functionality of several specialized primers into one convenient solution. Multi-surface primers often>various surfaces.
– Benefits of Multi-Surface Primers
Using a multi-surface primer can provide several advantages, especially for projects involving multiple material types. Some of these benefits include:
- Convenience: A single product can be used on numerous surfaces, streamlining the priming process and reducing the need for multiple different primers.
- Cost-effectiveness: Investing in a multi-surface primer can be more cost-efficient than purchasing several specialized products, particularly for smaller projects or DIY enthusiasts who may not need large quantities of multiple primers.>time.
– Selecting the Right Multi-Surface Primer for Your Project
When choosing a multi-surface primer, consider the following factors:
- Compatibility: Ensure the primer is suitable for the specific surfaces you plan to work with. Most products will provide information on their labeling or product description regarding which materials they are appropriate for.
- Drying time: Different primers have varying drying times, which can impact the project’s duration. Consider selecting a primer with a drying time that fits your project timeline.
- Coverage: Primer coverage can vary, so look for a product that offers adequate coverage for your project. Considering the primer’s spreading rate (how much area it can cover per gallon or liter) can be helpful in making your decision.
- 0Finish: Different primers may result in varying finishes, such as matte, satin, or glossy. Select a primer that aligns with your desired final appearance.
- VOCs: Volatile organic compounds (VOCs) are substances found in many paint and primer products that can release harmful emissions. Consider choosing a primer with a low VOC content for a more environmentally friendly option.
– How to Apply Multi-Surface Primer
Follow these guidelines when applying a multi-surface primer:
- Surface preparation: Thoroughly clean the surface to be painted, removing dirt, dust, and debris. Consider sanding any rough or damaged areas to create a smooth surface.
- Application tools: Choose appropriate brushes, rollers, or sprayers for your project.
- Primer application: Following the manufacturer’s instructions, apply the primer in thin, even coats.
- Drying and recoating: Allow the primer to dry according to the manufacturer’s suggested drying time before applying additional coats or paint.
• In Conclusion
A multi-surface primer can be an invaluable asset in any painting project, offering convenience and versatility while ensuring long-lasting, high-quality results.
By understanding the benefits of these products, selecting the right primer for your project, and following proper application techniques, you can save time, money, and frustration.
Behr Multi-Surface Primer & Sealer: Application Techniques
The Behr multi-surface primer and sealer is a versatile product that can be used on a variety of surfaces, from walls and ceilings to wood and masonry. It is important to know how to apply this primer and sealer correctly to ensure a long-lasting, professional finish.
• Preparing the Surface
Before applying the primer and sealer, it is crucial to prepare the surface properly. This includes cleaning, repairing, and protecting the substrate.
– Cleaning the Surface
To ensure proper adhesion of the primer and sealer, the surface must be clean and free of dirt, grease, and other contaminants. Depending on the surface material, use the appropriate cleaning method:
- For painted surfaces, lightly sand the surface using 150-grit sandpaper, then clean with warm soapy water.
- For wood surfaces, use a wood cleaner and a soft bristle brush to remove dirt and mildew stains.
- For masonry surfaces, like brick or concrete, remove dirt and stains with a pressure washer or scrub brush.
After cleaning, rinse the surface with clean water and allow it to dry completely. For more information on surface cleaning, visit the EPA guidelines for lead-safe paint preparations.
– Repairing the Surface
Inspect the surface for any imperfections, such as cracks, holes, or peeling paint.
- Use a putty knife to scrape away loose paint and fill any small cracks or holes with a patching compound.
- For larger cracks in masonry surfaces, use a masonry repair product, such as hydraulic cement.
- Allow any repairs to dry and cure as per the manufacturer’s instructions.
– Protecting the Surrounding Areas
Before applying the primer and sealer, protect adjacent surfaces, such as flooring or furniture, by using drop cloths, painter’s tape, and plastic sheeting.
• Applying Behr Multi-Surface Primer and Sealer
Once the surface is properly prepared, follow these steps to correctly apply the Behr multi-surface primer and sealer.
– Stirring the Product
Before applying the primer, thoroughly stir the product using a paint stick to ensure an even consistency.
– Loading the Brush or Roller
Dip a high-quality synthetic brush or roller into the primer, ensuring even coverage over the bristles or roller cover. Avoid overloading the brush or roller, as this may lead to drips and uneven application.
– Applying the Primer
Using smooth and even strokes, apply a thin, even coat of the primer to the surface, working in small sections. For best results, use a “W” or “M” pattern when rolling and always maintain a wet edge to avoid visible seams.
– Drying Time
Allow the primer to dry for at least a one-hour in a well-ventilated area, as recommended by Behr. In colder temperatures, prolonged humidity, or with less air circulation, the drying time may increase.
– Adding a Second Coat (If Necessary)
In some cases, a second coat may be necessary for optimal coverage, especially on porous or stained surfaces. If a second coat is required, allow the first coat to dry completely before reapplying.
• Expert Tips for Success with Behr Multi Surface Primer and Sealer
- Choose a high-quality brush or roller suitable for the surface material to ensure even application and coverage.
- Test the primer on a small, inconspicuous area first to ensure compatibility and adhesion to the substrate.
- Apply primer in a well-ventilated space and use respiratory protection, especially when working with masonry or wood surfaces that can generate dust.
- Monitor temperature and humidity levels during the application, as this may affect the drying time and overall finish.
- Always follow the manufacturer’s instructions and safety precautions when working with Behr multi-surface primer and sealer.
In conclusion, using Behr multi-surface primer and sealer can lead to professional results when applied with care and attention to surface preparation and application techniques.
By following the steps outlined in this article and incorporating expert tips, you can confidently achieve a long-lasting and durable finish on a variety of materials.
| How to Use Behr Multi Surface Primer and Sealer | |
|---|---|
| 1. Surface Preparation | Remove mildew stains, filth, peeling paint, dust, and patch cracks and holes. Use a proper cleaner to wash greasy or dirty surfaces. Allow new stucco or concrete to cure for at least 30 days before applying the primer. |
| 2. Application Tools | Use a high-quality brush, roller, or airless sprayer with a 0.015 – 0.021 inch spray tip to apply the primer. |
| 3. Mixing | Stir the primer thoroughly before and occasionally during the application. Do not thin. |
| 4. Apply the Primer | Apply a uniform and continuous coat of primer sealer, making sure to maintain a wet edge. Do not over-roll or over-brush. Apply at a spread rate of approximately 250-400 square feet per gallon, depending on surface texture and porosity. |
| 5. Drying Time | Allow 1 hour of drying time before painting lightly-colored topcoats or 4 hours for deeper colors. |
| 6. Cleanup | Use warm, soapy water to clean up any spills, drips, or unused primer. |
Drying Time for Multi-Surface Primers: What to Expect
A multi-surface primer is an essential product for both professionals and DIY enthusiasts who seek to paint various surfaces such as walls, ceilings, wood, metal, and plastics.
Ensuring that the primer is dry before applying paint is crucial for a successful and durable paint job. As such, understanding the drying time is of significant importance.
• Types of Multi-Surface Primers
There are mainly three types of multi-surface primers: oil-based, water-based, and shellac-based primers. Each has distinct drying times and characteristics.
– Oil-Based Primer
Oil-based primers give excellent adhesion and stain-blocking properties. However, they may take longer to dry compared to other primers. Generally, they require 24 to 48 hours of drying time before you can apply the topcoat.
– Water-Based Primer
Water-based (or acrylic) primers are popular choices thanks to their quicker drying times and lower VOC content. They usually dry within 1 to 2 hours but may require additional time to cure fully.
– Shellac-Based Primer
Shellac-based primers offer exceptional adhesion and are effective for sealing various stains. Their drying time is the fastest among the three, taking only 30 minutes to an hour before you can proceed with the topcoat application.
• Factors Affecting Drying Time
Several factors may affect multi-surface primer drying time, as outlined below.
– Temperature and Humidity
Higher temperatures and low humidity typically speed up the drying process. On the other hand, cooler temperatures and high humidity may extend drying time.
Aim for an environment with a temperature ranging from 60F to 80F and relative humidity between 40% to 70% for optimal drying conditions.
– Surface Porosity
The porosity of the surface is another significant factor. For instance, porous surfaces like untreated wood or concrete will absorb more primer, thereby lengthening the drying time. In these cases, you may need to apply multiple coats to achieve the desired result.
– Application Method
Your application method can also influence drying time. Rollers or brushes usually leave a thicker film of primer, which requires more time to dry than a thin layer applied using a sprayer.
– Primer Thickness
The thicker the layer of primer, the longer it takes to dry. Thus, it is essential to apply thin, even coats to accelerate drying time.
• How to Speed Up Drying Time
If you want to expedite the drying process, you can employ the following strategies:
- Increase Ventilation: Improve air circulation in the area by using fans, opening windows, or employing exhaust systems.
- Use a Dehumidifier: Using a dehumidifier can help maintain optimal humidity levels and speed up drying time.
- Apply Thin Coats: Thin coats will dry faster, so applying multiple thin layers is a better approach than a single thick coat.
- Follow Manufacturer’s Instructions: Primers may have specific recommendations for drying time, so it is essential to adhere to the guidelines provided by the manufacturer.
In conclusion, the drying time of multi-surface primers largely depends on their type, environmental conditions, and application factors.
As a rule of thumb, allow at least 24 hours for oil-based primers, 1 to 2 hours for water-based primers, and 30 minutes to an hour for shellac-based primers before applying the topcoat.
Keep the discussed factors in mind and follow the manufacturer’s recommendations to ensure a successful and long-lasting paint job.
Primer Type | Approximate Drying Time |
|---|---|
Multi-Surface Primer | 1-3 hours (touch dry), 3-6 hours (fully dry) |
Mastering Valspar Multi-Surface Primer & Sealer Usage
When it comes to painting surfaces, a high-quality primer is essential for ensuring long-lasting and professional results.
Valspar Multi-Surface Primer and Sealer offers a versatile and durable solution for a range of indoor and outdoor surfaces.
• Identifying Surface Types and Material Compatibility
Before you begin, it is essential to identify the surface material and its compatibility with Valspar Multi-Surface Primer and Sealer. The primer is suitable for surfaces such as:
- Wood
- Metal
- Masonry
- Drywall
- Plaster
- Galvanized metal
- PVC
- Aluminum
Consult the manufacturer’s website or product label for specific recommendations or limitations related to your surface type. (Valspar Product Information)
• Preparing the Surface for Primer Application
Proper surface preparation is crucial for achieving optimum results with Valspar Multi-Surface Primer and Sealer. Follow these steps to ensure that the surface is ready for priming:
- Cleaning: Remove any dirt, dust, and debris from the surface using a cloth, brush, or vacuum cleaner. For outdoor surfaces, pressure washing is an effective option to ensure thorough cleaning.
- Repair: Inspect the surface for any cracks, holes, or loose and peeling paint. Repair as needed, using appropriate fillers or patching materials for the type of surface. Allow the repairs to dry thoroughly.
- Sanding: Sand the surface with medium-grit sandpaper (120-150 grit) to remove any remaining loose or peeling paint and to create a smooth, even surface for primer application. Be sure to remove any sanding dust with a clean, damp cloth or tack cloth.
- Degreasing: For metal surfaces, use a suitable degreaser to remove any oils or grease that may interfere with primer adherence. Rinse the surface with water and let it dry completely before priming.
- Masking: Mask any areas that you do not wish to paint using painter’s tape and protective plastic or paper.
• Applying Valspar Multi-Surface Primer and Sealer
Once the surface has been appropriately prepared, you can proceed with applying the Valspar Multi-Surface Primer and Sealer. Follow these steps for seamless and efficient application:
- Stirring: Stir the primer thoroughly to ensure its components are evenly mixed. This is especially important if the primer has been sitting unused for a while.
- Application Tools: Select your application tool of choice. Common options include paintbrushes (for smaller surfaces or edges), paint rollers (for larger surfaces), or paint sprayers (for extensive or hard-to-reach areas).
- Primer Application: Apply a thin, even coat of Valspar Multi-Surface Primer and Sealer onto the surface using your chosen application tool. Maintain consistent pressure and overlap strokes to ensure even coverage. Avoid applying excess primer, as this can lead to sagging or poor drying.
- Drying Period – Allow the primer to dry for the recommended time as specified on the product label, generally 2-4 hours under normal conditions. Drying time may vary depending on factors such as humidity, temperature, and ventilation. It is vital not to rush the drying process, as doing so can compromise the primer’s performance.
- Additional Coats (if required): Depending on the surface color or condition, an additional coat of primer may be necessary to ensure adequate coverage and adhesion for the final paint. If required, wait for the first coat to dry and then apply a second coat following the same process as the initial application. Allow the second coat to dry completely before proceeding with painting.
• Painting Over Valspar Multi-Surface Primer and Sealer
Once the Valspar Multi-Surface Primer and Sealer has dried, you can proceed with applying your chosen paint:
- Choosing Paint: Select a compatible, high-quality paint for your surface type. Ensure that the paint is suitable for use over the Valspar Multi-Surface Primer and Sealer.
- Stirring: Stir the paint thoroughly before applying, ensuring an even distribution of components and consistent color.
- Application: Using the same tools and techniques employed during the primer application, apply a thin, even coat of paint over the primed surface. Allow the paint to dry for the specified time on the product label.
- Additional Coats: Additional coats of paint may be required to achieve the desired opacity and finish. Allow each coat to dry thoroughly before applying the next, as instructed on the paint product label.
- Cleanup and Storage: Once you have achieved the desired finish, remove any masking tapes or protective materials, and clean your application tools thoroughly. Store leftover primer and paint following the manufacturer’s instructions to ensure maximum shelf life and performance for future projects.
In conclusion, proper use of Valspar Multi-Surface Primer and Sealer is key to achieving professional, long-lasting results on a variety of surfaces.
With accurate surface identification, thorough preparation, and correct application techniques, this versatile primer and sealer are guaranteed to provide excellent adhesion, coverage, and paint performance in various interior and exterior projects.
| How to use Valspar multi-surface primer and sealer | |
|---|---|
| Step 1: | Prepare the surface by cleaning it thoroughly and removing any dirt, debris, or loose paint. |
| Step 2: | Choose the type of Valspar multi-surface primer and sealer suitable for your surface, such as latex or oil-based. |
| Step 3: | Stir the primer and sealer thoroughly using a paint stick before applying. |
| Step 4: | Using a brush, roller, or paint sprayer, apply the primer and sealer evenly across the surface in thin coats. |
| Step 5: | Allow the primer and sealer to dry according to the manufacturer’s recommended time, typically 2 to 4 hours. |
| Step 6: | If necessary, apply a second coat of primer and sealer, allowing it to dry according to the manufacturer’s guidelines. |
| Step 7: | Once the primer and sealer have dried completely, you can apply your desired top coat of Valspar paint to the surface. |