Scraping Away Rust And Loose Paint, 25 Things You Should Know
Tackling rust and loose paint is vital in your restoration project or even just maintaining your valued possessions. It may seem daunting, but worry not; we’ve got you covered with the best approach to do the job effectively. With our tips and tricks, you’ll soon be on your way to scraping away rust and loose paint, revealing the original beauty beneath those stubborn layers.
Scraping away rust and loose paint:
To effectively scrape away rust and loose paint, use a paint scraper for peeling paint and a wire brush for rusted surfaces. After removal, sand the surface with appropriate-grit sandpaper to achieve a smooth finish. Ensure thorough cleaning and proper ventilation during the process. Follow the manufacturer’s instructions if applying a rust converter or primer.

Are you tired of rusty surfaces and peeling paint? Fear not! We have an arsenal of tips and techniques to help you scrape away rust and loose paint like a pro.
But that’s just the beginning; dive deeper to explore the best tools, safety measures, and how to protect your surfaces from future damage. Keep reading to restore and preserve your beloved items!
Contents
- 1 Eliminating Rust and Peeling Paint Effectively
- 2 Is Sanding and Repainting Rusty Surfaces Possible?
- 2.1 • Assessing the Extent of Rust
- 2.2 • Gathering the Necessary Tools and Materials
- 2.3 • Preparing the Area
- 2.4 • Sanding the Rust
- 2.5 • Treating the Surface with Rust Converter or Rust Remover
- 2.6 • Applying Primer
- 2.7 • Painting the Surface
- 2.8 • Adding a Clear Coat for Extra Protection (Optional)
- 2.9 • Final Thoughts
- 3 Prioritizing Paint or Rust Removal: What’s Best?
- 4 Achieving Rust Removal Without Affecting Paint
- 5 Rust Scraping: Is It Sufficient for Surface Restoration?
Eliminating Rust and Peeling Paint Effectively
Whether you are a DIY enthusiast or a professional painter, dealing with rust and loose paint can be quite a challenge.
Over time, metal surfaces become prone to rust, and paint may chip or peel, giving an unsightly appearance to your home or workplace.
• Importance of Proper Rust and Paint Removal
Before we dive into the removal process, it is essential to understand the significance of proper rust and paint removal.
Failure to thoroughly remove rust and loose paint can lead to structural damage, as rust may continue to corrode the metal beneath the new paint layer.
Furthermore, applying paint over rust or peeling paint can result in an uneven and unattractive finish, wasting time and resources.
• Tools of the Trade: What You Will Need
To effectively remove rust and loose paint, you need the right tools for the job. These may vary depending on the project’s size and the surface you are working on. Some common tools required for rust and paint removal include:
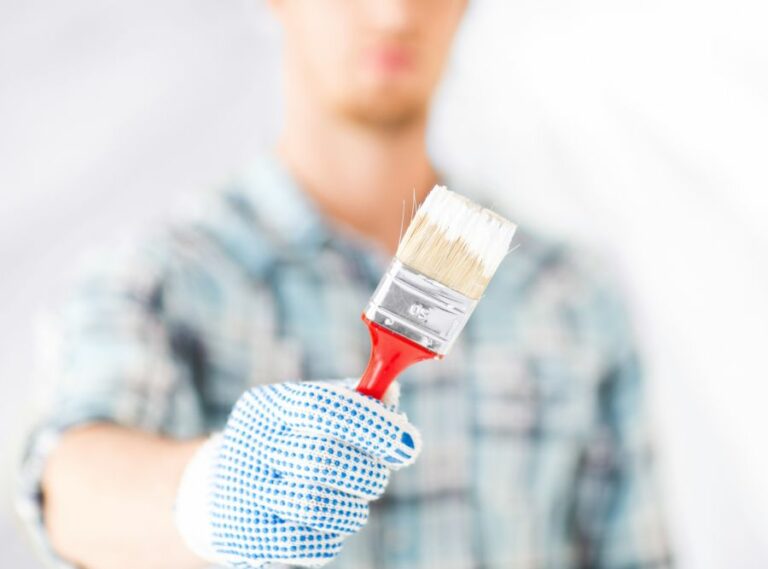
- Paint scraper: A paint scraper is a handheld tool with a sharp blade that is used to remove paint from surfaces. It is a basic but essential tool in paint removal.
- Wire brush: A wire brush is useful for cleaning rust off metal surfaces and removing loose paint. You can use a handheld wire brush or an attachment for a power drill.
- Sandpaper: Sandpaper is needed to smooth the surface after rust and paint removal. Choose sandpaper with the appropriate grit level, depending on the metal and rust conditions.
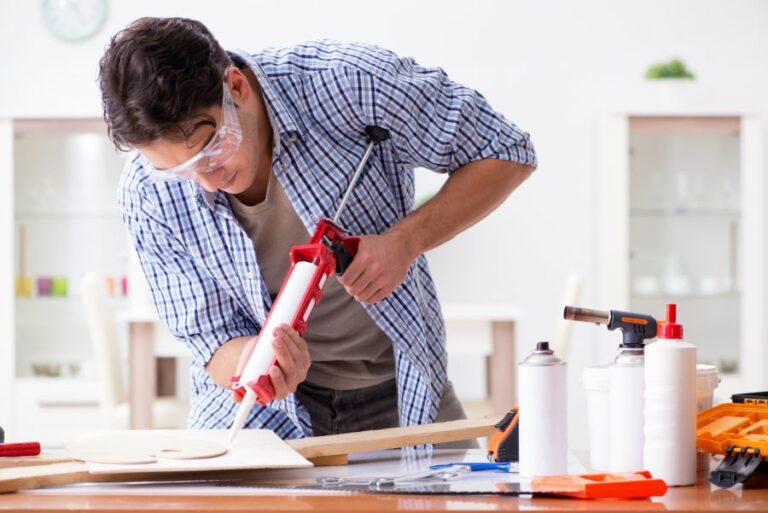
- Protective gear and primer (optional): In some cases, a rust converter and primer may be applied to the surface after removing rust to inhibit rust formation and ensure better paint adhesion.
• Step-by-Step Guide to Scraping Away Rust and Loose Paint
Now that you have your tools ready, follow these steps to achieve a clean and smooth surface:
– Step 1: Inspect and Clean the Surface
Begin by inspecting the surface for areas with rust and loose paint. Use a cloth or brush to clean the surface, removing any dirt, grease, or debris that may interfere with the removal process.
– Step 2: Scrape Off Loose Paint
Using a paint scraper, gently scrape off any loose or peeling paint. Make sure to hold the scraper at an angle to avoid gouging the surface.
– Step 3: Remove Rust with a Wire Brush
For rusted surfaces, use a wire brush to remove as much rust as possible. If you are working on a large surface, consider using a wire brush attachment with a power drill to speed up the process.
– Step 4: Sand the Surface
After scraping away rust and loose paint, use sandpaper to smooth the surface further. Start with a coarse-grit sandpaper to remove any remaining rust and then gradually move to finer-grit sandpaper to achieve a smooth finish.
– Step 5: Clean and Prepare for Painting
Before applying paint or any other treatment to the surface, ensure that it is free from dust and debris. Use a cloth or brush to clean the area thoroughly.
If you choose to apply a rust converter and primer, follow the manufacturer’s instructions for best results.
• Tips for Effective Rust and Paint Removal
- Work in a well-ventilated area when scraping away rust and loose paint to minimize dust exposure.
- Always follow the manufacturer’s instructions when using rust converters, primers, or other chemical products.
- Do not rush the process; take your time to ensure thorough rust and paint removal for a lasting, quality finish.
Is Sanding and Repainting Rusty Surfaces Possible?
Rust is a common problem that affects various metal surfaces, resulting in unsightly stains and potential damage. It is crucial to address this issue, as neglecting it can lead to further corrosion and, ultimately, a decrease in the item’s value or functionality.
One of the many ways to effectively treat rust involves sanding down the affected area and repainting.
• Assessing the Extent of Rust
Before starting the restoration process, it is crucial to assess the extent of the rust to determine the best course of action. Light surface rust can be easily tackled with sanding and repainting.
However, deep and extensive rust damage may require professional help or even the replacement of the affected part.
• Gathering the Necessary Tools and Materials
To effectively sand down rust and repaint, you’ll need the following tools and materials:
- Safety gear (gloves, goggles, mask)
- Sandpaper (ranging from coarse to fine grit)
- Wire brush
- Rust converter or rust remover
- Primer (preferably rust-inhibiting)
- Paint (choose a color that matches the original)
- Paintbrush or spray paint
- Clear coat (optional)
• Preparing the Area
Before starting the sanding process, ensure the area is clean and dry. Wipe down the surface with a damp cloth to remove any dirt, grease, or dust. Let the area dry completely before proceeding.
• Sanding the Rust
Start by using coarse-grit sandpaper (60-80 grit) to remove the rust. In my experience, sanding in circular motions yields the best results. Make sure to apply even pressure, and avoid pressing too hard, as it might damage the surface.
Once the rust is completely removed, switch to a finer grit sandpaper (150-180 grit) to smooth out the surface. This step ensures a seamless transition between the unaffected and the treated areas, allowing for a more professional-looking result.
Make sure to wipe down the surface with a damp cloth after each sanding step to remove any debris or rust particles.
• Treating the Surface with Rust Converter or Rust Remover
After removing the rust with sandpaper, applying a rust converter or rust remover will ensure any remaining traces of rust are neutralized.
Rust converters chemically transform rust into a stable and paintable surface, while rust removers dissolve the rust for easy removal. Follow the manufacturer’s instructions to apply the chosen product.
• Applying Primer
Once the surface is free of rust, it’s essential to apply a primer to improve the paint’s adhesion and durability.
I recommend using a rust-inhibiting primer, as it will add an extra layer of protection against future corrosion. Apply the primer with a brush or spray paint, following the manufacturer’s instructions regarding dry times.
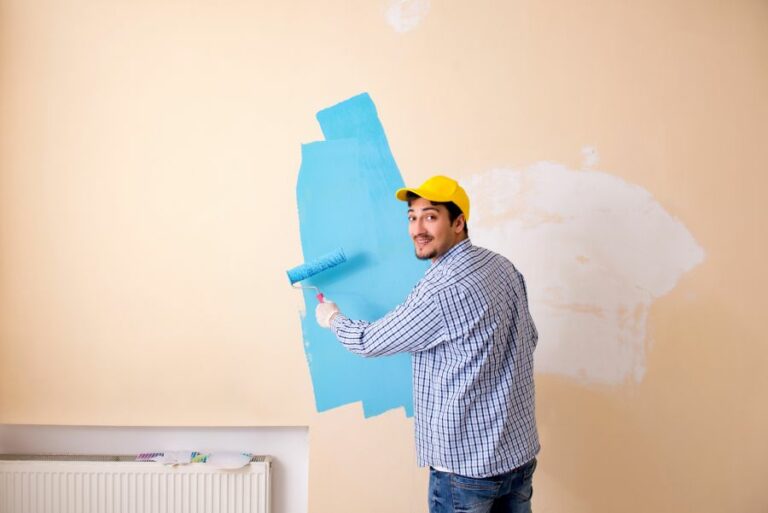
• Painting the Surface
When the primer is dry, it’s time to paint the surface. Use a color that matches the original, and apply the paint with a brush or spray paint, ensuring even coverage. Several light coats will provide better results than one heavy coat.
Make sure to allow each coat to dry according to the manufacturer’s instructions before applying the next one.
• Adding a Clear Coat for Extra Protection (Optional)
Applying a clear coat can provide additional protection against environmental factors and enhance the overall appearance. If you choose to add a clear coat, follow the manufacturer’s instructions for application and drying times.
• Final Thoughts
Sanding down rust and repainting can be an effective solution for dealing with light to moderate rust issues. The key to long-lasting results lies in thorough rust removal, proper surface treatment, and using high-quality products.
Taking the time to perform these steps carefully will ensure not only a visually appealing result but improved durability and protection against future rust formation.
| Can you sand down the rust and repaint it? | |
|---|---|
| Sanding down rust | Yes, you can sand down rust using sandpaper or a wire brush to remove the rust and smoothen the surface. |
| Repainting | After sanding down the rust and cleaning the surface, you can apply a primer and then repaint the surface. |
Prioritizing Paint or Rust Removal: What’s Best?
• Understanding the Problem
Before diving into the question of whether to remove paint or rust first, it’s essential to understand what causes these issues.
Metal surfaces, especially iron, and steel, are prone to rusting when exposed to moisture and air. The process of rusting (oxidation) weakens the metal, making it susceptible to further damage.
On the other hand, paint acts as a protective layer over the metal, preventing it from rusting. However, over time, paint can become damaged, chipped, or cracked, exposing the metal surface and leading to rust.
• Advantages of Removing Paint First
Removing paint before tackling rust has several advantages. Here are some reasons why it’s beneficial to remove paint first:
– Easily Identifying Rust
Peeling off the paint allows you to easily inspect the metal surface, identify rust spots, and determine the severity of the problem. You may also uncover additional rusted areas hidden beneath layers of paint.
– Ensuring Thorough Cleaning
Removing paint first ensures that you can thoroughly clean all rusted areas without any leftover paint getting in the way. This is vital to prevent new rust from forming after you’ve finished your restoration project.
– Better Adhesion of New Paint and Primer
Stripping old paint off the surface will result in a smoother surface that will better adhere to new paint and primer. This ensures a longer-lasting and more durable finish for your repainted metal surface.
• Advantages of Removing Rust First
There are also some benefits to removing rust before painting. Some of these include:
– Prevention of Further Rusting
Rust can spread rapidly, especially if the metal remains exposed to moisture. By addressing rust first, you can prevent it from spreading further and causing more extensive damage to the metal surface.
– Improved Paint Bonding Performance
Removing rust will provide a smoother, more uniform surface for the new paint to bond to. This will ultimately result in a longer-lasting paint job, as there will be fewer opportunities for moisture to penetrate the surface and cause future rusting.
• Recommendations from Personal Experience
Based on my experience in dealing with rust and paint on metal surfaces, I recommend removing paint first, followed by rust removal.
This approach allows you to better assess the extent of rust, ensures a thorough cleaning, and prepares the metal surface for better paint adhesion. Here is a suggested process to follow:
– Step 1: Remove Paint
Use a paint stripper or a paint-removing tool such as a scraper or wire brush to remove the old paint from the metal surface. Follow the instructions and safety guidelines provided by the paint stripper manufacturer, and wear appropriate protective gear like gloves and goggles.
– Step 2: Clean the Surface
Once the paint is removed, use a cloth or brush to clean the surface and remove any paint residue or debris present.
– Step 3: Remove Rust
Choose an appropriate method for removing rust according to the type and extent of the oxidation. Some options are:
- Sandpaper: Use coarse sandpaper to rub away rust spots (recommend starting with 80-grit and gradually moving to finer grades).
- Wire brush: Use a wire brush to scrub away rust, taking care not to damage the underlying metal.
- Rust converter: Apply a rust converter to the rusted areas, following the manufacturer’s instructions. Rust converters chemically transform rust into a more stable compound that can be painted over.
- Electrolysis: For heavily rusted items, consider using electrolysis, a process that uses an electric current to dissolve rust from metal surfaces.
– Step 4: Apply Primer and Paint
Once the rust has been removed, it’s crucial to apply a primer to the clean metal surface to ensure proper adhesion of the new paint. Select a primer specifically designed for metal surfaces and follow the manufacturer’s instructions for application.
Allow the primer to dry as indicated before applying the paint. Choose a high-quality paint suitable for metal surfaces, and apply it in thin, even coats, allowing each coat to dry before applying the next.
• Conclusion
In conclusion, removing paint first is our recommended approach when dealing with both rust and paint on metal surfaces.
It allows for easier rust identification, more thorough cleaning, and better adhesion of new paint and primer, ensuring a durable and long-lasting finish for your metal restoration project.
Achieving Rust Removal Without Affecting Paint
When it comes to dealing with rust on painted surfaces, many people often wonder if they can remove the rust without having to strip the paint. The answer to this question can be both yes and no, depending on the severity of the rust and the methods used.
• The Different Types of Rust
Before discussing the ways to remove rust without removing paint, it’s important to understand the different types of rust. Rust can generally be categorized into three types:
- Surface Rust: This type of rust is relatively mild and only affects the surface of the metal. It can be removed without causing damage to the paint, provided that you use the right tools and techniques.
- Scale Rust: This type of rust is more severe and has permeated deeper into the metal. While it may be possible to remove some of the rust without removing the paint, complete removal may require the paint to be stripped.
- Penetrating Rust: This type of rust has eaten through the metal and caused structural damage. In these cases, removing the rust will require paint removal as well as more extensive repair work.
• Rust Removal Techniques That Preserve Paint
If you’re dealing with surface rust or light-scale rust, there are several methods you can use to remove the rust without damaging the paint on your vehicle, furniture, or other painted surfaces. Here are some of the most effective methods:
– Using a Rust Converter
A rust converter is a chemical solution that reacts with rust to create a stable compound that can be painted over. This method can be effective for dealing with surface rust without damaging the paint. To use a rust converter:
- Clean the surface to remove any dirt, grease, or loose paint.
- Apply the rust converter according to the manufacturer’s instructions.
- Allow the converter to dry, then lightly sand the area to smooth any rough spots.
Once you’ve completed these steps, you can apply touch-up paint to match the surrounding area if necessary.
– Using a Rust Eraser
Another option for removing rust without damaging paint is employing a rust eraser. These erasers are made from an abrasive material that can help to remove surface rust without causing damage to the paint.
To use a rust eraser:
- Clean the surface to remove any dirt, grease, or loose paint.
- Rub the rust eraser along the rusted area until the rust is removed.
- Wipe the area clean and apply touch-up paint if necessary.
– Using A Detailing Clay
Detailing clay is commonly used to remove contaminants from a vehicle’s paint surface, but it can also be effective at removing surface rust while preserving the paint. To use detailing clay:
- Clean the surface to remove any dirt, grease, or loose paint.
- Apply a lubricant designed for use with detailing clay.
- Lightly glide the clay bar over the rusted area until the rust is removed.
- Buff the area with a clean microfiber cloth and apply touch-up paint if necessary.
• When Paint Removal is Necessary
While the mentioned methods are effective at removing rust without damaging paint, if you encounter structural damage from penetrating rust, you’ll need to remove the paint in order to perform more extensive repairs.
In such cases, the proper steps should be taken to remove the paint and repair the rusted metal by either grinding, sanding, or replacing the damaged areas. Once the repairs are complete, the surface can be prepped and repainted to restore its appearance.
• Conclusion
In conclusion, it is indeed possible to remove rust from painted surfaces without stripping the paint, so long as you use techniques appropriate for the rust’s severity.
Surface rust can often be dealt with using chemical solutions or various abrasive techniques, while more severe cases may necessitate paint removal and repair of the underlying metal.
By understanding the type of rust you’re dealing with and selecting the appropriate method, you can successfully rid your painted surfaces of rust without causing damage to the finish.
Method | Description | Effect on Paint |
|---|---|---|
Vinegar | Soak the rusted area in vinegar for an hour, then scrub away the rust. | May affect the paint if the surface is soaked for too long. |
Baking soda and water | Create a paste with baking soda and water, apply it to the rusted area, let it sit for an hour, then scrub away the rust. | Should not harm the paint unless excessively scrubbed. |
Lemon juice and salt | Mix lemon juice and salt to create a paste, apply it to the rusted area, let it sit for a few hours, then scrub away the rust. | May potentially discolor the paint due to the acidic content of lemon juice. |
Commercial rust remover | Follow the manufacturer’s instructions on applying the rust remover to the rusted area. | Depends on the product, some may be safe for paint while others may cause damage. Always read the label and test on a small area first. |
Rust Scraping: Is It Sufficient for Surface Restoration?
Rust is a common issue that affects various metal surfaces and objects over time, especially when they are exposed to moisture and air. Many people wonder if scraping off rust is a viable solution to this problem.
• Understanding Rust Formation
Before discussing rust removal, it is important to understand how rust forms. Rust is the result of a chemical reaction between iron, oxygen, and moisture, leading to the creation of iron oxide.
This reaction, known as oxidation, is what causes the characteristic reddish-brown appearance and flaking texture of rust.
• Is Scraping Rust Off Effective?
In general, scraping rust off can provide a temporary solution to the problem. It can help remove the visible layers of rust and improve the appearance of the metal surface.
However, it is important to note that scraping the rust off does not eliminate the underlying causes of rust formation, such as moisture or air exposure, nor does it remove the rust that has soaked into the pores of the metal.
Consequently, rust may reappear over time, potentially causing damage to the structure and integrity of the metal surface. As a result, it is crucial to consider additional measures beyond scraping to protect the metal from further rust formation and damage.
• Best Practices for Scraping Rust Off
If you decide to scrape the rust off, it is vital to follow some best practices to minimize the risk of damaging the metal surface and prevent further rust development. Below are some recommended steps to take when scraping rust off.
1. Choose the Right Tools
Using the appropriate tools for rust scraping is crucial. It’s essential to strike a balance between a tool that is effective in removing rust without causing damage to the underlying metal. Some of the commonly recommended tools for rust scraping include:
- Wire brush
- Plastic scraper
- Steel wool
- Sandpaper
- Power tools with brush or abrasive attachments (for larger surfaces or stubborn rust)
2. Use the Proper Technique
When scraping rust off, use gentle, even pressure to avoid gouging or scratching the metal surface. Start with the least abrasive tool and progress to more aggressive methods if necessary.
Always work in the direction of the grain or along the lines of the metal object to reduce the risk of additional damage.
3. Clean the Surface
After removing the visible rust, it is important to clean the metal surface to remove any remaining rust particles or debris.
This can be done using a clean, damp cloth or sponge. Ensure that the surface is completely dry before proceeding to the next step, as lingering moisture can contribute to further rust formation.
4. Apply a Rust-Inhibiting Solution
Applying a rust-inhibiting solution or primer can help protect the metal surface from the recurrence of rust. These products create a barrier between the metal and the environmental factors that contribute to rust formation, making it more difficult for rust to form.
Some options for rust-inhibiting solutions include:
- Rust converter
- Rust-inhibiting primer
- Rust-proof paint
Always follow the manufacturer’s instructions for the rust-inhibiting product for the best results.
5. Protective Measures
Finally, it is essential to take measures to protect the metal from further exposure to moisture and air whenever possible. These measures can include:
- Keeping the object in a dry, well-ventilated area
- Using a dehumidifier in humid environments
- Applying a protective coating or sealant to create a moisture-resistant barrier
By following these steps when scraping rust off, you can minimize damage to the metal surface and reduce the likelihood of rust reappearing.
However, remember that scraping rust off is not a permanent solution, and proper maintenance and prevention are critical to ensuring the long-term health of your metal belongings.
Can you just scrape off rust?
Step | Description |
|---|---|
1 | Wear protective gloves and eyewear to ensure your safety while handling rust. |
2 | Choose an appropriate tool for scraping, such as a wire brush, steel wool, or a scraper. |
3 | Apply pressure and scrape the rust off the surface in a back-and-forth motion. Be cautious not to damage the underlying material. |
4 | Use fine-grit sandpaper or emery cloth to remove any remaining rust and smooth the surface. |
5 | Clean the surface with a damp cloth to remove any rust particles and let it dry. |
6 | Apply a rust converter or rust-inhibiting primer to prevent further rust formation, if necessary. |
7 | Finish by applying a coat of paint or other protective coating, depending on the material and desired appearance. |