Secrets To Scrape For Smooth Paint, 25 Things You Should Know
If you’ve ever wondered how to achieve that perfectly smooth paint finish on your walls, you’re in the right place. We have uncovered the secrets to scraping and preparing surfaces that will have your paint application looking like a professional did it. With these foolproof tips, you’ll be on your way to transforming your space into a stunning masterpiece in no time.
Secrets to scrape for smooth paint:
Proper surface preparation is crucial to achieving a smooth paint job, including meticulous scraping, sanding, cleaning, and priming. Use the appropriate scraper tool, maintain a sharp edge, and employ proper scraping techniques, such as holding the scraper at a low angle and applying consistent pressure. Additionally, invest in quality paint and primer for the best results.

Ready to transform your painting experience and achieve flawless, smooth finishes? Read on as we reveal time-tested secrets that professional painters use guaranteed to take your DIY projects to a whole new level. Don’t miss out on these game-changing tips!
Contents
- 1 Techniques for Achieving Flawless Paint Scraping
- 2 Ultimate Guide to an Ultra-Smooth Paint Finish
- 3 Smoothing Out Gritty Paint: Top Tips and Tricks
- 4 Mastering a Smooth and Glossy Paint Finish
- 5 Prepping Your Surface for a Seamless Painting Experience
Techniques for Achieving Flawless Paint Scraping
A smooth, professionally finished paint job begins with proper surface preparation. One key aspect of this preparation is scraping away any loose or peeling paint.
• Importance of Scrupulous Scraping
Before diving into the secrets of scraping, it’s important to understand why this step is crucial. Properly scraping a surface removes any loose, cracked, or peeling paint, allowing the new layer of paint to adhere evenly and last longer.
Failure to remove old paint can lead to an uneven surface and peeling of the new coat.
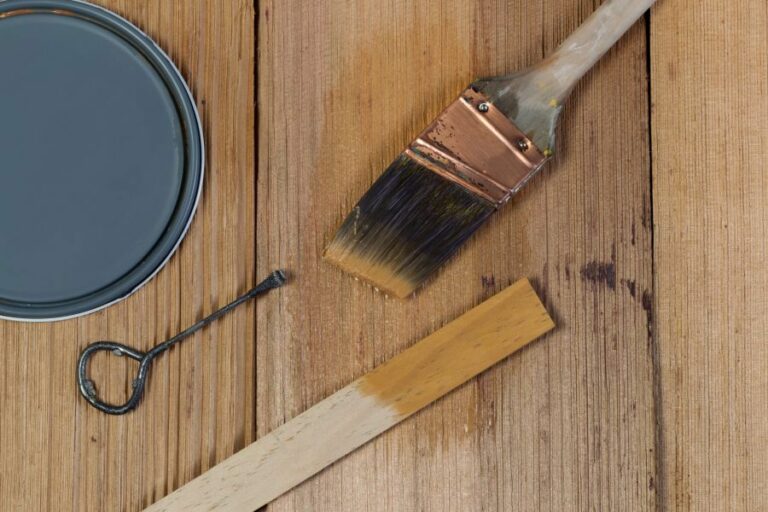
• Choosing the Right Scraper
Picking the right scraper for the job is essential to achieving a smooth paint finish. Here are three common types of scrapers and their uses:
1. Putty Knife
A putty knife is a versatile tool, great for small projects and tight spaces. It works well for removing loose paint, particularly on flat surfaces.
2. Paint Scraper
Paint scrapers come in various sizes and blade shapes, making them suitable for larger projects or areas with curvatures. They are designed specifically for removing paint and offer more leverage when scraping.
3. Wire Brush
A wire brush is ideal for cleaning and smoothing rough surfaces, such as brick or metal, before priming and painting. Although not technically a scraper, it serves the same purpose of removing loose paint and debris.
• Sharpening Your Scraper
A sharp edge on your scraper will make the task significantly easier and more efficient. Regularly maintain your scraper’s blade by using a file or sharpening tool to ensure a clean, smooth surface.
• Proper Scraping Technique
Using the correct technique is crucial when scraping surfaces. Here are some tips to ensure your success:
1. Hold the Scraper at a Low Angle
Keeping the scraper at a low angle reduces the risk of gouging the surface. This position provides better leverage and control, as well as a smoother finish.
2. Apply Firm, Even Pressure
Avoid digging into the surface by applying consistent pressure as you move the scraper across the surface. Steady pressure will help prevent damage to the surface and ensure a smooth result.
3. Scrape in the Direction of the Wood Grain
When working on wood surfaces, always scrape in the direction of the wood grain. This reduces the likelihood of damaging the wood and produces a smoother finish.
4. Work in Small Sections
Breaking the job into smaller sections makes it more manageable and ensures that you do not miss any areas. This approach will also help you maintain focus and avoid becoming overwhelmed.
• Additional Tips for a Smooth Paint Job
Scraping is just one aspect of surface preparation. Keep these additional tips in mind when preparing for a paint job:
1. Sand the Surface
After scraping, sand the surface to remove any remaining rough spots and create a smooth, even surface for painting. Using a power sander or sandpaper, start with lower-grit sandpaper and progress to higher grits for the best results.
2. Clean the Surface
A clean surface is essential for proper paint adhesion. Remove all dust, dirt, and debris from the surface by washing it with soap and water, then rinsing and allowing it to dry before painting.
3. Prime the Surface
Applying a primer before painting ensures a more even finish and better adhesion of the paint. Be sure to select a primer that is compatible with the type of paint you will be using.
4. Use Quality Paint
Investing in quality paint is worth the additional cost, as it typically requires fewer coats and lasts longer. Look for paint with high-quality pigments and binders that provide better coverage and durability.
• In Conclusion
Proper surface preparation, including thorough scraping and attention to detail, is the key to a smooth, professional paint job. By following the techniques and tips above, your paint job will be more likely to withstand the test of time, providing a beautiful and durable finish for your home or project.
Ultimate Guide to an Ultra-Smooth Paint Finish
A super smooth paint finish can significantly enhance the overall appearance and quality of a painted surface.
• Choosing the Right Paint and Tools
The first crucial step in achieving a smooth paint finish is selecting the appropriate paint and tools for your project. Here are some recommendations:
– High-Quality Paint
Invest in premium quality paint products, as they generally contain a higher percentage of solids, which results in a better finish. Trusted brands such as Benjamin Moore, Sherwin-Williams, and PPG are good options.
– Primer
Using a primer before applying your topcoat will help create a smoother finish. Choose a compatible primer for your paint type, or opt for a paint-and-primer-in-one product.
– Paintbrushes and Rollers
Select high-quality brushes and rollers to ensure a uniform application of paint. Synthetic bristle brushes work well with water-based paints, while natural bristle brushes are recommended for oil-based paints. For rollers, a woven cover with a 1/4 to 3/8-inch nap is suitable for most interior surfaces.
• Preparing the Surface for Painting
Proper surface preparation is essential for achieving a smooth paint finish. Follow these steps for the best results:
– Cleaning
Remove dirt, dust, and grease from the surface with a mild detergent solution, and rinse thoroughly. Allow the surface to dry completely before proceeding.
– Repairing Imperfections
Fill any holes, cracks, or dents in the surface with the appropriate patching material, such as spackling paste or wood filler. Allow the filler to dry before sanding it smooth.
– Sanding
Lightly sand the surface using fine-grit sandpaper (180 to 220-grit) to promote paint adhesion and smooth out any remaining imperfections. Wipe clean with a tack cloth to remove sanding dust.
– Masking
Protect any adjacent surfaces, such as trim or fixtures, with painter’s tape to ensure a neat and clean paint job.
• Proper Painting Techniques
Using the correct painting techniques will help you achieve a super smooth paint finish. Here are some expert recommendations:
– Cutting In
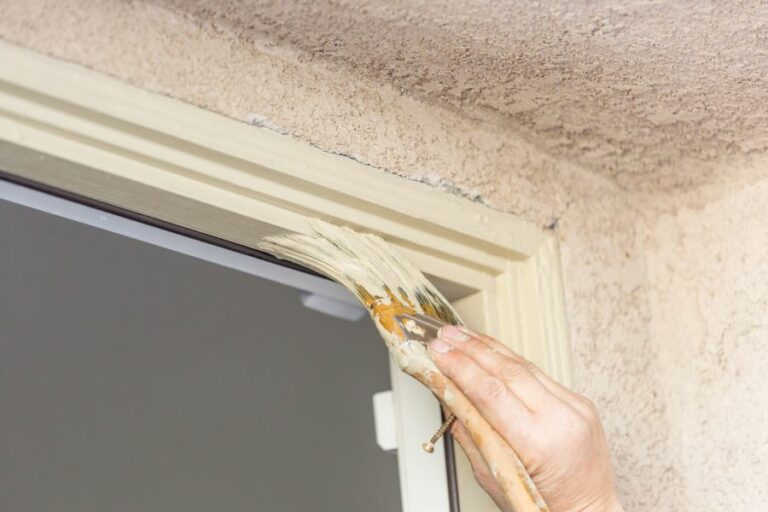
Start by “cutting in” the edges of the surface with a brush. Hold the brush at a 45-degree angle and apply a narrow strip of paint along the edge, maintaining a wet edge as you go. This process reduces the possibility of roller marks and visible brush strokes.
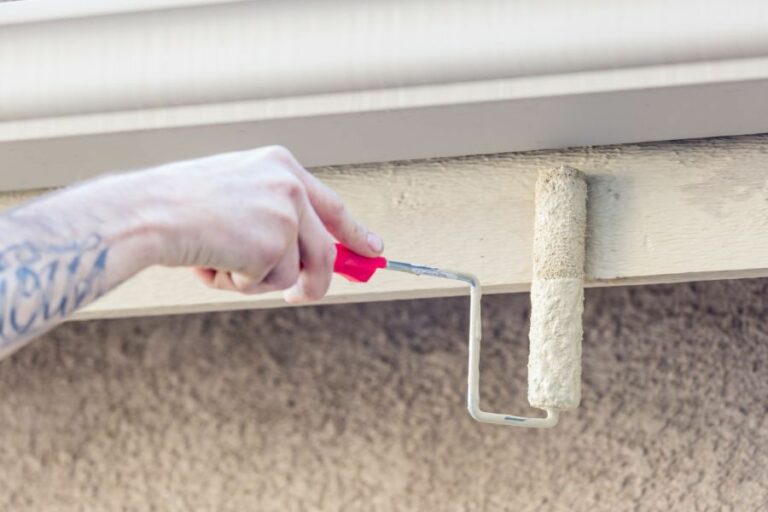
– Rolling
When using a roller, saturate it evenly with paint by rolling it back and forth in the paint tray. Apply the paint to the surface using a “W” or “M” pattern while maintaining a wet edge. This technique ensures even coverage and minimizes the risk of roller marks.
– Rolling Pressure
Avoid applying too much pressure to the roller when painting, as this can cause lines and an uneven finish. Apply just enough pressure to ensure a consistent application without forcing the paint out of the roller.
– Layering and Drying
Apply a minimum of two coats of paint for a durable and smooth finish, allowing each coat to dry according to the manufacturer’s recommendations.
– Sanding Between Coats
For an ultra-smooth finish, lightly sand the surface with fine-grit sandpaper (220-grit or higher) between coats. This step removes any dust or debris, as well as any small imperfections left from the previous coat. Wipe the surface with a tack cloth before applying the next coat of paint.
• Final Touches and Maintenance
Following these final tips will help preserve your super smooth paint finish for years to come:
– Removing Painter’s Tape
To avoid damaging the paint, remove the painter’s tape at a 45-degree angle shortly after the final coat has dried. If the paint has already fully cured, use a utility knife to score the edge of the tape for clean removal.
– Cleaning and Maintenance
Keep the painted surface clean and free of dust by wiping it down regularly with a damp cloth. Avoid using harsh or abrasive cleaners, as they can scratch the paint and damage the finish.
By following these expert tips and recommendations, you can achieve a super smooth paint finish that will greatly enhance the appearance and quality of your painted surfaces.
Smoothing Out Gritty Paint: Top Tips and Tricks
Gritty paint is a common issue faced by painters, whether you’re a DIY enthusiast working on a personal project or a seasoned professional in the industry. It’s crucial to know the right ways to tackle this problem and achieve a smooth and flawless finish.
• Identifying the Causes of Gritty Paint
Gritty paint can be a result of various factors, such as improper preparation, environmental conditions or low-quality materials. Let’s delve into these major causes:
1. Poor Surface Preparation
Poor surface preparation is the most common cause of gritty paint. Inadequate cleaning, sanding or priming can lead to inconsistencies in the paint’s texture and ultimately result in a flawed paint job.
2. Environmental Factors
Dust, dirt, or other contaminants in the environment can settle onto the paint during application or drying, leading to a gritty surface.
3. Low-Quality or Expired Paint
Using low-quality paint or expired products may also result in a rough and gritty texture. It’s essential to invest in high-quality paint and ensure it’s stored properly to prolong shelf life.
• Expert Techniques to Smooth Gritty Paint
Now that we understand the common causes of gritty paint, let’s discuss expert-recommended techniques to rectify and prevent this issue.
– Technique 1: Sanding the Gritty Surface
When dealing with a gritty paint surface, the first step is to sand the surface carefully. Use either a fine-grit sandpaper (around 220 grit) or a medium-grit sanding sponge. Ensure the surface is dry before starting the sanding process.
After sanding, wipe down the surface using a microfiber or tack cloth to remove any residual dust.
– Technique 2: Thinning the Paint
If the paint is too thick, it’s prone to becoming coagulated and forming a gritty texture. Before applying paint, ensure it’s adequately thinned as per the manufacturer’s instructions. Water-based paints can typically be thinned with water, while oil-based paints require a specific thinner.
Never over-thin the paint, as it may compromise the paint’s adhesion and durability.
– Technique 3: Straining the Paint
To remove any lumps, debris, or impurities, it’s essential to strain the paint using a paint strainer or cheesecloth. This will ensure only a smooth and clean paint is applied to the surface.
– Technique 4: Proper Application Techniques
Using the right tools and techniques while painting is crucial for a smooth finish. Here are some expert recommendations:
- When using a brush, opt for a high-quality, preferably synthetic bristle brush for water-based paints and a natural bristle brush for oil-based paints.
- When using a roller, ensure it has the appropriate nap length for your surface texture.
- Apply the paint in thin, even layers, and avoid overloading the brush or roller.
- Maintain a wet edge and work in sections, overlapping as you progress.
- Ensure to follow the recommended drying times between coats.
– Technique 5: Using a Paint Conditioner
Adding a paint conditioner like Flowtrol for latex paints or Penetrol for oil-based paints can help improve the paint’s flow and level, resulting in a smooth and even finish. Follow the manufacturer’s directions to determine the ideal quantity of conditioner to be added to the paint.
– Technique 6: Controlling Environmental Conditions
Establish a clean and controlled environment to minimize dust, dirt, and other airborne contaminants. Close windows and doors, turn off fans and cover the floor and other surfaces with drop cloths. Additionally, ensure the surface to be painted is thoroughly cleaned and free from contaminants.
• Maintaining a Smooth Paint Finish
After successfully achieving a smooth and grit-free paint surface, it’s essential to maintain it. Regularly dust the surfaces with a microfiber cloth or use a vacuum cleaner with a brush attachment.
Clean the surfaces using mild soap and water as required, ensuring the paint is durable enough to withstand cleaning.
In conclusion, achieving a smooth and flawless paint finish is entirely possible with proper preparation, high-quality materials, and the right techniques.
As an expert painter, I highly recommend following these procedures to avoid grappling with gritty paint and ensure a beautiful, long-lasting finish on your projects. Remember, taking the time to do things right the first time ensures a lifetime of satisfaction with your paint job.
Step | Instructions |
|---|---|
1 | Inspect the paint for grit and debris. Consider the source of grit, such as dirty paintbrushes or unfiltered paint. |
2 | Clean painting tools, such as brushes and rollers, before use. If possible, use new equipment to avoid introducing any contaminants. |
3 | Filter your paint using a paint strainer to remove any impurities or debris that may contribute to grit. |
4 | Apply the paint using thin, even coats. Allow each coat to dry thoroughly before applying additional layers. |
5 | Once the paint has dried, gently sand the gritty areas with a fine-grit sandpaper. Be careful not to sand too much, as it can cause damage to the paint or the surface beneath. |
6 | After sanding, use a tack cloth to remove any dust or debris. Apply another thin, even coat of paint and allow it to dry completely. |
7 | Repeat the sanding and repainting process if necessary. Continue until the desired smoothness is achieved. |
Mastering a Smooth and Glossy Paint Finish
Smooth and shiny paint finishes can provide a professional and polished look to your painting projects. These glossy results are not only aesthetically appealing but can also offer advantages like easy cleaning and durability. Here are some expert tips to help you achieve a smooth and shiny finish with your paint.
• Selecting the Right Paint
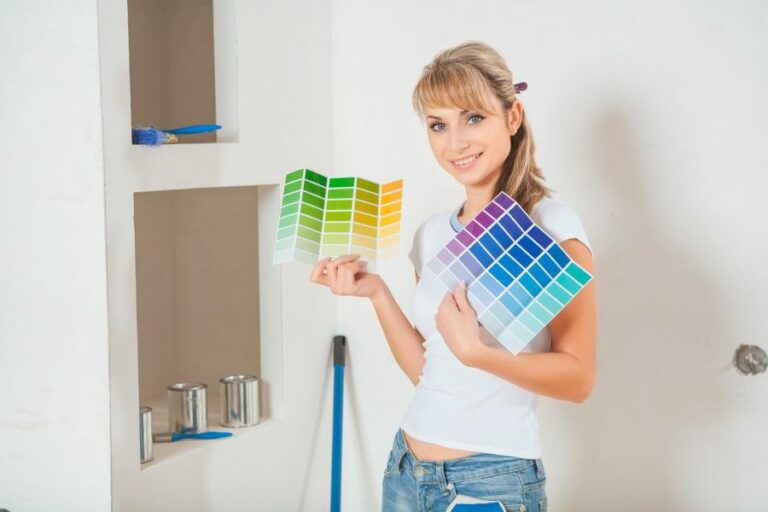
Choosing the proper paint is the foundation for achieving a smooth and shiny finish. Nowadays, there are many options available, but it is essential to select high-quality paint specifically designed for the application you have in mind.
I recommend looking for paints with a semi-gloss or gloss finish, as these tend to be shinier than matte or flat finishes. Visit your local paint store or consult a professional to help you find the right product for your project.
• Preparing the Surface
A smooth surface is crucial for achieving a smooth and shiny finish. Therefore, take the time to prepare the surface properly before applying the paint.
– Cleaning
Remove dirt, dust, and grease from the surface, as these particles can cause an uneven and bumpy finish. Use a non-abrasive cleaning solution and a cloth or sponge to clean the area. Rinse with water and wait for the surface to dry completely before proceeding.
– Sanding
Sanding will create a smooth and even surface to apply your paint. Start with coarse-grit sandpaper (around 100-grit) and work your way to a fine-grit (around 220-grit) sandpaper.
Always sand in the direction of the surface’s grain (e.g., wood), and make sure to remove any residue with a tack cloth or vacuum.
– Repairing
Fill any cracks, holes, or imperfections with an appropriate filler, such as wood filler, drywall compound, or plaster. Allow the filler to dry, and then sand the area until smooth. Use a primer to seal the repaired area and ensure the paint adheres correctly.
• Proper Painting Techniques
The way you apply paint can significantly impact the final result. Follow these techniques to ensure a smooth and shiny finish:
– Priming
Applying a quality primer before painting not only helps with paint adhesion but also contributes to a smoother and more uniform finish. Ensure that the primer is compatible with your paint selection and follow the manufacturer’s instructions for drying time.
– Using the Right Tools
Invest in high-quality brushes and rollers, as subpar tools can leave streaks, marks, and drips on the paint surface. For glossy finishes, foam rollers and brushes typically offer smoother results compared to traditional roller covers and bristle brushes.
– Mixing the Paint
Stir the paint thoroughly before use, as the gloss agents can settle at the bottom. This is especially important for semi-gloss and gloss paints, as the proper mixing ensures an even distribution of shine throughout the finish.
– Painting Technique
When applying the paint, use long, even strokes with light pressure. Avoid overlapping paint strokes, as this may leave visible lines on the finish. Make sure to apply thin coats and allow each coat to dry completely before applying the next.
– Paint Extenders
To help the paint self-level and reduce brush or roller marks, consider adding a paint extender. These extenders increase the drying time, allowing the paint to flow and settle more evenly on the surface.
• Final Touches – Sanding and Polishing
For an even smoother and shinier finish, complete your project by sanding and polishing the painted surface once it is fully cured (according to the manufacturer’s instructions).
– Wet-Sanding
Start by wrapping fine-grit (around 600-grit) wet/dry sandpaper around a sanding pad or sponge. Dip the sandpaper into the water and begin sanding, using only as much pressure as necessary. Regularly wipe the surface with a clean, damp cloth to remove the sanded paint residue.
Continue this process, gradually increasing the grit of the sandpaper until you reach around 2000-grit.
– Buffing and Polishing
Once the surface is smooth, use a buffer and polishing compound to further enhance the shine. Slowly move the buffer in circular motions, applying even pressure. Finish by wiping down the surface with a clean cloth.
By following these expert recommendations and investing time in the surface preparation and painting techniques, you will be well-equipped to achieve that desired smooth and shiny paint finish. Happy painting!
Step | Description |
|---|---|
1 | Choose a high-quality, glossy paint for a shiny finish. |
2 | Prepare the surface by cleaning it thoroughly and removing any dirt or grime. |
3 | Sand the surface to ensure it is smooth and even. Wipe away any dust or debris with a tack cloth. |
4 | Apply a primer to help the paint adhere properly and create a smooth base. |
5 | Apply the paint using a high-quality brush or roller, using even strokes and maintaining a wet edge to avoid brush marks. |
6 | Allow the paint to dry completely, then lightly sand the surface with fine-grit sandpaper and wipe with a tack cloth. |
7 | Apply additional coats of paint, allowing each coat to dry and sanding between layers for a smooth and shiny appearance. |
8 | Finish with a clear, glossy topcoat to protect the paint and enhance the shine. |
Prepping Your Surface for a Seamless Painting Experience
Painting is an excellent way to give a fresh, new look to any surface. However, the key to a professional-looking paint job lies in proper surface preparation.
• Assessing the Surface
Before getting started, it’s essential to take a close look at the surface you’ll be painting. Inspect for any visible damage, such as cracks, holes, or uneven areas.
Keep in mind that any imperfections left unattended will likely be more noticeable after painting. In some cases, the surface may be in such poor condition that it’s better to replace it entirely.
– Dealing with Imperfections
If there are cracks or holes, they must be filled with appropriate materials, such as a pre-mixed patching compound for larger holes or a lightweight spackle for smaller ones.
After applying the filler, use a putty knife to remove excess material and create a smooth, even surface. Allow the filler to dry according to the manufacturer’s instructions.
• Cleaning the Surface
A clean surface is crucial for proper paint adhesion. Begin by removing any loose debris, dust, or dirt with a soft brush or cloth. For more stubborn dirt, use a damp cloth and mild detergent to gently clean the surface.
Should you encounter mold or mildew, combine a solution of bleach and water (1 part bleach to 3 parts water), and apply it to the affected areas with a sponge or cloth. Allow the solution to sit for a few minutes before rinsing thoroughly with clean water.
Always let the surface dry completely before proceeding to the next step. Any lingering moisture may interfere with paint adhesion and result in peeling or bubbling later on.
• Sanding the Surface
Sanding is a critical step in achieving a smooth surface for painting, as it helps remove any remaining imperfections, creates a more even surface, and promotes better paint adhesion.
Use fine-grit sandpaper (120 to 150 grit) for most surfaces, being careful not to sand through any existing paint layers down to the bare substrate.
When sanding, apply light or even pressure, and move in a circular motion to avoid creating grooves or uneven areas. For large, flat surfaces, consider using a sanding block to maintain consistent pressure.
Once sanding is complete, use a vacuum or tack cloth to remove all dust from the surface. Skipping this step can result in paint adhesion issues, as well as a rough, inconsistent finish.
• Applying a Primer
A primer is an essential component of proper surface preparation, serving as a foundation that helps the paint bond to the surface and improves overall durability. Some modern paints include primer, but for the best results, it’s recommended to use a separate primer product.
Choose a primer based on the surface and paint type you’ll be using. For example, use a latex-based primer for latex paints and an oil-based primer for oil paints.
Applying multiple coats of primer may be necessary in some cases, such as when painting a dark color over a lighter one or painting over a heavily stained surface.
Allow the primer to dry fully, as specified by the manufacturer’s instructions. Drying times may vary, so allowing for enough time will ensure proper paint adhesion and a smooth finish.
• Final Inspection
Before applying paint, take the time to inspect the surface one last time. Check for any missed blemishes or imperfections and address them as needed. Performing a final inspection will help you achieve the best possible finish and avoid frustrating touch-ups later.
• Painting the Surface
Now that your surface is smooth and fully prepared, you’re ready to begin painting. Use high-quality paint, brushes, and rollers to achieve a professional-looking finish. Applying multiple thin coats is better than trying to cover the surface in one thick coat, as it promotes a smoother, more even appearance.
By diligently following these steps to prepare a smooth surface for painting, you’ll enhance the longevity and overall appearance of your paint job. With proper care and maintenance, your newly painted surface should look great for years to come.
| How to prepare a smooth surface for painting | |
|---|---|
| 1. Clean the surface | Remove dirt, dust, and grease from the surface by wiping it down with a soft cloth dampened with soap and warm water. Make sure to rinse off any soap residue and allow the surface to dry completely. |
| 2. Sand the surface | Use fine-grit sandpaper to lightly sand the surface, removing any existing paint, rough spots, or uneven areas. Be sure to sand in the direction of the wood grain or the direction of the existing paint, if any. |
| 3. Remove sanding dust | After sanding, use a soft cloth or tack cloth to remove any remaining dust or particles. You can also use a vacuum with a brush attachment to remove dust. |
| 4. Apply primer (optional) | If the surface is porous, has an uneven texture, or has discoloration, applying a high-quality primer can help create a more even surface for painting. Choose a primer appropriate for the type of paint you’re using and follow the manufacturer’s instructions for application. |
| 5. Sand the primer (optional) | If you apply primer, allow it to dry completely, then use fine-grit sandpaper to lightly sand the surface to ensure maximum adhesion of the paint. Remove dust with a cloth or vacuum. |
| 6. Start painting | Once the surface is clean, smooth, and dry, you’re ready to start painting. Be sure to use high-quality paint and follow the manufacturer’s instructions for the best results. |