Top Methods For Prepping Surfaces To Paint. What Pros Say
Are you ready to transform your space with a fresh coat of paint, but not sure where to start? Don’t worry! We’ve got the inside scoop on the top methods for prepping surfaces to ensure a flawless paint job. With our tips and tricks, you’ll gain the confidence and knowledge necessary to tackle any painting project like a pro.
Top methods for prepping surfaces to paint:
Top methods for prepping surfaces to paint include thorough cleaning, surface repairs and smoothing, proper sanding for optimal adhesion, priming for a uniform finish, and selecting the appropriate paint for the surface. Following these methods ensures professional, long-lasting results.

Discover the secrets to perfecting your painting projects by learning the top methods for prepping surfaces. Uncover expert tips that promise a flawless finish every time. Curious? Read on to elevate your skills and make your paint job stand out!
Contents
- 1 Best Techniques for Preparing Surfaces for Painting
- 2 Optimal Surface Preparation for Painting Success
- 3 Essential Pre-Painting Preparation Steps
- 4 A Guide to Prepping Surfaces for Paint Application
- 5 Recommended Products for Cleaning Surfaces Prior to Painting
Best Techniques for Preparing Surfaces for Painting
Properly preparing a surface before painting is crucial for achieving a long-lasting, professional-looking result.
• Thorough Cleaning
One of the most critical steps before applying paint to any surface is to make sure the area is clean and free of dirt, grease, and grime. Cleaning will ensure proper adhesion between the paint and the surface, resulting in a durable and long-lasting finish.
For interior walls, I recommend using mild detergent and a sponge or soft cloth to remove any dust, dirt, and cobwebs. In case of more stubborn stains or greasy spots, a trisodium phosphate (TSP) cleaner is highly effective. However, make sure to wear gloves and eye protection when handling TSP.
For exterior walls, a pressure washer or garden hose with a strong nozzle can effectively remove dirt, mildew, and loose paint. If the surface has mold or mildew, consider using a commercial cleaner formulated for these issues.
• Surface Repairs and Smoothing
Before painting, it’s essential to address any imperfections like cracks, holes, or peeling paint. Failing to do so will detract from the overall appearance of your paint job.
For small holes or cracks in drywall or plaster, use a quality patching compound or spackling paste applied with a putty knife. Allow the compound to dry, and then sand the area smoothly before painting.
For larger repairs or damaged areas, you may need to use joint tape and joint compound, following the manufacturer’s instructions.
In the case of wood surfaces, fill any cracks or holes with a wood filler or putty, and sand it smooth once it’s dry.
If you’re dealing with peeling or flaking paint on the surface, use a scraper or sandpaper to remove the loose material. Sanding will also help to create a smoother and more even surface, particularly when working with wood or metal substrates.
• Proper Sanding for Optimal Adhesion
Sanding is a critical step when prepping a surface for painting. It not only smooths imperfections but also promotes better adhesion between the paint and the material being painted.
For interior walls, a fine-grit sanding sponge or sandpaper (around 220-grit) is sufficient to create a smooth surface. For wood surfaces, I recommend starting with a coarser grit, such as 80 or 100, and working your way up to a finer grit, like 220, for a smooth finish.
When sanding metal surfaces, begin with a coarse grit like 80 to 100, depending on the degree of rust or paint removal required. Follow with a finer grit, such as 180 or 220, to achieve a smooth and even finish.
Always remember to clean off the sanding dust before painting. A tack cloth or a soft, damp rag is suitable for this purpose.
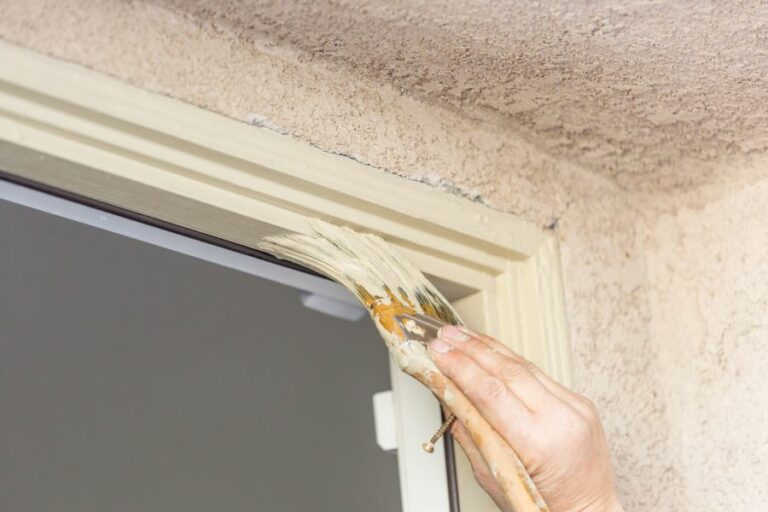
• Priming for a Uniform Finish
Applying a quality primer is an essential step, particularly when working with porous surfaces or when changing from a dark to lighter paint color. Primer seals the surface, ensuring consistent color and appearance after the finishing coats of paint are applied.
When priming wood surfaces, choose a primer formulated specifically for wood. For metal surfaces, use a rust-inhibiting primer to prevent rust formation.
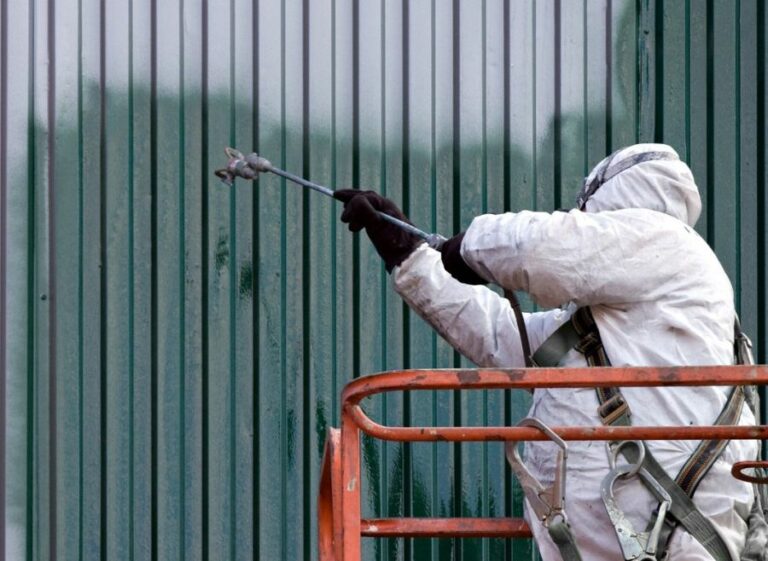
• Paint Selection and Application
Choosing the correct paint for the surface you’re working on is crucial. Exterior paints are formulated to resist weathering and UV exposure, while interior paints are intended for use on indoor surfaces.
Water-based (latex) paint is suitable for most surfaces, whereas oil-based (alkyd) paint is recommended for surfaces that require a harder, more durable finish, such as metal doors and trim.
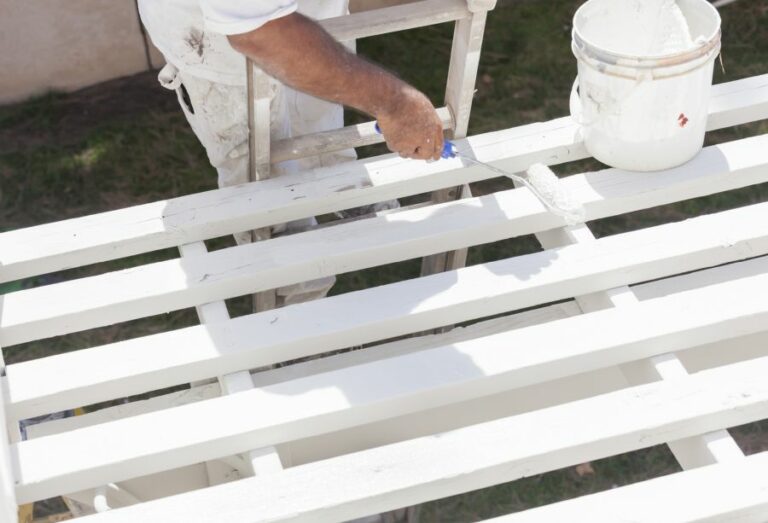
When applying paint, it’s essential to use quality brushes, rollers, and tools designed for the specific type of paint you’re using to ensure a professional outcome. Apply a minimum of two coats of paint, allowing ample drying time between coats per the manufacturer’s instructions.
By following these top methods for prepping surfaces to paint, you’ll be well on your way to achieving a professional, long-lasting paint job that enhances the beauty and value of your home or property.
Method | Description |
|---|---|
Cleaning | Remove dirt, dust, and debris from the surface using a cloth or sponge with mild detergent and water. |
Sanding | Smooth out the surface by using sandpaper (80-220 grit) to remove any rough areas, old paint or varnish, and create an even surface. |
Priming | Apply a coat of primer to the surface, which allows the paint to adhere better and provides a uniform base for the topcoat. |
Filling Holes and Cracks | Use filler or putty to fill any small holes or cracks in the surface, and then sand the filled areas smooth before painting. |
Removing Wallpaper | Peel or scrape off any existing wallpaper before applying paint, using a wallpaper remover solution if necessary to ensure the paint adheres properly. |
Taping Off | Use painter’s tape to protect any areas of the surface that should not be painted, such as trim, windows, and light switches. |
Optimal Surface Preparation for Painting Success
Proper surface preparation is key for achieving a flawless, long-lasting paint job. By far, it has the most significant impact on the finished product, determining both the appearance and durability of the final result.
• Cleaning and Degreasing the Surface
Before starting any prep work, it’s essential to thoroughly clean and degrease the surface. This step removes dirt, dust, and grime, providing a smooth surface for the paint to adhere to.
Use a gentle cleaner, such as a mix of water and mild detergent, to avoid damaging the surface or leaving a residue that could interfere with adhesion. Rinse thoroughly with clean water and allow it to dry completely before moving on to the next step.
• Sanding the Surface
Sanding is crucial for ensuring proper paint adhesion, as it increases the surface area and provides a uniform, slightly rough texture for the paint to bond. Different surfaces require different sanding techniques and grits, so it’s important to understand what works best.
– Wood Surfaces
For raw, untreated wood, start with coarse-grit sandpaper (80 to 100 grit) to level any rough patches or mill marks. Move on to medium-grit sandpaper (120 to 180 grit) to smooth out the wood, and finish with fine-grit sandpaper (220 grit) to provide a perfectly smooth surface that’s ready for priming and painting.
For previously painted wood, only sand lightly using fine-grit sandpaper to remove any loose or peeling paint while creating a sufficient texture for the new paint to adhere. If the surface has stains or a glossy finish, consider using a de-glosser before sanding to ensure good adhesion.
– Metal Surfaces
Sand metal surfaces using fine to medium-grit sandpaper to remove any loose or peeling paint and smooth out any imperfections. For particularly rough or rusty areas, a wire brush or steel wool can be used to remove corrosion before sanding.
Be sure to wipe down metal surfaces with mineral spirits after sanding to remove any dust or residue.
– Drywall and Plaster Surfaces
For a smooth and even finish on drywall or plaster surfaces, start with medium-grit sandpaper to remove any rough areas or imperfections. Follow up with a fine-grit sandpaper for an ultra-smooth surface that’s ready for priming and painting.
• Filling Holes and Cracks
Filling any holes, cracks, or gaps in the surface is essential for a flawless paint job. Use a suitable filler, such as wood filler, putty for wood surfaces, or joint compound for drywall and plaster surfaces.
Be sure to follow the manufacturer’s instructions for applying and drying time, and follow up with sanding to ensure a smooth, even finish.
• Priming the Surface
Priming creates a barrier between the surface and the paint, ensuring proper adhesion and preventing any stains, knots, or resins from bleeding through. It’s important to select the right primer based on the surface material and any specific concerns, such as stain-blocking or adhesion-promoting properties.
– Wood Surfaces
For raw, untreated wood, opt for an oil-based primer to penetrate and seal the wood, providing a solid base for the paint. For previously painted wood surfaces, choose a high-quality water-based primer to promote adhesion and block any potential stains.
– Metal Surfaces
Choose a rust-inhibiting primer specifically designed for metal surfaces, such as a zinc-chromate or zinc-phosphate primer. Applying a thin layer of primer will help prevent future rust and corrosion while promoting adhesion for the paint.
– Drywall and Plaster Surfaces
Use a high-quality, water-based primer designed specifically for drywall or plaster surfaces to ensure a smooth, even base for the paint. This will minimize the appearance of seams or any remaining imperfections on the surface.
• Final Surface Prep Considerations
Before you start painting, be sure to cover any surrounding surfaces or areas that need protection from paint spills or drips. Use masking tape and drop cloths to create clean lines and prevent any unwanted paint transfer.
By following these essential surface preparation steps, you’ll set the foundation for a professional, long-lasting paint job that looks impeccable for years to come.
Remember, the time and effort put into preparing the surface will directly impact the final result, so it’s crucial not to cut corners and ensure each step is carried out with care and precision. Happy painting!
Step | Description |
|---|---|
1. Clean the surface | Remove dirt, dust, grease, and any other contaminants from the surface with mild detergent and warm water. Rinse thoroughly and let it dry completely. |
2. Remove old paint and imperfections | Use a scraper, sandpaper, or a chemical paint remover to remove any peeling or poorly adhered paint. Also, repair any damages, cracks, or holes in the surface. |
3. Sand the surface | Evenly sand the entire surface with medium-grit sandpaper to create a smooth and uniform surface that will promote better paint adhesion. |
4. Wipe down the surface | Use a damp cloth or a tack cloth to wipe down the surface, removing any sanding dust, dirt, or debris. Allow the surface to dry completely before moving on to the next step. |
5. Prime the surface | Apply a suitable primer to the surface, following the manufacturer’s instructions. This will promote better adhesion of the paint and help to prevent peeling or other paint failures. |
6. Allow the primer to dry | Let the primer dry according to the manufacturer’s recommendations. This will help to ensure that the paint will adhere properly and result in a professional-looking finish. |
Essential Pre-Painting Preparation Steps
Proper preparation before painting is crucial in ensuring a smooth, even, and long-lasting paint job.
Whether you’re tackling an interior or exterior painting project, taking the time to properly prepare surfaces can be the difference between subpar, short-lived results and a professional-looking finish that lasts for years.
• Clean Surfaces Thoroughly
Before you begin any painting project, it’s vital to clean the surfaces you’ll be painting. Dust, dirt, grease, and grime can all interfere with paint adhesion and cause an uneven finish.
– Interior Cleaning Tips
For interior walls, use a sponge or cloth with water and mild detergent to remove dirt and grease. Pay special attention to high-traffic areas and spots behind furniture, where dust and dirt may accumulate. For hard-to-reach spots, use a soft-bristled brush or a vacuum with a brush attachment.
Rinse the cleaned area with water and let it dry completely before moving on to the next step.
– Exterior Cleaning Tips
When cleaning exterior surfaces, start with a garden hose to remove loose dirt, spiderwebs, and other debris. For tougher grime, use a power washer or a long-handled, soft-bristled brush with a detergent diluted in water.
Be sure to rinse thoroughly with water and allow the surfaces to dry completely before moving on to the next step.
• Repair Damaged Areas
Inspect the surfaces for any damage, such as dents, cracks, holes, or peeling paint. Properly addressing these issues ensures a smooth, even finish.
– Patching Holes and Cracks
For small wall and trim imperfections, use a putty knife to apply a thin layer of a patching compound or painter’s putty. Allow the compound to dry, then sand it lightly to create a smooth surface.
For larger cracks and holes, apply joint compound or a specialized patching product following the manufacturer’s instructions. Be sure to apply multiple thin layers and sand between each coat to achieve the smoothest finish possible.
– Addressing Peeling Paint
Peeling paint can be a sign of many issues, like moisture or improper surface preparation. Remove loose, peeling paint with a scraper, then sand the edges to create a seamless transition between the affected area and the surrounding surface.
• Sand Surfaces for a Smooth Result
Sanding is essential for removing any remaining imperfections and creating a smooth surface for paint to adhere to.
Depending on the paint type and surface condition, various sanding techniques can be used. For most projects, a fine- to medium-grit sandpaper or sanding sponge works well for smoothing walls and trim.
When sanding, remember to:
- Wear a dust mask and safety goggles to protect yourself from particles.
- Sand in the same direction as the grain on wood surfaces to avoid scratches.
- Wipe the surfaces with a damp cloth or vacuum with a brush attachment to remove dust after sanding.
• Prime Surfaces for Superior Adhesion
Priming is a critical step in the preparation process, as it creates a uniform, sealed surface for paint to adhere to. Primers are formulated to fill small imperfections, block stains, and improve the bond between the paint and the surface, resulting in an even, durable finish.
When selecting a primer, consider factors like:
- The surface material (drywall, wood, masonry, etc.) and its condition.
- The paint type and color you’ll be using, as some primers are formulated to work well with specific paint types or colors.
- Problematic areas that may require specialized primers, such as those designed to block stains or adhere to challenging surfaces.
Apply primer following the manufacturer’s instructions, using a brush, roller, or sprayer as appropriate. Once the primer is dry, lightly sand if necessary to remove any brush strokes or roller marks and remove any sanding dust.
• Protect Surrounding Areas from Paint
Finally, prior to painting, protect surrounding surfaces like trim, ceilings, and floors from accidental paint splatters. Use painter’s tape to mask off areas you don’t want to paint, and cover the floor with drop cloths or plastic sheeting to keep it paint-free.
Taking the time to prepare surfaces before painting ensures a high-quality, long-lasting result properly. By following these steps for cleaning, repairing, sanding, priming, and protecting surfaces, you’ll create the ideal surface for a smooth, even, and durable paint job that stands the test of time.
Step | Description |
|---|---|
1. Clean the surfaces | Remove dust, dirt, and grease from the surfaces you intend to paint. Cleaning ensures the paint adheres properly to the surface. |
2. Repair any damages | Fix cracks, dents, and holes on the surface with a patching compound, sand the repaired areas smooth, and apply a primer. This helps create a uniform base for the new paint. |
3. Protect surrounding areas | Cover floors, furniture, and other items close to the painting area with drop cloths, plastic sheets, or painter’s tape. This helps prevent paint splatters and drips from damaging or staining the space. |
4. Sand and prime surfaces (if necessary) | Sanding lightly scuffs up the surface for better paint adhesion. Priming is necessary when you are painting over a darker color, exposed wood surfaces or surfaces with a lot of stains or repairs. |
5. Remove or mask hardware and fixtures | Remove or tape off door knobs, light switches, outlet covers, and other hardware near the painting area. This helps ensure a clean, professional-looking paint job. |
6. Stir and strain the paint | Stir the paint well to ensure even color and consistency. If necessary, strain the paint to remove any lumps or debris that could interfere with your paint job. |
A Guide to Prepping Surfaces for Paint Application
A well-executed paint job can transform your space and make it look fresh and updated. However, without proper preparation, you might end up with a less-than-perfect finish. Below is a helpful guide on prepping your walls, ceilings, and other surfaces before painting.
• Evaluating the Surface
Before taking on any painting project, it’s important to evaluate the surface you’ll be working on. Look for any defects such as cracks, holes, and chipping paint that need to be addressed before painting. Also, assess whether the existing paint is in good condition or if it needs to be stripped or primed.
The EPA provides more information on how to identify and deal with lead paint, which can be detrimental to your health if not handled correctly.
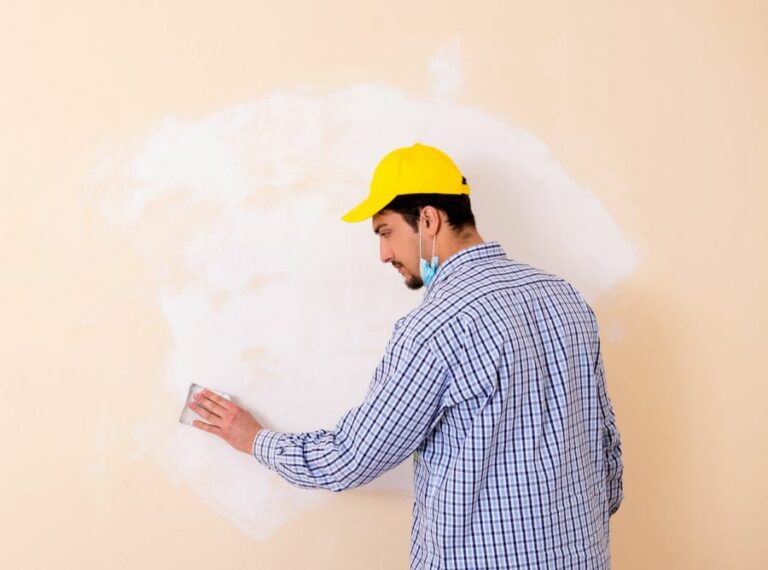
• Cleaning the Surface
To ensure that the paint adheres properly, it’s important to clean the surface thoroughly. Removing dirt, grease, and grime helps improve paint adhesion and creates a better, long-lasting finish.
– Walls and Ceilings
- Dust the surface: Use a broom or duster to clean off any visible dust or cobwebs from the walls and ceilings.
- Wash the surface: Mix a solution of warm water and mild detergent, then use a sponge or cloth to gently scrub the surface. Be sure to rinse with clean water and allow the surface to dry completely before proceeding.
– Woodwork and Trim
- Wipe down: Use a damp cloth or sponge to remove any dirt or dust buildup.
- Sand: If necessary, lightly sand the surface to smooth out any rough areas or to remove old paint that may be peeling or chipping. Wipe clean with a tack cloth to remove dust.
• Repairing Surface Imperfections
A smooth surface is crucial for a professional-looking paint job. To achieve this, take time to repair any cracks, holes, or dents before painting.
– Filling Holes and Cracks
- Choose filler: Select an appropriate filler for the job. Lightweight spackle works well for small holes, while a joint compound is suitable for larger imperfections or cracks.
- Apply filler: Use a putty knife to apply the filler, making sure to press it firmly into the holes or cracks. Smooth the surface and remove any excess filler.
- Let dry: Allow the filler to dry according to the product instructions. This might take a few hours or overnight, depending on the size and depth of the repair.
- Sand: Once the filler is dry, sand the surface to ensure a smooth, even finish. Wipe clean with a tack cloth to remove dust.
– Addressing Peeling or Chipping Paint
- Scrape: Use a paint scraper or a putty knife to carefully remove any loose, peeling, or chipping paint.
- Sand: Sand the edges of the remaining paint to create a smooth, even transition between the painted and bare surfaces. Wipe clean with a tack cloth.
• Sanding the Surface
Sanding plays a key role in prepping before painting. It helps to remove glossy finishes, roughen the surface for better paint adhesion, and smooth out any imperfections. It’s essential to sand properly and use the appropriate sandpaper grit.
– Choosing Sandpaper Grit
- 80-120 grit: For rough surfaces and removing old paint
- 150-180 grit: For smoothing the surface before priming or painting
- 220-240 grit: For a final sanding pass or between coats of paint
– Proper Sanding Techniques
- Always sand in the direction of the wood grain (for wood surfaces).
- Apply even pressure and use a sanding block to keep the sanding surface flat.
- Frequently clean the sandpaper to prevent clogging and irregular marks.
• Priming
Applying a primer is an essential step in prepping before painting. Primers create a uniform surface that allows for better paint adhesion, hiding stains and improving the overall appearance of the paint job.
– Choosing a Primer
- Latex primer: For most surfaces, including drywall and wood
- Oil-based primer: For surfaces that have heavy stains or water damage
- Shellac primer: For sealing knots in the wood and for surfaces with severe stains or odors
– Applying Primer
- Stir the primer: Mix the primer well before use.
- Apply primer: Use a brush or roller to apply a thin, even coat of primer.
- Let dry: Allow the primer to dry according to the product instructions, usually 1-3 hours.
- Sand: Lightly sand the surface with a fine-grit sandpaper (220-240 grit) to smooth any raised fibers or brush strokes. Remove dust with a tack cloth.
• Masking and Protection
Protecting areas that you don’t want to paint is crucial for a clean, professional finish.
- Masking tape: Apply painter’s tape around windows, doors, electrical outlets, and any other areas that need protection.
- Drop cloths: Protect floors and furniture with drop cloths or plastic sheeting. Secure in place with painter’s tape if necessary.
By following these preparation steps, you can achieve a professional-looking paint job that will last for years to come. Remember, taking time to prep before painting is crucial for creating a lasting, impressive finish. Happy painting!
Step | Description |
|---|---|
1. Clean the surface | Remove any dirt, dust, and grease from the surface using a mild detergent and water. |
2. Repair imperfections | Fill cracks, holes, and dents using a suitable filler. Sand the filled areas once they are dry. |
3. Protect areas you don’t want to paint | Use masking tape and drop cloths to protect floors, furniture, and items that you don’t want to be painted. |
4. Sand the surface | Sand the entire surface to create a slightly rough texture, which will allow the paint to adhere better. |
5. Apply primer | Apply a coat of primer to the surface to improve paint adhesion and create an even base for the paint. |
6. Choose the right paint | Select a paint that is suitable for the surface and the area you are painting (interior or exterior, walls or trim). |
7. Gather necessary tools | Have paintbrushes, rollers, paint trays, and any other necessary tools ready before you begin painting. |
Recommended Products for Cleaning Surfaces Prior to Painting
Ensuring a clean surface before applying paint is essential for achieving a professional and long-lasting finish. Knowing what products to use and how to use them can make a significant difference in the overall success of your project.
• Why Cleaning is Crucial
Before diving into the specific products, it is important to understand why properly cleaning the surface before beginning a painting project is so critical.
Any dirt, grease, or dust left on the surface can negatively impact how the paint adheres and dries, which could cause peeling, chipping, or an uneven finish. Therefore, taking the time to clean the area thoroughly can save you time, money, and frustration in the long run.
• Selecting the Right Cleaning Product
There are numerous options available for cleaning surfaces, and selecting the right one depends on several factors, including the type of surface being painted and the type of dirt or residue that needs to be removed. Here, we will discuss several popular options and their ideal use cases.
– Soap and Water
For general cleaning purposes, a simple mixture of warm water and mild dish soap is an effective and affordable option. This solution works well on most surfaces, from walls to trim, and removes dirt, dust, and light grease without any harsh chemicals.
To create a soap and water solution, mix one-part mild dish soap with three parts warm water. Use a cloth or sponge to gently clean the surface, ensuring that you remove any dirt, dust, or grime.
Be sure to rinse the area with clean water to remove any soap residue and then allow it to dry completely before painting.
– Trisodium Phosphate (TSP)
Trisodium Phosphate, commonly referred to as TSP, is a powerful cleaning agent that is often recommended for heavy-duty jobs, such as removing grease, grime, and mildew stains. TSP can be used on various surfaces, such as walls, ceilings, and even concrete.
However, you should exercise caution when using TSP, as it is a harsh chemical that can cause skin and eye irritation.
To use TSP, follow the instructions on the package and ensure you are wearing proper protective gear, such as gloves and goggles. After cleaning the surface with TSP, it is crucial to rinse it thoroughly with water and allow it to dry completely before painting.
– Ammonia and Water
Another option for cleaning surfaces before painting is a solution of ammonia and water. This mixture can be especially useful for removing crayon marks, ink, or grease from walls. However, use caution when handling ammonia, as it can emit toxic fumes and cause skin and eye irritation.
To create an ammonia and water solution, mix one-part ammonia with three parts water. Like with soap and water, use a cloth or sponge to gently clean the surface, then rinse thoroughly with clean water and allow it to dry before painting.
– Denatured Alcohol
Denatured alcohol can be used to clean surfaces, particularly for removing residue or stains from previously painted areas. This solvent effectively removes grime without causing damage to the underlying paint or surface. However, it is essential to use denatured alcohol in a well-ventilated area and wear protective gear, as it can emit harmful fumes.
To use denatured alcohol, simply dampen a cloth or sponge with the solvent and gently rub the surface until the stain or residue is removed. Allow the area to air dry before proceeding with painting.
• Additional Cleaning Tips and Recommendations
Aside from choosing the right cleaning product, there are a few additional tips that can help ensure your surface is as clean as possible before painting:
- Always test a small, inconspicuous area with your selected cleaning product before applying it to the entire surface to ensure it does not cause damage or discoloration.
- Use a lint-free cloth or sponge to avoid leaving behind any fibers that could interfere with paint adhesion.
- Be patient and allow the surface to dry thoroughly before applying paint, as moisture can affect paint adhesion and dry time.
- Consult the Paint Quality Institute for further guidance on selecting the right cleaning products and painting techniques for your specific project.
In conclusion, understanding how to properly clean a surface before painting is essential for achieving a professional and long-lasting finish. By selecting the right product for your specific needs and following the recommended guidelines, you will set the stage for a successful painting project.