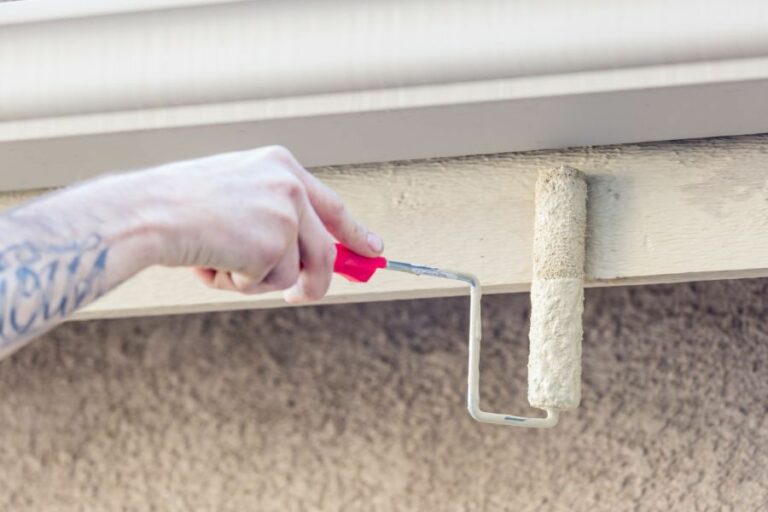
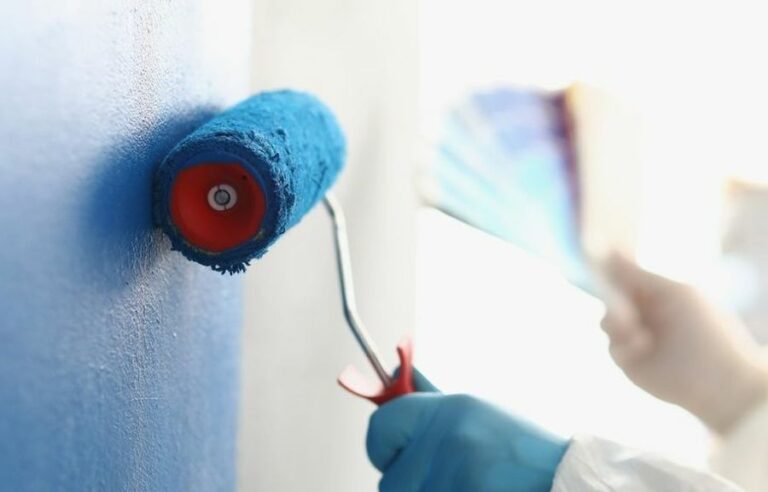
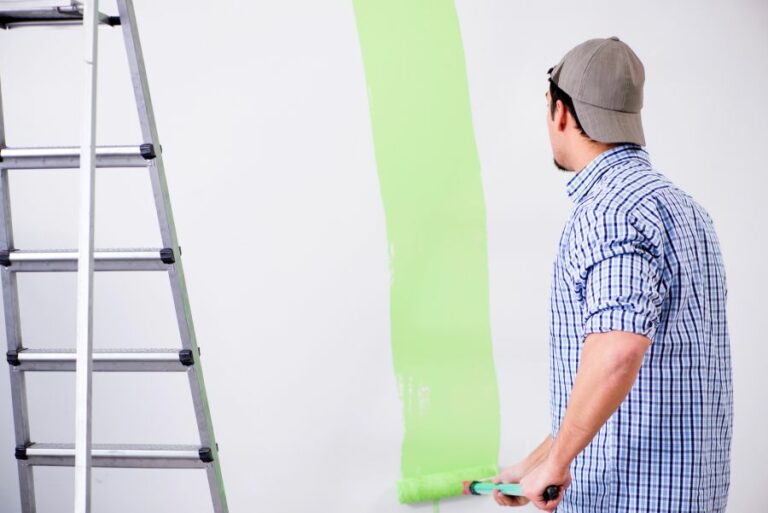
Pre-Paint Surface Cleaning & Degreasing Tips. What Pros Say
Are you ready to achieve that perfect paint job? Preparing your surfaces with proper cleaning and degreasing is crucial to ensure a flawless finish. We’ve got you covered with expert tips for pre-paint cleaning that will make your painting project a stunning success.
Pre-paint surface cleaning & degreasing tips:
Pre-paint surface cleaning and degreasing are essential for optimal paint adhesion and a long-lasting finish. Tips include choosing the right cleaning solution (such as dish soap, TSP, ammonia, or commercial degreasers), employing pre-paint cleaning techniques (sweeping, vacuuming, washing, rinsing, drying, and sanding), and ensuring safety precautions (proper ventilation, protective gear, and compatible cleaning agents).

Discover expert tips on pre-paint surface cleaning and degreasing for flawless results every time! Delve into the world of surface preparation, ensuring a smooth and long-lasting paint job.
Dive in to learn more about the secret techniques and materials used by professionals. Keep reading to enhance your painting skills and master the art of preparation.
Contents
- 1 Tips for Pre-Paint Surface Cleaning and Degreasing
- 2 Top Surfaces Preparation Methods Before Painting
- 3 Importance of Cleaning Surfaces Prior to Painting
- 4 Effective Pre-Paint Wipe Solutions for Surfaces
- 5 Using Paint Thinner for Surface Cleaning Before Painting
Tips for Pre-Paint Surface Cleaning and Degreasing
• Importance of Proper Surface Preparation
Before applying any paint, it is essential to properly clean and prepare the surface to ensure optimum paint adhesion and a long-lasting finish. Dirt, grease, and oil on the surface can prevent the paint from adhering effectively, resulting in peeling, bubbling, or uneven coverage.
A clean and properly prepared surface will not only improve the overall appearance of the paint job but also extend its lifespan.
• Choosing the Right Cleaning Solutions
The type of cleaning solution used depends on the nature of the surface and the type of contaminants present. Some common cleaning agents include:
- Dish soap and water: Ideal for light-duty cleaning and removal of dust and dirt from surfaces like walls, ceilings, and trim.
- TSP (Trisodium Phosphate): A heavy-duty cleaning agent that effectively removes grease, smoke stains, and mildew. TSP can be used on various surfaces, including wood, metal, and masonry. Follow the manufacturer’s guidelines for mixing and application.
- Ammonia: Can be used in place of TSP, but it requires proper ventilation due to its strong fumes. Mix one-part ammonia with three parts water for an effective cleaning solution.
- Commercial degreasing agents: Available in a variety of formulations and strengths, these products are specifically designed to remove stubborn grease and oil buildup. Always follow the manufacturer’s instructions for use.
• Essential Pre-Paint Cleaning Techniques
Below are some useful pre-paint cleaning and degreasing techniques that can help you prepare the surface effectively:
– Sweeping and Vacuuming
For large areas like walls or exteriors, start by using a broom to sweep off any loose dirt, dust, or debris. A vacuum cleaner with a brush attachment can be helpful in removing dirt and dust from smaller areas, such as trim and baseboards.
– Washing Surfaces
To wash the surface, mix your chosen cleaning solution in a bucket with warm water. Use a sponge, cloth, or soft brush to apply the solution generously, working from the bottom upwards to avoid streaks. Scrub the surface gently, paying close attention to any dirty or greasy areas.
For stubborn stains, a stiff-bristle brush may be necessary to agitate the solution and lift the dirt.
– Rinsing and Drying
After washing the surface, it is essential to rinse off the cleaning solution thoroughly. Use a clean sponge or cloth and water to remove any residues. Alternatively, for exterior surfaces, consider using a garden hose or pressure washer to rinse away the cleaning solution.
Allow the surface to dry completely before moving on to the next step. Any remaining moisture on the surface may adversely affect the paint adhesion and cause issues with the final finish.
– Sanding Surfaces
Sanding is essential for an even and smooth paint application. It helps remove surface imperfections, such as loose or peeling paint while promoting better paint adhesion. Always use the appropriate sandpaper grit for the type of surface being prepared.
Finer grit sandpaper is suitable for smoother surfaces, while rougher grit is necessary for effectively removing heavy imperfections. After sanding, use a tack cloth to remove any residual dust left on the surface.
• Additional Considerations
- Always wear gloves, eye protection, and a respirator or mask when cleaning and degreasing surfaces. Ensure proper ventilation in the work area, as some cleaning agents can produce strong fumes.
- When working with TSP or ammonia, never mix these cleaning agents with bleach, as dangerous and toxic fumes may result.
- When using commercial degreasers, perform a test on an inconspicuous area of the surface to ensure compatibility and avoid potential damage.
- In case of mold or mildew presence, ensure proper treatment and prevention measures are taken before painting. The Environmental Protection Agency offers guidelines on mold remediation that can be helpful in this regard.
• Final Thoughts
Pre-paint surface cleaning and degreasing are crucial steps in ensuring a successful and long-lasting paint job. By following the tips and techniques mentioned in this article, you can achieve a clean and well-prepared surface ready for painting.
The time and effort spent on proper surface preparation will result in a beautiful and durable finish that will stand the test of time.
Top Surfaces Preparation Methods Before Painting
Proper surface preparation is the key to a successful paint job. A clean and well-prepared surface ensures better paint adhesion, leads to a smooth and long-lasting finish, and prevents potential issues such as peeling and chipping.
• The Role of Cleaning Agents in Surface Preparation
Using the right cleaning agent is crucial for removing dirt, grease, and other contaminants from the surface. There are several cleaning agents available in the market, but some of the most effective ones include TSP (trisodium phosphate), TSP alternatives, and household detergents.
– Trisodium Phosphate (TSP)
TSP is a powerful cleaner and degreaser that can effectively remove stubborn dirt, grease, and grime on various surfaces. It is commonly used on walls, ceilings, and woodwork before painting.
To use TSP, follow the mixing instructions provided on the package, then apply it to the surface using a sponge or cloth. Rinse the area thoroughly with clean water and allow it to dry completely. Be sure to wear gloves, goggles, and appropriate clothing while using TSP, as it can cause skin and eye irritation.
– TSP Alternatives
Due to environmental concerns related to phosphates, many TSP alternatives have been developed. These are phosphate-free cleaning agents that are biodegradable and environmentally friendly. TSP alternatives work similarly to TSP, and the application process is generally the same.
Just make sure to follow the specific instructions provided by the manufacturer when using these products.
– Household Detergents
For surfaces that are not heavily soiled, you can use a mild household detergent mixed with water for cleaning. This is generally safer than using stronger cleaning agents like TSP. Apply the detergent solution to the surface with a sponge or cloth, then rinse it thoroughly and let it dry completely.
• Essential Pre-Painting Surface Cleaning Techniques
There are a variety of ways to clean surfaces before painting, depending on the type of surface, the degree of dirt, and the presence of other contaminants. Here are some essential techniques to help you achieve an optimal painting surface.
– Dusting and Vacuuming
Before using any cleaning agent or solution on the surface, it is essential to remove loose dirt and dust particles. Use a vacuum cleaner with a brush attachment to remove dust from walls, ceilings, and trim.
You can also use a duster or a soft, dry cloth to wipe down the surface. This step prevents dirt particles from getting trapped under the paint, ensuring a smoother finish.
– Washing
Once you have removed the loose dirt and dust, proceed to wash the surface using the appropriate cleaning agent (TSP, TSP alternative, or household detergent). Make sure to rinse the area thoroughly after washing to remove any residue left behind.
– Degreasing
If grease and grime are present on the surface (such as in a kitchen), a degreasing agent is necessary. You can use a commercial degreaser or a homemade solution, such as a mixture of white vinegar and water in a 1:1 ratio.
Apply the degreaser with a sponge or cloth, working it into the surface, and then rinse with clean water.
– Sanding
Sanding is a crucial step for most surfaces before painting. Light sanding removes any rough or uneven patches, thus ensuring better paint adhesion. Use fine-grit sandpaper (150 to 180 grit) for a smooth finish. After sanding, be sure to vacuum or wipe down the surface to remove any dust particles.
– Removing Mold and Mildew
If mold or mildew is present on the surface, it must be treated with a bleach solution or a commercially available mold cleaner. Follow the manufacturer’s instructions when using these products.
Make sure to wear protective gear and work in a well-ventilated area when handling these chemicals. Upon completion, allow the surface to dry completely before proceeding with painting.
• Final Thoughts
In conclusion, proper surface cleaning and preparation are essential to a successful paint job. By understanding the different cleaning agents available and employing the appropriate techniques for the specific surface, you will achieve a professional look and extend the life of your paint job.
Following these recommendations and dedicating time to thorough surface preparation will ultimately save you time and resources in the long run.
Surface | Cleaning Solution |
|---|---|
Wood | Soapy water or TSP solution |
Metal | Mineral spirits, degreaser, or TSP solution |
Plastic | Warm, soapy water or rubbing alcohol |
Masonry/Concrete | TSP solution, muriatic acid, or degreaser |
Drywall | Soft, damp cloth or dry microfiber cloth |
Importance of Cleaning Surfaces Prior to Painting
Absolutely, cleaning the surface before painting is a crucial step for ensuring a successful painting project, whether you are dealing with interior or exterior surfaces.
Proper cleaning not only helps to remove dirt, grease, and debris but also allows the paint to adhere more effectively.
• The Importance of Surface Cleaning
There are various reasons why cleaning the surface is essential before applying any paint:
- Adhesion: Paint adheres better to a clean surface, ensuring a long-lasting and durable finish.
- Appearance: A clean surface allows the paint to appear more uniform and visually appealing.
- Preventing defects: Removing dirt, grease, and contaminants minimizes the risk of paint defects and failures, such as blistering, peeling, or staining.
• Preparing Different Surfaces for Painting
– Cleaning Interior Walls
- Inspect the walls: Before you start painting, examine the walls for any defects, such as cracks, holes, or stains. Repair all the imperfections to ensure smooth paint application.
- Remove dust: Use a soft, dry cloth or a vacuum cleaner with a brush attachment to gently remove any dust or cobwebs from the walls and the surrounding area.
- Wash the walls: Mix a mild detergent with warm water, and use a sponge or cloth to clean the walls. Avoid soaking the walls; a slightly damp cloth or sponge will suffice. Rinse the walls with clean water to remove any remaining soap residue.
- Deal with stains: Pets, smoke, and cooking can cause stubborn stains on the walls. Use a household stain remover or a mixture of water and white vinegar to clean these stains.
- Allow walls to dry: Let the walls dry completely before painting; otherwise, you may encounter adhesion issues or uneven paint distribution.
– Cleaning Exterior Surfaces
- Inspect the surface: Look for any signs of wear, such as peeling paint, cracks, mold, or mildew. Address these issues before proceeding with cleaning.
- Remove loose paint: Use a scraper, sandpaper, or wire brush to remove any loose, peeling, or chipping paint. Exercise caution not to damage the underlying surface.
- Clean the surface: For exterior surfaces, you can use either a pressure washer or a garden hose with a spray nozzle attachment. If you opt for a pressure washer, choose a low-pressure setting, and keep the nozzle at least 18 inches away from the surface to avoid potential damage. Start washing from the bottom of the surface, working your way up.
- Manage mold and mildew: If you discover mold or mildew on the surface, use a mixture of bleach and water or a commercial mildewicide to treat the affected areas.
- Allow the surface to dry: Give the surface ample time to dry before painting, as moisture can cause adhesion issues and other paint defects.
• Expert Tips for Surface Preparation
- Avoid painting on a hot, sunny day or during high humidity, as these conditions can cause paint defects.
- To prevent streaks, apply the cleaning solutions in a uniform direction, preferably from top to bottom.
- Follow the instructions on paint cans and cleaning products, as inappropriate use can cause damage, poor paint adhesion, or an uneven finish.
- Invest in high-quality painting tools and materials, like brushes, rollers, and tape, to ensure a professional result.
• Conclusion
Cleaning the surface before painting is an essential step for a successful painting project. A clean surface ensures better paint adhesion, improved appearance and prevents paint defects.
Be it interior walls or exterior surfaces, thorough cleaning and preparation help achieve a long-lasting, professional finish.
Lastly, follow the expert tips and recommendations mentioned in this article, and for more guidance on surface preparation and painting, visit diynetwork.com.
Remember, a little extra time and effort before painting can make all the difference in the final result. So, clean those surfaces well and get ready for a stunning transformation.
Effective Pre-Paint Wipe Solutions for Surfaces
Preparing the surface before applying paint is a crucial step to ensure a smooth, long-lasting, and professional finish. One essential part of this preparation process is using a pre-paint wipe to clean and degrease the surface.
• Types of Pre-Paint Wipes
There are numerous choices when selecting a pre-paint wipe that can effectively remove dust, dirt, grease, and other contaminants from a surface. Some common options include:
– Microfiber Cloths
Microfiber cloths are an excellent choice for a pre-paint wipe due to their ability to attract and hold dust, dirt, and grime. These cloths can be used dry or dampened with water or a cleaning solution. They are also machine washable and reusable, making them an eco-friendly option.
– Tack Cloths
Tack cloths are specially designed to remove dust and other particles from surfaces before painting. These cloths are made from a sticky, lint-free material that effectively picks up and holds onto contaminants.
Tack cloths are typically used in the automotive and woodworking industries but can be utilized for any painting project.
– Lint-Free Cotton Cloths
Lint-free cotton cloths, such as those made from surgical or cheesecloth materials, are another option for a pre-paint wipe. These cloths can be used with or without a cleaning solution to remove loose particles and residue from surfaces before painting.
– Disposable Wipes
Disposable wipes, like shop or paper towels, can be used as a pre-paint wipe in a pinch. However, these options may not be as effective as other choices and tend to leave behind lint or other residue on the surface.
• Cleaning Solutions for Pre-Paint Wipes
In addition to selecting the right type of wipe, it’s also essential to find the appropriate cleaning solution for your pre-paint wipe. Some recommended cleaning agents include:
– Isopropyl Alcohol (IPA)
Isopropyl alcohol is an excellent choice for a cleaning solution because it evaporates quickly and leaves no residue.
It is also effective at breaking down grease and other surface contaminants that can interfere with paint adhesion. IPA can be found in various strengths, but a 50-70% solution is typically recommended for pre-paint cleaning.
– Acetone
Acetone is a powerful solvent that is effective in removing grease, oil, and other contaminants from surfaces.
However, it can also cause damage to certain materials, like plastic or synthetic surfaces. Always test a small, inconspicuous area before using acetone to ensure it won’t cause damage to the surface you’re preparing for painting.
– Denatured Alcohol
Denatured alcohol, also known as methylated spirits, is another effective cleaner for pre-paint wipes. This solvent is less harsh than acetone and evaporates quickly without leaving residue. Denatured alcohol is usually mixed with water or a dedicated paint prep cleaner for optimal cleaning results.
– Paint Prep Cleaners
Paint prep cleaners are commercially available cleaning solutions specifically formulated for prepping surfaces before painting. These cleaners are designed to remove grease, oil, and other contaminants without damaging the surface or leaving residue behind.
An example of a paint prep cleaner is Prepaint Cleaner, which is formulated for use with waterborne paint systems.
• Recommended Steps for Using Pre-Paint Wipes
To ensure the most effective use of pre-paint wipes, follow these steps:
- Start by removing any loose dust or debris from the surface with a vacuum, brush, or compressed air.
- Select the appropriate pre-paint wipe and cleaning solution for your project.
- Dampen the wipe with the cleaning solution and wring out any excess liquid to avoid dripping.
- Wipe down the entire surface in a consistent pattern, making sure to overlap strokes.
- Allow the surface to air dry or use a clean, dry cloth to remove any remaining moisture.
- Inspect the surface for any missed areas or debris and repeat the process if necessary.
By utilizing a pre-paint wipe as part of your surface preparation process, you can ensure that your painting project will have a smooth, professional finish that lasts for years to come.
Using Paint Thinner for Surface Cleaning Before Painting
Cleaning surfaces before painting is an essential step to ensure that the paint adheres properly and has a professional-looking finish. One common question among homeowners and DIY enthusiasts is whether they can use paint thinner for this purpose.
• What is Paint Thinner?
Paint thinner is a solvent commonly used to thin oil-based paints, making them easier to work with and quick to dry. The most common type of paint thinner is mineral spirits or white spirits, which are petroleum-based and have powerful solvents.
This is particularly important when it comes to painting techniques that require a more fluid paint consistency or cleaning brushes and equipment.
• Can I Use Paint Thinner for Surface Cleaning?
Yes, paint thinner can help you clean surfaces before painting, particularly if you’re working with greasy, oily, or dirty surfaces. The solvent properties of paint thinner remove these impurities and prepare the surface for a fresh coat of paint.
However, there are a few important things to keep in mind when using paint thinner:
– Safety Precautions
Paint thinner is a strong chemical that can be hazardous if handled incorrectly. When using paint thinner to clean surfaces, make sure to follow these safety precautions:
- Always wear gloves, safety goggles, and an appropriate mask to protect yourself from chemical exposure.
- Work in a well-ventilated area, as fumes can be toxic.
- Keep paint thinner away from open flames, sparks, and heat sources since it is flammable.
- Dispose of used paint thinner and any contaminated materials properly, following local regulations.
Remember that paint thinner can also damage certain surfaces, including plastic, rubber, and some types of paint. Always test a small, inconspicuous area before using paint thinner on the entire surface.
– Proper Application
To effectively use paint thinner for surface cleaning:
- Apply the paint thinner on a lint-free cloth or a rag, avoiding direct pouring onto the surface.
- Wipe the surface gently in a circular motion, making sure to remove any accumulated grime or dirt.
- Give the surface ample time to dry before proceeding with painting. This may vary depending on environmental conditions, so be patient.
It’s worth noting that using paint thinner may not be suitable for every surface, nor is it the most environmentally-friendly option. Therefore, it can be helpful to explore alternative cleaning methods in certain cases.
• Alternatives to Paint Thinner for Surface Cleaning
In some situations, using paint thinner may not be necessary or the best choice. Here are some alternative cleaning methods and products to consider:
– Warm, Soapy Water
For surfaces that are relatively clean or require mild cleaning, simply using warm, soapy water can suffice. This method is eco-friendly and typically safe for most surfaces. However, this may not be strong enough to remove stubborn stains, oil, or grease from surfaces.
– TSP (Trisodium Phosphate)
TSP is a powerful cleaning agent often used as an alternative to paint thinner. It effectively degreases surfaces and is especially useful when working with areas that have accumulated grime. Always follow the manufacturer’s instructions and safety precautions when using TSP.
– Commercial Cleaners
There are various commercial cleaning products on the market that are specifically designed to prepare surfaces for painting.
These products can be more environmentally friendly than paint thinner, and they are formulated to remove various types of grime, dirt, and stains without causing damage to the surface. Be sure to read and follow the instructions on the product label for best results.
• Final Thoughts
While paint thinner can be used to clean surfaces before painting, it is essential to use it safely and consider if it is the best option for your specific project.
Alternative cleaning methods, such as warm, soapy water, TSP, or commercial cleaners, can also provide effective results without the need for strong chemicals. Always assess the specific needs of your project and choose the most suitable cleaning method to ensure a professional, long-lasting paint job.
For additional information and resources on surface preparation, consider visiting the US Environmental Protection Agency.