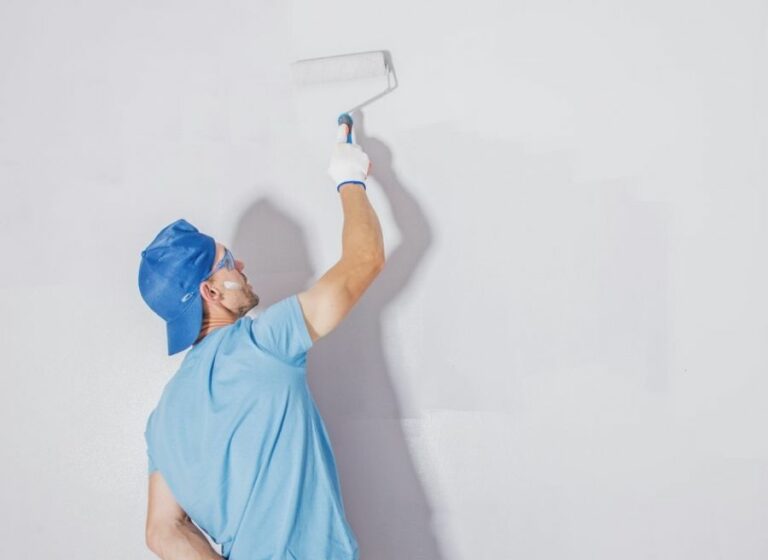
Solutions For Antique Building Surface Upkeep. What Pros Say
Caring for and maintaining the surfaces of antique buildings can be quite a challenge, but fear not, as effective and proven solutions will help preserve the original aesthetics and structural integrity of these historic treasures. With a deep understanding of the unique needs of antique buildings, we are well-equipped to ensure that their surfaces remain pristine for years to come.
Solutions for antique building surface upkeep:
Antique building surface upkeep involves proper cleaning techniques, repair and restoration methods, and preventive measures. Key solutions include gentle manual cleaning, appropriate detergents, steam cleaning, poulticing, re-pointing, patch repair, consolidation and strengthening, and protective coatings. Environmental control, protective barriers, and regular monitoring and maintenance are essential for preserving historic exteriors.

Preserving the charm and beauty of antique buildings is an art in itself. Delve deeper into our comprehensive guide as we reveal expert techniques and meticulous approaches to maintain and restore these timeless structures.
Uncover valuable insights and practical solutions to keep history alive. Read on!
Contents
- 1 Preservation Techniques for Historic Building Exteriors
- 2 Methods for Restoring and Protecting Vintage Wood
- 3 Tips for Safe and Efficient Cleaning of Antiquities
- 4 Proper Wood Surface Maintenance Techniques
- 5 Cleaning and Caring for Century-Old Wooden Furnishings
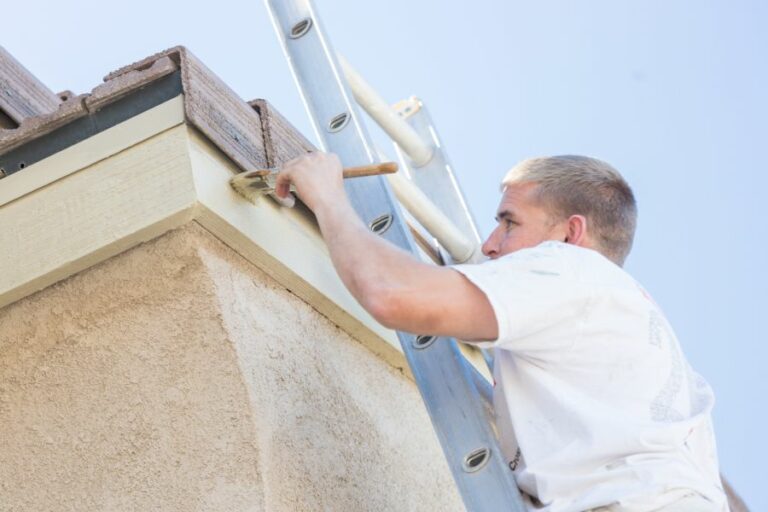
Preservation Techniques for Historic Building Exteriors
• Importance of Maintaining Antique Building Surfaces
Preserving the authenticity and original charm of antique structures is essential in conservation and restoration projects. Proper upkeep of the building surfaces not only safeguards the materials and aesthetics of the structure but also contributes to its longevity.
• Cleaning Techniques for Antique Building Surfaces
– Manual Cleaning
To protect delicate surfaces and fragile features, manual cleaning with soft brushes or cloths may be recommended. Always use gentle, non-abrasive materials, and avoid applying excessive pressure to prevent damage to the surface.
– Detergent and Water
Mild detergents and water are often effective for cleaning antique building surfaces, such as brick, stone, and stuccowork. Consult a conservation expert to determine the appropriate choice of detergent, dilution ratios, and rinsing methods to avoid unnecessary harm to the materials.
– Steam Cleaning
Steam cleaning is a non-chemical, non-abrasive option ideal for removing surface grime, moss, algae, and lichens. The process uses low-pressure steam to gently remove pollutants and residue without causing damage to the structure.
However, it should be implemented with caution, as excessive heat or moisture could result in material degradation.
– Poulticing
Poulticing is a suitable method for removing deep-seated stains and encrustations from porous materials such as stone, brick, and terracotta. A poultice comprising an absorbent material and a suitable cleaning agent is applied to the stained area, and when it dries, the contaminants are drawn out of the pores.
The choice of poultice materials and the duration of the treatment should be carefully considered in consultation with a conservation specialist.
• Repair and Restoration of Antique Building Surfaces
– Re-pointing
Re-pointing is the process of repairing damaged or deteriorated mortar joints in stone or brick masonry. The materials and mix proportions for the new mortar should closely resemble the original to ensure compatibility with the existing masonry, preserving the building’s appearance and structural integrity.
– Patch Repair
Cracks or regions of local deterioration on antique surfaces can be treated with patch repair techniques. The repair material should be carefully selected to achieve both visual and structural integration with the original surface.
Appropriate techniques should be used for application, curing, and finishing to ensure long-lasting results.
– Consolidation and Strengthening
Antique building surfaces often require consolidation or strengthening measures to prevent further decay or collapse.
Chemical consolidants can be used to enhance the cohesive strength of stone, brick, or terracotta surfaces. Structural repairs or reinforcement may also be required for load-bearing portions of the building.
– Protective Coatings
In some instances, the application of a protective coating may be deemed necessary to shield antique surfaces from potential damage inflicted by environmental or human elements.
Clear coatings can be used to enhance water resistance, while breathable coatings can be employed to control surface moisture without trapping condensation.
• Preventive Measures for Antique Building Surface Upkeep
– Environmental Control
Controlling the environmental conditions surrounding an antique building is crucial for preserving its surfaces. Proper ventilation, maintaining appropriate humidity levels, and avoiding exposure to extreme temperatures can go a long way in mitigating deterioration.
– Protective Barriers and Buffers
Physical barriers, such as fences or bollards, can safeguard delicate surfaces from accidental damage or vandalism. Strategic vegetation or landscape buffers can also be used to reduce exposure to wind, solar radiation, or pollutants.
– Monitoring and Maintenance
Regular monitoring and maintenance of the building surfaces and surroundings can help identify potential problems and guide timely interventions.
Observation of the structure’s condition, supported by photographic or written records, can aid in assessing the efficacy of conservation measures and refining future maintenance strategies.
• Conclusion
Antique building surface upkeep is a critical aspect of heritage conservation and restoration. Through careful selection and implementation of appropriate cleaning, repair, and preventive strategies, we can ensure the conservation of these cherished structures for future generations.
Methods for Restoring and Protecting Vintage Wood
Antique wooden furniture and objects have a charm and character that can’t be replicated by modern pieces. These treasures can include items of furniture, picture frames, sculptures, or even wooden paneling.
With age comes a series of maintenance challenges that, if not properly addressed, can lead to irreversible damage. One of the essential aspects of caring for antique objects and furniture is keeping the wood conditioned.
• Why Conditioning is Essential
Conditioning antique wood helps to preserve its structural integrity, ensuring that it remains resistant to any changes in temperature or humidity. Well-conditioned wood is less likely to crack, warp, or split, and protection from any infestations from pests like woodworm.
Additionally, proper conditioning will help the wood to maintain its aesthetic appeal. It can clean the surface, restore its original color, and even out any discoloration caused by exposure to sunlight.
Conditioning can also provide a protective barrier against water damage and stains and minimize the risk of scratches.
• Preparing Antique Wood for Conditioning
Before conditioning antique wood, it’s essential to prepare the surface. This step is crucial to guarantee that the conditioner penetrates the wood correctly and provides long-lasting protection.
– Cleaning
Begin the process by carefully cleaning the antique wood. Remove any dust or dirt by using a soft, dry cloth or a gentle vacuum cleaner. Avoid abrasive cleaning methods as they may cause scratches on the surface.
For extremely dirty or stained surfaces, The Smithsonian Institute recommends using a mild solution of water and a gentle detergent in combination with a soft cloth. Be cautious not to soak the wood, as excess water can cause damage.
– Remove wax and old polish
If the antique wood piece has a wax or polish buildup, it should be removed before conditioning. Apply a commercial wax remover or a homemade solution of equal parts vinegar and water using a soft cloth. Gently rub the surface to eliminate any traces of old wax or polish.
After removing the buildup, wipe the surface clean with a damp cloth and let the wood dry thoroughly.
• Choosing the Right Wood Conditioner
There are various products and natural alternatives available for conditioning antique wood. Ensure the chosen conditioner is suitable for the type of wood you have, as well as being safe and non-toxic. Some popular options include:
- Beeswax polish: An all-natural option, beeswax polish provides excellent protection and creates a beautiful, lustrous finish. It’s ideal for both hard and soft woods.
- Tung oil: Derived from the seeds of the tung tree, tung oil is a durable and water-resistant natural finish. It penetrates deep into the wood, offering long-lasting protection.
- Linseed oil: Another natural option, linseed oil is derived from flaxseed and provides a rich, warm finish. Ensure you use boiled linseed oil, as raw linseed oil may not dry completely when applied to wood.
- Specialty antique wood conditioner: Many companies offer products specifically designed for conditioning antique wood pieces. These products usually contain a mix of natural oils and waxes and are formulated to protect and restore antique wooden furniture.
• Applying the Conditioner
Once the antique wood has been cleaned and prepared and a suitable conditioner has been chosen, it’s time to apply the product using these simple steps:
- Use a soft, lint-free cloth to apply the conditioner, working in small sections. For intricate details or carved areas, use a soft brush to reach all the crevices.
- Apply the conditioner in a circular motion, making sure to cover the entire surface evenly.
- Allow the conditioner to penetrate the wood for the time recommended on the product’s label, usually around 10 to 20 minutes.
- Remove the excess conditioner by buffing the surface with a clean, dry cloth. Continue to buff until the desired level of shine is achieved.
• Regular Maintenance
To keep your antique wood in the best possible condition, develop a regular maintenance routine. Generally, it’s advised to condition antique wood at least once or twice a year, depending on the overall climate and environment.
If the antique wooden piece is exposed to direct sunlight or in a dry room with insufficient humidity, it may require more frequent conditioning.
• Conclusion
Properly conditioning antique wood is an essential aspect of maintaining these cherished pieces. By following the steps outlined in this guide, you can preserve their structural integrity, enhance their appearance, and ensure they continue to be enjoyed for years to come.
Step | Description |
|---|---|
1. Clean the surface | Use a soft cloth or sponge gently dampened with mild soapy water to clean the antique wood surface. Rinse with a cloth dampened with clean water and then dry the surface with a soft, lint-free cloth. |
2. Remove old wax and grime | Use a furniture wax remover or mineral spirits on a soft cloth to gently rub away any old wax, grime, or residue left on the wood surface. Always test the remover on a small, inconspicuous area first. |
3. Apply wood conditioner | Select a wood conditioner specifically designed for antique wood. Follow the manufacturer’s instructions on how to apply the conditioner. Usually, it is applied with a soft, lint-free cloth and allowed to sit for a specified time before wiping away any excess. |
4. Buff the wood | After the conditioner has been applied and the excess wiped away, gently buff the wood with a clean, lint-free cloth to bring out its natural shine and luster. |
5. Maintain the wood regularly | Re-condition the wood regularly according to the manufacturer’s recommendations. Keep the antique wood in a stable environment with appropriate humidity levels and avoid placing it in direct sunlight or near heat sources. |
Tips for Safe and Efficient Cleaning of Antiquities
Cleaning and maintaining the elegance of antique surfaces is essential to preserve their value and beauty.
As a seasoned expert in antique restoration, I highly recommend following these techniques to ensure the longevity of your precious collectibles.
• Identifying Material Type
Different materials require specific cleaning methods. Hence, knowing the type of material is crucial to determine the right cleaning process.
The most common materials used for antique surfaces are wood, metal, glass, and ceramic. If you are unable to identify the type, consult an expert or a conservator to avoid causing further damage.
• Cleaning Antique Wooden Surfaces
Initial Wipe Down
With wooden antiques, start by gently dusting off the surface using a soft, lint-free cloth or a natural bristle paintbrush to remove loose particles without scratching the wood.
Cleaning Solution
Create a mild cleaning solution by mixing distilled water with a few drops of mild, pH-neutral dish soap. Avoid using harsh chemicals or bleach, which may damage the wood’s finish.
Using the Right Tool
For intricate carvings, use a cotton swab or a soft toothbrush dipped in the cleaning solution. Softly brush the surface to get rid of dirt and grime. For large flat surfaces, utilize a soft, lint-free cloth soaked in the cleaning solution and wrung out thoroughly.
Drying Process
After cleaning, use a dry, soft cloth to remove any excess moisture from the wood. Let the antique air dry completely, avoiding direct sunlight or heating sources.
Polishing or Waxing
Finish up the process by applying good-quality furniture wax or polish. Apply it using a soft, lint-free cloth following the wood’s grain. Buff afterward with a clean, soft cloth to impart sheen and protect the wood against dust and grime.
• Cleaning Antique Metal Surfaces
Dry Cleaning
Depending on the type of metal, dry cleaning methods like gentle dusting with a soft brush should suffice. For brass, bronze, or copper with a non-delicate patina, try using a soft cloth and a suitable metal cleaner or polish.
Always test in a small, inconspicuous area before applying to avoid harming the metal finish.
Wet Cleaning
If necessary, opt for wet cleaning methods. Create a mild solution of water and a few drops of pH-neutral dish soap. Dip a soft toothbrush or cloth into the solution and gently clean the antique. Ensure no water enters any crevices or joints.
Rinsing and Drying
Rinse the metal surface with distilled water to remove any soap residue. Dry the antique using a soft cloth or a hairdryer set to a cool setting, ensuring no moisture remains.
• Cleaning Antique Glass Surfaces
Initial Cleaning
For glass antiques, start with a gentle wipe-down using a soft, lint-free cloth or a natural bristle paintbrush to remove loose dust particles.
Cleaning Solution
Mix a few drops of mild, pH-neutral dish soap with distilled water to create a gentle cleaning solution. Never use acidic or ammonia-based products, as they can damage the glass.
Application
Dampen a soft, lint-free cloth or a cotton swab with the cleaning solution and gently clean the glass surface. For deep cleaning or getting into crevices, opt for a soft toothbrush.
Drying Process
After cleaning, gently dry the glass surface using a soft, lint-free cloth or a hairdryer set to a cool setting. Ensure the glass is completely dry.
• Cleaning Antique Ceramic Surfaces
Dry Dusting
Similar to other antiques, start with a soft, lint-free cloth or a natural bristle paintbrush for dusting and removing loose particles from the ceramic surface.
Cleaning Solution
Mix a few drops of mild, pH-neutral dish soap with distilled water. Avoid using abrasive or acidic cleaners as they can damage the ceramic surface.
Cleaning Process
Use a soft cloth or a cotton swab dampened with the cleaning solution to gently clean the ceramic surface. For intricate patterns and crevices, opt for a soft toothbrush.
Rinsing and Drying
Rinse the ceramic with clean distilled water, then use a soft, lint-free cloth to gently dry it. Let the antique air dry completely before storing or displaying.
By following the techniques mentioned above, you can ensure the safest and most effective cleaning process for your antique surfaces. Always remember to test in an inconspicuous area before using any cleaning solution on antiques, and consult a professional conservator when in doubt.
Proper care and maintenance will help keep your antiques looking their best and preserve their value for generations to come.
Proper Wood Surface Maintenance Techniques
Wood surfaces, whether it’s furniture, flooring, or home fixtures, can bring a sense of warmth and natural beauty into a space. However, to keep these surfaces looking their best, proper care and maintenance are essential.
• Regular Cleaning: A Crucial First Step
The most fundamental aspect of maintaining a wood surface is regular cleaning. Dust, dirt, and other debris can accumulate on wood surfaces and potentially cause damage. Therefore, it is crucial to keep these surfaces clean and free of debris.
- Dusting: To remove dust from wooden surfaces, use a soft, lint-free cloth or a microfiber duster. Gently wipe the surface following the direction of the wood grain. It is advisable to perform this task once a week or more frequently in high-traffic areas or homes with pets.
- Cleaning: For more thorough cleaning, mix a few drops of mild dish soap with warm water. Dampen (not saturate) a lint-free cloth and gently clean the surface. Afterward, use a dry, soft cloth to remove any excess moisture. Do this at least once a month or as needed.
• Safeguarding Wood Surfaces: Prevent Damage and Wear
Taking steps to prevent damage and wear is essential for maintaining the appearance and longevity of wood surfaces. Here are some key preventative measures to consider:
- Protect from sunlight: Prolonged exposure to direct sunlight can cause wood surfaces to fade and crack over time. If possible, reposition furniture or adjust window treatments to limit direct sunlight exposure to wood surfaces.
- Maintain temperature and humidity: Wood can expand and contract due to changes in temperature and humidity. To minimize this risk, maintain consistent indoor temperature and humidity levels.
- Use protective pads: Place felt or rubber pads under the legs of furniture or other heavy items to help prevent scratching and wear on hardwood floors. Also, use coasters, placemats, or trivets to protect wooden furniture from heat and moisture damage.
• Treating Minor Damage: Scratches, Stains, and Scuffs
Despite our best efforts, wood surfaces can occasionally show signs of wear, such as scratches, stains, or scuffs. Fortunately, these minor damages can often be repaired with simple solutions:
- Scratches: Minor scratches can be treated using a wood repair kit, often available in various shades to match different wood finishes. Another option is to apply a small amount of walnut oil, mineral oil, or furniture polish to the scratch. Gently rub the oil into the scratch using a lint-free cloth, making sure to blend it with the surrounding area.
- Stains: For water rings or stains, apply white, non-gel toothpaste directly to the mark. Use a soft cloth to gently rub the toothpaste in a circular motion, then wipe clean with a damp cloth and dry with a soft cloth. If the stain persists, try mixing equal parts of baking soda and toothpaste and repeating the process.
- Scuffs: For scuff marks on floors, use a melamine foam sponge (commonly known as a “Magic Eraser”) to gently buff away the scuff. Alternatively, apply a small amount of baking soda to a damp cloth and gently rub the scuff until it disappears. Finish by wiping the area with a clean damp cloth and drying with a soft cloth.
• Maintaining Wood Finish: Periodic Refinishing or Repainting
Over time, wood surfaces may require refinishing or repainting to restore their appearance and protection. The frequency of this maintenance depends on the type of finish, usage, and personal aesthetic preferences:
- Refinishing: In general, hardwood floors require refinishing every 10-20 years, depending on the traffic and wear. For furniture, the frequency varies depending on usage and the existing finish condition. Assess your wood surfaces periodically and consult a professional if you are unsure whether it’s time for refinishing.
- Repainting: Painted wood surfaces may need repainting more frequently than those with a clear finish. Chipping, peeling, or fading paint might indicate it’s time for a fresh coat. When repainting, be sure to properly clean and prepare the surface before applying a high-quality primer and paint for the best results.
In conclusion, maintaining wood surfaces involves regular cleaning, preventative measures, addressing minor damages, and periodic refinishing or repainting when necessary.
By following these expert tips and advice, you can ensure your wood surfaces remain beautiful, functional, and resilient for years to come.
| How do you maintain a wood surface? | ||
|---|---|---|
| Step | Action | Tips |
| 1 | Clean the surface | Wipe with a soft cloth or sponge dampened with warm water and mild detergent. Avoid soaking the wood and immediately dry with a towel. |
| 2 | Dust regularly | Use a soft, lint-free cloth to dust the wood surface, ensuring that you pick up dust rather than spreading it. |
| 3 | Avoid direct sunlight and heat | Direct sunlight and heat can cause wood to fade and warp over time. Use window treatments to block sunlight and maintain a consistent temperature and humidity level in the room. |
| 4 | Protect the surface from moisture and scratches | Use coasters, placemats, or furniture pads to protect the wood from moisture, scratches, and dents. |
| 5 | Polish or wax | Apply a high-quality furniture polish or wax regularly to protect and maintain the wood’s natural beauty. Follow the manufacturer’s instructions and test on a small, inconspicuous area first. |
| 6 | Buff the surface | After applying polish or wax, gently buff the surface with a soft cloth to bring out the wood’s natural luster. |
| 7 | Address spills and stains immediately | Clean up spills and stains as soon as they occur to prevent permanent damage. A damp cloth and a small amount of wood cleaner may be necessary for stubborn stains. |
Cleaning and Caring for Century-Old Wooden Furnishings
As an expert in antique furniture restoration, I’ve had to clean a lot of 100-year-old wood furniture over the years. I’ll share my knowledge and experience on how to best clean and preserve the beauty of your antique wooden furnishing.
• Identifying the Type of Wood
Before you start cleaning your antique furniture, it’s essential to identify the type of wood it’s made from. Different woods require different cleaning methods and precautions. Here are some common woods used in antique furniture and their characteristics:
- Oak: Oak is a dense and durable wood, making it easy to recognize by its prominent grain patterns. The color can vary from light to dark depending on the type of oak.
- Mahogany: Mahogany is a rich, reddish-brown wood with a straight, even grain. It’s often used for high-quality furniture and is easy to distinguish from other woods by its distinctive hue.
- Walnut: Walnut is a darker wood with both straight and wavy grain patterns. The color can range from light to dark brown with a warm, golden undertone.
- Pine: Pine is a soft, lightweight wood with a yellowish hue and noticeable knots in the grain pattern.
For more information on identifying your wood type, check here.
• Inspecting for Damage
Before cleaning, inspect your furniture for any damage or weakness that could potentially worsen during the cleaning process. This includes:
- Loose joints or dowels
- Cracked, warped, or missing wood pieces
- Peeling, bubbling, or damaged finish or veneer
- Signs of pest infestation (e.g., woodworm holes)
If you notice any of these signs, consult a professional furniture restorer for advice on how to proceed. Ensuring structural integrity before starting the cleaning process is crucial.
• Gathering Cleaning Supplies
Preparing your tools and cleaning supplies beforehand will help make the job more efficient. The following are essential for cleaning antique wood furniture:
- Soft, lint-free cloths
- Mild dish soap
- Distilled water
- Wood cleaner or wood soap (optional)
- Toothbrush or small, soft-bristled brush
- Wooden or plastic scraper (for removing hardened dirt or residue)
- Furniture wax or polish (specific to wood type)
• Dusting and Vacuuming
Before starting with wet cleaning methods, remove surface dirt and dust by:
- Using a soft, lint-free cloth to gently wipe the surface of your furniture.
- Adding a brush attachment to your vacuum cleaner to remove any dirt from crevices or detailed areas.
It’s essential not to apply any water or cleaning solution to the wood without proper dust removal as this can create a muddy substance, making cleaning more difficult.
• Cleaning with Mild Soap and Water
After removing surface dust, proceed with gentle cleaning:
- Mix a few drops of mild dish soap with distilled water in a bowl.
- Dampen your cloth with soapy water, then wring it out thoroughly, ensuring it’s not overly wet.
- Gently wipe the wood’s surface with the damp cloth, following the grain direction.
- Use a toothbrush or small brush to reach crevices and detailed areas if needed.
- Once the wood has been wiped, immediately use a clean, dry cloth to remove any remaining moisture.
In some cases, using a specific wood cleaner or wood soap may be necessary. If you choose to do so, follow the product’s instructions.
• Dealing with Stains or Marks
Occasionally, antique wood furniture may have stubborn stains or marks. To deal with these:
- Create a paste of baking soda and distilled water.
- Use a wooden or plastic scraper to gently apply the paste to the stain.
- Leave the mixture on the stain for a few minutes, then gently scrape it away.
- Wipe the area with a damp cloth, then immediately dry it with a clean cloth.
• Drying and Polishing
Once the cleaning process is complete, allow your furniture to air-dry for several hours or even overnight in a well-ventilated area away from direct sunlight.
After the furniture is dry, apply good-quality furniture wax or polish specific to your wood type, following the instructions on the product. Gently buff the wood with a clean, lint-free cloth.
• Final Thoughts
Having a 100-year-old wood furniture piece is a privilege, and taking care of it is crucial for preserving its value and beauty. Following the steps outlined in this guide will ensure your antique wood furniture continues to be enjoyed for generations to come.
Remember to consult a professional furniture restorer if you encounter any problem areas or have concerns about your cleaning approach.
| How to clean 100-year-old wood furniture | |
|---|---|
| 1. Inspect the furniture | Examine the furniture for any loose parts, damage, or deterioration and perform necessary repairs before cleaning. |
| 2. Dust the furniture | Use a soft, lint-free cloth or a soft-bristled brush to remove dust and dirt from the surface and crevices of the furniture. |
| 3. Test cleaners | Test any cleaning solutions on a small, inconspicuous area of the furniture to ensure that it won’t damage the wood or finish. |
| 4. Clean with a mild solution | Make a mild cleaning solution by mixing a few drops of dish soap with warm water. Dip a soft cloth in the solution and wring it out so it is damp, not wet. Wipe the furniture gently, being careful not to saturate the wood. |
| 5. Rinse with water | Dampen a clean cloth with water and gently wipe the furniture to remove any soapy residue. |
| 6. Dry the furniture | Use a clean, dry cloth to wipe the furniture and remove any excess moisture. Allow the furniture to air dry completely before using or applying any finishes. |
| 7. Apply a protective finish | Once the furniture is clean and dry, apply a protective finish, such as wax or oil, to maintain its appearance and protect it from future damage. |