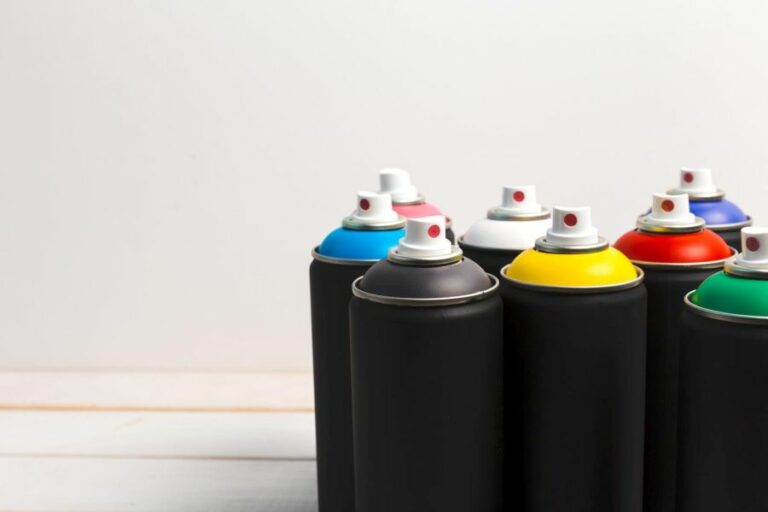
Expert Tips On Spray Can Maintenance. What Pros Say
As avid users of spray cans, we understand how important proper maintenance is to ensure they perform at their best every time. Whether you’re a graffiti artist, a DIY enthusiast, or just making some home improvements, these expert tips on spray can maintenance will help you avoid any issues and keep your cans in top-notch condition.
Expert tips on spray can maintenance:
Expert tips on spray can maintenance include shaking the can well before use, testing the spray on a piece of cardboard, cleaning the nozzle after each use, storing cans properly, replacing nozzles periodically, disposing of empty or damaged cans correctly, and educating oneself on spray can safety.
Want to keep your spray cans in perfect condition? We’ve got you covered! Our expert tips on spray can maintenance will help you prevent clogging, avoid leaks, and ensure top-quality results every time. Don’t miss out on these valuable insights. Read on to become a spray can pro!
Contents
- 1 Professional Advice on Maintaining Spray Cans
- 1.1 • Understanding the Components of a Spray Can
- 1.2 • Tip 1: Shake the Can Well Before Use
- 1.3 • Tip 2: Test Spray on a Piece of Cardboard
- 1.4 • Tip 3: Clean the Nozzle After Each Use
- 1.5 • Tip 4: Store Spray Cans Properly
- 1.6 • Tip 5: Replace Nozzles Periodically
- 1.7 • Tip 6: Properly Dispose of Empty or Damaged Cans
- 1.8 • Tip 7: Educate Yourself on Spray Can Safety
- 1.9 • Conclusion
- 2 Achieving a Flawless Finish with Spray Cans
- 3 Preventing Clogged Nozzles in Spray Paint Cans
- 4 Top 3 Tips for Applying Aerosol Paint on Steel
- 5 Guidelines for a Seamless Spray Painting Experience
Professional Advice on Maintaining Spray Cans
Proper maintenance of spray cans is essential for consistent and efficient performance. As a professional in the field, I have gathered essential tips over time to ensure the longevity of spray cans.
In this article, I will share my expertise on spray can maintenance to help you improve the performance and lifespan of your tools.
• Understanding the Components of a Spray Can
Before diving into the maintenance tips, it is essential to understand the different components of a spray can. Familiarizing yourself with these parts will help you identify potential issues and resolve them effectively:
- Nozzle: The small opening where the paint is released. It is crucial to keep this part clean and unclogged.
- Valve: The mechanism inside the can that releases the paint when the nozzle is pressed.
- Stem: The tube connecting the valve to the paint.
- Agitator ball: A small metal or plastic ball inside the can that helps mix the paint.
Now that we understand the various components let’s explore expert tips for maintaining your spray cans.
• Tip 1: Shake the Can Well Before Use
Shaking the spray can is essential to mix the paint thoroughly, ensuring a smooth and even application. I recommend shaking the can vigorously for at least one minute before each use.
You should hear the agitator ball moving freely inside the can; if you don’t, it might be time to clean the can or replace it.
• Tip 2: Test Spray on a Piece of Cardboard
Before applying paint to your project, it’s a good idea to test the spray on a scrap piece of cardboard or paper. This allows you to check the spray pattern and colors and ensure the can is functioning correctly. This step can help you avoid potential issues while working on your project.
• Tip 3: Clean the Nozzle After Each Use
To prevent the nozzle from clogging, cleaning it promptly after each use is essential. While wearing gloves, turn the can upside down and spray onto a piece of paper or cardboard until only gas comes out.
This step helps to clear any residual paint from the nozzle and valve. Then, remove the nozzle and clean it with a cloth dipped in paint thinner or rubbing alcohol.
• Tip 4: Store Spray Cans Properly
Storing spray cans correctly is critical for their performance and lifespan. Always store cans in a cool, dry place away from direct sunlight and heat sources. Extreme temperatures can cause pressure build-up in the cans, leading to the paint leaking or not spraying correctly.
Additionally, store cans with the nozzle facing down to prevent paint from collecting in the valve, which may cause clogs.
• Tip 5: Replace Nozzles Periodically
Even with regular cleaning, nozzles can degrade and become less efficient over time. I recommend replacing them periodically to maintain optimal performance.
Many spray can manufacturers provide replacement nozzles, or you can purchase them separately in various spray patterns and sizes. Continually rotating between different nozzles can also prevent excess paint buildup and clogs.
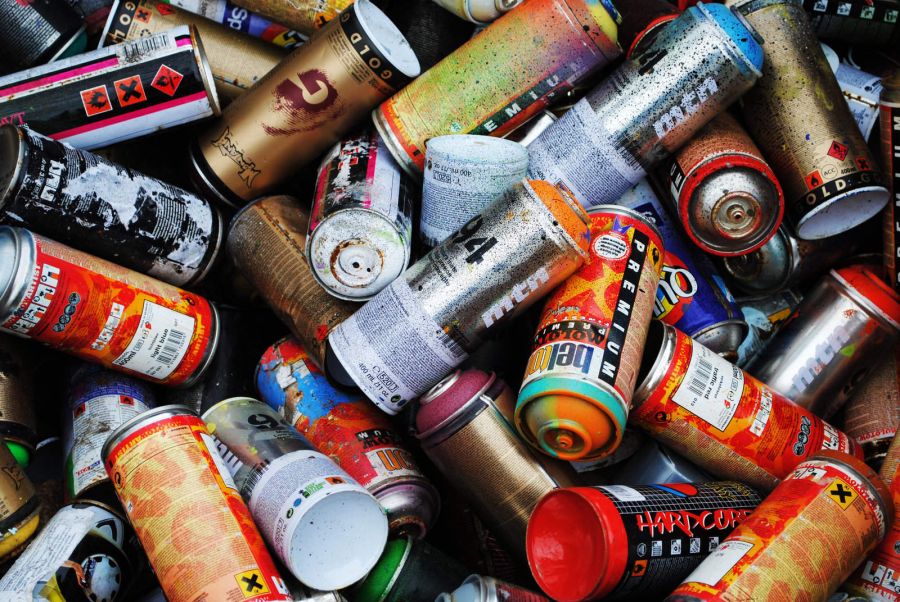
• Tip 6: Properly Dispose of Empty or Damaged Cans
It is essential to dispose of empty or damaged spray cans properly to prevent harm to the environment and comply with local regulations. Check with your local waste management facility for proper disposal instructions.
Generally, empty cans should be punctured to release any remaining pressure and then placed in an appropriate recycling bin. Damaged or leaking cans should be handled with caution and may require special disposal procedures.
• Tip 7: Educate Yourself on Spray Can Safety
Working with spray cans can be dangerous without proper knowledge and precautions. Take the time to inform yourself about the safety measures and potential hazards of using spray paints.
This educative step can help you prevent accidents, ensure proper usage, and extend the life of your spray cans.
• Conclusion
Proper spray can maintenance is a critical aspect of ensuring consistent performance and extending their life. By following these expert tips, you can maximize your spray cans’ longevity and achieve professional results for your projects.
Remember that safety should always be a priority when working with spray cans, and educate yourself on proper handling and disposal methods.
Achieving a Flawless Finish with Spray Cans
Spray cans, also known as aerosol paints or spray paints, are an affordable and accessible painting tool for various applications, including automotive painting, graffiti art, and home improvement projects.
Achieving a professional-quality finish using spray cans may seem daunting, but by following the right techniques and tips, you can achieve the desired results.
• Choose the Right Spray Paint
Selecting the appropriate spray paint for your project is crucial. Different paint types have distinct properties, so ensure that you read the label and choose the type that best suits your needs. Some popular types of spray paints include:
- Acrylic: Known for its versatility and quick-drying properties, acrylic paint is a popular choice for various surfaces like metal, plastic, and canvas.
- Enamel: Highly durable and glossy, enamel spray paint is ideal for automotive applications, outdoor furniture, or home decor.
- High-Temperature Paint: Designed to withstand heat, this type of paint is perfect for engines, grills, or radiators.
Additionally, consider the paint’s primer and finish when making your decision, as these will affect the final appearance of your project.
• Prepare the Surface for Painting
A clean, properly prepared surface is essential in obtaining a smooth finish. Be sure to take the following steps before applying spray paint:
- Clean the surface: Thoroughly clean the surface you will be painting to remove any dirt, grease, or debris. Using a gentle detergent or degreasing solution works well, but make sure to rinse thoroughly and allow the surface to dry before proceeding.
- Sand if necessary: If the surface you are painting is rough or has an existing paint layer, lightly sand it with fine-grit sandpaper to create a smooth surface for the new paint to adhere to. Be sure to remove any dust or residue after sanding.
- Apply primer: A primer will help achieve a more uniform finish and improve paint adhesion. Choose a primer that complements the paint you plan to use and apply it according to the manufacturer’s instructions.
• Spray Can Techniques for High-Quality Finish
The following techniques will assist you in achieving a smooth, even finish with your spray can:
– Shake the Can Well
Before starting to spray, make sure to shake the can vigorously for at least one minute, as recommended by Aerosol Paint Industry. This helps mix the paint and propellant inside the can, ensuring even color and consistent application.
– Test the Spray Paint
Before applying spray paint to your project, test the paint on a scrap piece of material or cardboard. This allows you to check the color and consistency, as well as practice your spraying technique.
– Maintain Proper Distance and Angle
Hold the spray can around 10-12 inches away from the surface you are painting, and maintain a consistent 90-degree angle. This distance and angle will help prevent drips and ensure even coverage.
– Apply Thin, Even Coats
Applying thin coats of paint will prevent drips, runs, and uneven coverage. When painting, start and end each pass off the surface to avoid build-up.
Allow each coat to dry for the recommended amount of time before applying the next coat. Typically, 2-3 coats are sufficient to achieve a professional-looking finish.
– Move in Smooth, Steady Motions
Move the spray can horizontally or vertically across the surface in a smooth, steady motion. This technique will help ensure consistent coverage and prevent build-up or drips from forming.
• Avoid Common Mistakes
Avoid the following common mistakes to ensure a high-quality finish:
- Spraying too close or too far: If the can is held too close, paint may build up and cause drips. In contrast, spraying from too far away can result in a grainy finish with poor coverage.
- Applying too much paint: Excessive paint application often leads to runs and drips. Apply thin coats and allow adequate drying time between layers.
- Ignoring temperature and humidity: Spray painting in extreme temperatures or high humidity can hinder paint drying and adhesion. Follow the manufacturer’s recommendations regarding optimum painting conditions.
• Protecting and Finishing Your Project
To protect and enhance the appearance of your spray-painted surface, consider applying a clear coat or sealant. Clear coatings come in matte and glossy finishes, so choose the one that best suits your project.
Additionally, store your project in a clean, dry, and protected area until the paint has fully cured.
In conclusion, achieving a professional finish with spray cans involves careful surface preparation, selecting the appropriate paint, and utilizing the proper techniques. With practice, patience, and attention to detail, you can obtain the desired results for your project.
Step | Instructions |
|---|---|
1 | Choose the right spray paint and read the instructions on the can carefully. |
2 | Prepare the surface you want to paint by cleaning it and removing any dirt, grease, or rust. |
3 | Sand the surface lightly and apply a primer if necessary. |
4 | Shake the spray can well before use and test the spray on a scrap piece of material to check if it’s working properly. |
5 | Hold the spray can at a distance of 10-12 inches from the surface and apply the paint using smooth, even strokes. |
6 | Apply several thin coats, allowing each coat to dry before applying the next one. |
7 | Once the final coat is dry, you can apply a clear coat or lacquer for added protection and shine, if desired. |
8 | Clean the spray nozzle immediately after use to prevent clogging. |
Preventing Clogged Nozzles in Spray Paint Cans
Spray paint is an incredibly versatile tool for both professional and personal projects. However, one common issue people face while using spray paint is clogged nozzles.
• Understanding the Causes of Clogged Nozzles
Before diving into prevention techniques, it’s crucial to understand what causes nozzles to clog in the first place. The primary culprit behind clogged nozzles is dried paint. When paint residue accumulates on the nozzle, it can create blockages that disrupt smooth paint flow.
Other factors, such as cold temperatures and expired paint cans, can also contribute to nozzle clogs.
Source: EPA – Paint Spray Gun Cleaning
• Storing Spray Paint Properly
Proper storage of your spray paint cans is the first step in keeping nozzles from clogging. This involves the following measures:
- Temperature: Store your spray paint cans in a room with a stable temperature, preferably between 60 and 80 degrees Fahrenheit. Extreme temperatures, especially cold ones, can cause the paint to thicken, leading to nozzle clogs.
- Storage Position: Keep spray paint cans in an upright position, with the nozzle pointing upwards. This will help to prevent paint residue from settling in the nozzle.
• Nozzle Maintenance Techniques
Maintaining and cleaning spray paint nozzles is another essential step for preventing clogs. Here are some recommendations based on personal experience:
– Regular Whipping
While using your spray paint, periodically wipe the nozzle with a clean, lint-free cloth. This will remove any paint residue building up on the nozzle during the painting process.
– Post-Use Cleaning
Always clean the nozzle after using a spray paint can. This not only prevents clogs but also ensures smooth paint flow in your future projects. Here are some recommended cleaning methods:
- Inverted Spray: Turn the can upside down and spray for approximately 10 seconds. This will help to clear out any remaining paint inside the nozzle.
- Nozzle Soak: If the nozzle is still clogged after the inverted spray, remove it from the can and soak it in paint thinner or mineral spirits for about an hour. After soaking, use a small brush or toothpick to remove any stubborn paint residue.
Note: Be sure to wear gloves and work in a well-ventilated area while handling paint thinner or mineral spirits.
– Nozzle Swapping
If all cleaning efforts fail, consider swapping the clogged nozzle with a new one. Many spray paint cans have interchangeable nozzles, so having spare nozzles on hand can save you time and frustration. You can also find replacement nozzles for purchase in most hardware stores.
• Test and Test Again
When you’re ready to use your spray paint, always perform a test spray on a scrap piece of material before starting your main project. This ensures that the nozzle is clean and the paint flow is smooth, helping you avoid any unpleasant surprises during your painting process.
• Conclusion
Proper storage and maintenance of spray paint cans and their nozzles go a long way in keeping the nozzles from clogging. By following these expert tips and recommendations, you’ll be able to use spray paint more efficiently and effectively while avoiding annoying nozzle clogs.
Don’t let clogged nozzles stand in the way of your creative projects; keep them clean and enjoy the fantastic versatility of spray paint.
Step | Description |
|---|---|
1 | Shake the spray paint can well before use. |
2 | Make sure the nozzle is clean prior to use. |
3 | Keep the nozzle at least six inches away from the painting surface to avoid buildup. |
4 | After using the spray paint, turn the can upside down and spray until the paint stops coming out. |
5 | Use a small brush, toothpick, or a pin to clean any residual paint from the nozzle. |
6 | If the nozzle is severely clogged, soak it in a container of paint thinner for about five minutes. |
7 | Always store spray paint cans in a cool, dry place to prevent clogging from humidity or temperature changes. |
Top 3 Tips for Applying Aerosol Paint on Steel
Spray painting is a popular and efficient method of applying paint to various surfaces, including steel. Aerosol paint, also known as spray paint, offers a quick and easy way to apply a smooth, even coat of paint to steel surfaces while avoiding the use of brushes or rollers.
• Surface Preparation: Clean, Dry, and Smooth
Before you start spray painting, proper surface preparation is essential to ensure that the paint adheres well and the finish is smooth and long-lasting. Follow these three steps to prepare the steel surface effectively:
1. Clean the Surface
First, you must remove any dirt, grease, or oil from the steel surface. Use a degreaser or a solvent like acetone to clean the surface thoroughly. For heavy dirt or grease, you can use a wire brush or a scraper to loosen the contaminants.
This step-by-step guide provided by the National Park Service offers detailed insights into different techniques for paint removal.
2. Dry the Steel
After cleaning the surface, allow it to dry completely. Moisture on the surface can affect the paint’s adhesion and cause it to bubble or peel. Use a clean, dry cloth or an air blower to speed up the drying process.
3. Sand the Surface
After the steel is clean and dry, use sandpaper or a wire brush to create a smooth surface. Sanding removes any remaining rust or paint, providing a perfect base for the new coat of paint. Remember to clean the surface once again after sanding to remove any dust or debris.
• Proper Application Techniques: Distance, Angle, and Overlap
Successful spray painting relies on mastering proper application techniques. Follow these guidelines to achieve an even, professional-looking finish:
1. Maintain the Right Distance
Hold the spray can at 8-12 inches from the steel surface. This allows the paint particles to spread uniformly, creating an even coat. If you hold the can too close, you may apply too much paint, causing dripping or pooling.
If you hold it too far away, the paint may not adhere properly or result in a rough, uneven surface.
2. Spray at the Proper Angle
Spray the paint at a 90-degree angle to the steel surface, moving the can horizontally or vertically as you apply the paint. This allows for even coverage and minimizes the likelihood of drips or pooling. Avoid spraying at an angle, as this can lead to uneven application and a less professional finish.
3. Overlap Your Passes
To ensure complete coverage, overlap each pass of the spray paint by about 50%. This will create a blended, seamless finish without any gaps or thin spots.
Be sure to apply multiple thin coats of paint, allowing each coat to dry according to the manufacturer’s instructions before applying the next one.
• Appropriate Paint Selection: Type, Primer, and Finish
Lastly, choosing the right paint for your steel project is crucial. Consider these factors when selecting paint:
1. Choose the Right Type of Paint
Select a paint that is specifically designed for use on metal surfaces. These paints typically contain rust inhibitors to protect the steel surface and ensure a long-lasting finish. Additionally, opt for a paint suitable for indoor and outdoor use, as environmental factors can affect durability.
2. Use a Primer
When painting steel, it’s important to use a primer before applying the paint. A primer provides a base layer that enhances the paint’s ability to adhere to the steel surface, thus improving durability and overall finish. Look for a rust-inhibiting primer to provide added protection against corrosion.
3. Consider the Desired Finish
Finally, choose a paint finish that aligns with your desired aesthetic. Spray paints are available in various finishes, including gloss, satin, and matte. Each finish offers a different appearance, so consider your project’s requirements and personal preferences when making your selection.
In conclusion, by following these important tips for surface preparation, proper application techniques, and appropriate paint selection, you can ensure a successful and professional-looking spray paint application on steel surfaces.
With practice and attention to detail, you’ll master the art of spray painting steel and enjoy a durable, attractive finish that lasts for years to come.
Tip Number | Tip |
|---|---|
1 | Clean the steel surface thoroughly before applying paint to ensure proper adhesion and prevent flaking or peeling. |
2 | Apply a primer on the steel surface to improve paint adhesion and protect the steel from corrosion or rust. |
3 | Apply the spray or aerosol paint in thin, even coats rather than a single thick coat to ensure a smooth and durable finish. |
Guidelines for a Seamless Spray Painting Experience
Spray painting can be a quick and efficient way to cover large surfaces or create intricate designs. However, it requires a certain level of skill and knowledge to produce a smooth, professional-looking finish.
• Choose the Right Tools and Materials
To achieve a smooth spray painting job, one must start by selecting the appropriate tools and materials for the task at hand. These include:
- A spray paint gun or aerosol spray paint cans
- The correct type of paint for the surface being painted
- A paint thinner or reducer, if necessary
- A primer, if painting on a bare or uneven surface
- Protective gear, such as goggles, gloves, and a dust mask
When selecting a spray paint gun, consider factors such as the size of the project, the type of paint being used, and the desired finish. Various spray paint gun models are available, each with parameters for air pressure, paint flow, and nozzle size.
• Prepare the Surface
Proper surface preparation is critical in achieving a smooth spray painting job. This involves:
– Cleaning the Surface
Remove any dirt, dust, grease, or oil from the surface to be painted. This can be done using a soft cloth or sponge and a mild detergent solution, followed by thorough rinsing with clean water. Allow the surface to dry completely before proceeding.
– Sanding and Filling
For uneven or damaged surfaces, sanding may be necessary to smooth the area before painting. Begin with coarse-grit sandpaper (80-120 grit) to remove major imperfections, then progress to finer-grit sandpaper (180-220 grit) to create an even surface.
Be sure to fill any gaps, cracks, or holes with a suitable filler according to the instructions provided by the manufacturer. Allow the filler to dry and sand it smooth.
– Applying a Primer
A primer should be used on porous, uneven, or bare surfaces to create a uniform base for the paint. Apply the primer according to the manufacturer’s instructions, ensuring a smooth and even coat. Allow the primer to dry fully before proceeding with the actual painting process.
• Set Up Your Workspace
Designate a well-ventilated, dust-free area for spray painting. Ideally, the painting area should be protected from drafts, direct sunlight, and humidity to prevent paint from drying too quickly or unevenly.
– Prepare the Spray Paint Gun or Aerosol Can
If using a spray paint gun, assemble it according to the manufacturer’s instructions and adjust the air pressure, paint flow, and nozzle size as required. For aerosol spray paint cans, shake the can vigorously for at least one minute to ensure proper color mixing and consistency.
– Test the Spray Pattern
Before applying paint to the project surface, test the spray pattern on a scrap piece of cardboard or similar material. This allows you to adjust the nozzle for the desired spray pattern and become familiar with the handling and control of the spray paint gun or aerosol can.
• Apply the Paint in Thin, Even Coats
To achieve a smooth finish when spray painting, applying the paint in thin, even coats is essential.
Hold the spray paint gun or aerosol can approximately 10-12 inches away from the surface and use a side-to-side sweeping motion while maintaining a consistent distance from the surface.
Overlap each pass by approximately 50% to ensure complete coverage.
Allow each coat of paint to dry according to the manufacturer’s instructions before applying the next coat. This may vary depending on the type of paint, humidity, and temperature.
It is generally advised to apply a minimum of two coats, but additional coats may be necessary for adequate coverage and desired appearance.
• Inspect and Correct any Imperfections
Once the final coat has been applied and has dried, it is crucial to inspect the surface for any imperfections, such as runs or drips. If necessary, lightly sand these areas with fine-grit sandpaper (320-400 grit) and ensure the surface is free of dust before applying a touch-up coat of paint.
It may also be helpful to refer to a troubleshooting guide if experiencing issues with the spray painting job.
• Finalize and Protect the Paint Job
If a clear coat or sealant is required to protect the paint job, follow the manufacturer’s instructions for application and drying time. Once the final clear coat or sealant has dried, the surface can be considered complete.
By carefully following these steps and using the right tools and materials, you can achieve a smooth and professional-looking spray painting job.
Remember to take your time, work in a well-ventilated area with proper protective gear, and practice good handling techniques to ensure the best possible results.