Paint Preparation Tips For Indoors, 25 Things You Should Know
Proper preparation for indoor painting projects can make all the difference in achieving professional-looking results. I’m here to help you with essential paint preparation tips that will save you time and ensure a flawless finish.
Paint preparation tips for indoors:
Choose the right paint type, finish, and color to prepare for an indoor paint job. Gather necessary supplies like brushes, rollers, and painter’s tape. Clear and cover the room, remove decorations and outlet covers, clean the walls, and apply painter’s tape. Repair and prime walls, sand them, and apply primer. Paint walls by cutting in, rolling, avoiding lap marks, and applying multiple coats if needed. Finally, clean up and dispose of used materials.

Discover expert advice on preparing your indoor space for a flawless paint job! We’ve got you covered with step-by-step guidance, essential tools, and insider tips for a hassle-free experience. Read on to learn how to achieve professional results that’ll transform your home in no time!
Contents
- 1 Indoor Paint Preparation Techniques
- 2 Getting Ready for Interior Painting: A Guide
- 2.1 • Clear the Room of Furniture and Belongings
- 2.2 • Clean the Walls and Ceiling
- 2.3 • Remove Wall Hangings, Outlet Covers, and Light Fixtures
- 2.4 • Repair Damaged Surfaces
- 2.5 • Sand the Walls and Ceiling
- 2.6 • Remove or Protect Trim and Baseboards
- 2.7 • Apply Painter’s Tape to Windows and Door Frames
- 2.8 • Lay Down Drop Cloths or Plastic Sheeting
- 2.9 • Prime the Walls and Ceiling
- 2.10 • Prepare Your Paint and Tools
- 3 Washing Walls: A Standard Practice Among Pro Painters?
- 4 Expert Painters’ Wall Preparation Methods Unveiled
- 5 Discover the Most Effective Pre-Painting Preparation Strategy
Indoor Paint Preparation Techniques
A successful paint job begins with proper preparation.
• Choosing the Right Paint
Selecting the right paint is essential for a successful paint job. Consider the following:
- Type of Paint: Choose between water-based (latex) or oil-based (alkyd) paints. Water-based paints are generally easier to work with and have lower fumes and quicker drying time, while oil-based paints are more durable and provide a smoother finish.
- Finish: Choose from flat, eggshell, satin, semi-gloss, or high-gloss finishes, depending on the desired look and room type. For instance, high-traffic areas such as hallways benefit from a more durable finish like satin or semi-gloss.
- Color: Test paint samples on the walls in different lighting conditions before committing to a color. This helps you get a better idea of how the paint color will look once it’s on your walls.
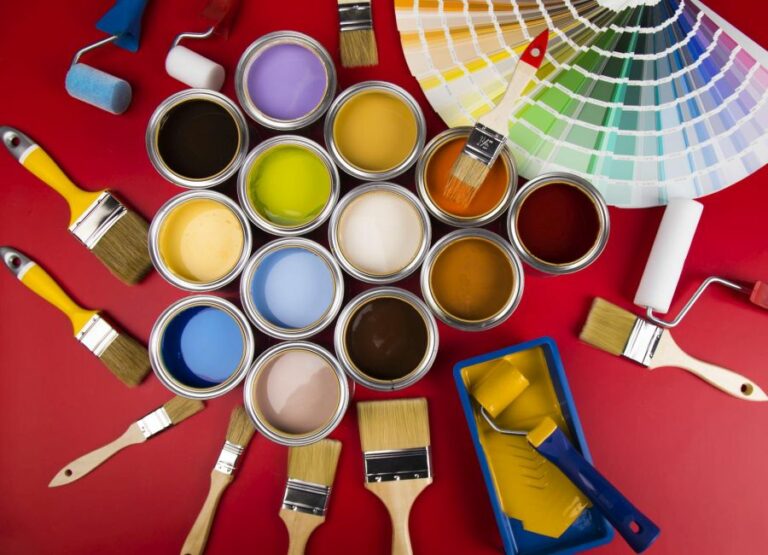
• Gathering Your Supplies
Having the right supplies and tools greatly contributes to the quality of your paint job. Essential tools and materials include:
- Paint
- Primer
- Brushes
- Rollers
- Paint trays
- Painter’s tape
- Drop cloths or plastic sheeting
- Ladder
- Sandpaper
- Caulk
- Putty knife
- Screwdriver
- Utility knife
• Preparing the Room
Take the time to prepare your room by following these steps:
- Remove Furniture: Clear the room of furniture or move it to the center and cover it with drop cloths or plastic sheeting.
- Cover the Floors: Use drop cloths or plastic sheeting to protect your floors from paint drips and spills.
- Remove Wall Decor and Outlet Covers: Take down any wall decorations and remove outlet covers, switch plates, and other fixtures using a screwdriver.
- Clean the Walls: Wipe down walls with a damp cloth to remove dust, dirt, and grease, which could otherwise cause the paint to peel or not adhere properly.
- Apply Painter’s Tape: Apply painter’s tape along baseboards, doorframes, and window frames to ensure clean edges and protect these surfaces from paint.
• Repairing and Priming the Walls
Before applying the paint, repair any damages and prime the walls for optimal results.
- Patch Holes and Cracks: Fill small holes and cracks with caulk, and use a putty knife to smooth larger holes with a spackle. Allow the filler to dry, then smooth the surface with fine-grit sandpaper.
- Sanding the Walls: Lightly sand the walls with fine-grit sandpaper to create a smoother surface and promote better paint adhesion.
- Priming: Apply primer to the walls using a brush or roller. Primer helps to cover imperfections, create a smoother finish, and improve paint adhesion. For best results, follow the manufacturer’s instructions for the drying time.
• Painting the Walls
With the room properly prepared, follow these tips for a successful paint job:
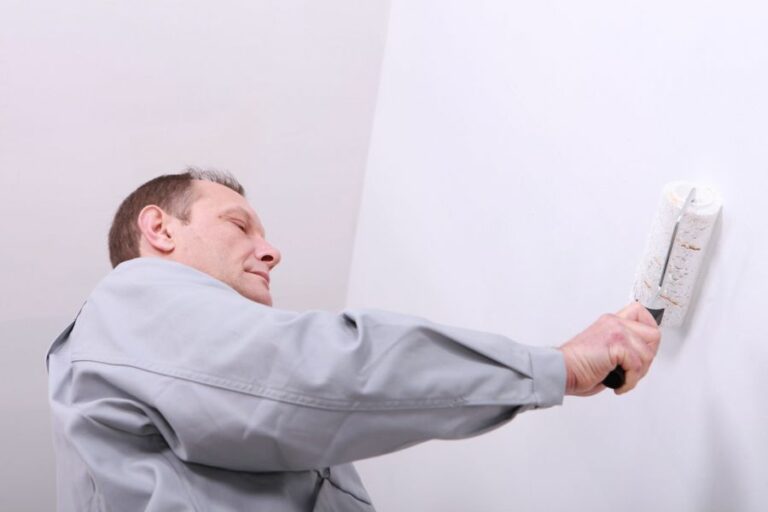
- Cutting In: Begin painting by “cutting in” the edges of the walls with a brush. This ensures clean lines and prevents roller marks near the edges.
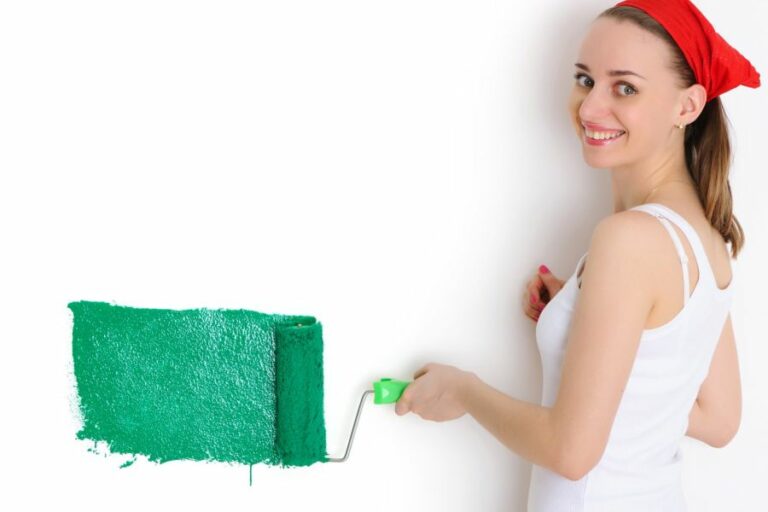
- Rolling: Use a roller to apply paint in a “W” or “M” pattern on the walls. Be sure to properly load the roller with paint to avoid drips and provide even coverage.
- Avoid Lap Marks: Maintain a wet edge with the roller to prevent lap marks by not allowing the paint to dry before moving on to the next section.
- Multiple Coats: If necessary, apply a second coat of paint after allowing the recommended drying time per the manufacturer’s instructions.
- Clean-Up: Properly dispose of used paint and supplies, clean your brushes and rollers, and patiently remove painter’s tape at a 45-degree angle for clean edges.
A well-prepared and carefully painted room contributes greatly to the overall atmosphere and aesthetics of your home. For more insight on interior painting techniques, consider visiting the This Old House website.
By following these essential paint preparation tips for indoors, you will be well on your way to achieving the professional-looking paint job your space deserves.
Getting Ready for Interior Painting: A Guide
Painting a room can be a simple, cost-effective way to freshen up your living space and give it a whole new look. But it’s essential to prepare your room for painting to ensure a flawless finish.
• Clear the Room of Furniture and Belongings
Before you start painting, it’s essential to clear the room of all furniture, clothing, and personal items. If possible, remove everything from the room to make it easy to move around and access all areas of the walls and ceilings.
If some items are too heavy or bulky, move them to the center of the room and cover them with a drop cloth or plastic sheeting.
• Clean the Walls and Ceiling
It’s important to clean the walls and ceiling before painting to ensure the paint adheres properly. Use a sponge or cloth dampened with water and mild detergent to gently clean any dust, dirt, or grease from the surface.
This guide from the US Environmental Protection Agency offers recommendations on safe cleaning products to use. Allow the surfaces to dry thoroughly before proceeding to the next step.
• Remove Wall Hangings, Outlet Covers, and Light Fixtures
Before painting, remove any wall hangings, outlet covers, and light fixtures that may be attached to the walls or ceiling. Carefully unscrew the fixtures and store them in a safe place. Be sure to turn off the power to any outlets in the room if you need to remove their covers.
This will help ensure your safety and prevent damage to your belongings.
• Repair Damaged Surfaces
Inspect the walls and ceiling for any cracks, holes, or other damage that needs repairing. Fill small holes and cracks with spackling compound, using a putty knife to smooth the surface. For larger repairs, like peeling paint or damaged drywall, consult a professional to determine the best course of action.
• Sand the Walls and Ceiling
Next, lightly sand the walls and ceiling to create a clean, smooth surface for the paint to adhere to. Use fine-grit sandpaper (around 120 grit) and a sanding block or pole sander for this task. Sand in a circular, overlapping motion, focusing on any areas that had been patched or repaired.
After sanding, use a damp cloth or sponge to remove any dust from the surface.
• Remove or Protect Trim and Baseboards
If you plan to paint the trim and baseboards, it’s essential to either remove them or protect them from paint drips and splatters. To remove trim, carefully pry it away from the wall with a flat pry bar, not damaging the wall or trim pieces.
If you choose to leave the trim in place, tape it off with painter’s tape, pressing down firmly to create a seal that will prevent paint from bleeding onto the trim.
• Apply Painter’s Tape to Windows and Door Frames
Painter’s tape is crucial for protecting surfaces you don’t want to be painted, like windows and door frames. Apply the tape in a straight line, pressing down firmly to create a tight seal. This will help prevent paint from seeping under the tape and onto the protected surfaces.
Remember to remove the tape before the paint dries entirely to avoid peeling off any paint with it.
• Lay Down Drop Cloths or Plastic Sheeting
Protect your floors and any remaining belongings in the room by laying down drop cloths or plastic sheeting. Make sure the entire floor is covered, and tape the edges of the sheeting to the baseboards or walls to prevent it from slipping or bunching up while you paint.
• Prime the Walls and Ceiling
Priming the walls and ceiling before painting is an essential step, as it helps the paint adhere better, reduces the number of coats required, and leads to a more uniform finish.
Use a high-quality primer and apply it to the walls and ceiling with a brush or roller, following the manufacturer’s directions on coverage and drying times.
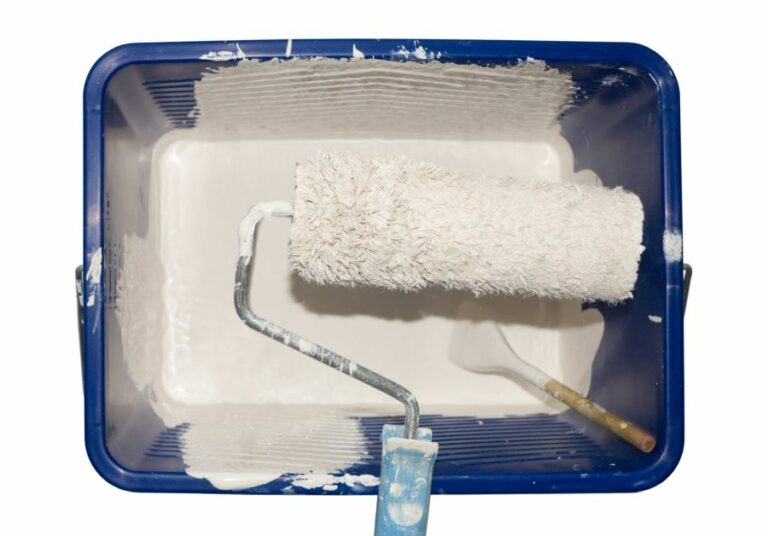
• Prepare Your Paint and Tools
Before you begin painting, make sure you have everything you need, like paint trays, brushes, rollers, and an extension pole if necessary. Stir the paint thoroughly to ensure even color distribution, and pour it into a tray for easy access.
After following these preparation steps, you’ll be ready to paint your indoor space with confidence, knowing that you’ve taken the necessary precautions to achieve professional-looking results.
Steps | Description |
|---|---|
1. Remove furniture and belongings | Clear the room of all furniture, decorations, and other items to prevent any damage from paint splatters. |
2. Clean the walls | Wipe down walls with a damp cloth to remove dust, dirt, and grease, ensuring the paint will stick properly. |
3. Repair imperfections | Fill any holes or cracks with spackling compound, and sand the area smoothly once it dries. |
4. Tape off the areas | Apply painter’s tape to baseboards, trim, windows, and any surfaces you do not want to paint. |
5. Apply primer | Apply a coat of primer, especially on new or repaired areas, to help the paint adhere and provide an even base. |
6. Choose the right paint | Select a high-quality paint in the desired color and finish for your space, taking into consideration factors like light and room use. |
7. Gather tools and supplies | Get paintbrushes, rollers, paint trays, drop cloths, and any other tools you will need to complete the painting job. |
8. Start painting | Begin painting your room, following best practices for cutting in, rolling, and ensuring even coverage. |
Washing Walls: A Standard Practice Among Pro Painters?
In the world of professional painting, the importance of proper preparation cannot be overstated. One essential step in the preparation process is washing the walls before applying paint.
• The Importance of Washing Walls
As a professional painter, I can attest to the fact that a clean surface is critical to achieving a high-quality, long-lasting paint job. Dirt, grease, grime, and dust can accumulate on walls over time, making it difficult for paint to adhere properly.
If these contaminants are not removed before painting, the result can be peeling, cracking, or blistering paint, which can lead to a less-than-desirable final appearance and the need for costly and time-consuming repairs.
According to the Painting and Decorating Contractors of America, proper surface preparation is one of the key factors in determining the success of a painting project. Washing the walls before painting not only improves the final result but also ensures the paint’s longevity.
• How to Wash Walls Before Painting
As a professional painter with years of experience, I recommend following these steps for washing walls before painting:
1. Gather Materials
To wash the walls effectively, you will need the following:
- A large bucket
- Water
- Mild detergent or TSP (trisodium phosphate) cleaner
- Sponge or cloth
- Rubber gloves
- A stepladder or extension pole (if necessary)
2. Prepare the Room
Before washing the walls, ensure the room is ready for cleaning:
- Remove furniture or cover it with plastic sheeting or drop cloths.
- Lay down drop cloths to protect the floor from water and detergent.
- Remove the electrical outlet and switch covers, then tape over the openings to prevent water from seeping inside.
- If you need to use a stepladder or extension pole, make sure they are properly set up and secure for safety.
3. Mix Cleaning Solution
In the bucket, mix warm water with the mild detergent or TSP cleaner, following the manufacturer’s instructions. Make sure also to wear rubber gloves to protect your hands from any possible irritation.
4. Start Washing the Walls
Beginning at the top of the wall, use a sponge or cloth to apply the cleaning solution. Work your way down the walls, using a circular motion to lift dirt, grease, and grime. Be careful not to soak the walls; using too much water can damage the drywall underneath.
5. Rinse the Walls
Once the walls have been thoroughly cleaned, use a sponge or cloth dampened with clean water to rinse away the detergent or TSP solution. Again, be mindful not to use too much water, as this can damage the walls.
6. Allow the Walls to Dry
After rinsing the walls, allow them to dry completely before proceeding with painting. Depending on the room’s temperature and humidity, this can take anywhere from a few hours to a full day.
• The Benefits of Washing Walls Before Painting
There are several key benefits to washing walls prior to painting, which include:
– Improved Paint Adhesion
A clean wall allows the paint to adhere more effectively, resulting in a smoother and more even finish. This ultimately leads to a higher quality and more professional-looking paint job.
– Longer Lasting Paint Performance
By removing dirt, grease, and grime from the walls, the paint is more likely to withstand peeling, cracking, or blistering. This can extend the lifespan of the paint job and save time and money on repairs and maintenance.
– Better Color Accuracy
A properly cleaned wall will result in a truer color representation once the paint is applied, ensuring the final result matches your desired aesthetic.
– Enhanced Safety
Washing walls before painting helps to remove potential allergens such as dust and mold spores, which can contribute to a healthier indoor environment.
• In Conclusion
As an experienced professional painter, I can confirm that washing walls is an essential step in achieving a successful and long-lasting paint job.
By taking the time to clean the walls prior to painting properly, you can ensure a higher quality finish, improved paint performance, and a more accurate color representation. Not to mention the enhanced safety benefits of a cleaner indoor environment.
Always remember that proper preparation is the key to success when it comes to any painting project.
Expert Painters’ Wall Preparation Methods Unveiled
• Importance of Wall Preparation
One of the most critical steps in achieving a high-quality paint job is proper wall preparation. Prepping walls ensures a smooth and even surface for paint application and reduces the risk of defects such as peeling, blistering, or uneven paint coverage.
• Inspection and Repair
– Identifying Imperfections
To begin the wall preparation process, professional painters carefully inspect the walls for any imperfections, such as cracks, holes, or peeling paint. It is crucial to address these issues before moving on to the next steps.
Failing to do so may result in a subpar paint job and could lead to long-term damage to the walls.
– Repairing Cracks and Holes
For small cracks or holes, a painter typically uses a lightweight spackling compound to fill and level the surface. Larger cracks and holes may require a more durable patching material, such as joint compound or a specialized repair product.
Once the repairs have dried, professionals lightly sand the area to ensure a smooth finish.
– Repairing Peeling Paint
Peeling paint should be carefully removed before applying a new coat of paint. A professional painter may use a scraper, sandpaper, or a wire brush to remove the damaged paint. In some cases, a chemical paint remover may be necessary.
After removing the peeling paint, the surface should be wiped clean, and any remaining debris should be removed to ensure proper adhesion of the new paint.
• Cleaning the Walls
– Removal of Dirt and Grease
Walls should be cleaned prior to painting to ensure proper adhesion of the paint. Accumulated dirt, dust, and grease can interfere with the bonding process of the paint, leading to uneven coverage or peeling. A mixture of mild detergent and water is usually sufficient for cleaning walls.
Professionals may use a sponge or soft cloth to scrub the surface gently, paying particular attention to heavily soiled areas.
– Dealing with Mold and Mildew
In cases where mold or mildew is present, special cleaning steps must be taken. A mixture of bleach and water, or a specialized mold cleaning solution, is typically used by professional painters.
It is important to follow the manufacturer’s instructions for these products carefully and to wear proper safety gear when handling toxic chemicals.
– Rinsing and Drying
After cleaning, walls should be thoroughly rinsed with clean water to remove any soap residue or cleaning chemicals. Excess water should then be wiped away using a clean cloth.
It’s essential to allow the walls to dry completely before applying paint, as moisture trapped beneath the paint can cause blistering, peeling, or mold.
• Surface Preparation
– Sanding
Sanding is an essential step in wall preparation, as it ensures a smooth and even surface for paint application. Professional painters generally use fine-grit sandpaper, such as 120 or 150 grit, to remove any bumps and rough spots on the walls.
To make the process more efficient, professionals often use sanding poles or orbital sanders.
– Dust Removal
Following sanding, it is crucial to remove any dust or debris from the walls before painting. Painters typically use a vacuum, tack cloth, or a soft-bristle brush to eliminate dust, ensuring that the new paint adheres properly to the surface.
– Applying Primer
Applying a primer is a crucial step that many professional painters take before painting walls. Primer helps to seal the surface, promotes even paint coverage, and can mask stains or dark colors. In some cases, a paint and primer combination may be used, allowing for one less step in the process.
There are various types of primers available on the market, including oil-based, latex, and shellac. It is essential to choose the appropriate primer for the specific wall material and paint being used. This guide from Bob Vila offers valuable advice on selecting the right primer for your project.
• Final Inspection
Before applying paint, professional painters perform one last inspection to ensure that all surfaces are smooth and free of defects. If any issues are discovered, they may require additional repair, sanding, or primer before the paint can be applied.
A well-prepped wall will soon be ready for a high-quality, long-lasting paint job.
Discover the Most Effective Pre-Painting Preparation Strategy
• Importance of Proper Preparation
Preparing your surfaces properly before painting is crucial for achieving a smooth and lasting finish. Inadequate preparation can lead to a number of issues, such as uneven surfaces, peeling paint, and longer drying times.
• Cleaning the Surface
The first step to preparing a surface for painting is to ensure it is clean and free of dirt, dust, and debris. This can be done using a combination of soft brushes, damp cloths, and mild soaps.
– Recommendation for Cleaning
I recommend using a mild dish soap diluted in water for most surfaces. This solution is gentle enough to avoid damage while effectively removing dirt and grease. For more stubborn stains, a trisodium phosphate (TSP) cleaner can be used.
To learn more about appropriate cleaning solutions for various surfaces, visit the Environmental Protection Agency (EPA) guide on painting and surface coatings.
• Repairing Damages
Before painting, it is essential to repair any imperfections on the surface, such as holes, cracks, or peeling paint. These issues can compromise the quality of the finish and may become more prominent upon painting.
– Filling Holes and Cracks
Using a putty knife, apply a good-quality filler, such as spackling compound, to fill any holes, dents, or cracks in the surface. Allow the filler to dry completely before sanding it smooth with a fine-grit sandpaper.
– Removing Loose and Peeling Paint
For areas with loose or peeling paint, use a scraper or wire brush to remove the damaged paint. Sand the area with fine-grit sandpaper to provide a smooth surface for the new paint to adhere to.
• Sanding the Surface
Sanding is a critical step in the preparation process, as it helps create a smoother surface and promotes better adhesion of the paint.
– Sanding Guidelines
- Use fine-grit sandpaper, such as 180 or 220 grit, to avoid creating visible scratches on the surface.
- For wooden surfaces, sand with the grain to prevent cross-grain scratches.
- Always wear a dust mask and eye protection while sanding to avoid inhaling particulates or getting them in your eyes.
- After sanding, use a tack cloth to remove any dust from the surface.
• Priming the Surface
Applying a primer is an essential step in the preparation process, as it provides a uniform base for paint application, improves paint adhesion, and helps in masking any underlying stains or discolorations.
– Selecting the Right Primer
Choose a primer that is compatible with the type of paint you’ll be using and the surface being painted. For example, use a latex-based primer for latex paint or an oil-based primer for oil paint. Additionally, specific surfaces, such as metal or masonry, may require a specialized primer for optimal results.
– Primer Application Tips
- Always stir the primer thoroughly before use to ensure even consistency.
- Use a brush, roller, or paint sprayer for application, depending on the size of the surface and personal preferences.
- Apply one or two coats of primer, depending on the manufacturer’s recommendations, allowing ample drying time between coats.
• Masking and Protecting the Area
Before beginning the painting process, it is important to protect adjacent surfaces and features from paint splatters and drips.
– Masking Techniques
- Use painter’s tape to mask off windows, trim, baseboards, and other features that should not be painted.
- Place drop cloths or plastic sheeting on the floor and any nearby furniture or appliances to protect against spills and splatters.
- Remove any hardware, such as doorknobs or light switch covers, or cover them with painter’s tape.
• Final Checklist Before Painting
Before you begin painting, use this final checklist to ensure proper preparation:
- Surface is clean and free of dirt and debris.
- Repairs to holes, cracks, and damaged paint have been made and sanded smooth.
- Surface has been sanded and wiped down with a tack cloth.
- Primer has been applied and allowed to dry thoroughly.
- Adjacent surfaces and features have been masked and protected.
By following these steps and recommendations, you can ensure proper preparation of your surfaces, contributing to a smoother, more durable, and longer-lasting paint job. Happy painting!
Steps | Description |
|---|---|
Clean Surfaces | Remove dirt, dust, and grease from the surfaces to be painted. You can use soapy water and a sponge for this. |
Repair Damage | Fix any cracks, holes, or dents in the walls or surfaces that need painting. Use a putty knife and spackling paste for small damages and joint compound for larger repairs. |
Sand Surfaces | Sand the surfaces to be painted to create a smooth, even base for the paint. Use a sanding block or an electric sander for larger areas. |
Remove Dust | After sanding, use a vacuum or a damp cloth to remove any remaining dust and debris from the surfaces. |
Apply Primer | Apply a coat of primer to the surfaces, which will help the paint adhere better and last longer. Use a brush for small areas and a roller for larger ones. |
Protect Surrounding Areas | Before painting, cover any furniture or items in the room with drop cloths and use painter’s tape to protect edges, trim, and adjacent surfaces. |