Tips For Using UV Reactive Paint Effectively. What Pros Say
Are you ready to take your art to a new level with the mesmerizing effects of UV-reactive paint? Look no further; we’ve covered you with the most effective tips and tricks to help you achieve show-stopping results. With our guidance, you’ll soon become an expert in harnessing the potential of this unique medium, leaving everyone in awe of your creations.
Tips for using uv reactive paint effectively:
To effectively use UV reactive paint, choose the right type for your surface, prepare the surface correctly, apply a white base coat, use multiple layers for optimal glow, mix pigments for custom colors, test with a UV light, seal with a clear coat, use proper lighting, experiment with techniques and textures, and maintain safety precautions.

Unleash your creativity with UV reactive paint! Our guide offers tips on maximizing the impact of these vibrant colors and ensures your artwork glows perfectly under blacklight. Read on for expert advice that will have you glowing with success.
Contents
- 1 Effective Utilization of UV Reactive Paint: Key Tips
- 1.1 • Choose the Right Type of UV Reactive Paint
- 1.2 • Prepare Your Surface Correctly
- 1.3 • Apply a Base Coat
- 1.4 • Use Multiple Layers for Optimal Glow
- 1.5 • Mix UV Reactive Pigments for Custom Colors
- 1.6 • Test Paint with a UV Light
- 1.7 • Seal Your Work
- 1.8 • Use Proper Lighting
- 1.9 • Experiment with Different Techniques and Textures
- 1.10 • Maintain Safety Precautions
- 2 Unlocking the Potential of Glow Paint: A Guide
- 3 Optimizing Glow in the Dark Paint: Achieve the Best Results
- 4 Enhancing the Brightness of UV Paint: Techniques
- 4.1 • Select High-Quality UV Paint
- 4.2 • Choose the Right Colors
- 4.3 • Apply Multiple Layers of UV Paint
- 4.4 • Use a White Base Coat
- 4.5 • Utilize High-Intensity UV Light Sources
- 4.6 • Increase the Distance Between the Light Source and Paint
- 4.7 • Maintain a Dark Environment
- 4.8 • Protect Your UV Paint from Sunlight
- 4.9 • Proper Storage of UV Paint
- 4.10 • Experiment and Practice
- 5 Troubleshooting Glow in the Dark Paint Issues: Reasons and Fixes
Effective Utilization of UV Reactive Paint: Key Tips
UV reactive paint, also known as glow-in-the-dark or fluorescent paint, adds a vibrant and electrifying touch to your artwork, party decorations, or crafts. To make sure your projects truly stand out, follow these expert tips to use UV reactive paint effectively.
• Choose the Right Type of UV Reactive Paint
Before starting any project, it is essential to choose the right type of UV reactive paint. These paints come in various forms, such as acrylic, spray, fabric, and body paint. Based on the surface you plan to paint, select the appropriate type for the best results.
– Acrylic UV Reactive Paint
This paint is ideal for paper, canvas, and other sturdy surfaces. Many artists recommend using Liquitex acrylic-based UV reactive paint for its bright, long-lasting glow.
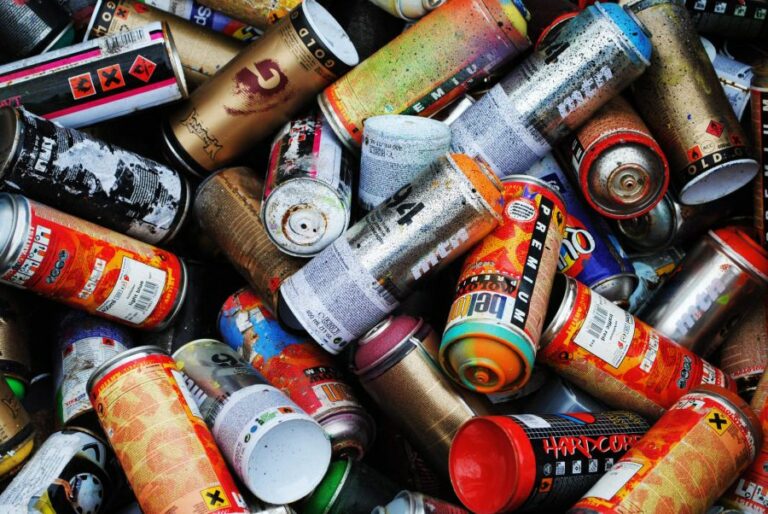
– Spray UV Reactive Paint
For large areas or irregularly shaped objects, opt for spray paint. Montana and Rust-Oleum are popular brands offering UV reactive spray paints in various colors.
– Fabric UV Reactive Paint
For textile applications such as clothing and linens, use fabric UV reactive paint. These paints are designed to adhere to the fabric and withstand washing. Tulip and Neon Nights both offer fabric UV reactive paint options.
– Body Paint UV Reactive Paint
If you want to create a stunning glow on a person’s skin, look for body-safe UV reactive paint. Brands such as Moon Glow and Midnight Glo specialize in this type of paint.
• Prepare Your Surface Correctly
To ensure your paint adheres well and lasts longer, begin by preparing your surface correctly. Clean the surface to remove any dust, dirt, or grease, and then allow it to dry thoroughly. For smoother surfaces, such as glass or plastic, use light sanding to create texture for better adhesion.
• Apply a Base Coat
A white base coat helps to enhance the brightness and vibrancy of UV reactive paint. For surfaces that you cannot paint white, use a UV reactive primer instead. This step is particularly important when working with dark-colored surfaces.
• Use Multiple Layers for Optimal Glow
UV reactive paint may appear thin and translucent after one coat. Therefore, it is advisable to apply multiple layers for a more vibrant and consistent glow. Allowing each layer to dry completely before applying the next one will help prevent streaks and uneven distribution of paint.
• Mix UV Reactive Pigments for Custom Colors
If you cannot find the exact shade you desire, create custom colors by mixing UV reactive pigments with a suitable binder. Experiment with proportions to attain the perfect hue and intensity.
• Test Paint with a UV Light
To ensure the desired glow effect, test your paint under a UV light (also known as blacklight) during the painting process. This helps to gauge the intensity of the glow and make any necessary adjustments.
• Seal Your Work
UV-reactive paints can be sensitive to weather and other environmental factors. To protect your work, apply a clear coat of sealant, such as Mod Podge or Krylon UV-resistant clear finish. This step helps to prolong the life of the paint and maintain its vibrancy.
• Use Proper Lighting
An essential aspect of using UV reactive paint effectively is ensuring proper lighting. This type of paint glows in the presence of ultraviolet light, so investing in a good quality blacklight is crucial. For large projects or events, consider renting a professional UV lighting system.
• Experiment with Different Techniques and Textures
Experiment with different techniques, such as stenciling, pouring, and brushwork, to create unique and striking designs with UV reactive paint. Combining textural elements like sand or glitter with the paint can also add depth and interest to your projects.
• Maintain Safety Precautions
While most UV reactive paints are non-toxic, always follow the manufacturer’s guidelines for usage and storage.
Wear appropriate protection, such as gloves and masks, when necessary, and ensure your workspace is well-ventilated. In the case of body paint, test a small patch on the skin first to check for any allergic reactions.
By following these tips for using UV reactive paint effectively, you can create visually captivating projects that stand out under ultraviolet light. Explore different techniques, textures, and colors while remembering to prioritize safety and proper preparation for long-lasting, impressive results.
Unlocking the Potential of Glow Paint: A Guide
Glow paint, also known as luminescent, phosphorescent, or fluorescent paint, adds a touch of excitement to any project. With its ability to emit light in the dark, it has captivated the interest of many DIY enthusiasts, artists, and party planners.
• Types of Glow Paint
– Phosphorescent Paint
Phosphorescent paints, also known as “glow-in-the-dark” paints, contain phosphor particles that absorb and store light energy.
When exposed to darkness, these particles release the stored energy, producing a soft, glowing effect. This type of paint is perfect for projects requiring a long-lasting glow without the need for constant exposure to a light source.
– Fluorescent Paint
Fluorescent paints work by absorbing UV light and re-emitting it in a visible spectrum. These paints appear vivid and vibrant under natural light, with the color amplifying when exposed to a UV light source (such as a black light).
Fluorescent paints are great for projects requiring intense and vivid colors, particularly those held under UV light.
• Preparing the Surface
To make glow paint work effectively, it’s crucial to prepare the surface correctly. The following tips will ensure a smooth, long-lasting result:
- Clean the surface: Make sure the surface is clean and free from dust, dirt, and grease. In case you need to remove residue, use soap and water or a mild detergent.
- Prime the surface: Priming helps create an even surface and promotes paint adhesion. Ideally, use a white primer – this will enhance the paint’s ability to absorb light and emit a stronger glow. Allow the primer to dry before applying the glow paint.
- Select the right surface: Glow paint works best on smooth, flat surfaces. Textured materials can disrupt the even distribution of paint, reducing its overall glow.
• Applying the Glow Paint
– Stir Well and Choose the Right Brush
Before application, make sure to stir the glow paint well to evenly distribute the phosphor particles. Choose a brush with soft bristles for a smoother application and a size that suits the area being painted.
– Thin Layers and Multiple Coats
It’s essential to apply thin, even layers of paint to achieve the best results. This ensures a smooth finish and even a glowing effect. After each coat, let the paint dry completely (refer to the manufacturer’s guidelines) before applying the next coat.
Applying multiple coats – at least two or three – enhances the glow effect.
• Enhancing the Glow Effect
– Use a Top Coat
Applying a protective top coat – such as a clear varnish – helps preserve the glow paint and enhance its effect. A glossy finish is preferable as it reflects light, thereby amplifying the glow.
– Exposure to Light
For the best result, ensure the painted object is exposed to a bright light source. The duration and intensity of exposure will impact the glow effect. Sunlight or black lights are optimal sources for charging glow paint, but strong indoor lighting can be effective too.
– Color Choices
Opt for lighter colors, as they usually emit a stronger and longer-lasting glow. Green tends to be the brightest and most popular choice, followed by blue and aqua.
• Safety Considerations and Cleanup
Most glow paints are non-toxic and safe for use, but always check the manufacturer’s guidelines for specific safety instructions. Use gloves during the paint application to prevent skin irritation, and work in a well-ventilated area to minimize inhalation.
To clean brushes and spills, use water for acrylic-based glow paints and mineral spirits for solvent-based paints. Dispose of paint responsibly, following local regulations.
• Conclusion
Glow paint can be an exciting addition to any project, providing eye-catching effects that are sure to impress. By understanding the different types of paint, preparing the surface correctly, and following best practices during the application, you can achieve the best results possible.
Explore your creative side, and let your projects shine with glow paint!
Step | Description |
|---|---|
1 | Choose a glow paint with a high-quality, long-lasting formula |
2 | Prepare the surface you will be painting by cleaning it and applying a primer if necessary |
3 | Apply the glow paint using a brush, roller, or spray gun, following the manufacturer’s instructions |
4 | Allow the paint to dry for the recommended time before exposing it to strong light |
5 | Charge the painted surface in bright light, preferably sunlight, for several minutes to an hour |
6 | Turn off the lights and observe the glow on the painted surface |
7 | Recharge as necessary to maintain the glow, and enjoy your glow paint creation! |
Optimizing Glow in the Dark Paint: Achieve the Best Results
Glow-in-the-dark paint, also known as phosphorescent paint, is a fascinating and versatile product that can bring an element of creativity and fun to numerous projects.
Whether you are creating luminous costumes, adding a cool feature to a room, or designing stunning artwork, achieving the best results with this type of paint requires understanding its characteristics and useful techniques.
• Choosing the Right Glow in the Dark Paint
– Quality Matters
Investing in high-quality glow-in-the-dark paint is essential for achieving vibrant and long-lasting glow effects. Although cheaper alternatives might seem tempting, they often result in a dim and short-lived glow.
Look for reputable brands that disclose information about the paint’s composition, such as the type of phosphorescent pigment used (strontium aluminate or zinc sulfide) and its glow duration.
– Water-Based vs. Oil-Based
Water-based glow-in-the-dark paints are typically easier to work with due in part to their quicker drying time and easier clean-up process. This type of paint can also be less toxic, making it suitable for use by children and in projects such as face painting.
However, oil-based paints can offer greater durability and glow intensity, which might be a better option for projects where longevity is key.
– Color-Coding Your Glow
Glow-in-the-dark paints are available in various colors, so carefully consider your project’s purpose and desired aesthetic before making your decision.
Not all colors glow with the same intensity – generally, green, aqua, and blue are the brightest and longest-lasting, while colors like red, orange, and purple have a more subdued effect.
• Proper Preparation and Application
– Setting the Stage with a Base Coat
Before applying glow-in-the-dark paint, think about the color and texture of the surface you’ll be working on. A smooth, white base will reflect light, providing an optimal canvas for the paint.
Conversely, a dark or highly textured surface will absorb light, resulting in a less vibrant glow. If necessary, apply a few coats of white or light-colored paint in advance to create a more luminous effect.
– Building Up Layers
To achieve maximum glow intensity, apply multiple thin layers of glow-in-the-dark paint. Allow each layer to dry completely before adding the next one. This layering technique will create a more effective glow due to the increased concentration of phosphorescent pigment on the surface.
For outdoor and weather-exposed projects, apply a protective clear coat to seal and shield the paint from environmental factors.
– Charging Your Glow
For optimal glowing results, expose the painted surface to bright, direct light for several minutes. The type of light can impact the charging process – an effective light source is a UV light, which can charge the paint more quickly than standard incandescents or LEDs.
Outdoors, sunlight is an excellent natural charger.
• Exploring Advanced Techniques
– Mixing and Matchmaking
Experiment with mixing glow-in-the-dark paint with regular acrylic paints to create a more subtle, blended effect. Unused glow paint can even be mixed with a clear medium, such as a clear glaze or gel, to create a transparent layer that retains the glowing properties.
– Stenciling and Masking
For clean and precise designs, use stencils or masking tape to create patterns or shapes on your desired surface. Apply the glow in the dark paint within these boundaries, allowing each layer to dry before carefully removing the stencil or tape.
This method can prevent any bleeding or smudging of the paint, resulting in a sharp and polished appearance.
• Caring for Your Glow in the Dark Creations
To maintain the vibrancy and longevity of your glow-in-the-dark paint, follow these tips:
- Clean the painted surface gently with a soft cloth or sponge to remove dust and grime.
- Avoid using harsh chemicals or abrasive materials that could damage the paint.
- Periodically refresh your glow by recharging it with direct light exposure.
In conclusion, achieving the best results from glow-in-the-dark paint involves choosing the right type and color of paint, proper preparation and application, and exploring advanced techniques tailored to your specific project.
By following these guidelines and experimenting with different methods, you can unlock the full potential of this versatile, luminescent paint.
Step | Instructions |
|---|---|
1 | Choose the right type of glow-in-the-dark paint for your project (e.g., water-based or solvent-based). |
2 | Ensure that the surface you’re painting on is clean, dry, and free from any contaminants. |
3 | Use a white or light-colored primer to coat the surface, as this will help enhance the brightness and longevity of the glow-in-the-dark effect. |
4 | Apply the glow in the dark paint using either a brush, roller, or airbrush. Apply it in thin and even layers, allowing each layer to dry before adding another one. The more layers applied, the brighter and longer-lasting the glow will be. |
5 | Charge the painted surface by exposing it to a bright light source. This can be natural sunlight or artificial light (e.g., a UV lamp or LED light). |
6 | Allow the painted surface to ‘charge’ for a few hours before enjoying the glow-in-the-dark effect. This may vary depending on the type of paint and light source used. |
7 | Maintain the glow in the dark effect by regularly recharging the paint with a light source. |
Enhancing the Brightness of UV Paint: Techniques
UV paint, also known as fluorescent or glow-in-the-dark paint, is a type of paint that responds to ultraviolet (UV) light by exhibiting a vibrant, illuminated appearance.
Whether you are working on a DIY project, creating art, or hosting an event, it’s crucial to maximize the brightness of your UV paint for optimal impact.
• Select High-Quality UV Paint
First and foremost, it is essential to start with high-quality UV paint. Not all UV paints are created equal, and using a cheap, low-quality product may result in a dim, lackluster appearance.
Invest in a reputable brand with good reviews to ensure optimum brightness. While it may be slightly more expensive, the superior results are worth the extra cost.
• Choose the Right Colors
Some UV paint colors naturally emit a higher degree of brightness than others. For instance, lighter colors like white, yellow, and green tend to appear brighter when exposed to UV light.
Meanwhile, darker colors such as red, blue, and purple may not be as vibrant. To maximize brightness, consider incorporating several lighter colors into your design or layering them over darker hues.
• Apply Multiple Layers of UV Paint
The thickness of UV paint can significantly impact its brightness. In most cases, a single coat of paint may not provide the level of illumination desired. To increase the intensity of your paint’s glow, consider applying multiple layers, allowing each coat to dry before applying the next.
This will create a more opaque finish that will better respond to UV light.
• Use a White Base Coat
When painting on dark surfaces, you should apply a white base coat before using your UV paint. This step helps to create a neutral backdrop that will amplify the glow of your UV paint. Remember to let the base coat dry completely before applying the UV paint to prevent any unwanted blending of colors.
• Utilize High-Intensity UV Light Sources
The intensity of the UV light source used to illuminate your UV paint will directly affect its brightness. To achieve the brightest glow possible, employ a high-intensity UV light source like UV Blacklights or LED UV floodlights.
These types of lights emit a stronger, more concentrated UV light, making your painted surfaces appear more vibrant and vivid.
• Increase the Distance Between the Light Source and Paint
The proximity of your UV light source to the painted surface also plays a role in how bright your paint appears. As a general rule, the further away your light source is from your paint, the brighter it will seem. Experiment with different distances to find the optimum placement for your UV light source.
• Maintain a Dark Environment
To maximize the visibility and impact of your UV paint, ensure that the surrounding environment is as close to complete darkness as possible. Excess ambient light in a room will make the paint’s glow appear less intense.
Turn off any non-UV lighting sources and close blinds or curtains, if possible, to block outside light.
• Protect Your UV Paint from Sunlight
Prolonged exposure to sunlight can cause your UV paint to fade or lose its luminosity. To maintain the brightest glow possible, protect your painted surfaces from direct sunlight by covering them or keeping them indoors whenever possible.
• Proper Storage of UV Paint
To preserve the brightness and quality of your UV paint, follow proper storage guidelines. Keep the paint in a cool, dry environment, away from direct sunlight and extreme temperatures. Ensure that the paint containers are tightly sealed when not in use to prevent them from drying out or being contaminated.
• Experiment and Practice
Finally, practice makes perfect when it comes to maximizing the brightness of your UV paint. Experiment with different techniques, colors, and lighting sources to find the perfect combination for your unique project or event.
With time and experience, you’ll be able to create stunning, eye-catching designs that truly shine.
In conclusion, by following these tips and techniques, you can significantly increase the brightness of your UV paint projects.
Remember to choose high-quality products, apply multiple layers of paint, use an intense UV light source, and provide an optimal viewing environment. Your illuminated creations will leave a lasting impression on all who see them.
How do you make UV paint brighter?
Step | Instructions |
|---|---|
1 | Choose a high-quality UV paint that has a high percentage of fluorescent pigments. |
2 | Apply the UV paint to a white or light-colored surface, as it will reflect more UV light and make the paint appear brighter. |
3 | Use a good quality UV black light for optimal brightness. A high-quality UV LED light with a dedicated wavelength (365nm to 395nm) works best. |
4 | Position the UV light close to the painted surface to increase the brightness of the paint. |
5 | Apply multiple layers of paint for better brightness, allowing each coat to dry completely before applying the next. |
6 | Consider mixing the UV paint with a clear or white medium to increase its spreadability and enhance the brightness. |
7 | Ensure the environment is relatively dark, as the contrast between the UV paint and the background will make the paint appear brighter. |
Troubleshooting Glow in the Dark Paint Issues: Reasons and Fixes
• Inadequate Exposure to Light
One of the most common reasons for glow-in-the-dark paint not working is lack of exposure to a bright light source.
Glow-in-the-dark paint works by absorbing light and then releasing it in the form of a glow. Without enough light exposure, the paint will not charge adequately and, therefore, not glow as brightly or for as long.
To avoid this issue, ensure that the paint is exposed to a bright light source, preferably direct sunlight or a high-lumen LED light, for at least 30 minutes to an hour prior to expecting it to glow in the dark.
• Incorrect Application
Another factor that can affect the efficacy of glow-in-the-dark paint is the way it is applied. For the paint to work optimally, it needs to be applied in an even, thick coat. Applying the paint too thinly can result in poor light absorption, which in turn will impair the paint’s ability to glow in the dark.
To ensure that the paint is applied evenly, it’s recommended to use high-quality brushes or rollers during the application process. Additionally, applying multiple layers of the glow in dark paint can significantly improve the paint’s performance.
• Old or Expired Paint
Just like any other kind of paint, glow-in-the-dark paints have a shelf life. Over time, the paint can lose its glowing properties or become less effective at absorbing and emitting light. Make sure to check the expiration date of the paint and properly store it when not in use.
If the paint is expired or damaged due to improper storage, it is recommended to replace it with fresh paint to get the desired glowing effect.
• Inadequate Pigment Concentration
Glow-in-the-dark paint contains phosphorescent pigments that are responsible for the glow effect when exposed to light. However, some paints may have a lower concentration of these pigments or may contain pigments that are less effective at glowing.
If this is the case, you may need to switch to a different brand or type of glow-in-the-dark paint that has a higher concentration of the pigments required for a bright and long-lasting glow.
• Unsuitable Surface
Although glow-in-the-dark paint is versatile and can be applied to a variety of surfaces, the type of surface you use can affect the paint’s performance. For the best results, apply the paint to a smooth, non-porous surface, such as plastic or metal.
Consider priming the surface before applying the glow-in-the-dark paint to improve adhesion and enhance the paint’s glowing effect.
• Interference From Ambient Light
Lastly, the presence of ambient light in the environment where the glow-in-the-dark paint is being used can significantly decrease the paint’s visible glow.
For the glow to be truly noticeable, it is essential for the surrounding area to be as dark as possible. If your paint is not working as expected, consider eliminating or reducing any ambient light sources to increase the visibility of the paint’s glow.
• In Conclusion
Glow-in-the-dark paint can be a fascinating and fun addition to various projects, from art to home decorations. However, it’s essential to understand the factors that can impact the paint’s performance.
By addressing factors such as light exposure, application, pigment concentration, and ambient light, you can enhance the glow of your paint and ensure your projects truly shine in the dark.