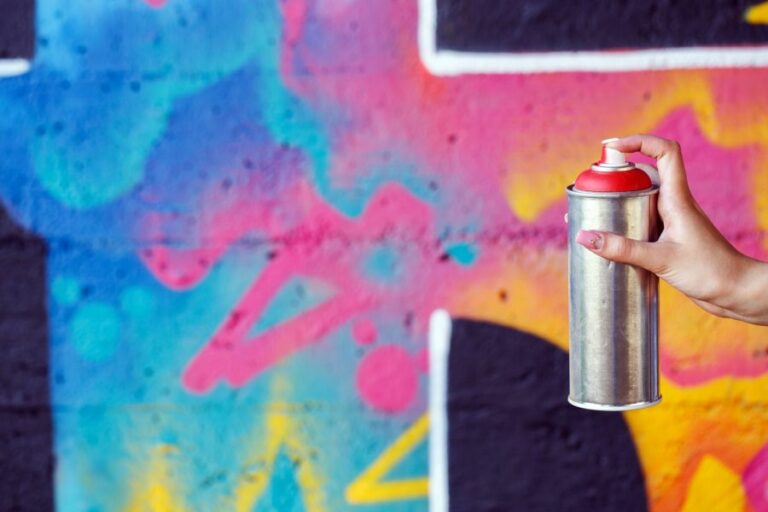
Understanding And Using UV Reactive Spray Paints
Are you looking to take your artwork to the next level or simply add a futuristic touch to an upcoming event? Look no further, as UV reactive spray paints might be the ideal solution. We’ll guide you through the world of these captivating paints, ensuring you have the knowledge and tools to create stunning, glowing masterpieces with ease.
Understanding and using uv reactive spray paints:
UV reactive spray paints, also known as fluorescent or blacklight-reactive paints, contain pigments called phosphors that absorb UV light and emit visible light, creating vibrant color effects. These paints are used in art, theater, festivals, and safety applications. When working with UV reactive paints, choose quality products, prepare surfaces, experiment with colors, use an appropriate UV light source, and practice safety precautions.

Unleash the full potential of UV-reactive spray paints in your next project! Dive deeper into understanding their unique properties, versatile applications, and expert tips for stunning results. You won’t want to miss the vibrant world that awaits. Read on to get glowing!
Contents
- 1 Grasping and Applying UV Reactive Spray Paints
- 2 Utilizing UV Spray Paint: A Guide
- 3 Exploring UV Responsive Paint Properties
- 4 Fluorescent Spray Paint: Blacklight Visibility
- 5 Crafting Invisible UV Paint: Techniques
- 6 Fluorescent Spray Painting: A Usage Guide
- 7 Using UV Lights to Dry Spray Paint: Is it Possible?
Grasping and Applying UV Reactive Spray Paints
UV reactive spray paints, also known as fluorescent or blacklight-reactive paints, are a type of paint that illuminates when exposed to ultraviolet (UV) light. The unique properties of these paints make them perfect for creating eye-catching, bright, and glowing artwork.
• The Science Behind UV Reactive Paints
UV reactive spray paints contain pigments that are capable of absorbing UV light and re-emitting this energy as visible light, creating a vibrant color effect. These special pigments, called phosphors, consist of various elements, such as zinc or strontium, which give them their unique properties.
When UV light strikes the phosphors in the paint, they become energized, and as they return to their original energy state, they emit the absorbed energy as visible light.
This process, known as fluorescence, makes the colors of UV reactive paints appear brighter and more vivid when exposed to UV light or blacklight. They also exhibit a glow-in-the-dark property, emitting a subdued glow for a short period after being exposed to UV light.
• Applications and Uses of UV Reactive Spray Paints
UV reactive paints are popular in a variety of settings due to their unique visual impact. Here are some common uses and applications.
– Art and Design
Artists and designers utilize UV reactive paints to create stunning, vibrant artworks that come to life under UV light. These paints are perfect for creating both abstract and intricate, detailed works of art.
– Theater and Stage
Theater productions often use UV reactive sprays for creating striking backdrops, props, and costumes, which come alive under the stage lighting. This adds an extra layer of visual interest and can help enhance the overall performance.
– Festivals and Parties
UV reactive sprays are a popular choice for creating visually exciting decorations and effects at festivals and parties. By decorating with these paints, event organizers can create a unique atmosphere that takes on a whole new dimension when blacklights are switched on.
– Safety and Industrial Applications
The bright, glowing quality of UV reactive paints makes them ideal for use in safety and industrial settings. High-visibility markings, signs, and equipment pieces can be painted to maintain visibility in low-light conditions or areas where blacklights are used.
• Tips for Choosing and Using UV Reactive Spray Paints
To get the most out of your UV reactive spray painting experience, follow these expert tips.
– Choose Quality Paints
Not all UV reactive spray paints are created equal. Invest in high-quality paints to ensure optimal color vibrancy and longevity. Look for paints that have a strong pigment content for the best fluorescent effect.
– Prepping Your Surface
Proper surface preparation is essential for achieving good adhesion and a smooth finish. Ensure surfaces are clean, dry, and free of grease or grime. You may need to prime the surface, particularly if it is porous or made from materials that absorb paint, such as wood or concrete.
– Play with Layering and Colors
UV reactive spray paints can be used on their own or mixed with other paints to create unique color effects. Experiment with layering and blending different colors to develop your own unique style.
– Optimize Your UV Light Source
To achieve the best results with UV reactive spray paints, it’s important to use the correct UV light source. Not all blacklights are equal; look for blacklights that emit UV light within the same wavelength range as the paint’s phosphors.
LED blacklights in the 365-385nm range are generally recommended, as they provide balanced UV exposure without creating excessive heat.
– Practice Safety Precautions
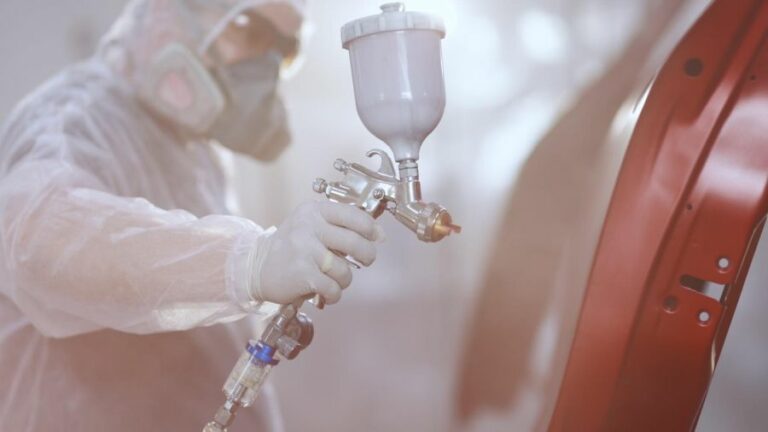
As with any spray paint, it’s important to take precautions to protect yourself and your surroundings. Work in a well-ventilated area, wear gloves and protective clothing, and cover any surfaces you don’t want to be painted.
• Conclusion
UV reactive spray paints offer a unique and eye-catching way to make your art, decorations, and projects stand out. By understanding the science behind these paints, their applications, and best practices for use, you can create stunning visuals that will make a lasting impression.
Don’t be afraid to experiment with different techniques, color combinations, and light sources to create your own unique style with these versatile and vibrant paints.
Utilizing UV Spray Paint: A Guide
UV spray paint, also known as fluorescent or glow-in-the-dark spray paint, is a unique and versatile medium that can add a touch of creativity and brightness to any project.
From decorating a bedroom to creating eye-catching artwork, UV spray paint is becoming increasingly popular for both professional and amateur artists alike.
• Understanding UV Spray Paint: The Basics
UV spray paint contains special pigments that react to ultraviolet (UV) light, causing the paint to emit a visible glow. This unique property makes it ideal for a wide range of applications, from artistic endeavors to safety markings.
There are several types of UV spray paints available, each with its own characteristics and specific uses. These include:
- Water-based UV spray paint: This type of paint is more eco-friendly and has less odor, making it suitable for indoor projects.
- Solvent-based UV spray paint: This paint dries more quickly and is more durable, making it ideal for outdoor projects.
- Acrylic-based UV spray paint: This type is suitable for various surfaces, including metal, wood, and plastic, making it a versatile choice for different projects.
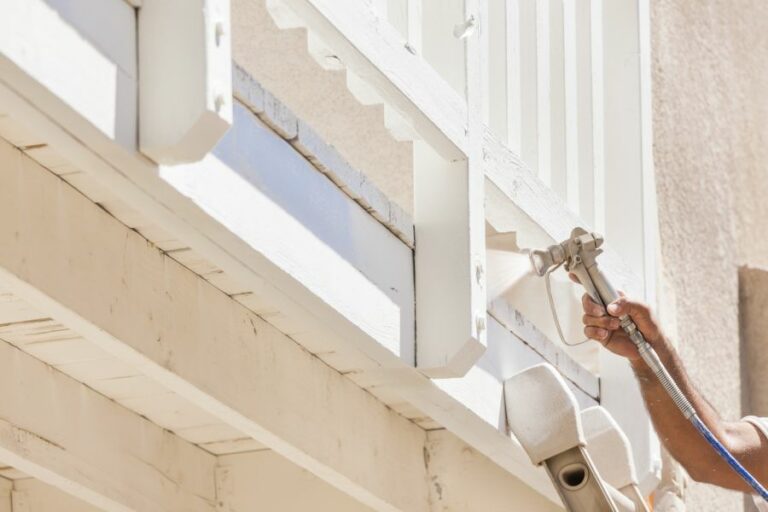
• Preparing Your Workspace and Materials for UV Spray Painting
Before starting your UV spray paint project, it’s crucial to prepare your workspace and materials properly. Here are some expert tips to ensure you get the best results:
– Choose a Well-Ventilated Area
Spray painting can produce fumes that can be harmful if inhaled, so it’s essential to work in a well-ventilated area. An open garage or a room with open windows and doors would be ideal. Also, consider wearing a mask to protect yourself from inhaling fumes.
– Prepare your Surface
To achieve optimal results, you need to prepare the surface of the object you’ll be painting. Follow these steps for different types of surfaces:
- Metal: Remove any rust and clean the surface with a degreaser. Prime the surface with a rust-blocking primer to prevent future rusting.
- Wood: Sand the surface to remove any rough spots, and then apply a coat of primer suitable for wood surfaces.
- Plastic: Clean the surface with a mild detergent, and then apply a plastic-compatible primer.
– Mask and Protect Surrounding Areas
To prevent overspray from affecting nearby objects or surfaces, use masking tape and newspapers to cover and protect areas you don’t want to paint.
• Using UV Spray Paint: Expert Tips and Techniques
Now that your workspace and materials are prepared, it’s time to get painting. Follow these expert tips and techniques for the best results:
– Shake the Can Well
Before starting, shake the UV spray paint can for at least one minute to mix the paint and ensure the pigments are evenly distributed.
– Holding the Can and Spraying Correctly
Hold the can approximately 12 inches away from the surface to prevent drips and uneven coverage. Spray in a smooth, sweeping motion, overlapping each pass by about 50%. This technique will ensure a consistent and even finish.
– Apply Multiple Thin Coats
For the best results, apply several thin coats of UV spray paint rather than one thick coat. This will help the paint adhere better and prevent drips. Allow each coat to dry for at least 15-20 minutes before applying the next coat.
– Test the Glow Effect
After applying the final coat and allowing it to dry, you can test the glow effect of your UV spray paint. Turn off the lights and shine a blacklight or powerful UV flashlight on the painted surface, and watch the paint come to life.
• Caring for Your UV Spray Paint Project
To ensure your UV spray paint project stays looking great for as long as possible, follow these expert care tips:
– Protect the Surface
If your painted object is going to be exposed to outdoor elements, consider applying a clear, UV-resistant sealant to protect against fading and wear.
– Clean the Painted Surface Gently
When cleaning the painted surface, use a soft cloth or sponge and mild detergent. Avoid using harsh chemicals or abrasive cleaning tools, as these can damage the UV paint.
• Conclusion
UV spray paint is a fun and creative medium that can add a touch of brightness and excitement to a wide range of projects. By following the expert tips and techniques outlined in this comprehensive guide, you can achieve professional-quality results and bring your UV spray paint ideas to life.
Remember to keep safety in mind by working in a well-ventilated area and wearing a mask to protect yourself from paint fumes. Now, let your imagination run wild and explore the vibrant world of UV spray paint!
Step | Description |
|---|---|
1 | Choose the surface you want to paint and ensure it is clean and dry. |
2 | Apply a primer if necessary this is particularly useful for porous or uneven surfaces. |
3 | Shake the UV spray paint can well for at least one minute to mix the paint thoroughly. |
4 | Hold the can about 15 to 20 cm away from the surface and spray a light, even coat of paint. Avoid spraying too close or in heavy layers, which can cause drips and uneven coverage. |
5 | Allow the first coat to dry according to the manufacturer’s instructions, usually around 20 minutes to one hour. |
6 | For more intense UV effects, apply additional thin and even coats, allowing each layer to dry in between. |
7 | Once the final coat is dry, remove any protective coverings or masking tape. |
8 | Expose the painted surface to UV light (such as blacklight) to see the paint’s full effect. |
Exploring UV Responsive Paint Properties
UV reactive paint, also known as glow-in-the-dark, blacklight, or fluorescence paint, is a unique type of paint that responds to ultraviolet (UV) light by emitting visible light. This type of paint is widely used for various applications, from theatrical performances to decorations in both private and commercial spaces.
• How UV Reactive Paint Works
UV reactive paint contains special pigments, also known as phosphors, that are activated when exposed to UV light.
This light is invisible to our eyes, beyond the visible spectrum. When UV-reactive paint absorbs ultraviolet energy, the phosphors in the paint become excited and emit visible light, usually in bright or neon colors.
The intensity and duration of the glow depend on the type and concentration of phosphors in the paint. The most common phosphor used in UV reactive paint is strontium aluminate, which provides excellent luminosity and long-lasting effects.
• Different Types of UV Reactive Paint
There are various types of UV reactive paint available on the market, each serving different purposes depending on the desired effect and area of application.
– Fluorescent Paint
One of the most popular types of UV-reactive paint is fluorescent paint. This paint contains pigments that emit bright, neon colors when they absorb ultraviolet light.
Fluorescent paint is best for applications where high visibility and a strong contrast to the background are desired, such as in signs, markers, and artwork.
– Glow-in-the-Dark Paint
Glow-in-the-dark paint absorbs energy from various light sources and releases it gradually as visible light. This light emission can last for hours, depending on the phosphors used in the paint.
Glow-in-the-dark paint is well-suited for indoor and outdoor applications where glow effects are desired in low-light conditions, such as murals, emergency signs, and decorations.
– Invisible UV Paint
Invisible UV paint, as the name suggests, is invisible under normal lighting conditions. However, when exposed to ultraviolet light, it emits a distinct glow. This type of paint is useful for hidden designs, security markings, and secret messages that are only revealed under blacklight.
• Applications of UV Reactive Paint
UV reactive paint has numerous applications across different industries and purposes, some of which include:
– Theatrical Performances
UV reactive paint is widely used in stage performances, concerts, and dance events, where performers apply it to their bodies, costumes, or props to create stunning visual effects under blacklight.
– Art and Decor
Many artists and interior designers use UV-reactive paint to create eye-catching murals, paintings, and decorative installations that can transform under ultraviolet light. Glow-in-the-dark paint is also popular for children’s bedroom decorations, providing a comforting light source when the room is dark.
– Safety and Emergency Signage
Glow-in-the-dark paint is commonly used for emergency exit signs, safety markers, and directional signage in buildings, tunnels, and other low-light environments. The long-lasting glow can guide people to safety during power outages or other emergencies.
– Party and Event Planning
UV reactive paint can add a unique and fun element to parties, events, and festivals. From neon-themed parties and glow-in-the-dark mini golf to outdoor adventure games, this paint can create a memorable experience for guests and participants.
• Tips for Using UV Reactive Paint
To achieve the best results with UV reactive paint, consider the following tips:
- Choose the right paint for your application: Consider the type of UV reactive paint best suited for your project fluorescent, glow-in-the-dark, or invisible. Also, consider the glow intensity and duration, as well as the preferred color.
- Prepare the surface: Ensure the surface you’re painting is clean, dry, and free of grease or dirt. Some surfaces may require a primer to enhance the paint’s adhesion and luminosity.
- Apply multiple thin layers: It’s recommended to apply multiple thin layers of paint with adequate drying time between applications. This approach provides a more even and brighter glowing effect.
- Use proper lighting: The performance of UV-reactive paint relies heavily on the illumination source. Make sure to use an appropriate UV or blacklight source that effectively activates the paint.
- UV reactive paint care: To prolong the life of your UV reactive paint, keep it away from direct sunlight and extreme temperatures.
In conclusion, UV reactive paint is a versatile and fascinating medium that can enhance various applications across different industries. By understanding the different types of UV reactive paint and following the tips provided, one can create stunning visual effects and ensure the paint’s longevity.
Fluorescent Spray Paint: Blacklight Visibility
• Introduction to Fluorescent Spray Paint
Fluorescent spray paints contain pigments that are capable of emitting light when they come in contact with ultraviolet (UV) light. These pigments can absorb energy from various sources, including sunlight, and then emit light in the form of a different color, which is perceived as a vibrant glow.
• Understanding the Science: Photoluminescence & Fluorescence
To understand how fluorescent spray paint interacts with blacklight, it’s essential first to grasp the concept of photoluminescence. Photoluminescence is a process in which a material, such as a pigment or crystal, absorbs energy from light (photons) and then releases this energy in the form of light.
Fluorescence is a type of photoluminescence, which is characterized by the emission of light for a short duration after the absorption of photons.
The glowing effect that we observe when exposed to ultraviolet (UV) light, such as blacklight, is the result of the fluorescent pigments present in the paint. These pigments are excited by the UV photons, causing them to emit visible light.
The emitted light is typically of longer wavelengths than the absorbed light, resulting in the perception of a change in color or a glowing effect.
• The Interaction of Fluorescent Paint and Blacklight
A blacklight, also known as a UV-A light or a Wood’s lamp, emits ultraviolet radiation (UV-A) in the wavelength range of approximately 315-400nm. This type of light can be used to illuminate and make fluorescent materials, including fluorescent spray paint, glow.
When a fluorescent spray paint is exposed to the UV-A light emitted by a blacklight, the fluorescent pigments in the paint absorb the high-energy ultraviolet radiation and convert it into lower-energy visible light.
This results in the emission of a different color and causes the paint to seemingly glow. This phenomenon can be observed in various applications, such as artistic creations, safety signs, and identification markings.
– Factors That Affect the Glow of Fluorescent Sprays
It is crucial to note that certain factors can impact the glowing effect of fluorescent spray paints under blacklight. Some of the primary factors include:
- The concentration of fluorescent pigment: The more fluorescent pigments present in the paint, the more intense the glow will be under a blacklight.
- Color of the spray paint: Different fluorescent colors have different light absorption and emission properties, which affect the brightness and intensity of the glow. Generally, warmer colors (such as orange, yellow, and red) have higher emitted light intensities, while cooler colors (like blue, green, and violet) have lower emitted light intensities.
- Quality of the blacklight: A high-quality UV-A blacklight will emit stronger ultraviolet radiation, resulting in a more vibrant glow from the fluorescent spray paint.
- Surrounding lighting conditions: The glowing effect of fluorescent paint under blacklight can be greatly enhanced by having a darker environment surrounding the illuminated object.
• Recommendation for Best Results
As someone with experience using fluorescent spray paints, I recommend using a reputable brand of paint to ensure high-quality pigments and a more intense glow.
Additionally, investing in a high-quality UV-A blacklight is essential for optimal results. Lastly, setting up a dark surrounding environment can significantly enhance the fluorescent effect.
• Safety Concerns when Using Fluorescent Spray Paint and Blacklight
It is crucial to handle fluorescent spray paint and blacklights with care and follow safety guidelines. When using these materials, always wear protective goggles, gloves, and respiratory protection. Moreover, ensure that the space is well-ventilated to avoid inhaling paint fumes.
Additionally, prolonged exposure to UV-A light can be harmful to the skin and eyes, so it is vital to avoid staring directly at a blacklight and to limit the duration of exposure.
• Conclusion
In summary, fluorescent spray paint does indeed glow under a blacklight due to the fluorescent pigments in the paint absorbing UV light and then emitting it as visible light.
To achieve the best results, it is crucial to use high-quality materials and consider the factors that may affect the glow, such as the concentration of pigment, paint color, quality of the blacklight, and surrounding lighting conditions.
Crafting Invisible UV Paint: Techniques
UV paint, also known as ultraviolet paint or fluorescent paint, is a type of paint that emits a bright glow when exposed to ultraviolet (UV) light. These paints are popular for various applications, including party decorations, art projects, and even for security marking.
However, one unique aspect of these paints is that they can be made invisible under normal lighting conditions, rendering them undetectable to the naked eye.
• Understanding UV Paint and Invisible UV Paint
The key to making UV paint invisible lies in the pigments and binders used in the paint. Traditional UV paints contain phosphors that react to UV light, emitting a visible glow. These visible pigments can be seen under normal lighting conditions, making the paint visible.
Invisible UV paints, on the other hand, utilize special clear pigments that only react to UV light, remaining invisible under normal lighting.
– Selecting the Right Invisible UV Paint
There are numerous products available in the market that claim to be invisible UV paint. When selecting an appropriate paint, it is important to consider the following factors:
- Surface compatibility: Some invisible UV paints may not adhere well to certain surfaces, while others may be specifically designed for specific materials like fabric, metal, or wood.
- Longevity: The duration of the paint’s glow and its resistance to fading over time.
- Toxicity: Ensure that the paint is non-toxic, especially if it will come into contact with skin or be used in areas accessible by children or pets.
- Applicability: Consider whether you need paint that can be applied with a brush, roller, or airbrush and if it requires any special equipment or techniques.
- Drying time and clean-up: Some paints may take longer to dry or require specific cleaning procedures.
• Applying Invisible UV Paint
– Prepare the Surface
Begin by cleaning the surface you plan to apply the UV paint to, ensuring that it is free of dust, dirt, and grease. If necessary, lightly sand the surface to create a rough texture for better paint adhesion. Be sure to clean any dust generated by sanding before applying the paint.
– Apply a Primer
Although not always necessary, applying a primer to the surface can help to create an even foundation for UV paint. A clear, matte primer is recommended to maintain the invisibility of the UV paint under normal lighting. Allow the primer to dry completely before proceeding with the UV paint application.
– Apply the Invisible UV Paint
Use the appropriate applicator for your specific paint type, be it a brush, roller, or airbrush. Apply a thin coat of invisible UV paint evenly over the entire surface, working in small sections to maintain an even application. If needed, use a UV flashlight or blacklight to help ensure even coverage.
Allow the first coat to dry before assessing whether you need to apply a second coat. Depending on the desired level of glow and the quality of the paint, multiple coats may be required.
– Protective Top Coat
For added durability and protection, you can consider applying a clear, matte top coat over the invisible UV paint. This can help to protect the paint from fading, dirt, and damage, especially for surfaces that are subject to wear and tear. Let the top coat dry completely before using the surface.
• Applications for Invisible UV Paint
There are numerous applications for invisible UV paint, including:
- Art installations: Create unique, interactive art pieces that can only be seen under UV light.
- Security marking: Mark valuable items, documents, or equipment with invisible UV paint for theft detection or identification purposes.
- Decorations and signage: Create detailed, glowing designs for parties, events, or signage that can only be seen under UV light.
- Body art and temporary tattoos: Design intricate body art using invisible UV paint that glows under UV light for a unique, temporary look.
In summary, invisible UV paint can be an invaluable tool for projects requiring an element of surprise, security, or creativity. By carefully selecting and applying the right paint, virtually any surface can be transformed into a glowing, UV reactive canvas or design.
Good luck, and let your imagination guide your next project involving the wonder of invisible UV paint!
Step | Description |
|---|---|
1 | Select a UV paint that dries clear or nearly invisible under normal light conditions. |
2 | Apply the UV paint to the desired surface using a brush or sponge. Ensure the application is thin and even. |
3 | Allow the UV paint to dry completely. This may take anywhere from a few minutes to a few hours, depending on the brand and environmental conditions. |
4 | Observe the painted surface under normal light to ensure the paint is not visible or minimally visible. If necessary, apply a second thin coat and let it dry. |
5 | Use a UV light source (blacklight) to illuminate the painted surface, making the UV paint visible. |
Fluorescent Spray Painting: A Usage Guide
Fluorescent spray paint is a versatile tool that can be used for a wide variety of applications, ranging from art projects to safety markings. Before diving into the world of fluorescent paint, it’s essential to understand how it works, how to use it effectively, and its best practices.
• Understanding Fluorescent Paint
Fluorescent paint contains phosphors, which are substances that emit visible light when exposed to ultraviolet (UV) light. This means that these paints react to UV lights, including natural sunlight and blacklights, making them appear brighter than typical paint colors.
Owing to its vivid, neon-like appearance, fluorescent paint is commonly used for high-visibility applications and artistic endeavors.
– Benefits of Fluorescent Spray Paint
- High Visibility: Its vibrant colors make it ideal for creating signs, markings, and artwork that stand out even at long distances.
- Safety: Fluorescent spray paint is widely used in PPE (personal protective equipment) such as vests, helmets, and other gear to enhance the visibility and safety of workers or athletes.
- Creativity: Its unusual appearance allows artists to experiment with new techniques and aesthetics.
• Prepping for a Fluorescent Paint Project
– Gearing Up
Before starting your fluorescent spray paint project, make sure to acquire the necessary materials and gear:
- Fluorescent spray paint (consider the desired color, finish, and brand)
- A protective mask or respirator to avoid inhaling fumes
- Gloves to protect your hands from paint adherence
- Dropcloths, newspapers, or plastic sheeting to protect surfaces
- Painter’s tape or masking tape for masking off areas
- Sandpaper for prepping surfaces
- A UV light, such as a blacklight, for testing paint performance
– Prepping the Surface
To achieve an even and long-lasting finish, it’s crucial to prepare the surface you’ll be working on:
- Clean the Area: Remove dirt, dust, grime, or grease by wiping the surface down with a cloth dampened with mild detergent.
- Dry Thoroughly: Allow the surface to air dry, or use a clean cloth to remove excess moisture.
- Sand if Necessary: For rough, uneven surfaces, use sandpaper to create a smooth surface for better paint adherence.
- Tape-Off Areas: Use painter’s tape or masking tape to cover parts where you don’t want the paint to reach.
• Applying Fluorescent Spray Paint
– Proper Technique
Using the right technique when applying your fluorescent paint is key to achieving a smooth and even finish.
- Shake the Can Well: Thoroughly mix the paint by vigorously shaking the can for at least one minute.
- Test Spray: Test the paint on a scrap piece of material to ensure proper spray pattern and color.
- Hold the Can Properly: Hold the spray can about 10-12 inches away from the surface at a slight angle and use a steady, sweeping motion. It’s essential to move the can, not just the nozzle, to maintain an even distance from the surface.
- Apply Thin Coats: Apply multiple thin coats rather than a single thick coat, allowing each layer to dry according to the manufacturer’s recommendations before applying the next.
– Drying and Curing Time
Refer to the manufacturer’s guidelines for the specific drying and curing times for your chosen paint. Most fluorescent spray paints dry to the touch within 15-30 minutes and fully cure within 24 hours.
• Tips for a Successful Fluorescent Paint Project
- Use a White Primer: Due to the translucent nature of most fluorescent paints, applying a white primer to the surface will create a brighter and more vibrant finished result.
- Temperature and Humidity Matter: Fluorescent paint works best when applied in temperatures between 65-85°F (18-29°C) and at a relative humidity below 85%. Check your local weather conditions before you begin your project.
- Overcoating: Applying a clear protective coating can prolong the lifespan and vibrancy of the paint, especially when used outdoors.
- Blacklight Test: Examine your project under UV light to ensure the desired level of fluorescence is achieved.
- Storage: Properly store leftover paint in a cool, dry place away from direct sunlight to prolong its shelf life.
Now that you have a comprehensive understanding of fluorescent spray paint, including its benefits, applications, and best practices, it’s time to make your mark with this vibrant tool. With proper preparation, application, and care, your fluorescent paint project will shine brightly for all to see.
Step | Instructions |
|---|---|
1 | Choose a well-ventilated area to work in. |
2 | Shake the spray paint can vigorously for about one minute to mix the paint and ensure even coverage. |
3 | Hold the paint can about 6 to 8 inches away from the surface you are painting, making sure the nozzle is pointed away from you. |
4 | Begin spraying the paint in a sweeping motion while depressing the nozzle, maintaining a consistent distance from the surface for even application. |
5 | Apply multiple light coats, allowing a few minutes to dry between each coat to achieve the desired level of brightness. |
6 | Seal the paint with a clear coat, if desired, to provide extra durability and protection to the finished surface. |
7 | Allow the paint to fully dry before handling or using the newly painted object. |
Using UV Lights to Dry Spray Paint: Is it Possible?
• Introduction
Ultraviolet (UV) light has been used widely in various industries due to its unique properties, such as its ability to kill bacteria and speed up drying processes. Therefore, it’s not a surprise that many might wonder if UV light can also be used to dry spray paint.
• The Science Behind UV Light and Drying
UV light is a form of electromagnetic radiation with wavelengths shorter than visible light but longer than X-rays. Its ability to dry certain materials is due to a process called photopolymerization, in which molecules within the material react when exposed to UV light.
These reactions cause the molecules to form cross-linking bonds, ultimately hardening the material and speeding up the drying process. This phenomenon is commonly used in various applications, such as drying inks, coatings, and adhesives.
Although many paints and finishes dry to some extent under UV light, not all materials react the same way. For instance, spray paint may not contain the necessary components for photopolymerization, thus limiting the effectiveness of UV light in drying it.
– UV-Curable Spray Paints
For UV light to efficiently dry spray paint, the formulation must contain specific chemicals, known as photoinitiators, which initiate the photopolymerization process when exposed to UV radiation.
Some manufacturers produce UV-curable spray paints specifically designed for this purpose, making these paints ideal for quick drying under UV light.
Using a UV lamp designed for curing or a high-intensity UV light source can result in faster drying times for these specialized spray paints. However, for regular spray paint, the benefits of using a UV light for drying may be minimal or nonexistent.
• Benefits of Using UV Light to Dry Spray Paint
If you’re using UV-curable spray paint, there are several advantages to using UV light to speed up the drying process:
- Faster drying times: UV light can significantly reduce drying time, making it an efficient option when working on projects that require multiple layers of paint or a quick turnaround.
- Improved hardness and durability: The cross-linking bonds formed during photopolymerization can improve the hardness and durability of the paint, providing a more resistant finish.
- Lower energy consumption: UV light curing systems typically consume less energy than traditional heat-based drying methods, making them more environmentally friendly and potentially cost-saving in the long run.
- Reduced exposure to harmful chemicals: Since UV-curable spray paints dry quickly, exposure to potentially harmful chemicals in the paint, such as volatile organic compounds (VOCs), is minimized.
• Drawbacks and Limitations
Despite its advantages, using UV light to dry spray paint also has some limitations:
- Limited effectiveness for non-UV-curable spray paint: As mentioned earlier, standard spray paint may not react effectively to UV light, making it unsuitable for this drying method.
- Safety concerns: Prolonged exposure to UV light can be harmful to the eyes and skin. Therefore, proper safety precautions, such as wearing UV-resistant goggles and gloves, must be taken when working with UV light sources. Additionally, direct exposure to UV radiation can potentially damage the spray paint or underlying surface.
- Equipment cost: While UV lamps may be more energy-efficient, the initial investment in equipment can be relatively high, especially for high-intensity UV light sources.
- Availability: Not all paint manufacturers offer UV-curable spray paint options, limiting the selection of colors and finishes for projects.
• Recommendations
Using UV light to dry spray paint can be highly effective, but only under specific circumstances. If you plan to use this method, consider the following recommendations:
- Use a UV-curable spray paint designed for this process to ensure compatibility and effectiveness.
- Utilize a UV lamp or high-intensity UV light source suitable for curing and follow the manufacturer’s guidelines for adequate exposure time.
- Prioritize safety by protecting your eyes and skin from direct exposure to UV light and maintaining proper ventilation in your work area.
- Weigh the benefits and drawbacks of using UV light to dry spray paint before making a decision, considering factors like cost, safety, and compatibility with your project’s requirements.