Best Techniques For Spray Painting Plastic Surfaces
Spray painting plastic surfaces can be tricky, but with the right approach, you can achieve lasting results. To ensure a smooth finish and prevent paint from chipping or peeling, it’s essential to follow a few key techniques. In this discussion, we will explore the most effective methods for spray painting plastic, so you can easily tackle your next project.
Best techniques for spray painting plastic surfaces:
To achieve professional results while spray painting plastic surfaces, use paint specifically designed for plastics, like Krylon, Rust-Oleum, or Valspar. Prepare the surface by cleaning, sanding, and priming. Employ proper spray painting techniques, such as shaking the can, maintaining consistent distance, applying thin and even coats, and allowing ample drying time. Consider using a clear coat for a glossy finish.

Ready to level up your spray-painting skills? Discover expert tips and foolproof techniques for achieving flawless finishes on various plastic surfaces. Dive in to unlock the secrets of a perfect paint job!
Contents
- 1 Top Methods for Spray Painting Plastic Materials
- 2 Is Direct Spray Painting on Plastic Possible?
- 3 Tips to Prevent Chipping While Spray Painting Plastic
- 4 Sandpapering Plastic: Is it Necessary for Spray Painting?
- 5 Primer for Plastic: Is it Required Before Spray Painting?
Top Methods for Spray Painting Plastic Materials
Spray painting plastic surfaces can be a tricky task if you don’t know the correct techniques to use. With the right preparation, tools, and paint, you can achieve professional-looking results. Here are some of the best techniques for spray painting plastic surfaces.
• Choosing the Right Paint for Plastic Surfaces
Selecting the proper paint is essential when working with plastic surfaces. Many traditional paints do not adhere well to plastic, causing them to peel or bubble over time. It’s essential to choose a paint specifically designed for plastic surfaces to ensure a long-lasting, smooth finish.
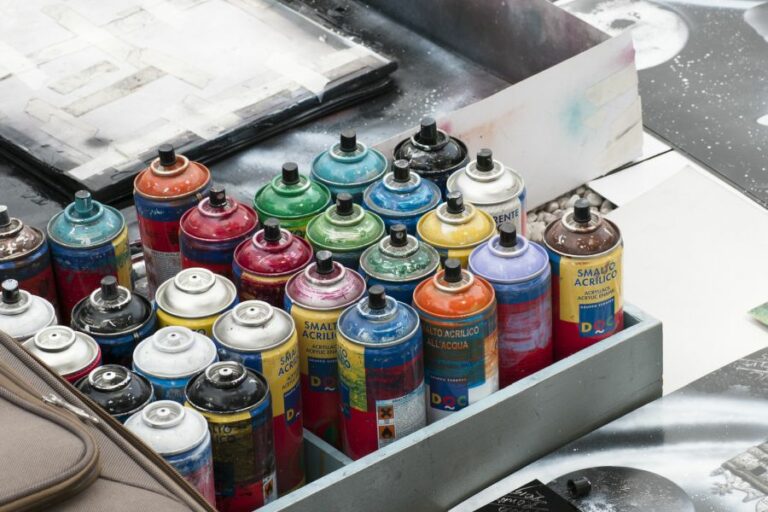
I recommend using spray paints formulated for plastic as they provide better coverage and ease of application. Brands like Krylon, Rust-Oleum, and Valspar offer spray paints designed for plastic surfaces. Be sure to read the label to ensure the paint is compatible with your specific plastic surface.
• Preparing the Plastic Surface for Painting
Before painting, it’s crucial to prepare the plastic surface to ensure proper adhesion of the paint. Follow these steps to prepare the surface:
– Clean the Surface
Remove any dirt, dust, or debris from the plastic surface by cleaning it with warm soapy water and a sponge or cloth. After washing, rinse the surface thoroughly with clean water to remove any soap residue. Allow the plastic to dry completely before moving on to the next step.
– Sand the Surface
Sanding the surface helps create a rough texture, allowing the paint to adhere more effectively. Using 220-grit sandpaper, lightly sand the entire surface of the plastic, being careful not to scratch or damage the surface.
After sanding, wipe the surface down with a damp cloth to remove any dust created by sanding.
– Apply a Primer
Priming the plastic surface provides a base for the paint to adhere to, improving the overall durability and finish of the paint job.
Choose a primer specifically designed for plastic surfaces, like Rust-Oleum Specialty Plastic Primer or Krylon Fusion for Plastic Primer. Apply one to two thin, even coats to the surface, allowing each coat to dry fully before applying the next.
• Proper Spray Painting Techniques
Follow these best practices when spray painting plastic surfaces for a smooth, professional finish:
– Shake the Paint Can
Before spraying, shake the paint can well for about one minute, making sure to mix the paint properly. This step ensures even application and prevents clumps or streaks in your paint job.
– Maintain Consistent Distance
Hold the spray paint nozzle about 12-14 inches away from the plastic surface. Maintaining a consistent distance helps prevent drips or blobs of paint from forming, resulting in an even finish.
– Apply Thin and Even Coats
Applying multiple thin, even coats of paint will provide a more durable finish and prevent drips or runs. Start by spraying the paint in a horizontal or vertical pattern, overlapping each pass by about 50% to ensure even coverage.
Apply one coat and allow it to dry for the recommended dry time listed on the paint can before applying another coat.
– Keep the Can Moving
To prevent paint drips or buildup, keep the spray can in constant motion while spraying. Begin spraying before hitting the plastic surface, and release the nozzle after you’ve passed the surface. This technique ensures an even finish without pooling or concentrated areas of paint.
– Allow Adequate Drying Time
Once the final coat of paint is applied, allow the plastic surface to dry for the full time recommended on the paint can.
The drying time may range from a few hours to a full day, depending on the paint and environmental conditions. Allowing the paint to dry fully will ensure proper adhesion and a long-lasting finish.
• Additional Tips for Success
- Paint in a well-ventilated area to reduce the risk of inhaling harmful fumes and to promote proper drying of the paint.
- If possible, bring the plastic surface indoors to paint in an environment free of dust, moisture, and other contaminants that may affect the final result.
- To achieve a glossy finish, consider applying a clear coat specifically designed for plastic surfaces once the paint has fully dried.
With these techniques, you can achieve professional results, whether you’re sprucing up an old lawn chair or giving a new life to a set of plastic storage bins.
Step | Description |
|---|---|
1. Surface Preparation | Clean the surface using soap and water, followed by rubbing alcohol to remove any residue. Lightly sand the surface to create a rough texture for better paint adhesion. |
2. Use a Plastic Primer | Apply a primer specifically designed for plastic surfaces to help the paint adhere properly. |
3. Choose the Right Paint | Use a spray paint that is designed for use on plastic surfaces to ensure proper adhesion and a smooth finish. |
4. Spray Technique | Hold the spray can about 8-12 inches away from the surface and apply thin, even coats in a sweeping motion. Allow each coat to dry before applying the next one. |
5. Drying Time | Allow the paint to dry for the time recommended by the manufacturer, generally at least 24 hours before handling or using the painted item. |
6. Clear Coat (Optional) | If desired, apply a clear coat for added protection and a glossy finish. |
Is Direct Spray Painting on Plastic Possible?
Spray painting plastic surfaces can be a quick and convenient way to give them a fresh, new look. However, many people often hesitate when it comes to painting plastic, fearing that the end result will be less than satisfactory.
• Why Spray Paint Plastic?
There are various scenarios in which spray painting plastic can prove useful. One common instance is when you have plastic furniture, such as outdoor chairs and tables, that have faded or become discolored over time.
A quick coat of spray paint can help restore the original appearance of these items without the need for a full replacement.
Other examples include breathing new life into plastic toys, household items, or even automotive parts. In these cases, applying spray paint directly to plastic can give these objects a fresh lease on life while also potentially saving money and reducing waste.
• Choosing the Right Spray Paint for Plastic
Not all spray paints are suitable for use on plastic surfaces. Many standard spray paints can crack, peel or damage plastic materials, leading to an unsatisfactory finish. To ensure professional results, it is crucial to invest in spray paint specifically designed for use on plastic.
Many reputable paint manufacturers produce plastic-specific spray paints. These include Rust-Oleum, Krylon, and Valspar, among others. These paints contain ingredients that allow them to bond effectively to plastic, ensuring a durable and long-lasting finish.
When selecting spray paint, look for those marked for use on plastics or featuring terms such as “plastic bond” or “fusion for plastic.”
• Preparing the Plastic Surface for Painting
Before you start spray painting your plastic item, it’s crucial to prepare the surface to ensure proper adhesion and an even finish. Follow these steps for the best results:
- Clean the surface: Remove any dirt, dust, or debris from the plastic using mild detergent and water. Be sure to rinse thoroughly and allow the surface to dry completely before proceeding.
- Sand the surface (optional): To help the paint bond better to the plastic, lightly sand the surface using fine-grit sandpaper (between 180-220 grit). This step is usually only necessary for smooth or glossy plastic surfaces. Wipe away any sanding dust with a tack cloth.
- Apply a primer (recommended): While many plastic-specific spray paints claim to bond directly to the plastic without the need for a primer, some may still benefit from applying a primer. Primers help to smooth out any imperfections and create a better surface for the paint. Choose a primer specifically designed for plastic surfaces and apply following the manufacturer’s instructions.
• Spray Painting the Plastic Surface
With the plastic surface cleaned and primed, you’re now ready to apply the spray paint. Follow these steps for a professional finish:
- Shake the spray paint can: Shake the can for at least one minute to ensure proper mixing of the paint. This step is crucial to achieve a consistent finish on the plastic surface.
- Test the spray paint: Test the spray paint on a piece of cardboard or scrap material to ensure it provides adequate coverage and is free from any defects.
- Spray the paint onto the plastic surface: Hold the spray paint can at least 8-12 inches away from the surface and apply the paint with smooth, sweeping motions. To avoid runs and drips, it’s better to apply multiple thin coats of paint rather than one thick coat. Allow each coat to dry per the manufacturer’s instructions before applying another coat.
- Apply a clear sealant (optional): For added protection and durability, consider applying a clear sealant over the painted surface once the paint is completely dry. Choose a sealant compatible with the spray paint and plastic surface.
• Tips for a Successful Spray Paint Finish on Plastic
To ensure your spray painting project is a success, keep the following tips in mind:
- Always work in a well-ventilated area, and wear proper safety gear such as a respirator mask and goggles.
- Use a drop cloth or tarp to protect surrounding surfaces from paint overspray.
- Keep the spray can moving while applying the paint to avoid runs or drips.
- Read and follow the manufacturer’s instructions for application, drying time, and recoat intervals.
- Apply paint on a calm day without excessive wind, as airborne dust and debris could compromise the finish.
• Conclusion
Yes, you can spray paint directly on plastic surfaces, provided you use plastic-specific spray paint, prepare the surface appropriately, and follow best practices for application. With the right tools and techniques, you can achieve a professional-looking finish that is both durable and attractive.
Tips to Prevent Chipping While Spray Painting Plastic
Spray painting plastic items can be an easy and inexpensive way to give them a new life, but one of the main concerns is how to avoid chipping. With the proper techniques and attention to detail, you can successfully spray paint your plastic item without worrying about chipping.
• The Importance of Proper Preparation
Before you begin, it’s essential to understand that proper preparation is key to preventing chipping. Follow the steps below to ensure your plastic object is ready to be painted.
– Cleaning the Surface
Start by cleaning the surface of the plastic item. Use soap and water to remove any dust, dirt, or oils that may be present. This step is crucial, as any contaminants on the plastic can cause the paint to chip.
– Sanding the Surface
Once the surface is clean, it’s time to sand it down. This will help the paint adhere better to the plastic and reduce the risk of chipping.
Use fine-grit sandpaper (such as 400-grit) and lightly sand the entire surface. Make sure to remove any glossy finish that may be present, as this can also hinder paint adhesion.
– Using a Plastic Primer
After sanding the surface, apply a plastic primer before you move on to paint. This primer will create a strong bond between the paint and the plastic, reducing the chances of chipping.
Look for a primer specifically designed for use on plastic, and apply it according to the manufacturer’s instructions.
• Choosing the Right Paint for the Job
With the plastic item prepared, it’s time to choose the right paint. Use a paint specifically formulated for plastic surfaces, as this will adhere better and have a lower chance of chipping.
Spray paints designed for plastic can be found in most hardware stores and often come with a built-in primer to further strengthen the bond.
• Applying the Paint
When it comes to applying the paint, the proper technique is essential in preventing chipping. Follow these steps for the best results:
– Setting up Your Workspace
Choose a well-ventilated space to spray paint, and protect the surrounding area from paint overspray with drop cloths or plastic sheeting.
Set up your plastic item on a stable surface, ideally elevated with a painting stand or blocks to allow for easy access to all sides. Put on safety gear, such as gloves and a mask, to protect yourself from paint fumes.
– Applying Thin, Even Coats
Hold the spray paint can approximately 8-12 inches away from the surface of the plastic item. Start spraying off the side of the object and move the can in a steady, continuous motion.
Apply a thin, even coat to avoid runs or drips, which can lead to chipping. Allow the first coat of paint to dry according to the manufacturer’s instructions, usually 15-20 minutes.
– Keep Adding Layers Until Desired Coverage
Once the first coat has dried, apply additional thin, even coats as needed to achieve the desired coverage. It is better to apply multiple light coats rather than one heavy coat. This method will result in a smoother finish and will help to prevent chipping.
• Protecting Your Newly Painted Plastic Item
After the paint has fully dried, you can take additional steps to protect it and further prevent chipping. Applying a clear coat or sealer can add an extra layer of protection, making the surface more resistant to scratches and damage.
Many spray paints designed for plastic already contain a protective clear coat, but you can also find separate clear coat products specifically formulated for use on plastic.
• In Conclusion
Spray painting plastic can be a simple and cost-effective way to give new life to a worn item.
By following the proper preparation steps, choosing the right paint and primer, and applying the paint using the correct techniques, you can achieve professional, long-lasting results without chipping.
With patience and practice, your newly painted plastic item will be both beautiful and durable for years to come.
Step | Description |
|---|---|
1 | Clean the plastic surface thoroughly with soap and water, then dry completely with a clean cloth. |
2 | Lightly sand the plastic surface with fine-grit sandpaper to create a slightly rough texture for better paint adhesion. |
3 | Apply a primer specifically designed for plastic surfaces. This will help create a strong bond between the paint and the plastic. |
4 | Choose a spray paint that is specifically formulated for plastic surfaces, ensuring better adhesion and preventing chipping. |
5 | Apply the spray paint in thin, even coats. This will help prevent any dripping or unevenness in the paint finish. |
6 | Allow each coat of paint to dry completely before applying the next coat. This will help to create a solid, chip-resistant finish. |
7 | Optionally, apply a clear coat over the spray paint to provide additional protection and a glossy finish. |
Sandpapering Plastic: Is it Necessary for Spray Painting?
• The Importance of Surface Preparation
Before addressing the question of whether to sandpaper plastic, it’s crucial to understand the significance of surface preparation when it comes to spray painting.
Proper surface preparation ensures that the paint adheres well to the material and creates a smooth, seamless finish. Without the right preparation, the paint may peel, bubble, or crack over time.
In general, the steps to prepare a plastic surface for spray painting include cleaning, sanding, priming, and painting. Skipping any of these steps can affect the overall outcome of your project.
• The Role of Sanding in the Painting Process
Sanding plastic serves several purposes in the spray painting process. It helps to:
- Remove any imperfections and smooth out the surface
- Promote better adhesion of the primer or paint
- Create a more professional and visually appealing final product
Sanding is a crucial step when it comes to painting not just plastic but almost any type of material. It creates a better foundation for the layers of primer and paint that follow.
• Choosing the Right Sandpaper for Plastic
When preparing to sand plastic, it’s essential to use the appropriate type and grit of sandpaper. Using the wrong kind can damage the surface or create unsatisfactory results.
For plastic materials, wet-dry sandpaper is highly recommended. Wet-dry sandpaper can function both in wet and dry conditions, allowing you to alternate between the two as the situation requires.
In terms of grit, it’s best to start with lower-grit sandpaper (around 400) and progressively move up to higher-grit sandpaper (around 800 to 1000). This gradual sanding process will prevent damage to the plastic surface and create a smoother finish.
Remember to switch to finer-grit sandpaper when you’re nearing the desired level of smoothness.
• Sanding Techniques and Tips for Plastic Surfaces
While sanding plastic may seem straightforward, following these expert techniques and tips can make the process more efficient and produce superior results.
– Test on a Hidden Area
Before sanding the entire plastic item, test your chosen sandpaper and technique on an inconspicuous area first. This will allow you to make adjustments and avoid any irreversible damage to the visible parts of the material.
– Wet Sanding
Wet sanding is the process of sanding a surface with water. It helps to reduce dust, makes the sandpaper last longer, and prevents gouging or scratching of the plastic.
Wet sanding is particularly effective when using finer-grit sandpaper (800 to 1000) and improves the overall smoothness of the final product.
To wet-sand plastic, simply dip the wet-dry sandpaper in water before sanding, and occasionally rinse the sandpaper during the process to remove any buildup or debris.
– Sand in a Circular Motion
When sanding plastic, use a circular motion to create a more consistent and even surface. Avoid applying too much pressure or staying in one area for too long, as this can result in unevenness or damage to the material.
– Clean the Surface Between Steps
After sanding the plastic with each grit level, it’s essential to clean the surface thoroughly to remove dust, debris, and leftover sand particles. Failure to do so can cause imperfections in the paint job.
To clean the surface, use a microfiber cloth, vacuum, or air blower, making sure not to introduce any scratches or contaminants in the process.
• Final Thoughts on Sanding Plastic for Spray Painting
In conclusion, sanding plastic is a vital step in ensuring a successful spray painting project. By selecting the proper sandpaper and following experts’ tips and techniques, you can achieve a smooth, professional finish on any plastic material.
Proper surface preparation, including sanding, will significantly contribute to the durability and aesthetics of the final product.
For more information on surface preparation and painting techniques, visit The Society for Protective Coatings (.org). Their educational resources and certified training programs provide valuable insights into spray painting projects and other painting applications.
Primer for Plastic: Is it Required Before Spray Painting?
Spray painting is an excellent way to refresh and add color to various items around the house. However, when it comes to plastic materials, a widespread question arises: do you need to prime plastic before spray painting it? The short answer is yes.
Priming plastic before spray painting is an essential step to ensure a successful paint job.
• Importance of Priming Plastic
Below are some reasons why priming plastic is crucial:
1. Surface Preparation
Priming provides a smooth, even coating on the plastic surface. It prepares the surface by removing any oils or debris, ensuring that the spray paint adheres effectively. This step guarantees a higher-quality finish and prevents any peeling or flaking.
2. Paint Adhesion
The nature of plastic surfaces is quite different from other materials like metal or wood. They are more durable and resistant to scratches, which might interfere with paint adherence.
Priming the surface allows the paint to form a more secure bond with the plastic material, preventing the paint from chipping or peeling off quickly.
3. Smooth Finish
Using a primer on plastic surfacing helps in achieving a smooth, even finish. It fills in any cracks, holes, or other imperfections on the surface. This benefit leads to a more visually appealing end product and boosts the longevity of the paint job.
• Choosing the Right Primer for Plastic
A wide range of primers is available in the market, specifically designed for plastic surfaces. These primers are available in various options, including spray cans, brush-on, and self-etching forms. Below are some suggestions to keep in mind while choosing the right primer:
1. Compatibility
Always ensure that the primer is compatible with the plastic material to be spray-painted. Some primers may work better on particular plastic types, while others may be more universal. Check the product packaging or consult a professional in a paint store for guidance.
2. Adhesion Promoter
Opt for a primer that contains an adhesion promoter. This component significantly improves the bond between the paint and the plastic surface, ensuring a durable finish.
• Steps to Prime Plastic Before Spray Painting
Now that you understand the significance of priming plastic before spray painting and choosing the apt primer follow these steps for a successful paint job:
1. Clean the Surface
Before applying the primer, thoroughly clean the plastic surface to remove any dust, debris, or grease. Use a mild detergent and a soft cloth or sponge to prevent scratches. Rinse with water and ensure the surface is completely dried.
2. Lightly Sand the Surface
Optionally, you may use light-grit sandpaper (400-600 grit) to gently sand the plastic surface for better adhesion. Sandpaper creates minute scratches that enhance the bond between the primer and the surface.
3. Mask Off Areas
If there are areas on the plastic item that you don’t want to paint, use masking tape to cover those sections.
4. Apply the Primer
Shake the primer can for at least a minute before use. Maintain an even distance (usually about 12 inches) between the can and the surface.
Apply the primer in thin, even coats, allowing sufficient drying time between each layer. Generally, 2-3 coats of primer are adequate for most plastic surfaces. Ensure that you work in a well-ventilated area while priming.
5. Sand the Primer
After the primer is completely dried, lightly sand the surface using a fine-grit sandpaper (1000-1500 grit) to achieve a smooth finish. Sanding also allows better paint adherence.
6. Clean the Surface
After sanding, clean the surface again to remove any dust or debris.
7. Apply the Spray Paint
Now that your plastic surface is primed, you can proceed to spray paint it. Apply the paint in thin, even coats, allowing sufficient drying time between each layer.
• Conclusion
In conclusion, priming is an essential preparation step before you spray paint a plastic surface. Priming ensures better paint adhesion and a smoother finish and prevents any peeling or chipping.
Proper priming techniques and using a compatible primer guarantee a long-lasting, high-quality paint job for your plastic items.
Question | Answer |
|---|---|
Do you need to prime the plastic before spray painting it? | Yes, it is recommended to prime plastic before spray painting it. Priming helps the paint to adhere better and more evenly, as well as preventing the plastic from absorbing the paint and causing it to look dull. |