Maintain Vibrant Spray Paint: Techniques For Durability
You have the perfect spray paint project in mind, but you want to ensure your masterpiece can withstand time. No worries, we’ve got insider tips on how to maintain vibrant spray paint for maximum durability! By following these tried-and-true techniques, you can create stunning, long-lasting works of art that will be appreciated for years.
Maintain vibrant spray paint: techniques for durability:
To maintain vibrant spray paint and increase its durability, choose the right spray paint and primer, prepare the surface properly, apply primer and paint in thin, even layers, and use a protective topcoat. Ensure optimal temperature and humidity while painting. Regular cleaning and maintenance will also help prolong the paint’s life.

Looking to make your spray paint artwork last longer? Discover tips and tricks for preserving that vibrant, fresh look. We’ve got expert techniques for enhancing durability, so read on to keep your creations shining bright for years to come!
Contents
- 1 Enhance Spray Paint Longevity: Tips for Lasting Vibrancy
- 2 Strategies for Increasing Spray Paint Durability
- 3 Safeguarding Spray Painted Surfaces: Prevention Tips
- 4 Preserving Spray Paint Artwork: Protection Methods
Enhance Spray Paint Longevity: Tips for Lasting Vibrancy
• Choosing the Right Spray Paint
Selecting the appropriate spray paint is crucial for long-lasting and vibrant results. Consider factors such as the surface you’ll be painting and the desired finish.
Ensure to pick a high-quality product from a reputable brand for better durability. In addition, choose paint specifically designed for the material you’re working on, such as plastic, metal, or wood.
For example, Krylon and Rust-Oleum are well-known brands that offer a wide range of products suitable for different applications.
• Proper Surface Preparation
To achieve spray paint longevity, the surface must be clean, dry, and free of any dirt, grease, or rust. Follow these steps for proper surface preparation:
- Clean the surface with a damp cloth, soapy water, or a commercial cleaning agent to remove dust, dirt, and grease.
- Sand the surface to smoothen any imperfections, ensuring a more even and durable paint job. Use a fine-grade sandpaper (180-220 grit) for best results.
- Remove any loose paint or rust with a wire brush or scraper.
- Wipe down the surface with a tack cloth or a damp cloth to remove any remaining dust.
Remember, thorough surface preparation contributes greatly to the paint’s adhesion, appearance, and durability.
• Applying a Primer
Using a primer before spray painting helps achieve better adhesion, coverage, and durability. The primer creates a uniform surface for the paint to adhere to and protects the surface from corrosion, moisture, and rust.
There are various primers available, such as all-purpose primers, rust converters, and self-etching primers for different applications.
– Selecting the Right Primer
Choose a primer that is suitable for the surface material and the paint you’ll be using. Some spray paints include a built-in primer, so always read the product label to determine if an additional primer is needed.
When painting on metal, opt for a rust converter or self-etching primer to provide maximum protection against rust and corrosion.
– Primer Application
Follow these steps to apply the primer:
- Shake the primer can vigorously for at least one minute to mix the contents properly.
- Hold the primer can about 9-12 inches away from the surface, parallel to it.
- Apply thin, even layers using a steady, sweeping motion across the surface, overlapping the spray pattern by around 50% on each pass.
- Allow the primer to dry according to the manufacturer’s recommendations before applying the spray paint.
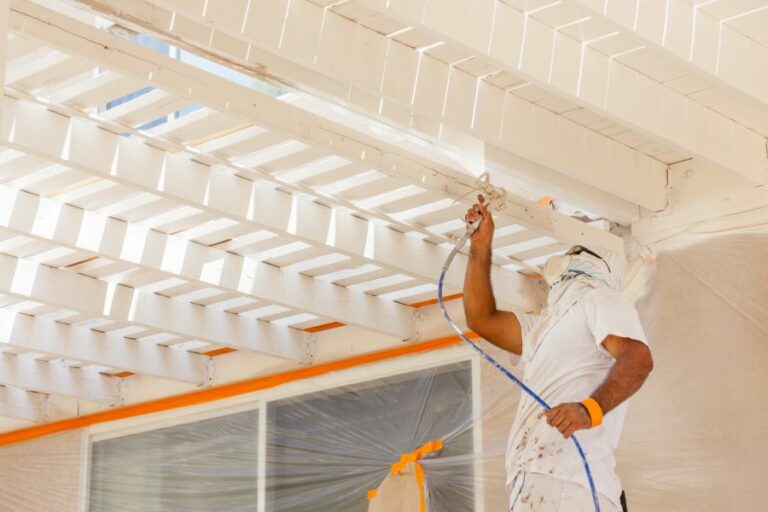
• Proper Spray Paint Application
A good spray paint job requires patience, practice, and technique. Avoid common pitfalls like dripping, uneven coverage, and poor adhesion by following these tips:
– Temperature and Humidity
Optimal environmental conditions play a role in achieving a long-lasting and vibrant spray paint finish. Paint during a dry day with low humidity and temperatures between 50 and 90 degrees Fahrenheit. Adverse weather may affect the paint’s drying time, adhesion, and finish.
– Painting Technique
- Shake the spray paint can vigorously for at least one minute before starting and frequently while painting to maintain consistency.
- Hold the can approximately 9-12 inches from the surface, keeping it parallel.
- Use a controlled, sweeping motion to apply thin, even coats, overlapping each pass by around 50%.
- Allow the paint to dry according to the product label before applying additional coats, if necessary.
• Adding a Protective Topcoat
A clear topcoat will add an extra layer of protection to your spray paint, enhancing its durability and extending its life.
Select a topcoat that is compatible with the spray paint and surface material. Follow the manufacturer’s recommendations for application, holding the can at the appropriate distance and using thin, even layers.
• Proper Care and Maintenance
To maintain vibrant spray paint and increase its durability, follow these care and maintenance tips:
- Keep the painted surface clean from dirt, grease, and grime.
- Protect the surface from harsh weather and direct sunlight by using a protective cover, shade, or UV-resistant topcoat.
- For painted outdoor items, inspect and touch up any chips or scratches regularly to prevent rust and corrosion.
By following these expert techniques, you can ensure that your spray paint projects remain durable and vibrant for years to come. For more information on spray paint application and maintenance, visit the National Institute for Painting for valuable resources and guides.
Strategies for Increasing Spray Paint Durability
Making spray paint more durable is a concern for many DIY enthusiasts and professionals who want their paint jobs to last. There are several steps anyone can take to ensure the durability of their spray paint projects.
• Importance of Surface Preparation
Before you even begin spray painting, it is crucial to prepare the surface correctly. A clean, smooth, and wrinkle-free surface will ensure that the paint adheres better, which in turn increases its durability.
– Cleaning the Surface
First and foremost, clean the area thoroughly. Remove any dirt, grease, or grime with a degreaser or all-purpose cleaner. For tough stains, you can use a soft brush or cloth
. Make sure to follow up with a thorough rinse and allow the surface to dry completely. The EPA recommends using a low-VOC cleaning solution for better environmental and health benefits.
– Sanding and Smoothing
After cleaning, it’s time to smooth the surface. Sand it using fine-grit sandpaper to remove any imperfections, such as old paint or uneven spots. If you’re working on a wood surface, sand along the wood grain.
For metal surfaces, slightly roughen them up to help the paint adhere better. Wipe down the area with a damp cloth to remove any dust created during sanding.
– Applying Primer
Primer is important for promoting adhesion and durability. Choose a primer that is suitable for the surface material and compatible with the spray paint you’ll be using. Apply the primer in a thin, even coat and let it dry completely before proceeding to the next step.
• Selecting the Right Spray Paint
Not all spray paints are created equal. Different types of spray paint offer varying levels of durability. Be sure to choose a high-quality, weather-resistant paint that’s formulated for the type of surface you’re working on.
– Enamel and Acrylic
Enamel and acrylic spray paints are the most durable options for most surfaces. Enamel paint tends to have a harder finish and is more resistant to scratches, whereas acrylic paint typically provides a smoother finish.
– Specialty Paints
For metal surfaces, consider using rust-preventative paint to protect against corrosion. For plastics, use spray paint that’s specifically formulated for plastic materials, as these will adhere better and last longer. Always read the manufacturer’s guidelines to ensure you’re using the appropriate paint for your project.
• Proper Spraying Technique
A proper spraying technique is crucial for achieving a durable and long-lasting paint job.
– Shake the Can
Before using the spray paint, shake the can vigorously for at least one minute or until you can hear the mixing ball rattling inside. This ensures that the paint is mixed properly and will result in a more even coat.
– Maintaining Distance and Overlap
Hold the can approximately 8-12 inches away from the surface and spray in a steady, sweeping motion. Overlap each pass by about 50% to ensure an even coat. Be careful not to hold the can too close, as this will result in drips and uneven coverage.
– Applying Multiple Coats
For added durability, apply multiple thin coats rather than one heavy coat. Allow each coat to dry for the recommended time specified on the paint can before applying the next one. For most projects, 2-3 coats should suffice.
• Sealing the Paint Job
Once your paint has dried completely, it’s essential to protect it with a suitable clear sealer.
– Types of Clear Sealers
Clear sealers come in different types, such as gloss, semi-gloss, or matte finishes. Choose the one that matches your desired finish and is compatible with the type of paint you’ve used.
– Applying the Clear Sealer
Follow the same spraying technique as with the paint, maintaining proper distance and overlap. Apply 2-3 coats of sealer, allowing each coat to dry completely before applying the next one. Clear sealers not only protect your paint job from the elements but also provide an additional layer of durability.
In conclusion, ensuring the durability of your spray paint projects involves careful surface preparation, selecting the appropriate paint, using the correct spraying technique, and sealing the paint job with a clear sealer.
By following these guidelines, you can expect a long-lasting and professional-looking result on any spray paint project you undertake.
Step | Instructions |
|---|---|
1 | Choose a high-quality spray paint that is designed for the specific surface you are painting. |
2 | Clean and prepare the surface properly by removing dirt, grease, and any loose paint. |
3 | Apply a primer to the surface before painting. This will promote better adhesion and increase durability. |
4 | Apply multiple thin coats of spray paint, allowing each coat to dry completely before applying the next one. |
5 | Allow the final coat of spray paint to cure for at least 24 hours before touching or using the painted surface. |
6 | Consider applying a clear coat or sealer to the painted surface. This will provide additional protection and make the paint more durable. |
Safeguarding Spray Painted Surfaces: Prevention Tips
Spray paint is a common and effective method for adding color or finish to various surfaces. However, without proper protection, spray-painted surfaces can become damaged or worn, leading to peeling and chipping.
• Choosing the Right Sealant
The first step in protecting a spray-painted surface is selecting the appropriate sealant. There are several different types of sealants available, each suited for specific surfaces and finishes. Some popular options include:
– Clear Acrylic Spray
The clear acrylic spray is a versatile sealant suitable for use on various surfaces, including wood, metal, and plastic.
It provides a clear, glossy finish that can enhance the appearance of spray-painted surfaces while protecting against scratches and general wear. The clear acrylic spray is an excellent choice for indoor and outdoor projects alike.
– Polyurethane
Polyurethane is another popular sealant, well-suited for wood surfaces. Available in oil-based and water-based varieties, it provides excellent protection against water damage, scratches, and general wear.
Polyurethane comes in various finishes, including matte, satin, and high-gloss, allowing for customization based on project needs.
– Varnish
Varnish is a durable and long-lasting sealant primarily used for wood surfaces. It provides a high level of protection against water damage, scratches, and UV damage, making it ideal for outdoor projects. Varnish is available in various finishes and can be applied by brush or spray.
• Proper Surface Preparation
Before applying any sealant, the spray-painted surface must be properly prepared. Ensuring the surface is clean and free of dust, dirt, and debris will help the sealant adhere effectively, providing maximum protection.
– Clean the Surface
Use a soft microfiber cloth or a lint-free rag to gently wipe away any dust or dirt from the surface. Avoid using overly abrasive materials, as they can potentially scratch the spray-painted surface.
– Allow Paint to Dry
Ensure the spray paint is completely dry before applying a sealant. This can take several hours or even days, depending on the paint type and application method. Following the manufacturer’s recommended drying time is critical for the best results.
• Applying the Sealant
Once the surface is clean and dry, it’s time to apply the chosen sealant.
– Test a Small Area
Before applying the sealant to the entire surface, test a small, inconspicuous area. This will help ensure compatibility between the paint and sealant, reducing the risk of adverse reactions.
– Apply Even Coats
Apply the selected sealant in thin, even coats, allowing each coat to dry according to the manufacturer’s recommendations. Typically, two to three coats will provide optimal protection, but consult the sealant packaging for specific instructions.
– Maintain a Proper Distance
When using aerosol sealants, hold the can at a consistent distance (usually 10 to 12 inches) from the surface being sprayed. This helps prevent dripping and uneven application.
– Allow Adequate Drying Time
Once the final coat is applied, allow the sealant to cure completely. This can take anywhere from 12 hours to several days, depending on the product used. Avoid touching or using the surface until the sealant is fully dry.
• Additional Protection Measures
Beyond applying a sealant, there are other steps you can take to ensure the longevity of a spray-painted surface.
– Avoid Direct Sunlight
Excessive sunlight can cause spray paint to fade or become discolored over time. If possible, place objects or surfaces in areas where they will not be exposed to constant, direct sunlight.
– Clean Gently
Keep surfaces clean and free of dust by gently wiping them down with a soft, damp cloth. Avoid using harsh chemicals or abrasive materials that may damage the protective sealant or paint.
– Inspect Regularly
Regularly inspect the surface for signs of wear, such as chipping or peeling paint. If damage is found, address it promptly to prevent the issue from worsening.
By following these expert techniques for properly sealing and caring for spray-painted surfaces, you can ensure they remain protected, durable, and looking their best for years to come.
For more detailed information on specific sealants, consult the U.S. General Services Administration’s Paints, Coatings, and Sealants Guidelines.
Step | Description |
|---|---|
1 | Allow the spray paint to dry completely according to the paint can’s directions. |
2 | Choose a clear protective topcoat to coat the painted surface, such as a clear varnish or sealant. |
3 | Clean the painted surface with a soft cloth or brush to remove any dirt or debris before applying the topcoat. |
4 | Apply the protective topcoat according to the manufacturer’s instructions, ensuring even coverage across the entire painted surface. |
5 | Allow the topcoat to dry thoroughly according to the product’s directions. |
6 | Optionally, apply a second coat of the protective topcoat for added durability and protection. |
7 | Maintain the protected surface by periodically cleaning it with a soft cloth or brush and reapplying a protective topcoat as needed. |
Preserving Spray Paint Artwork: Protection Methods
As an experienced spray paint artist, I understand the importance of preserving and protecting your artwork. Your spray paint creations deserve to be displayed and enjoyed for as long as possible.
• Selecting the Right Materials
1. Invest in High-Quality Spray Paint
First and foremost, using the highest quality spray paint available within your budget can make a significant difference. High-quality paints are more durable, long-lasting, and resistant to fading.
Several reputable brands, such as Montana Gold, Rust-Oleum, and Krylon, offer spray paints designed for artists and their specific needs. Make sure to research and invest in the best quality paint you can afford.
2. Use a Durable Canvas
Choosing the right surface for your artwork is equally important. A durable, well-prepared canvas or wooden panel will help your spray paint art last longer. For canvas, opt for one that is pre-primed to prevent paint absorption and ensure better adhesion.
Alternatively, you can also prime a raw canvas yourself using gesso, which will help seal the surface.
For wooden panels, it is essential to sand the surface smooth and apply a primer, such as gesso or acrylic-based primer, that is compatible with spray paints.
This preparation will help protect the wooden surface against moisture and ensure that your spray paint adheres well to the panel.
• Proper Application and Drying
3. Apply Multiple Thin Coats
One common mistake artists make is applying heavy coats of spray paint, which can lead to uneven color and surface texture, and may cause the paint to crack over time.
Instead, apply multiple thin, even coats, allowing each layer to dry thoroughly before applying the next. This practice ensures better adhesion and helps extend the lifespan of your artwork.
4. Respect Drying and Curing Times
Allowing your spray paint art to dry and cure properly is crucial for its longevity. Most spray paint brands specify the drying and curing times on their cans, so be sure to follow these guidelines.
- Drying time refers to the time needed for the paint to become dry to the touch. It typically ranges from 10 minutes to an hour, depending on the brand and environmental conditions.
- Curing time, on the other hand, is the time required for the paint to fully harden and reach its maximum durability. This process can take anywhere from a few hours to several weeks, depending on the paint brand and surrounding conditions.
Respecting these timelines ensures that your artwork remains in good condition.
• Applying a Protective Sealant
5. Choose the Right Sealant
Applying a protective sealant is a critical step in protecting your spray paint art. Several types of sealants are available on the market; however, I recommend clear acrylic sealants as they provide a durable, non-yellowing finish that does not alter the appearance of the artwork.
Choose from either matte or gloss finishes, depending on the desired effect. Some popular sealant brands for spray paint art include Krylon, Liquitex, and Golden.
6. Proper Application of Sealant
Follow these steps to apply the sealant correctly and avoid damaging your spray paint art:
- Make sure the artwork is clean and free from dust.
- Ensure the spray paint is completely dry and cured before applying the sealant.
- Apply the sealant in a well-ventilated area, following the manufacturer’s instructions.
- Apply even, thin layers of sealant, and allow each layer to dry completely before applying the next.
Multiple layers of sealant will provide better protection for your artwork.
• Displaying and Storing Your Artwork
7. Protect from Sunlight and Humidity
Exposure to excessive sunlight and humidity can cause your spray paint art to fade, discolor or even peel over time. When displaying your artwork, choose a location away from direct sunlight and avoid hanging it in areas with significant temperature and humidity fluctuations.
8. Frame Your Art
Framing your artwork not only enhances its appearance but also adds an additional layer of protection. A simple frame with UV-protective glass or acrylic glazing will protect your art from dust and harmful UV rays.
9. Proper Storage
If you need to store your spray paint art, make sure to store it in a cool, dry, and dark environment. Protect the artwork with acid-free tissue paper or glassine, carefully rolled or stacked with adequate padding between each piece to prevent damage.
Following these expert tips and recommendations will help you protect your spray paint art, ensuring its longevity and enabling you to enjoy and share your creations for many years to come.
For more information on spray paint techniques and preservation, visit the Golden Paints website, which offers a wealth of knowledge on various types of paints and proper care for your artwork.
Step | Description |
|---|---|
1 | Allow the spray paint art to dry completely. |
2 | Clean the surface of the artwork gently using a soft cloth or sponge, if necessary. |
3 | Choose a clear coat spray that is compatible with your spray paint type (usually acrylic or enamel). |
4 | Apply the clear coat spray in a well-ventilated area, following the manufacturer’s instructions. |
5 | Apply multiple thin, even layers of clear coat, allowing each layer to dry before applying the next. |
6 | Wait for the final clear coat layer to dry completely before handling the artwork. |
7 | Store or display your spray paint art in an area protected from direct sunlight, moisture, and extreme temperatures. |