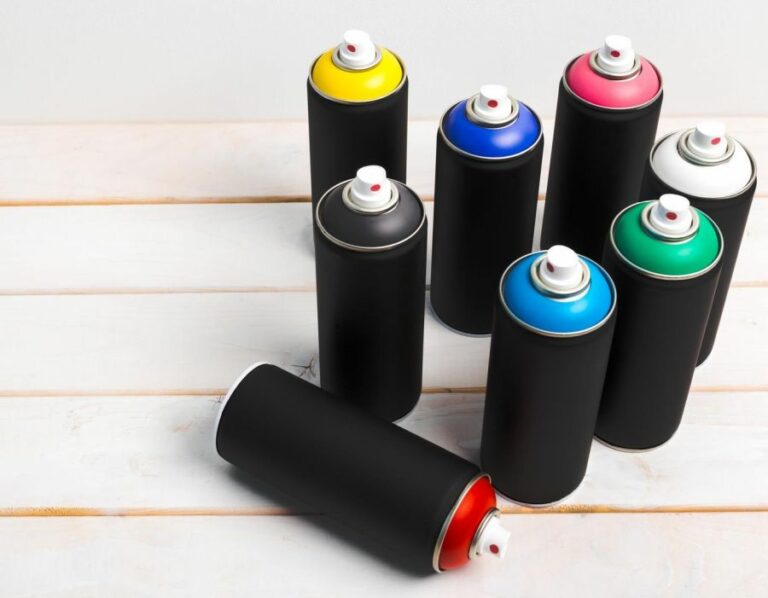
Spray Painting Techniques For Open Spaces. What Pros Say
Spray painting is a versatile and efficient way to transform open spaces into vibrant, captivating environments. With the right techniques, you can unlock the full potential of your creativity and make your mark on both small and large-scale projects. As experienced artists in this field, we have curated a comprehensive guide on the most effective spray painting methods for open spaces.
Spray painting techniques for open spaces:
For spray painting in open spaces, ensure surface preparation by cleaning, sanding, and priming. Practice safety measures like wearing goggles, gloves, and a respiratory mask. Maintain a 10-12 inch distance between the spray can and the surface. Utilize techniques like basic passes, crosshatching, drop shadows, 3D effects, stenciling, and fade-out effects. Care for painted surfaces by following curing guidelines and sealing for added durability.

Unlock the full potential of your spray painting skills! Continue reading to discover expert tips and techniques for mastering the art of spray painting in open spaces. Prepare to dazzle and amaze, as we guide you to create breathtaking masterpieces with ease. Keep reading and let the magic unfold!
Contents
- 1 Techniques for Spray Painting in Expansive Areas
- 2 Expert Tips for Spray Painting Challenging Spaces
- 3 Top-Rated Spray Painting Methods Revealed
- 3.1 • Introduction to Spray Painting
- 3.2 • Essential Tools and Materials
- 3.3 • Technique 1: Test and Adjust
- 3.4 • Technique 2: Proper Surface Preparation
- 3.5 • Technique 3: Maintain a Consistent Distance
- 3.6 • Technique 4: Controlled and Smooth Motion
- 3.7 • Technique 5: Multiple Thin Coats
- 3.8 • Technique 6: Proper Stance and Body Movement
- 3.9 • Technique 7: Ventilation and Safety
- 3.10 • Technique 8: Regular Cleaning and Maintenance
- 3.11 • Conclusion: Practice Makes Perfect
- 4 Choosing the Ideal Spray Paint for Cosmic Art
- 5 Mastering Precise Spray Painting without the Mess
- 6 Avoiding Tiger Stripes: Spray Painting Secrets
- 7 Pro Techniques for Evenly Spray Painting Large Areas
Techniques for Spray Painting in Expansive Areas
Spray painting is a versatile and efficient way to apply paint evenly on various surfaces. It has been widely used in street art, automotive, and home improvement projects. When working in open spaces, using the most effective spray painting techniques is essential for achieving the best results.
• Surface Preparation
Before any spray painting process begins, a crucial aspect is preparing the surface. I recommend following these steps to ensure a smooth application:
- Cleaning: Remove any dirt, grease, and grime from the surface using a damp, clean cloth.
- Sanding: Sand the surface, if necessary, to remove any existing paint or uneven areas. You can use fine-grit sandpaper or an electric sander.
- Priming: Apply a primer to the surface, which grants better adhesion for the spray paint. Primers also help in creating a uniform base for the desired color.
• Ventilation and Safety
While open spaces provide ample fresh air, it is essential to understand the potential hazards associated with spray painting. Appropriate safety gear should be used, such as goggles, gloves, and a respiratory mask. Additionally, I advise avoiding spray painting on windy days to prevent the spread of paint mist.
• Optimal Distance
Maintaining the right distance between the spray can or paint gun and the surface enhances the finish quality. For most projects, a distance of 10-12 inches works well. Applying steady pressure and moving the spray can back and forth in a linear motion ensures even paint distribution.
• Spray Painting Techniques
– The Basic Pass
This technique is the foundation of all spray painting projects. Practice making smooth, continuous passes, overlapping each one slightly, to create a uniform layer of paint. Repeat the process until the desired coverage is attained.
– The Crosshatch Method
The crosshatch technique is ideal for masking imperfections on the surface. To achieve this design, start by making horizontal passes, followed by a series of vertical passes. Overlapping the layers in a crosshatch pattern creates a more consistent and even finish.
– Drop Shadows and 3D Effects
For a realistic three-dimensional effect, add drop shadows to your design by applying paint at a 45-degree angle from the surface. Use a darker shade of your chosen color to create contrast between the shadows and primary colors. In doing so, you can lend depth and dimension to your artwork.
– Stenciling
Stencils are an easy way to create intricate designs or patterns consistently. Place the stencil securely on the surface, and apply spray paint following the contours of the design. Remove the stencil carefully and allow the paint to dry before adding any additional layers.
– The Fade Out Effect
This technique is perfect for creating subtle gradients or color transitions. Start by applying a thick layer of paint at the desired origin point, then reduce the pressure while moving away from the starting area. This will create a gradual fade in the paint application.
• Caring for Your Spray Painted Surface
Following the manufacturer’s guidelines on the duration for curing the paint is essential for preserving the finish. Protect the surface from dirt, dust, and moisture during the drying period. Depending on the type of paint, it may be necessary to seal the surface for added durability.
• Final Thoughts
Mastering spray painting techniques can immensely enhance your projects in open spaces. By taking the time to practice and experiment with different methods, you can achieve impressive results.
Remember to always prioritize safety and follow proper preparation steps for the most satisfying outcomes. Happy painting!
Expert Tips for Spray Painting Challenging Spaces
Spray painting can be a quick and efficient way to cover large surfaces, but achieving a professional-looking finish in difficult areas can be challenging.
• Prepare Your Workspace and Materials
– Proper Ventilation and Protection
Always ensure that your workspace is well-ventilated and that you wear appropriate protection, such as a mask and goggles. The United States Environmental Protection Agency provides information on indoor air pollutants and how to protect yourself from them.
– Clean and Prep the Surface
To achieve a smooth and even finish, it’s essential to clean the surface you’ll be painting thoroughly. Use a cloth or brush to remove any dust, dirt, or debris. For stubborn stains, a mild detergent and water solution usually does the trick.
Once the area is clean, use sandpaper to lightly sand the surface and create a better grip for the paint. After sanding, wipe the area again to remove any dust.
– Mask Off Adjacent Areas
To avoid accidental overspray, use painter’s tape and masking paper or plastic sheeting to cover any adjacent areas that you don’t want to be painted.
• Select the Right Tools and Paint
– Choose a Quality Spray Paint
Opt for high-quality spray paint that’s designed specifically for the material you’re painting. Many spray paints contain primer, which can save time and help create a smooth and even finish.
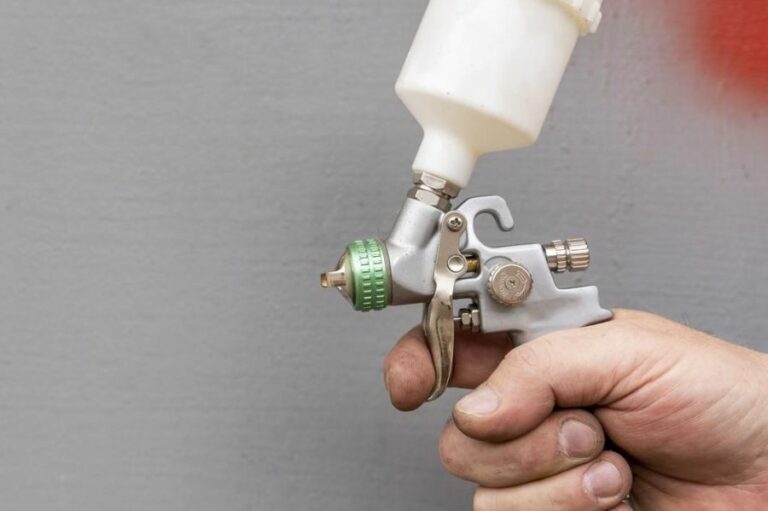
– Consider Using a Spray Paint Gun
A spray paint gun can provide better control and consistency in difficult areas. There are various models available, ranging from affordable beginner options to professional-grade equipment.
– Use a Spray Can Extension Handle
For hard-to-reach areas or prolonged use, a spray can extension handle can provide better control and help reduce hand fatigue.
• Master the Art of Spray Painting Techniques
– Maintain an Optimal Distance
Spray paint application should be done approximately 8 to 12 inches away from the surface being painted. Maintaining a consistent distance will help ensure an even coat and prevent over-spraying.
– Apply Thin, Even Coats
Avoid the temptation to apply thick, heavy coats of paint. Instead, apply multiple thin and even coats, allowing each to dry per the manufacturer’s recommendations before applying the next. This will help prevent drips and create a more professional-looking finish.
– Use a Consistent Motion
Develop a steady, sweeping motion while maintaining a consistent distance from the surface. As you begin, start in a continuous movement and overlap each pass slightly for a more even coat. Stop the spray at the end of each pass to prevent pooling or dripping.
• Tackle Tight Spaces and Intricate Details
– Use a Mini or Detail Spray Gun
A mini, or detail, spray gun is designed to provide precise control for small, intricate areas. These tools typically have higher transfer efficiency, which means less wasted paint and a cleaner workspace.
– Apply Low-Pressure Techniques
In tight spaces, like corners or crevices, use lower pressure to reduce the risk of overspray or paint buildup. For example, a narrow fan setting or smaller paint tip can help with these difficult areas.
– Use Specialty Brushes for Touch-Ups
When spray painting is not an option for intricate details or touch-ups, consider using specialty brushes or paint pens. These tools provide precision and control necessary for detailed work.
• Practice and Patience are Key
As with any skill, practice and patience are essential when learning how to spray paint difficult areas. Experiment with different techniques, settings, and equipment to find what works best for your specific project. And always remember, practice makes perfect.
By following these expert tips and techniques, you’ll be well on your way to mastering the art of spray painting difficult areas, achieving professional-looking results, and saving yourself time and effort in the process.
Steps | Description |
|---|---|
1. Prepare the area | Clean and remove any dirt or debris from the area. Cover nearby surfaces with painter’s tape or plastic sheets to protect them from paint. |
2. Choose the right paint | Select a spray paint that is suitable for the surface material and the desired finish. Make sure to shake the can well before use. |
3. Test the spray paint | Spray on a piece of cardboard or scrap material to check the paint flow and consistency. Adjust the nozzle or distance as needed. |
4. Spray from a distance | Hold the spray can about 12 inches away from the surface, using a sweeping motion. Apply thin, even coats, allowing each layer to dry before applying the next. |
5. Use an extension nozzle | For hard-to-reach areas, use an extension nozzle to provide extra reach and control. This can help to avoid overspray and uneven coverage. |
6. Use a stencil or mask | If you need to create a precise pattern or design, use a stencil or masking tape to create the desired shape. Remove the stencil carefully after painting. |
7. Allow to dry | Allow the paint to dry completely, according to the manufacturer’s instructions. Once dry, carefully remove any tape or protective materials. |
8. Clean up | Dispose of any used materials and paint cans in accordance with local regulations. Ensure the area is properly ventilated. |
Top-Rated Spray Painting Methods Revealed
• Introduction to Spray Painting
Spray painting is a versatile and time-saving technique to achieve a professional and uniform finish on various surfaces. From automotive bodywork to furniture and decorative items, spray painting offers a wide range of applications.
• Essential Tools and Materials
Before discussing the techniques, you must be familiar with the essential tools and materials required for spray painting. These include:
- Spray paint: Choose the appropriate type based on the surface (wood, metal, plastic, etc.) and desired finish (glossy, matte, textured, etc.).
- Protective gear: Safety glasses, gloves, and a mask are required to protect yourself from harmful fumes and chemicals.
- Surface preparation: Use sandpaper or a degreaser to clean the surface and ensure proper paint adhesion.
- Primer: A primer is necessary to enhance paint adhesion and improve durability.
- Spray gun: Invest in a good-quality spray gun for precise control and even coverage.
- Respirator: Use a respirator to protect yourself from harmful fumes and chemicals.
Here is a reliable resource from the University of Vermont Extension for safe and effective spray painting practices: Spray Painting Safety
• Technique 1: Test and Adjust
Before starting on the actual project, it is advisable to test the spray paint on a scrap piece of material similar to the one you will be working with.
This will not only help you familiarize yourself with the spray gun but also allow you to adjust the pressure, nozzle, and paint flow to achieve the desired coverage and finish.
• Technique 2: Proper Surface Preparation
Preparing the surface is a crucial step to ensure the paint will adhere correctly and achieve a professional finish. Remove any dirt, dust, grease, or rust from the surface using sandpaper, a degreaser, or a combination of both. After cleaning, apply a primer to enhance adhesion and improve durability.
• Technique 3: Maintain a Consistent Distance
Maintaining a consistent distance between the spray gun and the surface is essential for achieving an even paint coverage.
A distance of 6-12 inches is recommended, depending on the type of spray paint and the surface being painted. Too close may cause the paint to run, while too far away will result in a lighter, uneven finish.
• Technique 4: Controlled and Smooth Motion
To achieve a uniform finish, move the spray gun at a steady pace, parallel to the surface being painted. Use a side-to-side sweeping motion, overlapping each stroke by approximately 50%. Avoid pivoting your wrist and maintain a constant angle between the spray gun and the surface.
• Technique 5: Multiple Thin Coats
Applying multiple thin coats, rather than one thick coat, helps achieve a smooth, even finish without the risk of paint runs or sags. Allow each coat to dry according to the manufacturer’s recommendations before applying the next layer. Typically, 2-3 coats are sufficient for adequate coverage and durability.
• Technique 6: Proper Stance and Body Movement
Adopt a comfortable stance that allows you to move freely and maintain balance while spray painting. Use your entire body to move the spray gun, rather than just your arm, to achieve a steady, controlled motion across the surface.
• Technique 7: Ventilation and Safety
Spray painting should be conducted in a well-ventilated area, ideally outdoors or in a designated spray painting booth. Adequate ventilation reduces the risk of inhaling harmful fumes and ensures proper paint drying.
Furthermore, wear protective gear such as safety glasses, gloves, a mask, and a respirator to minimize exposure to harmful chemicals.
• Technique 8: Regular Cleaning and Maintenance
Proper maintenance of your spray gun is essential to ensure its longevity and prevent clogging or uneven paint application. Follow the manufacturer’s instructions for cleaning and maintenance, and consider investing in a spray gun cleaning kit.
• Conclusion: Practice Makes Perfect
Mastering the best spray painting techniques requires patience and practice. By following the tips and techniques shared in this article, you will be well on your way to achieving professional-quality results in your spray painting projects.
Remember to always take safety precautions and practice on scrap materials before attempting a new technique on a valuable piece.
With persistence and attention to detail, you will soon become proficient in spray painting and enjoy the satisfaction of a job well done.
Technique | Description |
|---|---|
Preparation | Ensure surface is clean, dry, and smooth. Sand and prime if necessary. |
Shaking the can | Shake the spray paint can vigorously for at least one minute before spraying. |
Proper distance | Maintain a distance of 8 to 12 inches from the surface while spraying. |
Test spray | Perform a test spray on a scrap piece of material to ensure smooth and even coverage. |
Light, even coats | Apply multiple thin, even coats instead of a single heavy coat for better coverage and smoother finish. |
Sweeping motion | Use a smooth, sweeping motion for even application and to avoid drips or runs. |
Overlap strokes | Overlap each spray stroke by about 50% to ensure full coverage. |
Drying | Allow paint to dry completely between coats as per the manufacturer’s instructions. |
Protective equipment | Wear a mask, gloves, and protective clothing to avoid exposure to harmful chemicals in the paint. |
Ventilation | Spray paint in a well-ventilated area to minimize health risks and achieve better results. |
Choosing the Ideal Spray Paint for Cosmic Art
Creating space art with spray paint is a fantastic way to explore your creativity and produce stunning, unique pieces of art. To achieve the best results possible, it is essential to use the right type of spray paint.
• Acrylic Spray Paint
Acrylic spray paint is the most commonly used type of spray paint in space art, and for good reason. It dries quickly, is waterproof, UV-resistant, and provides a smooth finish.
The quick-drying nature of acrylic paint means that you can layer colors and create textures without waiting too long between each application.
Pros:
- Quick drying
- Waterproof
- UV-resistant
Cons:
- May require additional protective coating
- Can be more expensive than other options
Recommendation: High-quality acrylic spray paints like Liquitex or Montana Cans are perfect for space art due to their wide range of vibrant colors and durable finish.
• Enamel Spray Paint
Enamel spray paint is another popular choice for space art, known for its durability and high-gloss finish. It is slower to dry than acrylic spray paint, but this longer drying time can provide greater flexibility when blending colors and creating unique effects.
Pros:
- Durable
- High-gloss finish
Cons:
- Longer drying time
- Stronger odor
Recommendation: Rust-Oleum Painter’s Touch enamel spray paint is a reliable, affordable option for space art, offering a wide range of colors and suitable durability.
• Oil-Based Spray Paint
Oil-based spray paint is less commonly used for space art due to its longer drying time and strong odor. However, it is worth considering if you are looking for a paint that is incredibly durable and provides a high-gloss finish similar to enamel spray paint.
Pros:
- Highly durable
- High-gloss finish
Cons:
- Extended drying time
- Strong odor
Recommendation: Krylon Professional spray paint is an excellent choice if you decide to use oil-based paint, providing a durable, high-gloss finish perfect for space art.
• Paint Quality and Pigment Concentration
Regardless of the type of spray paint you choose, it is essential to consider the quality and pigment concentration of the paint. Higher quality paints with a higher pigment concentration will generally result in more vibrant colors, better coverage, and increased durability.
While they may be more expensive initially, investing in high-quality spray paint can save you money in the long run, as you will need fewer coats and touch-ups and your artwork will last longer.
Recommendation: I highly recommend artists invest in high-quality, artist-grade spray paint for the best results in their space art.
• Tips for Successful Space Art Painting
- Surface preparation: Ensure that the surface you are painting on is clean, dry, and primed if necessary.
- Test before painting: Always test out the spray paint on a scrap piece of the same material, this will allow you to gauge how the paint applies and dries.
- Layering colors: Start with dark colors and gradually build layers with lighter colors to create depth and dimension.
- Blending: Softly blend colors using a blending tool or by spraying a small amount of paint and manipulating it with a plastic sheet or other material.
- Protective finish: After your painting is complete and dry, consider a clear protective finish to enhance the longevity of your artwork.
• Additional Resources
For further information on spray paint techniques and inspiration for your space art, explore the following nonprofit art resources:
- Golden Artist Colors: An excellent resource for spray paint techniques and best practices.
- National Aeronautics and Space Administration (NASA): Explore space-themed art and photography for inspiration for your space art project.
- Spray Planet: Offers tutorials and artist features for inspiration and learning various techniques.
In conclusion, choosing the right type of spray paint for your space art project is essential for achieving optimal results. Consider factors such as drying time, finish, durability, and pigment concentration when selecting your spray paint.
With the right materials and proper techniques, you can create stunning, captivating pieces of space art that will stand the test of time.
Mastering Precise Spray Painting without the Mess
Spray painting can be a quick and efficient way to transform various surfaces. However, the primary concern while spray painting is accidental overspray, which can spread paint to unwanted areas.
• Choose the Right Location and Set Up a Workspace
Begin by choosing an appropriate location for spray painting. Outdoors is the optimal choice due to the need for proper ventilation, but if this isn’t possible, a well-ventilated garage, workshop, or large room will suffice.
When selecting an indoor location, ensure that it is free from dust and dirt. This will prevent contamination of your freshly painted surface. To further protect nearby items from overspray, place cardboard, newspapers, or drop cloths on the floor and around the area.
Setting up a temporary spray booth can also help limit overspray. To create a simple booth, use a large box or construct one using plastic sheeting and PVC pipe.
• Prepare the Surface for Painting
Proper surface preparation is crucial for achieving a clean, smooth finish. Start by cleaning the surface to remove any dirt, grease, or debris. A mild detergent solution or rubbing alcohol can be used for this task, depending on the type of surface.
Next, lightly sand the surface using fine-grit sandpaper. This will help the paint adhere better and result in a smoother finish.
Once the surface is clean and smoothed, apply masking tape and paper, or plastic sheeting to protect any adjacent areas from overspray. Be sure to cover any hardware, trim, or other areas of the item you do not want to paint.
• Select the Appropriate Spray Paint
Choose a spray paint that is specifically designed for the material you are painting. Follow the manufacturer’s recommendations for compatible primer and paint. A primer is essential for achieving a durable and even finish on surfaces such as wood or metal.
Also, consider using a spray paint with a low amount of volatile organic compounds (VOCs), providing a safer and more environmentally-friendly option. You can find this information on the product label or in the manufacturer’s safety data sheet.
• Master the Correct Spray Painting Technique
Before starting your project, practice your spray painting technique on a scrap piece of cardboard or wood. This will help you become familiar with the spray can’s pressure and flow.
When spray painting, hold the can approximately 10-12 inches away from the surface. Begin spraying off the edge of the item and continue past it, using a smooth and continuous motion. This will help prevent excess paint buildup and reduce the risk of runs and drips.
Apply the paint in thin, even coats. Wait for each coat to dry according to the manufacturer’s instructions before applying the next one. Applying multiple thin coats will result in a smoother, more professional finish.
• Proper Disposal and Cleanup
Lastly, it’s essential to clean up your workspace and dispose of leftover materials properly. Place used masking tape, paper, and plastic sheeting in a trash bag and discard it according to local waste disposal guidelines.
Clean any spray paint equipment, such as spray guns or nozzles, following the manufacturer’s instructions. If using a reusable spray paint can, make sure to release any remaining pressure and clean the nozzle before storage.
By following these expert tips and recommendations, you can ensure a clean and professional spray painting experience without getting paint everywhere. Whether you’re a beginner or experienced DIY enthusiast, proper planning, preparation, and technique will lead to successful results. Happy painting!
Step | Description |
|---|---|
1 | Choose a well-ventilated area to work in. |
2 | Wear appropriate protective gear such as gloves, mask, and goggles. |
3 | Prepare the surface by cleaning and sanding it, if necessary. |
4 | Cover surrounding objects and surfaces with drop cloths, paper or plastic sheeting to prevent overspray. |
5 | Shake the spray paint can well before using. |
6 | Hold the spray paint can 10-12 inches away from the surface while spraying. |
7 | Apply thin, even coats using smooth, side-to-side motions. |
8 | Allow paint to dry between coats. |
9 | After finishing, clean the spray nozzle by holding the can upside-down and spraying until only clear gas comes out. |
Avoiding Tiger Stripes: Spray Painting Secrets
• Overview of Tiger Stripes Issue
Tiger stripes are a common problem encountered by DIY enthusiasts and professionals while spray painting.
These unwanted stripes occur when the paint layers do not blend seamlessly, creating an uneven and undesirable finish. Proper painting techniques and preparation can effectively prevent tiger stripes from forming.
• Importance of Thorough Surface Preparation
Before you start spray painting, it’s crucial to prepare the surface correctly. Proper surface preparation can significantly reduce the chances of tiger stripes appearing on your paint job.
– Cleaning and Degreasing the Surface
First, clean the surface to remove dust, dirt, and other contaminants. I recommend using a mild detergent and water solution, followed by a thorough rinse with clean water.
For stubborn stains or grease, you can use a commercial degreaser designed for removing oil, grease, and other hard-to-remove contaminants.
– Sanding and Priming
Once the surface is clean, you may need to sand it to create a smooth surface for painting. I suggest using fine-grit sandpaper (between 220 and 400 grit) and sand it evenly. After sanding, wipe the surface with a tack cloth to eliminate dust particles.
If the surface you’re painting is bare metal or shows signs of oxidation, applying a suitable primer is highly recommended. A primer provides an extra layer of protection and helps the paint to adhere to the surface better. Allow the primer to dry according to the manufacturer’s instructions before painting.
• Choosing the Right Paint and Equipment
Using high-quality paint designed for spray application can make a significant difference in preventing tiger stripes. I advise investing in top-quality spray paint from reputable brands to get the best results.
Additionally, ensure you have the correct spraying equipment. A proper spray gun with the right nozzle size and air pressure settings can provide a steady and even application of paint. For more information on choosing the right spray gun, refer to this guide provided by the American Coating Association.
• Proper Spray Painting Techniques
Mastering the right spray painting techniques is essential in avoiding tiger stripes. The following steps can help you achieve a professional and stripe-free finish.
– Maintaining a Consistent Distance
When using a spray gun, maintaining a consistent distance between the gun and the surface is critical. I recommend keeping the spray gun approximately 6-8 inches away from the surface to ensure an even paint distribution.
– Overlapping the Spray Pattern
One effective technique for preventing tiger stripes is to overlap the spray pattern by approximately 50% with each pass. By doing this, you are ensuring that each coat blends seamlessly with the previous one, minimizing the risk of creating uneven lines.
Remember to move the spray gun parallel to the surface to prevent any build-ups or drips.
– Applying Thin and Even Coats
It’s important to apply several thin coats of paint, allowing each coat to dry according to the manufacturer’s instructions before applying the next. Thin coats provide better adhesion and reduce the chances of tiger stripes forming.
– Using a Cross-Coating Pattern
A cross-coating pattern involves spraying the paint in horizontal passes followed by vertical ones (or vice versa), ensuring complete coverage. This technique can prevent tiger stripes by providing a more even paint distribution across the surface.
• Practice and Patience
Practice makes perfect. If you’re new to spray painting, dedicating some time to practice on a spare piece of material can help you fine-tune your techniques and gain confidence in your painting skills.
Additionally, be prepared to have patience: achieving a flawless paint job requires time, care, and attention to detail.
In conclusion, preventing tiger stripes while spray painting involves proper surface preparation, choosing the right paint and equipment, mastering spray painting techniques, and having patience. By following the tips provided in this article, you can achieve a professional, seamless finish free from tiger stripes.
| How do you prevent tiger stripes when spray painting? | |
|---|---|
| 1. Proper surface preparation | Ensure the surface to be painted is clean, dry, and free from grease or any contaminants. |
| 2. Use a primer | Applying a primer helps to create a uniform surface for the paint to adhere to, reducing the chances of tiger stripes. |
| 3. Spray technique | Maintain a consistent distance between the spray can and the surface, and use smooth, overlapping strokes. |
| 4. Multiple thin coats | Apply multiple thin coats of paint instead of fewer heavier coats. Allow each coat to dry completely before applying the next. |
| 5. Spray direction | Change the direction of your spray with each coat (e.g., horizontal strokes followed by vertical strokes) to help avoid uneven coverage. |
| 6. Proper lighting | Ensure good lighting conditions when painting to help identify uneven areas and adjust your spray technique accordingly. |
| 7. Correct paint and nozzle | Choose a high-quality paint that’s designed for spray painting, and select the correct nozzle size for your project. |
Pro Techniques for Evenly Spray Painting Large Areas
Spray painting a large area can be a daunting task, but with the right technique, equipment, and preparation, you can achieve a professional-looking, evenly applied coat of paint.
• Choosing the Right Equipment
Selecting the appropriate spray painting equipment is essential for achieving an evenly applied coat of paint. Consider the following when choosing spray painting tools:
- Paint sprayer: Choose a high-quality sprayer designed for the type of paint you will be using. Airless paint sprayers are ideal for large areas, while HVLP (high volume, low pressure) sprayers work well for smaller jobs and intricate surfaces. Look for one with adjustable pressure settings and a suitable tip size for your project.
- Nozzles: Use the appropriate nozzle size based on the paint type and the surface you are covering. Larger surfaces will require a larger nozzle for optimal coverage, while smaller or detailed areas may necessitate a smaller nozzle.
- Protective equipment: Ensure that you have proper safety gear, such as gloves, goggles, and a mask. These items will protect you from paint fumes and overspray while you work.
• Preparing the Surface
Preparing the surface appropriately is vital for an even paint application. Follow these steps to achieve the best results:
- Cleaning: Clean the area thoroughly, removing any dirt, dust, or debris. For exterior surfaces, you may need to use a pressure washer to get rid of any stubborn grime.
- Sanding: Lightly sand the surface to remove any loose or flaking paint and to create a smooth, even surface for your new paint to adhere to. Wipe down the area after sanding to remove any dust.
- Masking: Use painter’s tape and plastic sheeting to mask off any nearby areas you do not wish to paint, such as windows or trim. This will prevent accidental overspray and ensure a clean finish.
• Mixing the Paint
Properly mixing the paint can make all the difference in achieving a uniform coat. Follow these guidelines:
- Stir thoroughly: Stir the paint well before transferring it to the paint sprayer. This ensures that the pigments are evenly distributed throughout the mixture.
- Thinning: Depending on the paint and sprayer, you may need to thin the paint according to the manufacturer’s instructions. This will help it flow through the sprayer more easily and prevent clogging. Be sure to use the correct thinning agent for the type of paint you are using.
• Applying the Paint
Now that you’ve prepared the surface and mixed the paint, it’s time to start spraying. Here are some tips for an even application:
- Maintain a consistent distance: Keep the spray nozzle approximately 12 inches away from the surface at all times. Consistency in distance is essential for an even coat of paint.
- Spray in even strokes: Move your arm in smooth, horizontal strokes, overlapping the paint slightly with each pass. Be sure to start and stop your stroke off the surface to prevent build-up or uneven application.
- Maintain steady pressure: It is crucial to keep a constant pressure while spraying to ensure even coverage. If your sprayer has adjustable pressure settings, use the manufacturer’s recommended setting for the type of paint and surface you are working with.
- Layering: Apply multiple thin layers of paint, allowing each to dry before applying the next coat. This allows the paint to build up evenly and prevents dripping or runs.
- Avoid weather issues: For exterior projects, avoid spray painting in extreme temperatures or windy conditions, as this can affect paint application and drying time.
• Final Touches
After applying your paint, it’s essential to check for any imperfections:
- Inspect: Examine the painted surface for any uneven areas, such as streaks, drips, or spots where the paint appears too thin or thick. Touch up any issues as needed.
- Clean up: Properly clean your sprayer according to the manufacturer’s recommendations to prolong its life and ensure continued optimal performance.
By following these steps, recommendations, and guidelines, you will be well-equipped to achieve a flawless, evenly applied coat of paint when spray painting a large area. Remember, preparation and patience are key to successfully completing a professional-looking paint job.
Step | Description |
|---|---|
1 | Prepare the surface by cleaning and sanding if necessary. |
2 | Choose the appropriate spray paint for the material being painted. |
3 | Shake the spray paint can for at least one minute before using. |
4 | Maintain a consistent distance of 8 to 12 inches from the surface while spraying. |
5 | Apply the paint using sweeping motions, overlapping each pass slightly. |
6 | Allow the paint to dry between coats, following the manufacturer’s recommended drying times. |
7 | Apply multiple thin coats of paint for an even finish. |
8 | Inspect the area for any uneven coverage or missed spots, and touch up if necessary. |
9 | Allow the final coat of paint to dry completely before handling or using the painted object. |