Preserve Cans With Proper Paint Care, 25 Things You Should Know
Are you tired of your paint cans losing their freshness and quality over time? No need to worry because we have the ultimate solution to keep them in good condition. We’ll guide you through the best practices for proper paint care to preserve the quality of your paints and extend their lifespan. Let us walk you through these simple yet effective strategies that will help you save both your money and time!
Preserve cans with proper paint care:
Proper paint care is essential for preserving cans and ensuring their longevity. Select the right paint type for the intended use, apply it correctly following the manufacturer’s instructions, and store the paint in optimal conditions. Regular maintenance and inspection of painted cans help prevent damage and contamination. Consult paint experts and follow best practices for effective paint protection and can preservation.

Ready to keep your preserves fresh and their cans looking great? We have more to share about the importance of paint care and how it can ensure the longevity and aesthetics of your cans. Keep reading to learn all about techniques to protect and maintain your preserved treasures!
Contents
- 1 Maintain Paint Cans with Appropriate Care Techniques
- 2 Preventing Paint from Drying Inside the Can
- 3 Prolonging Paint Life within a Canister
- 4 Best Practices for Storing Paint Cans
- 5 Effective Preservation Techniques for Paint Containers
- 6 Upside-Down Storage: Beneficial for Paint Cans?
- 7 Properly Sealing a Paint Can for Storage
Maintain Paint Cans with Appropriate Care Techniques
• The Importance of Paint Care for Canned Products
Cans are a popular choice for preserving food items, making it crucial to maintain their quality and extend their shelf life.
Proper paint care plays a vital role in safeguarding can integrity and preventing contamination. Inadequate paint maintenance could lead to undesirable consequences, such as rust formation or product spoilage.
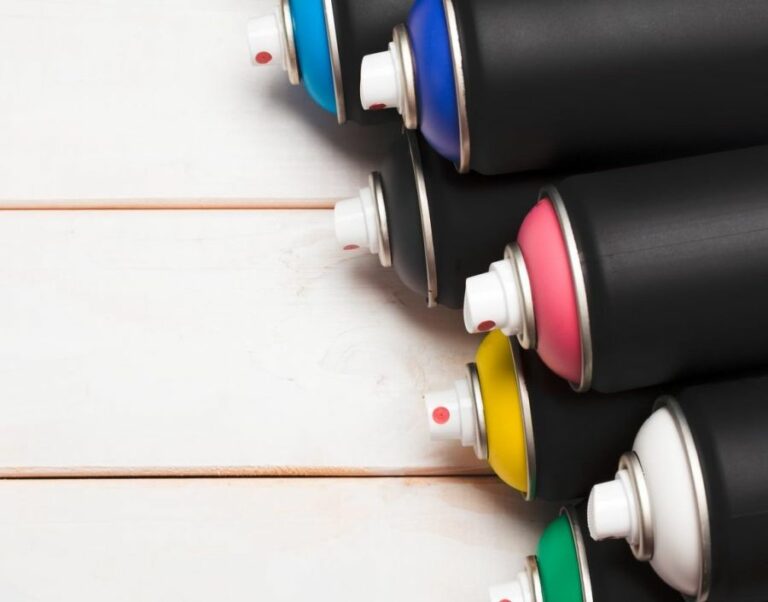
• Selecting the Right Paint Type for Cans
Choosing the most suitable paint for cans is crucial in ensuring their longevity. Various paint types offer distinct advantages and drawbacks, and understanding these differences is essential in making an informed decision.
– Epoxy Paints
Epoxy paints are known for their exceptional resistance to chemicals and durability. This feature makes them a common choice for coating cans used in storing acidic or corrosive substances. Furthermore, they provide excellent adhesion, ensuring their longevity even under extreme conditions.
– Acrylic Paints
Acrylic paints, on the other hand, are also water-resistant and durable but offer more flexibility than epoxy paints, making them suitable for cans that might require a degree of flexibility. They are also a popular choice for their low odor and easy clean-up.
– Alkyd Paints
Alkyd paints, made from natural oils like linseed or soybean, are a traditional option for their resistance to moisture and abrasion. However, they tend to be less resistant to chemicals and might not be the best choice for storing corrosive substances in cans.
– Polyurethane Paints
Polyurethane paints are another popular option due to their resistance to abrasion, moisture, and chemicals. They dry to form a hard, glossy finish, making them suitable for a wide range of applications.
While it’s essential to weigh the pros and cons of each paint type, it is recommended to consult with a paint expert or conduct thorough research to determine the most suitable paint for a specific can use.
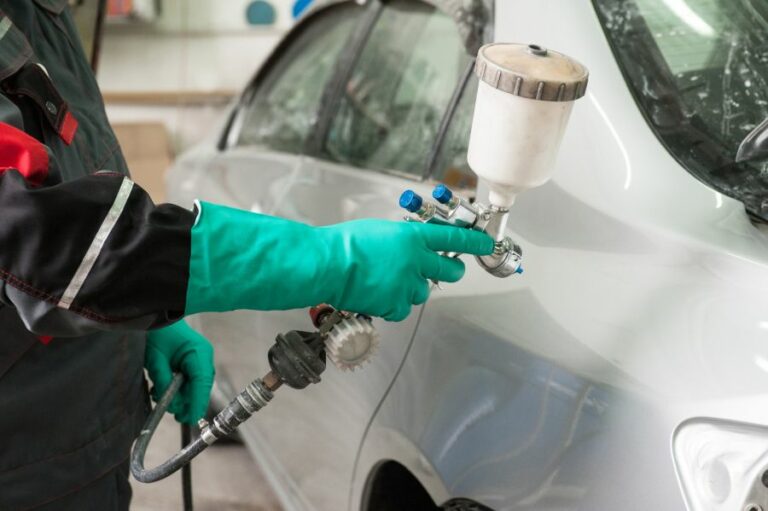
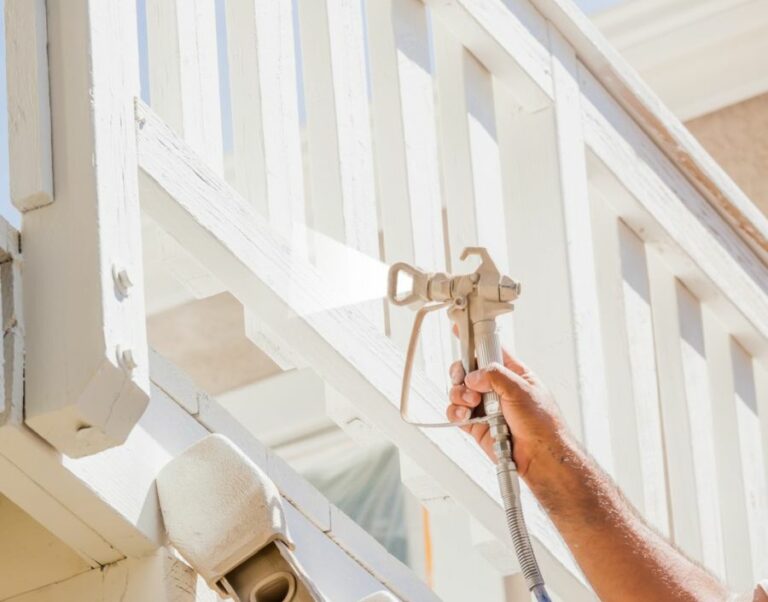
• Proper Application of Paint on Cans
Ensuring the paint is correctly applied to the cans is vital in maximizing its potential benefits. Following the paint manufacturer’s instructions diligently will lead to an effective application.
– Surface Preparation
Preparing the can’s surface is a critical first step in the painting process. The can should be thoroughly cleaned to remove any dirt, grease, or contaminants that could hinder paint adhesion. Sanding the surface lightly using fine-grit sandpaper will further promote adhesion and ensure an even application.
– Primers and Topcoats
Using a primer before applying the final paint coat is crucial in providing an extra protective layer and promoting paint adhesion. Choosing a primer specifically designed for the chosen paint type will maximize its effectiveness.
Apply the primer and final paint coats according to the manufacturer’s guidelines, typically waiting for the recommended drying time between coats.
– Moisture and Temperature Considerations
To ensure the best results, paint application should be done in optimal environmental conditions. Excess moisture in the air could negatively affect paint adhesion, and high temperatures might cause the paint to dry too quickly, leading to an uneven finish.
Consult the paint manufacturer’s guidelines for the ideal painting conditions.
• The Role of Proper Paint Storage in Can Preservation
Proper paint storage not only extends the paint’s shelf life but is also vital in maintaining can quality. Exposure to extreme temperatures and high humidity could adversely affect the paint’s protective properties.
– Temperature Control
Store paint cans in a cool, dry area away from direct sunlight and heat sources. Temperatures between 60 and 80 degrees Fahrenheit (15 and 27 degrees Celsius) are typically recommended for most paints. Keeping paint stored at consistent temperatures within this range will help preserve its quality.
– Sealing and Labeling
Ensure that paint cans are tightly sealed when not in use to prevent air and moisture from entering the container, which could negatively impact the paint’s performance. It’s also crucial to label paint cans clearly, indicating their contents and color to avoid any mix-ups during application.
• Regular Maintenance and Inspection of Painted Cans
Regularly inspecting painted cans and conducting timely maintenance is crucial in preserving their integrity. Look for any signs of surface damage, such as cracks, peeling, or flaking paint, which could compromise the can’s protection.
If damage is detected, remove the affected paint area, clean and sand the surface, and repair it by applying an appropriate primer and paint according to the manufacturer’s guidelines.
• Conclusion
Proper paint care plays a crucial role in preserving cans and ensuring their longevity.
From selecting the right paint type and applying it correctly to storing the paint and conducting regular maintenance, following best practices will significantly contribute to the effectiveness of paint protection and the overall quality of cans.
For further information on paint care and preservation, visit the American Coatings Association website, which offers valuable resources and expert advice on paint-related matters.
Preventing Paint from Drying Inside the Can
• Storing Paint Properly
One of the most crucial aspects of preventing paint from drying out is to ensure proper storage. After using the paint, it is essential to seal the can tightly before storing it.
First, wipe the edges of the can clean, and then firmly press the lid back on with a rubber mallet. Avoid using a regular hammer, as it may dent the lid, compromising the seal.
– Climate-Controlled Storage
To prevent paint from drying out and to maintain its quality, a climate-controlled environment is essential. Temperature fluctuations and humidity can negatively affect the paint. It is recommended to store paint cans in a cool, dry place, away from direct sunlight and heat sources.
Basements or storage closets work well for this purpose. The ideal storage temperature is between 60 and 80 degrees Fahrenheit. Make sure also to keep cans away from freezing temperatures, as paint can be damaged when it freezes and thaws.
– Storing Opened Paint Cans
For partially used cans, it is advisable to transfer the remaining paint to a smaller, airtight container. This reduces the amount of air in contact with the paint, slowing down the drying process.
Pour the paint through a fine mesh strainer while transferring it to the new container to remove any contaminants or dried bits of paint. Label the container with the paint color, brand, and room where it was used for future reference.
Airtight Container Options
There are several options for airtight containers for leftover paint storage:
- Plastic paint storage containers: These are specifically designed for preserving paint and come in various sizes. The airtight seal ensures the paint remains in optimal condition.
- Glass jars: Old food jars with airtight screw-top lids can work well for storing paint, especially for smaller amounts. Plus, the clear glass allows you to see the paint color easily.
- Plastic containers with a resealable lid: Food storage containers like Tupperware or similar products can be used to store paint as long as the lid forms an airtight seal.
• Tips for Keeping Paint Fresh in the Can
Here are some additional recommendations to prolong the life of the paint and prevent it from drying out:
– Use a Paint Pouring Spout
Purchasing a paint pouring spout or paint can lid with a built-in spout can help minimize the mess and exposure to air while pouring paint. These spouts are reusable and can easily be found at home improvement stores or online retailers.
– Create an Extra Barrier to Air
Before sealing the paint can, consider placing a layer of plastic wrap directly over the paint surface. This extra barrier reduces the amount of air in contact with the paint and helps maintain its quality.
– Invert the Paint Can
After tightly sealing the can, store it upside down. This step creates a vacuum seal and ensures that any remaining air is not in direct contact with the paint at the surface, preventing the formation of dried skin.
– Properly Dispose of Unusable Paint
If the paint has already dried out or is no longer usable, contact your local waste management facilities for proper paint disposal guidelines. Some facilities offer paint recycling programs or specific disposal instructions to help you make an environmentally responsible choice.
• Reviving Dried Out Paint
Sometimes, despite our best efforts, paints can still partially dry out. Before disposing of the paint, there is an option to try and revive it. You can use paint conditioners specifically designed to restore the consistency and quality of latex or oil-based paints.
Follow the manufacturer’s instructions to determine the appropriate ratio of conditioner to the paint, and mix thoroughly.
• Conclusion
Preventing paint from drying out in a can requires proper storage, sealing methods, and attentiveness to changes in paint quality. By following these recommendations and using airtight containers, the paint can remain in optimal condition for future touch-ups and projects. For further assistance on how to store paint, consult the U.S. Environmental Protection Agency (EPA) for guidelines on paint storage and disposal.
Step | Instruction |
|---|---|
1 | Clean the can’s opening with a damp cloth or paper towel, ensuring that the groove where the lid sits is free of paint. |
2 | Place a piece of plastic wrap directly on the surface of the paint, pressing it down to remove any air bubbles. |
3 | Place the lid on top of the plastic wrap and use a rubber mallet to securely reseal the can, tapping firmly around the edges. |
4 | Store the can upside down, which helps create an airtight seal and prevents the paint from drying out. |
5 | Store the can in a cool, dry place, away from direct sunlight and extreme temperatures. |
Prolonging Paint Life within a Canister
Keeping paint fresh and extending its life is vital, especially when you have leftover paint from a previous project.
• Store Paint in a Cool, Dry Environment
Temperature and humidity levels play a key role in paint storage. To prevent your paint from going bad, store paint cans in a cool, dry environment such as a basement or garage.
The U.S Environmental Protection Agency (EPA) recommends maintaining a consistent temperature, ideally between 60F and 80F.
• Seal the Lid Properly
Ensuring the paint can lid is sealed properly is essential for preserving the paint’s quality. Follow these steps for a securely sealed lid:
- Clean the can’s rim: Before sealing the can, remove any dried paint residue on the rim. This will ensure a secure seal and prevent air from entering the container.
- Cover the opening with plastic wrap: Place a piece of plastic wrap over the can before replacing the lid. This creates an additional moisture barrier and helps prevent oxidation.
- Use a rubber mallet: Gently tap the lid with a rubber mallet to create an airtight seal. This method reduces the risk of damaging the can and prevents the paint from leaking.
- Label the can: Clearly mark the paint can with the color, type of paint, and date it was last used. This information will come in handy when needing the paint again.
• Use the Right Container Size
Transferring excess paint into a smaller, airtight container can help keep it fresh for a longer time. Follow these steps when moving paint to a smaller container:
- Select the appropriate container: Choose a container made from plastic or glass with a tight-fitting lid.
- Clean the container: Thoroughly clean and dry the container before transferring the paint.
- Strain the paint: Use a strainer to remove any debris or clumps before transferring the paint to the new container.
- Seal the container tightly: Ensure the lid is securely fastened to create an airtight seal.
• Oxygen Protection Methods
Oxygen exposure can cause paint to deteriorate over time. Implementing methods to protect paint from oxygen exposure can significantly extend its life:
- Use a paint preserver: Adding a paint preserver or paint conditioner can help prevent oxidation and improve paint quality. These products are available at most home improvement stores.
- Displace the air: Fill empty space in the paint can with materials such as marbles or packing peanuts to displace oxygen and minimize the paint’s exposure to air.
- Vacuum seal the paint: Some paint storage solutions on the market, such as vacuum-seal systems, can help reduce oxygen exposure. These products create a vacuum seal around the paint can, keeping it fresh for a longer time.
• Mixing and Pouring Techniques
To help preserve paint quality when using it, follow these best practice techniques:
- Use a paint stirrer: Mix the paint thoroughly with a paint stirrer, ensuring any settled pigments are evenly distributed.
- Pour paint through a strainer: When pouring paint from the can into a tray or roller pan, use a strainer to remove any clumps or debris.
- Replace paint in storage container: After using the paint, pour any remaining paint from the tray or roller pan back into the storage container through a strainer. This not only helps preserve the paint but also minimizes waste.
By following these tips and recommendations, you can help ensure your paint remains fresh and usable for a more extended period. Properly stored paint not only saves you money on materials but also promotes better coverage and finish quality for your painting projects.
Step | Instructions |
|---|---|
1 | Close the paint can properly: Make sure to securely seal the lid by using a rubber mallet or a block of wood and a hammer to tap the lid shut. |
2 | Clean the can rim: Wipe away any paint residue from the rim of the can before closing it to ensure a tight seal. |
3 | Store it upside down: Once the can is properly sealed, store it upside down to create an airtight seal, keeping the paint fresh. |
4 | Keep the paint can in a cool and dry place: Store paint cans away from direct sunlight, heat, and moisture to preserve their quality. |
5 | Use a paint key: Instead of using a screwdriver to open the paint can, use a paint key, which helps preserve the integrity of the lid’s seal. |
Best Practices for Storing Paint Cans
Storing paint cans correctly is essential to ensure the longevity and quality of the paint inside.
• Optimal Storage Conditions
Proper storage conditions are crucial for maintaining the quality of the paint in the cans.
– Temperature Control
It’s essential to store paint cans in a cool, dry, and well-ventilated area. The recommended temperature range is between 60-80°F (15-27°C), as extreme heat or cold can damage the paint.
Heat can cause the paint to separate, and freezing temperatures can lead to the paint becoming unusable. The EPA recommends not letting paint freeze, as frozen paint will no longer spread or adhere properly when applied to surfaces.
– Away from Sunlight
Store the cans away from direct sunlight, as UV rays can degrade the paint’s color and quality. A dark and dry place, such as a basement or garage, is typically an ideal location for paint can storage.
– Elevated Surface
Place the paint cans on an elevated surface, such as a shelf, to keep them off the floor. This ensures that they remain dry and protected from potential water damage or flooding.
• Properly Sealing Paint Cans
A well-sealed paint can is crucial for preserving the paint and preventing it from drying out or forming skin on the surface.
– Using a Rubber Mallet
One recommendation is to use a rubber mallet to tap the lid gently around the edges, ensuring a tight seal. This tool prevents damage to the can or lid and is more effective than using a hammer.
– Avoid Rusting
Keep the rim of the can clean and free from paint residue before sealing. Built-up paint on the rim can create an imperfect seal and cause rusting, which can negatively affect the paint’s quality.
• Labeling Paint Cans
Label each paint can with essential information to ensure it’s easy to identify its contents and use the paint accordingly.
– Content Information
Include the paint color, brand, finish, and date of purchase on the label. This information is helpful when repurchasing the same paint color or touching up a specific area in the future.
– Usage Details
Indicate the rooms or surfaces where the paint was used. This is particularly useful when addressing any discrepancies in color or finish.
• Rotating Stock
Like most products, paint has a shelf life. Regularly rotating your paint stock ensures that older cans are used first, preventing them from going to waste.
– Check for Signs of Aging
Paint typically has a shelf life of 7-10 years if unopened and 2-5 years once opened. Regularly inspect the cans for signs of aging, such as rust or a foul odor, and dispose of them accordingly.
• Safe Disposal of Unwanted Paint Cans
When disposing of unwanted paint or empty cans, it’s crucial to follow proper disposal procedures.
– Local Guidelines
Check your local waste management guidelines for paint disposal or recycling centers. Many communities offer paint recycling options, where the paint can be repurposed or disposed of in an eco-friendly manner.
– Unused Paint
If the paint is still usable, consider donating it to local schools, community centers, or non-profit organizations. This helps to reduce waste and provides valuable resources for community projects.
• Conclusion
Proper paint can storage is essential for maintaining the quality and usability of the paint. By following the recommendations outlined in this article, you can ensure your paint remains in optimal condition for future projects while promoting safe and eco-friendly disposal methods.
Effective Preservation Techniques for Paint Containers
Maintaining and preserving paint containers is crucial to ensure the longevity of the paint and its usability for future projects.
• Proper Storage
The first step to extending the life of your paint and its container is proper storage. Here are some recommendations to follow:
- Temperature: Store paint containers in a climate-controlled environment, with temperatures ranging from 50°F to 80°F (10°C to 27°C). Extreme temperatures can lead to irreversible damage to the paint. Do not store paint containers near heating or cooling vents, as fluctuating temperatures can negatively affect the paint’s consistency.
- Humidity: Keep paint containers in a dry, low-moisture environment. High humidity can cause the paint to separate and result in mold or mildew growth.
- Light: Prevent direct exposure to sunlight or artificial light, which can weaken the paint’s color and endurance.
- Shelf life: While the shelf life of paint varies depending on its type, typically, unopened containers can last up to 10 years, while opened containers may last 2-5 years. It’s essential to check the paint’s expiration date and use it within this timeframe.
• Seal the paint container
An essential step in preserving the paint container is to ensure it is correctly sealed to prevent air exposure. The following methods can help achieve a proper seal:
- Clean the rim and lid: Before closing the container, remove any excess paint from the lid’s inner grooves and the container’s rim. Built-up residue can make it challenging to create an airtight seal and may result in the paint drying out prematurely.
- Use plastic wrap: Place a layer of plastic wrap over the container’s opening before securing the lid. This creates an additional barrier to protect the paint from air exposure.
- Hammer the lid shut: Instead of pushing the lid down by hand, use a rubber mallet to hammer the lid shut evenly. This creates a tighter seal and minimizes the likelihood of air entering the container.
- Upside-down storage: Store the container upside down, with the lid resting on the ground. This creates a tight seal and keeps the paint fresh.
• Label and organize
Label the paint containers with essential information such as paint color, type, brand, and date opened. Keep a record of the paint codes or chip samples for reference in future projects. Organize the containers based on their age, with older paints stored in front for easier access and proper rotation.
• Keep lids rust-free
Rust on the paint container’s lid can negatively impact the paint’s quality. The following steps can help prevent rust:
- Avoid using metal tools while painting: Using metal tools such as paint can openers or stirrers can scratch the container or lid, leading to rust. Opt for plastic tools instead.
- Clean the outer surfaces: Wipe down the container and lid with a damp cloth to remove any dirt, dust, or paint residue after each use. This prevents moisture from accumulating on the outer surfaces, which can cause rust.
• Rotate and mix paint periodically
Older and unused paint containers should be occasionally rotated and mixed to maintain consistency and prevent separation. Use a paint stirrer or a drill with a paint-mixing attachment to mix the paint thoroughly.
• Proper disposal
If the paint in the container is damaged, unusable, or expired, it’s essential to dispose of it correctly. Follow the guidelines provided by your local waste disposal or recycling facilities, as improper disposal can be harmful to the environment.
More information on proper paint disposal can be found on the Environmental Protection Agency website.
• Conclusion
Proper preservation of paint containers ensures the longevity of the paint and maintains its quality for future use. By following the tips presented in this article, you’ll be able to extend the life of your paint containers and minimize waste effectively.
Step | Instructions |
|---|---|
1 | Clean the rim of the paint container to remove any excess paint. |
2 | Place a piece of plastic wrap over the paint can opening to create an airtight seal. |
3 | Replace the lid and press it down firmly until it is tightly sealed. |
4 | Store paint containers away from sources of heat, cold, or direct sunlight to prevent damage to the paint. |
5 | Label the paint container with the color, brand, and date of purchase for future reference. |
Upside-Down Storage: Beneficial for Paint Cans?
Storing paint cans upside down has been a topic of debate among professionals and DIY enthusiasts for years. The idea is that storing a paint can upside down will create an airtight seal, thus preventing the paint from drying out and increasing its shelf life.
• Pros of Storing Paint Cans Upside Down
– Airtight Seal
One of the main benefits of storing paint cans upside down is the airtight seal created by the paint itself. When the can is upside down, the paint pools around the lid, acting as a sealant and reducing the risk of air entering the can.
This helps to preserve the paint and prevent it from drying out, which is the primary concern for any leftover paint.
– Easy Mixing
Over time, paint can settle and separate into different layers, making it difficult to use again. Storing the can upside down ensures that the pigment, resin, and solvent are in close contact with one another.
When it’s time to use the paint again, simply turn the can right side up and mix it well. The paint should now be easier to stir and blend, resulting in a smoother application.
– Reduction of Rust
By keeping the paint in contact with the inside of the can’s lid, there’s less chance for rust to form around the rim. This helps to maintain the integrity of the can and its contents over an extended period of time.
• Cons of Storing Paint Cans Upside Down
– Potential Leakage
The primary concern with storing paint cans upside down is the possibility of leakage. If the lid isn’t sealed correctly, either due to damage or simply not being tight enough, turning the can upside down can result in a messy paint leak.
This situation might lead to wasted products and damage to your storage area.
– Difficulty Opening the Can
Storing cans upside down can also cause the paint to dry around the rim of the lid, making it difficult to open the next time you need to use it. This could lead to using excessive force in an attempt to pry the lid off, potentially damaging the can or even causing the paint to splatter.
• Recommended Alternatives to Upside Down Storage
– Clean the Lid and Can
Before storing leftover paint, ensure the lid and can are clean. Remove any excess paint from the rim using a brush or cloth. This will help to reduce the risk of dried paint interfering with the seal and prevent rust around the rim.
– Tap the Lid Down Securely
After cleaning the rim, place the lid on top of the can and firmly press it down all around the edges. For added security, use a rubber mallet or hammer to softly tap down the lid and ensure the seal is tight. Cover the hammer’s head with a cloth to avoid damaging the lid.
– Store in a Cool, Dry Place
Choose a location that is cool, dry, and away from direct sunlight to store your paint cans. Sunlight, temperature fluctuations, and moisture can all have adverse effects on the paint and can itself.
– Use a Paint Can Sealer
If you’d rather store your paint cans right side up, consider investing in a paint can sealer device. These gadgets create an airtight seal around the can’s edge, eliminating the need to store the can upside down. You can find them at most hardware stores and even online retailers like Amazon.
• Conclusion
In conclusion, storing paint cans upside down can have some benefits such as creating an airtight seal and making it easier to mix the paint. However, it also comes with potential risks like leaks and difficulties opening the cans.
As an alternative, consider cleaning the rims and lids, tapping the lids down securely, and using a paint can sealer to store your cans right side up. For more information on paint storage, visit the Paint Quality Institute’s website, which offers valuable information and resources on proper paint storage and use.
Properly Sealing a Paint Can for Storage
Painting projects are an essential part of home improvement, and ensuring that you properly reseal paint cans after each use is crucial for the longevity of the remaining contents.
• Preparing for Resealing
Before you begin the sealing process, it is important to take a few steps in preparation:
– Remove Excess Paint from the Rim
It is common for paint to accumulate around the rim of the paint can when pouring or during the painting process. Use a paintbrush or a clean cloth to wipe away any excess paint from the rim, as this can interfere with creating a proper seal.
– Clean the Lid
Similarly, clean the underside of the can’s lid, removing any dried paint or debris. This will help it reseal more effectively and prevent the lid from becoming stuck to the can.
– Stir the Paint
It is necessary to stir the paint properly before sealing, as this will help maintain a consistent viscosity and pigment distribution throughout the entire can. Use a clean, wooden paint stirrer or another appropriate tool and stir thoroughly.
• Properly Sealing the Can
Now that your paint can, and its lid are clean and prepared, it is time to follow these steps to seal the can correctly:
– Align the Lid
Place the lid on top of the can, ensuring that its outer edge is accurately aligned with the rim. Misaligned lids can cause leakage and may be difficult to remove later on.
– Gently Tap the Lid
Using a rubber mallet or the flat side of a screwdriver handle, gently tap the lid around its edge. This will help to create a tight seal without damaging the lid or paint can. It is important to tap gently and evenly, avoiding any forceful blows that could dent or warp the can.
– Check for a Proper Seal
Once the lid is in place and you have gently tapped it into position, ensure that it has created a proper seal. A properly sealed paint can should have no visible gaps between the lid and the rim.
– Store the Paint Can Correctly
Now that your paint can is sealed, it is essential to store it properly to maintain the quality of the paint. Keep paint cans in a cool, dry area away from sunlight and heat sources to prevent any undesirable changes in the paint’s consistency.
Storing cans upside-down can also form an air-tight seal that keeps out air and moisture, preserving the paint for longer periods of time.
• Troubleshooting Issues
Occasionally, issues may arise when attempting to seal a paint can. Here are some tips to resolve them:
– Stuck Lid
A lid that is stuck to the rim of the paint can may require additional leverage to remove. Use a flathead screwdriver or a paint can opener to carefully pry open the lid, ensuring you do not dent the can or damage the seal.
– Rusty or Bent Cans
Rusty or bent paint cans may be difficult to reseal, and in some cases, it is better to transfer the remaining paint to a new, clean container. A sturdy plastic container with an airtight lid is an excellent option for preserving the paint’s quality.
• Additional Resources
For further guidance on caring for and storing paint cans, consult resources like The United States Environmental Protection Agency, which provides helpful tips and recommendations.
In conclusion, properly sealing a paint can is an essential step in home improvement projects to ensure the longevity and quality of your paint. By following the steps outlined in this guide, you can preserve your paint for future use and avoid unnecessary waste.
Step | Instructions |
|---|---|
1 | Prepare the can: Remove any excess paint from the rim of the can using a putty knife or a clean cloth. |
2 | Place the lid: Position the lid on top of the can, making sure it is lined up properly and flush with the can’s edge. |
3 | Gently tap: Using a rubber mallet, tap gently around the edge of the lid until it is firmly sealed. |
4 | Store the can: Store the paint can upside down to create an airtight seal and prevent the paint from skinning over. |