Maximizing Spray Can Durability & Storage
Have you ever been frustrated by a spray can losing pressure, clogging, or underperforming? You’re not alone! The good news is that with a little extra care and knowledge, you can maximize the longevity of your spray cans, ensuring they perform optimally when you need them.
Maximizing spray can durability & storage:
To maximize spray can durability and storage, ensure the nozzle is sealed properly, clean, and capped when not in use, and store cans at a temperature between 50-70°F (10-21°C) in a cool, well-ventilated area away from heat sources or ignition risks. Avoid over-pressurization and store cans on sturdy shelves rather than stacked. Regularly test and inspect cans for functionality and damage. Follow safety guidelines and recommendations from the NFPA to ensure proper use and storage.

Unlock the full potential of your spray cans! In the following sections, we’ll dive into innovative techniques and best practices that will maximize your spray cans’ durability, longevity, and storage efficiency.
Get ready for a world of seamless and seamless spraying experience! Read on to learn more.
Contents
- 1 Enhance Spray Can Longevity & Optimize Storage
- 2 Increasing the Durability of Spray Paint
- 3 Safeguarding Spray-Painted Surfaces Effectively
- 4 Assessing the Durability of Can Spray Paint
- 5 Optimal Storage Solutions for Spray Paint Cans
Enhance Spray Can Longevity & Optimize Storage
Spray cans, also known as aerosols, have a variety of uses in our daily lives. From automotive paint to household cleaners and personal care products, these cans are both versatile and convenient.
However, ensuring their durability and proper storage is essential to maintain both their efficiency and safety.
• Properly Sealing The Nozzle
One of the most important aspects of maintaining spray can durability is to ensure the nozzle is sealed properly. This helps to prevent any leakage and maintains the pressure within the can.
- Whenever you are not using the spray can, make sure the nozzle is in the “off” position. This is usually indicated by an arrow or by rotating the nozzle to a locked position.
- After each use, wipe off any residual product from the nozzle to prevent clogging and ensure a proper seal.
- If a spray can comes with a cap, place it back on the nozzle to prevent dirt or other contaminants from entering the nozzle.
• Storing Spray Cans at the Correct Temperature
Temperature plays a significant role in maintaining the durability of spray cans. Extreme temperatures can cause the cans to lose pressure, leak, or even burst.
- Store your spray cans in a cool, well-ventilated area. The ideal temperature range for most aerosols is between 50°F and 70°F (10°C – 21°C). Avoid areas with direct sunlight or heat sources, such as radiators or stoves.
- Never store spray cans in your vehicle, as temperatures inside a car can quickly rise during warmer weather, leading to potential damage or safety hazards.
- Be cautious when using spray cans in extremely cold temperatures, as this can cause a decrease in pressure and negatively affect the product’s performance. If necessary, allow the can to warm up for a short period at room temperature before using it.
• Avoiding Over-Pressurization
Spray cans rely on the proper pressure to function effectively. Over-pressurization can lead to poor performance or, in extreme cases, cause the can to burst.
- Do not puncture, incinerate, or crush spray cans. These actions can cause the can to become over-pressurized and lead to safety hazards.
- Ensure you are using the correct nozzle for the product. Some cans may require specific nozzles that control the pressure and flow of the product.
- If a spray can appears to be over-pressurized or is not functioning correctly, I recommend contacting the manufacturer for guidance on how to safely use or dispose of the can.
• Properly Storing Spray Cans
Storing your spray cans in the right environment will help to maintain their durability and ensure they are safe to use.
- Keep spray cans on shelves or in cabinets to reduce the risk of them being knocked over or damaged. Ensure the shelving is sturdy and suitable for the weight of the spray cans.
- Avoid stacking spray cans on top of each other, as this can lead to damage, leakage, or pressure issues.
- Store spray cans away from open flames or ignition sources, such as electrical outlets or pilot lights, to reduce the risk of accidents.
• Regularly Testing and Inspecting Spray Cans
Regularly testing and inspecting your spray cans can help to identify any potential issues and maintain their durability.
- Test your spray cans periodically to ensure they are functioning correctly by spraying a small amount of product onto a piece of scrap material or an inconspicuous area. This can help to identify any issues, such as clogged nozzles or decreased pressure.
- Inspect the cans for any signs of damage or leaking. If you find any concerns, I recommend disposing of the can according to the manufacturer’s guidelines or contacting them for advice.
The National Fire Protection Association (NFPA) provides guidelines and recommendations on the safe storage and use of spray cans that can be helpful for both individuals and businesses.
By following these tips and recommendations, you can maximize the durability of your spray cans and ensure they are stored correctly, ultimately enhancing their efficiency and your safety.
Increasing the Durability of Spray Paint
Spray painting is an easy and affordable technique to apply color on different surfaces, but it’s essential to ensure the paint’s durability to enjoy a long-lasting finish.
• Surface Preparation
Adequate surface preparation is crucial to make spray paint more durable. Thorough cleaning, sanding, and using primer are essential steps when prepping surfaces.
– Clean the Surface
Before painting, it is essential to clean the surface to remove dust, dirt, and grease. Use a damp cloth or sponge with mild soap or detergent for general cleaning. For oily or greasy surfaces, a degreaser can be used. It’s important to let the surface dry completely before applying paint or primer.
I recommend checking this environmental guide from the EPA for tips on effective surface cleaning while minimizing environmental impact.
– Sand the Surface
Sanding the surface before painting helps create better adhesion by roughening the surface, allowing the paint to grip it more effectively. Use fine-grit sandpaper (around 240 grit) and lightly sand the surface. After sanding, wipe the surface with a tack cloth to remove any dust or debris.
– Apply Primer
Primer is an essential step to make spray paint more durable, as it promotes better adhesion and improves paint coverage. Choose a primer specifically designed for the type of material you’re painting. Apply a thin, even coat of primer and let it dry completely before applying spray paint.
• Choose the Right Spray Paint
Selecting high-quality spray paint suited to your project’s material and conditions is crucial to achieving a durable finish. Consider the following aspects when choosing spray paint:
– Paint Quality
Invest in high-quality paint for improved durability. High-quality paints possess greater pigments and resins, ensuring better adhesion, coverage, and resilience to fading, peeling, and chipping.
– Compatibility with Material
Choose a spray paint that’s formulated for the material you’re painting. Different materials react differently to various types of paint. Selecting a paint specifically designed for your project’s material ensures optimal adhesion and durability.
– Environmental Considerations
Consider the environment where the painted object will be placed. If the object will be exposed to sunlight or harsh weather conditions, choose a spray paint with added UV protection and rust resistance to enhance durability.
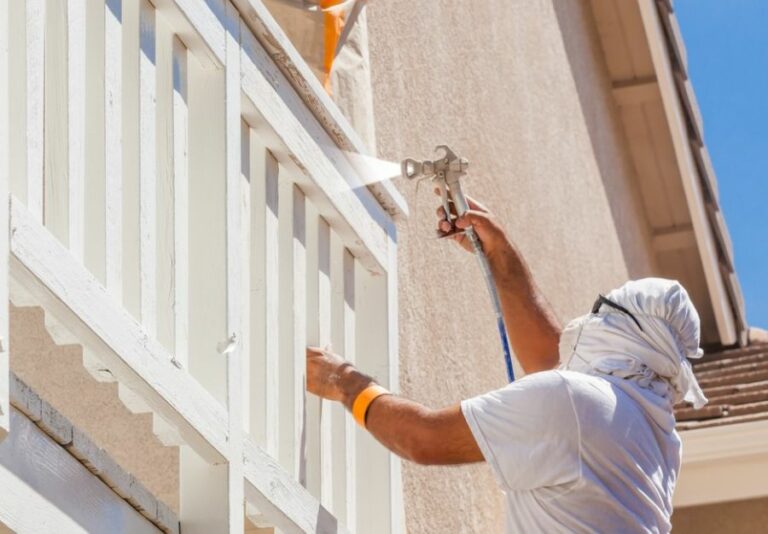
• Proper Application Techniques
Using correct application techniques when spray painting contributes to a more durable finish. Some key points to follow during application include:
– Apply Thin Coats
Thin coats of spray paint are better than thick layers, as they will dry evenly and are less prone to paint runs, drips, or sags. Apply multiple thin coats, allowing each coat to dry fully before applying a new layer.
– Maintain Proper Distance
Maintain approximately 8-12 inches distance between the spray can nozzle and the surface being painted. This distance allows for an even spray pattern and avoids excessive paint buildup, which can lead to drips and an uneven finish.
– Use a Consistent Spray Pattern
Apply the paint using a consistent spray pattern to maintain an even layer of paint across the surface. Moving the spray can in a continuous side-to-side motion while maintaining consistent pressure on the nozzle prevents uneven application.
• Seal the Paint for Protection
After the paint is fully dried, applying a clear sealer provides a protective barrier, adding durability and resistance to the paint. Clear sealers are available in various finishes such as matte, satin, and gloss.
– Choose the Right Sealer
Select a sealer that’s compatible with spray paint and suitable for the type of painted material. Ensure that the sealer has UV and weather-resistant properties if the painted object will be exposed to outdoor conditions.
– Correct Application
Apply the clear sealer in thin, even coats, maintaining proper distance and technique, as mentioned above. Allow each coat to dry fully before applying additional layers. Typically, two to three coats of clear sealer are sufficient to provide adequate protection.
By following these recommendations on surface preparation, choosing the right paint, adhering to correct application techniques, and sealing the paint, you’ll be able to make spray paint more durable and enjoy a long-lasting finish on your projects.
Steps | Description |
|---|---|
1. Surface Preparation | Thoroughly clean and sand the surface to remove any dirt, dust, or oils that could affect paint adhesion. Sanding promotes better adhesion and smoothens rough areas. |
2. Primer Application | Apply a proper primer to the surface. A primer helps in improving the adhesion of paint and increases the paint’s durability. |
3. Applying Multiple Thin Coats | Apply multiple thin coats of spray paint instead of one thick coat. The thinner the layer, the less likely it will suffer damage or chipping. Allow each coat to dry before applying the next layer. |
4. Proper Drying Time | Allow the paint to dry fully before touching or using the object. The longer the paint cures, the harder and more durable it will become. |
5. Seal with Clear Coat | Apply a clear, protective topcoat to seal and protect the paint from damage. A clear coat adds a layer of protection against scratches, chipping, and general wear and tear. |
Safeguarding Spray-Painted Surfaces Effectively
Spray paint is a versatile and useful tool for a multitude of applications, ranging from art projects and automotive paint jobs to household items refurbishment. However, protecting and maintaining the vibrancy and longevity of a spray-painted surface can be a challenge.
• Why is Surface Protection Necessary?
Spray-painted surfaces are vulnerable to various factors that can negatively affect their appearance and durability. These threats include weather, UV rays, chipping, peeling, and general wear and tear from daily use.
To ensure the paint remains in excellent condition and continues to look great, it’s essential to take appropriate measures to protect the painted surface.
• Choosing the Right Type of Clear Coat
The first step in protecting a spray-painted surface is selecting the appropriate clear coat or protective topcoat. Clear coats not only protect the paint from damage but also enhance the color and provide additional durability.
– Gloss Clear Coat
A gloss clear coat provides a higher sheen while amplifying the color depth, making it ideal for automotive paint jobs or projects that require a high-gloss finish.
– Satin Clear Coat
Satin clear coats create a velvety, semi-gloss appearance, which is perfect for enhancing and protecting decorative items or furniture without creating a shiny surface.
– Matte Clear Coat
If you want to protect your spray-painted surface without altering its appearance, opt for a matte clear coat. This finish provides a non-reflective, flat look, suitable for antique refurbishment or preserving a low-gloss finish.
It is essential to choose a clear coat suited for your specific project and paint type, ensuring compatibility between the clear coat and spray paint. Always refer to the manufacturer’s instructions and recommendations.
• Proper Surface Preparation and Application Techniques
The key to obtaining a long-lasting, durable protective finish is proper surface preparation and application techniques. The following steps should be followed to ensure effective protection:
- Surface Cleanliness: Make sure the spray-painted surface is clean and free of dirt, grease, or other contaminants before applying the clear coat. Use a gentle cleaner and a lint-free cloth to scrub the surface, then allow it to dry completely.
- Surface Sanding (Optional): If the paint surface is uneven or has imperfections, carefully sand the surface using fine-grit wet/dry sandpaper (600-800 grit). Wipe down the surface with a damp cloth to remove any sanding residue and allow it to dry.
- Clear Coat Application: Apply the chosen clear coat using the same technique as when spray painting. Maintain a consistent distance from the surface (usually 8-12 inches) and use multiple light coats instead of a heavy application. Allow the recommended drying time between coats as suggested by the manufacturer.
- Drying and Curing Time: Allow the clear coat enough time to dry and cure according to the manufacturer’s instructions before using or reassembling the object. It can be anywhere from 24 hours to several days, depending on the product and environmental conditions.
• Additional Protective Measures
Besides using a clear coat, there are other protective measures that you can consider to ensure your spray-painted surface remains in good condition.
– Environmental Protection
If possible, keep the painted object indoors or away from direct sunlight and moisture, which can cause damage and fade over time. Consider using breathable covers or shade structures for outdoor items.
– Proper Maintenance
Regularly clean the painted surface with gentle cleaning agents and a lint-free cloth to remove dust, dirt, and buildup that can compromise the paint quality.
– Avoiding Physical Damage
Be cautious of impacts or potential abrasion to the painted surface, as these can cause chipping, peeling, or scratching. Use protective pads, coasters, or other barriers to minimize the risk of damage.
• Conclusion
Protecting spray-painted surfaces is an important aspect of ensuring their longevity, durability, and overall appearance.
By choosing the correct type of clear coat, following proper surface preparation and application techniques, and taking additional protective measures, you can successfully preserve your spray-painted surface for many years to come.
Step | Description |
|---|---|
1 | Allow the spray paint to dry completely. |
2 | Clean the surface with a soft cloth to remove any dust or debris. |
3 | Apply a clear sealant or topcoat to the painted surface. |
4 | Allow the sealant or topcoat to dry completely. |
5 | Apply additional coats of sealant or topcoat, if necessary, allowing each coat to dry before applying the next. |
6 | Once the final coat is dry, buff the surface gently with a soft cloth to achieve a smooth, glossy finish. |
Assessing the Durability of Can Spray Paint
Spray paint has come a long way from being a temporary solution for graffiti and vandalism to becoming an essential tool for DIY enthusiasts, artists, and professionals alike.
Undeniably versatile, spray paint is now commonly used for painting various surfaces, ranging from home interior projects to automotive customization. But one question still lingers – is spray paint durable?
• Durability of Different Types of Spray Paint
There are several types of spray paint available on the market, and their durability varies depending on the ingredients used, quality, and application method. Below are three common types of spray paint and their durability levels.
1. Enamel Spray Paint
Enamel paints are known to be incredibly hard-wearing and long-lasting. These oil-based paints provide an excellent finish and superior protection against various external elements.
They are often used for painting metal surfaces, such as automotive parts and machinery, and can withstand high temperatures and exposure.
2. Acrylic Spray Paint
Acrylic spray paint is water-based, making it an environmentally friendly and non-toxic option. It dries much faster than enamel paint and is less prone to cracking.
Acrylic spray paint is also resistant to water, ultraviolet rays, and general wear and tear. Thanks to its durability and ease of use, acrylic paint is widely used for both indoor and outdoor projects.
3. Lacquer Spray Paint
Lacquer spray paint is well-known for its luxurious, high-gloss finish. While it may not be as robust as enamel or acrylic paint, it is still relatively durable when applied correctly.
It is usually used for sealing or top-coating finished projects, providing an extra layer of protection and enhancing color depth.
• Factors Affecting the Durability of Spray Paint
Several factors can influence the lifespan and durability of spray-painted surfaces. Some of these factors include:
1. Surface Preparation
Proper surface preparation is crucial for ensuring the durability of the paint. This process involves cleaning, sanding, and priming the surface to provide a smooth, even base for the paint to adhere to. Poorly prepared surfaces can lead to issues such as peeling, bubbling, and chipping.
2. Application Technique
The way spray paint is applied can also affect its durability. It is essential to apply multiple thin and even coats of paint, allowing sufficient drying time between each coat. This ensures better adhesion, reduces the likelihood of runs and drips, and ultimately results in a more durable finish.
3. Quality of the Spray Paint
High-quality spray paint typically has better pigmentation, more durable ingredients and is less prone to issues such as inconsistency, clogging, and fading. Investing in a reputable brand and suitable type of spray paint for your project will undoubtedly lead to better results and improved durability.
4. Environmental Conditions
Extreme temperatures, fluctuating humidity, and excessive sun exposure can affect the performance and longevity of spray-painted surfaces. The durability of outdoor applications, in particular, can be significantly influenced by these environmental factors.
• Tips for Enhancing the Durability of Spray-Painted Surfaces
Here are some recommendations based on my personal experience to help improve the lifespan and durability of your spray-painted projects:
1. Proper Surface Preparation
As mentioned earlier, taking the time to clean, sand, and prime your surface correctly can significantly impact the paint’s adhesion and overall durability. Be sure to follow the manufacturer’s instructions regarding surface preparation to ensure the best possible results.
2. Use Quality Primer
Using a high-quality primer is essential, especially when painting porous surfaces, plastics, or metals. A primer not only provides a consistent base for the paint to adhere to but also enhances its durability, color intensity, and overall finish.
3. Protect the Painted Surface
Applying a clear coat or sealer to your painted surface can help protect it from external factors such as scratches, UV rays, and moisture. This additional layer of protection will contribute to the enhancement of the paint’s durability and longevity.
4. Store and Maintain Correctly
Regular maintenance, periodic cleaning, and proper storage of painted items, especially when not in use or during extreme weather conditions, can help increase the lifespan of the spray paint.
• Final Thoughts
The durability of spray paint depends on several factors, including the type of paint, surface preparation, application technique, and environmental conditions. With the correct approach, spray paint can provide a long-lasting, resilient finish for various projects.
By adhering to best practices and investing in high-quality materials, you can ensure the durability of your spray-painted surfaces and enjoy your creations for years to come.
Optimal Storage Solutions for Spray Paint Cans
Storing spray paint cans properly is essential for the safety and longevity of the paint. A well-organized storage system will not only protect your investment but also ensure that your paints remain effective and easy to use when needed.
• Understanding the Ideal Storage Conditions
Before discussing specific storage solutions, it’s important to understand the ideal storage conditions for spray paint cans.
According to The National Institute for Occupational Safety and Health (NIOSH), the optimal storage temperature for aerosol cans is between 60°F and 70°F (15.5°C and 21°C).
Storing cans in extreme temperatures can cause the pressure inside the can to increase, potentially leading to the can leaking or even exploding.
In addition to temperature, spray paint cans should be stored in a dry location, as excessive moisture can cause the paint to deteriorate or promote rusting of the can. Lastly, the storage area should be well-ventilated to prevent the buildup of harmful vapors.
• Designing an Effective Storage System
1. Labeling and Organizing
Labeling spray paint cans is an important aspect of proper storage. This helps you easily identify the contents and prevent wasted time searching for the right color or finish
. A simple label with the color name, finish type, and date of purchase can make a huge difference. This practice can also help you track your paint inventory and know when it’s time to repurchase or dispose of old cans.
Organizing the cans by color, type, or brand is another useful step in creating an effective storage system. Creating designated areas or shelves for specific categories will make it easier to locate the desired paint and monitor your inventory.
2. Shelving Solutions
The use of shelves or racks is the best way to store spray paint cans. This will keep them organized and off the ground, where they can be knocked over or damaged.
The use of metal or heavy-duty plastic shelves is recommended, as these materials are less likely to warp or deteriorate over time.
When choosing a shelving system, consider the weight capacity and dimensions to ensure that it can support the number of cans you plan to store.
Additionally, choose a system that allows for easy access to individual cans, such as a slatted or wire-frame design. You can either purchase pre-made shelves or construct your own custom solution to fit the specific needs of your storage space.
3. Secure Storage
Securing your spray paint cans is crucial for preventing accidents or unauthorized access. If you have small children, pets, or simply want to protect your investment, consider using a lockable storage cabinet or adding a padlock to your shelving unit.
This extra layer of security will keep curious hands or paws away from the potentially dangerous chemicals in spray paint cans.
• Safe Disposal of Empty or Old Cans
It’s important to safely dispose of empty or old spray paint cans to protect the environment and prevent potential hazards.
First, ensure that the can is completely empty by spraying until the propellant runs out. Then, follow your local area’s guidelines for hazardous waste disposal, which can typically be found on your local government’s website.
Never throw empty spray paint cans in regular trash or recycling bins, as residual chemicals can be harmful to waste management workers and the environment.
• Periodic Inspection of Stored Cans
Periodically inspecting and maintaining your stored spray paint cans is essential for upholding the integrity of the paint and preventing accidents.
Check for signs of leaking or rusting and promptly dispose of any compromised cans. Regularly clean your storage area to prevent dust buildup and improve ventilation.
• Final Thoughts
Properly storing spray paint cans is essential for the safety, longevity, and effectiveness of the paint. By following the recommendations in this article, you’ll be able to create an organized, secure, and efficient storage system that ensures your paints remain in prime condition and easy to access when needed.
Whether you’re an avid DIY enthusiast or a professional painter, taking the time to perfect your storage method will greatly benefit your painting projects and overall safety.
Storage Method | Description |
|---|---|
Upright position | Store spray paint cans in an upright position with the nozzle facing up to prevent leaks and ensure proper functioning. |
Room temperature | Keep the cans in a room with a moderate temperature, between 60-80°F (15-27°C), to prevent damage from extreme temperatures. |
Away from direct sunlight | Store the cans away from direct sunlight to reduce the risk of overheating and explosion. |
Well-ventilated area | Choose a well-ventilated area to store the cans, such as a garage, shed, or utility room, to prevent the buildup of hazardous fumes. |
On shelves or in storage bins | Keep the cans organized on shelves or in storage bins to prevent accidental punctures or damage from falling objects. |
Away from open flames and heat sources | Store spray paint cans away from open flames, such as candles or pilot lights, and heat sources like radiators or heaters, to reduce the risk of fire or explosion. |