Indoor/Outdoor Spray Paint Clean-Up Tips, What Pros Say
Are you tired of dealing with the aftermath of indoor and outdoor spray paint projects? Fear not, because we have compiled a list of practical and effective clean-up tips to make your life easier! With our guidance, you can take on any spray paint project with complete confidence. Say goodbye to those messy clean-ups and embrace the satisfaction of a job well done!
Indoor/outdoor spray paint clean-up tips:
To clean up indoor/outdoor spray paint, prepare your workspace with protective coverings, ensure proper ventilation, and wear protective gear. Clean nozzles and spray guns after use, and remove overspray with razor blades, sandpaper, or pressure washing, depending on the surface. Clean spills with solvents and dispose of paint materials responsibly according to local guidelines.

Want to know the secrets behind quick and hassle-free spray paint clean-up? Read on to discover clever tips and tricks for effectively dealing with indoor/outdoor spray paint messes. Say goodbye to stubborn stains and hello to pristine surfaces!
Contents
- 1 Tips for Cleaning Up Indoor and Outdoor Spray Paint
- 2 Mess-Free Outdoor Spray Painting Techniques
- 3 Effective Methods for Cleaning Spray Painted Surfaces
- 4 Indoor Spray Painting Without Making a Mess: Tips & Tricks
- 5 Ventilating a Room After Spray Painting: Best Practices
Tips for Cleaning Up Indoor and Outdoor Spray Paint
Spray painting is an efficient, fast, and cost-effective way to transform and restore various items both indoors and outdoors.
However, the cleaning aspect of spray paint can oftentimes be challenging and time-consuming. To make the cleanup process easier, here are some expert indoor/outdoor spray paint clean-up tips.
• Preparing Your Workspace
Before starting your spray painting project, it’s essential to prepare your workspace to minimize mess and ensure easy cleanup.
1. Use Protective Coverings
Cover any surfaces near the painting area with plastic sheeting, tarp, or drop cloths. This will help to catch paint drips and overspray, making it easier to clean up later.
2. Ventilation and Masking
Proper ventilation is crucial when spray painting indoors. Open windows and doors to ensure good airflow. Additionally, using a painter’s mask can protect you from harmful fumes during the painting process.
3. Wear Protective Gear
Always wear gloves and old clothes while spray painting. This will keep your hands clean and protect your clothing from potential spills and splatters.
• Cleaning Your Spray Painting Tools
To ensure your spray painting equipment is well-maintained and ready to use for future projects, it is important to clean them diligently.
1. Clean Spray Paint Nozzles
After each use, turn the spray paint can upside down and spray for a few seconds to clear the nozzle. If the nozzle is clogged, you can soak it in a solvent like mineral spirits or acetone to dissolve the dried paint.
You can also clean spray gun nozzles using a small brush or a toothpick to clear any remaining paint.
2. Take Care of Your Spray Gun
If you are using a spray gun, it’s important to disassemble and clean it thoroughly after each use. Wipe off any paint residue and soak the various parts in a solvent.
Once the parts are clean, dry them and reassemble the gun. You can find detailed information on cleaning different types of spray guns in the manufacturer’s manual.
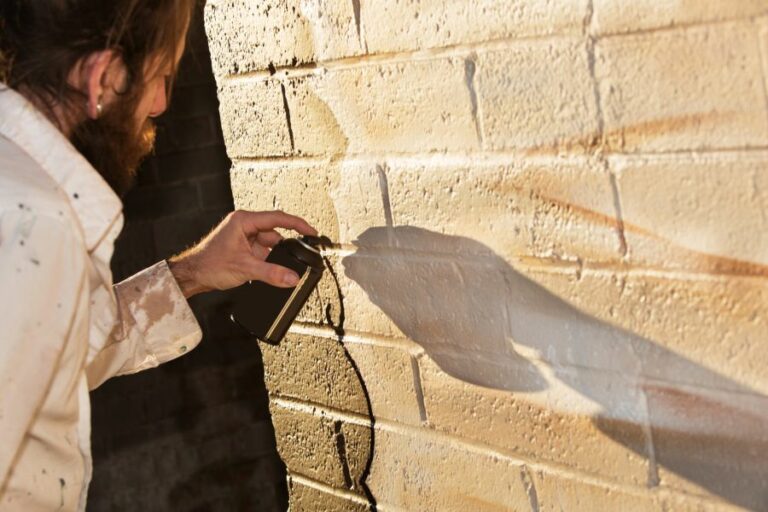
• Removing Overspray and Spills
Despite taking all necessary precautions, you may still find some overspray and spills around your painting area. Here’s how to clean those up effectively.
1. Removing Overspray from Surfaces
Glass and Metal
Overspray on glass and metal surfaces can be removed using a razor blade. Hold the blade at a 45-degree angle and gently scrape away the paint. You can also use fine steel wool with soapy water to scrub away any remaining residue.
Wood
For wooden surfaces, try using fine-grit sandpaper to gently remove the paint. Alternatively, you can use a chemical paint stripper specifically formulated for wood surfaces to break down the paint layers. Always follow the manufacturer’s instructions for a safe and effective paint removal process.
Concrete
A pressure washer is a handy tool for removing paint from outdoor concrete surfaces. If you need a more aggressive approach, try using a biodegradable paint stripper or a poultice with trisodium phosphate (TSP). Make sure to neutralize the surface with water when finished.
2. Cleaning up Spills and drips
Fresh Spills
For fresh paint spills, use a cloth or paper towel to blot up as much paint as possible. Avoid wiping or rubbing, as this can spread the paint further. Once you’ve blotted up the excess, use a solvent (such as mineral spirits, acetone, or rubbing alcohol) to remove the remaining paint residues.
Always follow the manufacturer’s instructions and test the solvent on a small, inconspicuous area to ensure it does not damage the surface.
Dried Spills
In case of dried paint spills or drips, use a paint scraper or putty knife to remove as much paint as possible. You might need to use a solvent or a paint stripper to soften the paint before you can successfully remove it.
Always follow the manufacturer’s instructions and be mindful of potential surface damage.
• Disposing of Paint Materials and Waste
It’s essential to dispose of paint materials and waste properly to protect the environment and comply with local regulations.
Check with your local waste disposal facility for proper paint disposal guidelines. In general, never pour solvents down the drain or dispose of them with regular household waste.
• Final Thoughts
By following these expert indoor/outdoor spray paint clean-up tips, you can ensure a neat and well-maintained workspace, prolong the life of your painting tools, and protect the surfaces you’re working on.
Preparation, attention to detail, and proper handling of materials are key to a successful cleanup process.
Mess-Free Outdoor Spray Painting Techniques
Spray painting outdoors can be a challenging task. Controlling overspray, paint fumes, and dealing with weather conditions can all make it incredibly difficult to achieve a clean and professional finish.
However, with the proper preparation and planning, it’s possible to spray paint outdoors without making a mess.
• Proper Preparation and Choosing the Right Equipment
– Selecting the Right Paint
When choosing a paint for outdoor spray painting, opt for a high-quality product that is specifically designed for exterior use. These paints are formulated with UV-resistant pigments and binders, ensuring they will not fade, peel, or crack when exposed to the elements.
Additionally, consider the surface you’ll be painting, as different paints adhere better to specific materials (e.g., metal, plastic, or wood).
– Invest in a Quality Spray Gun and Nozzle
A quality spray gun and nozzle will make it easier to control the flow and pattern of the paint, reducing the chances of making a mess. Invest in a spray gun with adjustable settings for pressure and spray width, which will help you achieve a more even and consistent finish.
– Set Up a Workspace and Protect Surrounding Areas
When spray painting outdoors, it’s crucial to protect the surrounding areas from overspray or paint splatters. Set up a designated workspace away from any buildings, vehicles, or plants that may be damaged by stray paint particles.
You can use drop cloths, tarps, or plastic sheeting to cover the ground and any nearby items that cannot be moved. Secure these materials in place with tape, rocks, or bricks to ensure the wind doesn’t blow them off.
• Proper Techniques and Tips for a Clean Result
– Prime and Clean the Surface
Before beginning your outdoor painting project, thoroughly clean and prime the surface to be painted. This will ensure proper adhesion of the paint and a clean finish. When cleaning, remove any dirt, grease, or other contaminants with mild soap and water.
Allow the surface to dry completely before priming. Choose a primer specifically designed for the material you will be painting and allow it to cure per the manufacturer’s instructions.
– Hold the Spray Gun at the Correct Distance and Angle
Holding the spray gun correctly is crucial for a mess-free result. Generally, the optimal distance between the spray gun and the surface is 6-12 inches, with the nozzle pointing directly at the surface.
Too close or too far away can result in uneven application and increased chances of mess. Always test the distance and angle on a scrap piece of material to ensure you have the right settings for your project.
– Control Overspray and Paint Fumes
When spray painting outdoors, paint particles can easily disperse through the air, causing a mess and potential health hazards. To prevent this, consider using a cardboard or plywood box as a spray booth to contain the overspray.
A box-like structure can be easily created by securing large pieces of cardboard or plywood around your painting area, helping to prevent paint particles from escaping.
When dealing with paint fumes, ensure that you’re working in a well-ventilated area and wearing a proper respirator mask. This will help protect you from inhaling harmful chemicals.
– Monitor Weather Conditions
Wind and humidity can greatly impact the outcome of your outdoor spray painting project. Windy conditions can cause overspray, making it difficult to control paint particles.
High humidity can slow down the drying process and can even cause the paint to become cloudy or crack. Aim to paint on days with low wind and humidity levels for the best results.
• Cleanup and Disposal
After completing the spray painting process, it’s important to properly clean and dispose of materials. Clean the spray gun and nozzle with water or paint thinner, depending on the type of paint used. Dispose of paint residue and other materials according to local regulations.
Additionally, properly store or dispose of paint cans according to the manufacturer’s instructions.
In conclusion, spray painting outdoors without making a mess is achievable with the proper preparation, equipment, and technique. Protect your surroundings, monitor weather conditions, and practice good techniques to ensure a clean and professional result.
Step | Description |
|---|---|
1 | Choose a calm, non-windy day to avoid paint spraying onto unintended surfaces. |
2 | Clear the area and protect surfaces by covering them with drop cloths, plastic sheeting, or newspapers. |
3 | Wear appropriate protective gear like a mask, goggles, and gloves to protect yourself from paint fumes and overspray. |
4 | Set up your spray paint can or gun according to the manufacturer’s instructions, ensuring proper nozzle size and spray settings. |
5 | Test the spray paint on a scrap piece of material before applying it to your project. |
6 | Hold the spray paint can or gun parallel to the surface you’re painting, and keep it at a consistent distance of about 6-12 inches. |
7 | Use steady, smooth, and even strokes while spraying, overlapping each stroke by about 50% to avoid drips and runs. |
8 | Allow the paint to dry according to the manufacturer’s instructions, and apply additional coats if needed. |
9 | Clean up after your project by disposing of the used drop cloths or newspapers and wiping down any surfaces where paint may have splattered. |
Effective Methods for Cleaning Spray Painted Surfaces
Spray painting is a popular method for applying color and protective layers to various surfaces. Its versatility and ease of use make it an attractive option for DIY projects and professional painters alike.
However, like all paints, the end result can sometimes be less than perfect due to overspray, drips, and other imperfections.
• Preparing the Surface: The Key to Proper Cleaning
Before attempting to clean a spray-painted surface, there are some preliminary steps that need to be taken. These simple actions will ensure that the paint is stable and the surface is ready for cleaning.
- Check the paint’s drying time: The first and most crucial step is allowing the paint to dry completely. The drying time for spray paint can vary significantly depending on the brand, temperature, and humidity levels.
- Clear the area of dust and debris: Prior to cleaning, remove any loose dirt or debris from the surface. This will prevent scratches and other damage during the cleaning process.
• Different Painted Surface Types Require Different Cleaning Methods
The appropriate cleaning technique will depend on the type of surface and the type of paint that has been applied. Here are some common types of spray-painted surfaces and the recommended cleaning methods for each:
– Hard, Non-Porous Surfaces (e.g., Metal, Plastic, Glass)
- Soap and water: Start by cleaning the surface with a mixture of warm water and mild dish soap. Using a soft cloth or sponge, gently scrub the surface in a circular motion. Rinse thoroughly with water and dry with a clean cloth.
- Solvents: If the paint is still visible, apply a small amount of a suitable solvent, such as acetone, rubbing alcohol, or mineral spirits, to a clean cloth and gently rub it into the affected areas. Make sure to test the solvent on an inconspicuous area first to ensure it doesn’t damage the surface. Be sure to work in a well-ventilated area and follow any safety precautions listed on the solvent’s label.
- Fine abrasive: If the paint is particularly stubborn, consider using a fine abrasive, such as a gentle scouring pad or superfine sandpaper. Be cautious, as this method can potentially cause scratching or dulling of the surface if not done properly. Always test the abrasive on a small hidden area first.
– Porous Surfaces (e.g., Wood, Concrete, Brick)
- Soap and water: As with hard, non-porous surfaces, start by cleaning the surface with a mixture of warm water and mild dish soap. Using a soft brush or cloth, gently scrub the surface, being careful not to drive the paint further into the pores. Thoroughly rinse with water and let the surface dry completely.
- Solvents: If soap and water are not sufficient, try using a solvent as described above. However, take extra care when applying solvents to porous surfaces as they can be absorbed more easily, potentially causing further damage.
- Pressure washing: If the surface is suitable for pressure washing, this method can be useful in removing spray paint from porous surfaces. Use caution when selecting the appropriate pressure setting and nozzle type to not damage the underlying material.
– Textured or Fabric Surfaces (e.g., Upholstery, Carpets)
- Vacuum: Remove any loose debris by vacuuming the affected area.
- Blotting: Using a clean cloth or paper towel, gently blot the paint to remove as much excess as possible.
- Solvent: Apply a small amount of a suitable solvent to a clean cloth and gently dab the affected area. Be sure to test the solvent on an inconspicuous area first to ensure it doesn’t damage the surface. Solvents such as rubbing alcohol or hydrogen peroxide may be helpful for removing spray paint from fabric.
- Launder if possible: If the fabric is removable and machine washable, launder it according to the manufacturer’s instructions.
• Additional Tips and Precautions
- Always read the manufacturer’s instructions on both the spray paint and cleaning materials to ensure proper use.
- Test any cleaning solutions or techniques on a small, inconspicuous area before applying them to the entire surface.
- Remember that safety comes first. When using solvents or other chemicals, be sure to work in a well-ventilated area and follow all safety guidelines.
- Patience is crucial when cleaning spray-painted surfaces. Some stains may require multiple treatments and a considerable amount of time to be entirely removed.
By following these expert recommendations, you can effectively clean spray-painted surfaces and restore them to their original appearance.
The key is to be patient and choose the right cleaning method for the particular surface and paint type. With the right approach, you can fix imperfections and extend the life of your painted surfaces.
Step | Description |
|---|---|
1 | Identify the type of surface |
2 | Choose the appropriate cleaning solution |
3 | Test the cleaning solution on a small, inconspicuous area |
4 | Apply the cleaning solution to the spray-painted area |
5 | Use a clean cloth or sponge to gently scrub the area |
6 | Rinse the area with water to remove the cleaning solution and residue |
7 | Dry the surface with a clean cloth |
8 | Repeat the process if necessary |
Indoor Spray Painting Without Making a Mess: Tips & Tricks
Meticulous preparation and having the right tools in hand are crucial when it comes to successfully spray painting indoors.
• Choose the Right Location
- Create a Spray Booth: Create a makeshift spray booth by hanging plastic sheeting from the ceiling to the floor around your workstation. This will contain paint overspray and make cleanup easier afterward.
- Light It Up: Set up bright and even lighting to ensure good visibility while working.
- Ventilation: Open windows and doors, or set up an exhaust fan to properly ventilate the painting area.
• Gather the Necessary Tools and Materials
Before you start spray painting, assemble all the necessary tools and materials. Here are some essentials:
- Spray paint cans
- Respirator mask
- Safety goggles
- Gloves
- Painter’s tape
- Sanding materials (sandpaper, sanding sponges, etc.)
- Cleaning supplies (tack cloth, rubbing alcohol, etc.)
- Drop cloths or plastic sheeting
- Box cutter or scissors (for cutting sheets and tape)
- Work light
- Turntable or raised platform
• Prepare the Item for Painting
– Clean and Sand the Surface
The surface needs to be clean, smooth, and free of grease or dust for optimum paint adhesion.
- Use a damp rag to clean the surface thoroughly.
- After drying, sand the surface with the appropriate grit sandpaper to smooth imperfections.
- Wipe the surface with a tack cloth to remove any sanding dust.
– Mask Off Areas
Use painter’s tape to cover any areas that you do not want to be painted.
• Choose a High-Quality Spray Paint
Select a spray paint that is compatible with the material of the object you are painting (such as plastic, metal, or wood).
Look for a fast-drying, low-odor, and easy-to-use formulation. Investing in high-quality spray paint can make a significant difference in the final result.
• Spray Paint Technique
– Test the Spray Paint
Always test the spray paint on a scrap piece of material or an inconspicuous section of the item before you begin.
– Proper Technique
- Shake the spray paint can vigorously for the recommended time.
- Hold the can about 8-12 inches from the object’s surface.
- Use smooth, even strokes while moving the can in a side-to-side or up-and-down motion.
- Release the spray button at the end of each stroke to prevent paint buildup.
- Apply several thin coats, allowing each coat to dry to the touch before adding the next one.
• Clean-Up and Post-Project Tips
Once the paint has dried completely, carefully remove the painter’s tape and reassemble the item if necessary. Dispose of used plastic sheeting, drop cloths, and other materials in a responsible manner.
Keep in mind that proper disposal of spray paint cans is crucial. Visit a local recycling center or hazardous waste disposal facility to avoid environmental harm, as recommended by the EPA.
Remember that practice makes perfect, so keep refining your techniques and expand your skillset with each project. Happy painting!
| How to Spray Paint Indoors Without Making a Mess | |
|---|---|
| 1. Prepare the area | Remove all furniture, cover floors with drop cloths or plastic sheeting, and mask off any surfaces you don’t want to be painted with painter’s tape. |
| 2. Ensure proper ventilation | Open windows and doors to improve airflow, and use an exhaust fan if available. Consider using a respirator mask to protect yourself from fumes. |
| 3. Choose the right spray paint | Select a paint that is designed for indoor use and has low VOCs (volatile organic compounds) to minimize harmful fumes. |
| 4. Test the spray paint | Practice your technique on a scrap piece of material before starting on your project to ensure even coverage and prevent drips. |
| 5. Apply light, even coats | Hold the spray can about 6-8 inches away from the surface and use a sweeping motion to apply thin layers of paint, allowing each coat to dry before applying the next. |
| 6. Clean up carefully | Wait for the paint to fully dry before removing any protective coverings and carefully clean all surfaces, ensuring to properly dispose of used materials and paint cans. |
Ventilating a Room After Spray Painting: Best Practices
Spray painting is an efficient and convenient way to apply paint to different surfaces. However, it releases fumes and odors that can be harmful if not handled properly.
After completing your spray painting project, it is crucial to air out the room effectively to ensure a healthy and safe environment.
• Importance of Proper Ventilation
During spray painting, volatile organic compounds (VOCs) are released as the paint dries. These VOCs can cause a range of symptoms, from eye irritation to more serious respiratory issues. Since these fumes could be harmful, it’s essential to ventilate the room thoroughly and efficiently.
To ensure a proper ventilation process, follow these steps:
1. Opening Windows and Doors
Creating a good cross breeze will help dissipate the fumes more quickly. Open as many windows and doors as possible to promote continuous airflow. If the room has only one window, place a fan facing outwards to draw out the stale air.
2. Using High-Speed Fans
Place high-speed fans near the windows and doors to increase the rate of air circulation. Direct the fans towards open windows to push the fumes outdoors. You can also place additional fans across the room to facilitate better air circulation.
3. Taking Breaks
While airing out the room, it is advisable to take frequent breaks rather than staying in the room for extended periods. This will minimize your exposure to harmful fumes and reduce the risk of developing symptoms related to VOCs.
4. Wearing Personal Protective Equipment (PPE)
Even after the spray painting process, it is essential to wear appropriate PPE, like gloves and masks, to minimize the risk of exposure to toxic substances. Consider wearing a respirator with a charcoal filter, which can help in filtering out VOCs.
5. Maintaining Air Circulation
Ensure proper air circulation during and after the spray painting process. An exhaust fan or an air purifier with an activated carbon filter can be beneficial in removing paint fumes from the room.
• Additional Tips for a Safer Spray Painting Experience
– Selecting Low-VOC Paints
As a precautionary measure, opt for low-VOC or water-based paints, which produce fewer fumes and have a reduced environmental impact. Such paints are labeled as ‘low odor’ or ‘low VOC’ on the packaging.
– Considering Weather Conditions
Choose to spray paint on a day with favorable weather conditions, such as a mild, sunny day with low humidity. This will allow the paint to dry faster and reduce the duration of fumes lingering in the room.
– Storing Paints and Supplies Safely
Proper storage of paints and spray painting equipment is crucial to prevent accidents and exposure to toxins. Store paints in a cool, dry place with proper ventilation. Keep them out of reach of children and pets.
– Following Manufacturer’s Instructions
Always read and follow the manufacturer’s instructions on the paint can for proper application, drying time, and other relevant information. Adhering to these guidelines will ensure a safe and successful spray painting experience.
Step | Description |
|---|---|
1 | Open windows and doors to create a cross breeze for better air circulation. |
2 | Use fans to help blow the fumes out of the room and improve air movement. |
3 | Remove any items that may have absorbed the fumes (such as furniture, rugs, or curtains) and allow them to air out separately. |
4 | Keep the room well-ventilated for at least 24 hours after the paint has dried to ensure the fumes have completely dispersed. |
5 | Use an air purifier with an activated carbon filter to help remove fumes and odors from the air. |
6 | Avoid sleeping or spending extended periods of time in the room until the fumes have dissipated. |
7 | Consider using low-VOC or water-based spray paint in the future to minimize exposure to harmful fumes. |
• When to Seek Professional Help
If, after following the above steps, the room still has a strong paint odor or you continue to experience symptoms like headaches or irritation, it may be time to consult a professional
. Contact your local environmental health department or an indoor air quality expert for assistance – they can provide guidance on additional measures to improve air quality.
The Environmental Protection Agency (EPA) has some resources regarding indoor air quality on their Indoor Environments Division website, which could be helpful in this regard.
In conclusion, properly airing out a room after spray painting is essential for maintaining a healthy indoor environment. Ensure adequate ventilation, use high-speed fans, and take necessary precautions to minimize exposure to harmful VOCs.
By following these steps, you can enjoy the benefits of a freshly painted room worry-free.