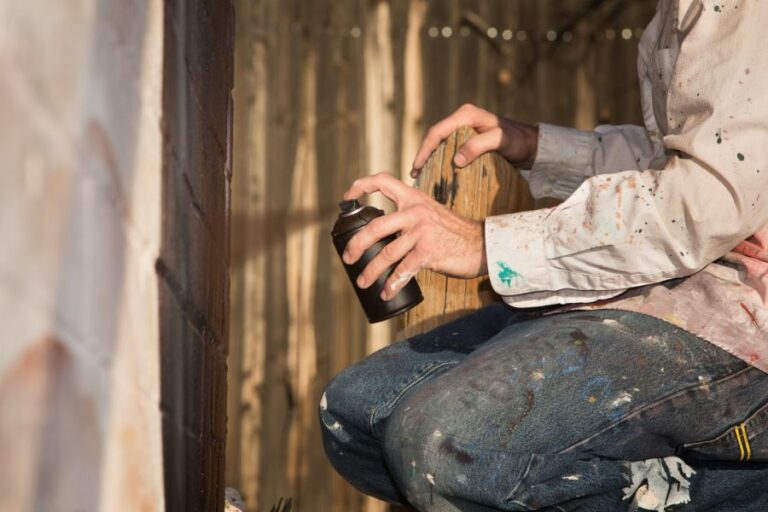
Faux Painting Tricks Using Spray Paint
Are you ready to transform your space with some eye-catching faux painting techniques using spray paint? You’re in the right place, as I have gathered some tried and tested tricks that will make your DIY project a success and leave people admiring your artistic skills.
Faux painting tricks using spray paint:
Faux painting tricks with spray paint include creating a stone texture, suede finish, stencil designs, and color washing. These techniques can be achieved through various application steps, such as preparing the surface, applying a base coat, creating textures, and sealing the surface with a clear sealer. Overall, spray paint offers versatility and affordability for numerous faux painting projects.

Unlock the secrets of faux painting with spray paint and transform your home into an artistic masterpiece. Explore various techniques, tips, and tricks that will elevate your DIY skills. Read on and let your creativity shine!
Contents
- 1 Spray Paint Techniques for Faux Finishing
- 2 Creating Artistic Designs with Spray Paint
- 3 Achieving Unique Spray Paint Effects
- 4 Acrylic Spray Paint Effect: A Step-by-Step Guide
- 5 Crafting a Speckled Look with Spray Paint
Spray Paint Techniques for Faux Finishing
Faux painting techniques create the illusion of texture or depth on a flat surface. Spray paint is a versatile and budget-friendly medium that can be used to achieve various faux painting effects.
• 1. Stone Texture
Creating a stone texture using spray paint is an excellent way to provide a natural, rustic look to various surfaces. This technique works well on both indoor and outdoor projects, including planters, garden ornaments, and even walls.
– Step-by-step process:
- Clean the surface: Begin by cleaning the surface thoroughly to ensure proper paint adhesion.
- Prime the surface: Apply a coat of primer specifically designed for your material (e.g., wood, metal, or plastic). It is important to use the appropriate primer to promote paint adhesion and durability.
- Apply a base coat: After the primer dries, apply a base coat of spray paint in the desired color. This layer will provide the background for the stone texture. Allow it to dry completely.
- Create the stone texture: Use a natural sea sponge to dab a different color of spray paint onto the base coat. This process creates random patterns that mimic the natural variations of a stone’s surface. Allow it to dry.
- Enhance the texture: Apply additional layers of sponge-dabbed paint until satisfied with the stone texture’s depth and variation.
- Seal the surface: To protect the faux stone finish, apply a clear sealer designed for the specific surface material.
• 2. Suede Finish
The suede finish technique gives surfaces a soft, velvety appearance that adds depth and sophistication to any room. This method is most effective on interior walls and furniture.
– Step-by-step process:
- Prepare the surface: Ensure the surface is clean, smooth, and free from imperfections. If working with a wall, patch any cracks or holes before commencing.
- Prime the surface: Apply an appropriate primer according to the surface material.
- Apply a base coat: Use a roller or brush to apply a base coat of paint in your chosen color, then allow it to dry completely.
- Spray the suede effect: Hold a can of suede effect spray paint approximately 12 inches from the surface and apply the paint using a sweeping motion. Remember to shake the can periodically for even distribution.
- Blend the paint: Before the paint dries, use a dry brush to gently blend the paint, creating the desired suede texture. Work in small sections to avoid the paint drying too quickly.
- Apply a second coat (optional): If you desire a more intense suede effect, repeat steps 4 and 5 after the first coat dries.
• 3. Stencil Designs
Using stencils with spray paint is a simple way to add intricate designs to various surfaces. You can purchase pre-made stencils or create your own using stencil paper or plastic sheets.
– Step-by-step process:
- Prepare the surface: As with the other techniques, begin by cleaning and priming the surface accordingly.
- Secure the stencil: Position the stencil on the surface, ensuring it is straight and level. Secure it in place using painter’s tape or a spray adhesive.
- Spray the design: Holding the spray paint can about 8-12 inches from the stencil, apply the paint using a light, even coat. Be cautious not to overspray, as this may cause paint to seep beneath the stencil.
- Remove the stencil: Carefully lift the stencil from the surface, revealing the design. Allow the paint to dry before moving to the next section or applying another color.
- Seal the design: For added durability, especially on high-traffic surfaces like furniture, apply a clear sealer after the paint dries completely.
• 4. Color Washing
Color washing is a faux painting technique that provides a worn, aged appearance to surfaces. This method works well on walls, furniture, and decorative objects.
– Step-by-step process:
- Prepare the surface: Clean and prime the surface as needed.
- Apply a base coat: Choose a base coat color and let it dry completely.
- Dilute the spray paint: In a separate container, mix a small amount of spray paint with water or a paint thinner, like mineral spirits, to create a “wash.” This article from Family Handyman may help with the dilution process.
- Apply the wash: Use a brush or sponge to apply the diluted paint to the surface, then immediately wipe off the excess with a clean cloth. Work in small sections to maintain control over the paint coverage.
- Repeat as needed: Continue applying and wiping off the wash until the desired aged appearance is achieved.
- Seal the surface: Once your color washing is complete, apply a clear sealer, if necessary.
In conclusion, faux painting tricks with a spray paint can transform various surfaces with unique and realistic finishes. The versatility and affordability of spray paint make it an ideal medium for numerous faux painting projects.
Whether you’re a novice or an experienced painter, using these expert techniques, you can achieve impressive results tailored to your taste and style.
Creating Artistic Designs with Spray Paint
Spray paint is a versatile and expressive medium that has gained popularity in the art world for its ability to create bold, striking, and unique paintings.
• Choosing and Preparing Your Supplies
Before you start, it’s essential to have the right supplies on hand. Here are some key items to consider:
- Spray paint: Look for quality paint available in hardware stores or art supply stores. Ensure the paint is intended for the surface you plan to paint on, such as wood or canvas. Some reputable brands include Montana, Ironlak, and Belton Molotow.
- Surface: Find a smooth, clean surface to spray on, like a canvas, wooden panel, or paper. Priming the surface with gesso or a primer spray ensures better color adherence.
- Masking tape and stencils: Help create clean edges, patterns, and shapes in your artwork.
- Safety gear: Ensure you have gloves, protective eyewear, and a respirator mask to protect yourself from paint fumes.
– Preparing Your Workspace
It’s crucial to work in a well-ventilated area, preferably outdoors or in a space with a proper ventilation system. Lay down a large drop cloth or a layer of newspaper to protect the area from paint overspray.
• Spray Paint Techniques for Art
There are several techniques to create professional-looking spray paint art. Let’s dive into each method and how to achieve the desired effect.
– Layering and Blending Colors
Spray paint can create beautiful, blended color gradients by layering one color over another while they are still wet. Start with a base color, spraying it in a broad area. Before the paint dries, lightly mist over it with a second color to create a gradient. Repeat this process with additional colors as desired.
– Stenciling and Masking
Using stencils and masking techniques can help create detailed shapes and patterns. Place the stencil or tape on your surface before spraying the desired color. Once the paint is dry, carefully remove the stencil or tape to reveal the design.
– Creating Texture and Effects
Spray paint allows for a variety of textures and effects. One common technique is to use crumpled paper or plastic and press it onto the wet paint, then lift it away to create a textured look.
Experiment with different materials and techniques to find the textures and effects that work best for your artwork.
– Controlling Spray Pressure
The pressure of your spray paint canister determines the thickness and intensity of the paint on the surface. To control the pressure, adjust the distance between the canister and the surface, or use a can with an adjustable spray nozzle.
Practice different spray pressures on scrap materials before applying the techniques to your artwork.
• Expert Tips for Creating Spray Paint Art
- Plan your composition: Sketch or outline your ideas before starting to spray. This helps you visualize the final result and gather the necessary colors and materials.
- Shake the can well: Shake the spray paint can for at least 1-2 minutes to ensure consistent color and spray.
- Clean the nozzle: After each use, wipe the nozzle with a cloth or turn the can upside-down and give it a quick spray to clear any excess paint and prevent clogs.
- Start with light layers: It’s easier to build up color and intensity with multiple light layers rather than one thick layer.
- Test on scrap material: Before working on your final piece, test colors, pressures, and techniques on a scrap material like cardboard.
- Allow for drying time: Giving each layer adequate time to dry before adding another layer prevents colors from mixing unintentionally.
• Inspirational Spray Paint Artists
To gather inspiration for your next spray paint art project, check out the work of renowned spray paint artists such as Beliefkrieger, who uses spray paint to create striking abstract artworks that explore social and political themes.
• Conclusion
Spray paint is a dynamic and expressive medium with limitless possibilities. With the right techniques, tips, and tricks, anyone can create a stunning work of art using spray paint.
Remember to always work safely, carefully plan your artwork, and never be afraid to experiment and push the boundaries of what spray paint can do.
Steps | Description |
|---|---|
1. Choose the right spray paint | Select a high-quality, durable spray paint that works well on the surface you plan to paint. |
2. Prepare the surface | Clean the surface thoroughly, removing any dust, dirt, or grease, and apply a primer if necessary. |
3. Plan your design | Sketch out your design on paper before starting to paint, and consider using stencils for more intricate details. |
4. Practice your technique | Experiment with different spray paint techniques, such as distance, angle, and motion, on a scrap piece of material before applying it to your final surface. |
5. Apply the paint | Hold the can at a consistent distance from the surface and use steady, even strokes to apply the paint, being careful not to overspray or create drips. |
6. Layer and blend colors | Build up different colors and textures by layering and blending the spray paint, allowing each layer to dry before adding the next. |
7. Add details and highlights | Use a smaller, more precise spray paint nozzle, or paint pens and brushes, to add intricate details and highlights to your design. |
8. Seal and protect the artwork | Once the paint is completely dry, apply a clear sealant or varnish to protect your spray paint art from fading, chipping, or peeling. |
Achieving Unique Spray Paint Effects
Spray paint is a versatile medium that has become increasingly popular in recent years. Its convenience and ease of use have made it a go-to choice for many artists and DIY enthusiasts.
• Preparing Your Workspace and Materials
Before starting your spray paint project, it is essential to have a well-ventilated workspace and wear appropriate safety gear, such as a respirator and gloves. Proper surface preparation, such as cleaning and priming, is crucial for achieving professional-looking results.
It is also a good idea to practice on a scrap piece of material before working on your final piece.
– Choosing the Right Spray Paint
Selecting the right spray paint for your project is essential. Quality, color, and finish options can vary greatly among the different brands.
I recommend using high-quality paint specifically designed for the material you are working on, such as Montana Gold for multi-purpose use or Krylon for specific surfaces like plastic or metal.
• Basic Techniques for Creating Effects with Spray Paint
Let’s dive into some basic techniques that can enhance your spray paint projects and help create stunning effects.
– Blending Colors
Spray paint can be easily blended to create smooth transitions or gradients between colors. Start with your base color and lightly spray your second color, overlapping the two. Using a side-to-side sweeping motion, continue layering the colors until the desired effect is achieved.
– Stencils and Masks
Creating crisp lines and detailed shapes is possible using stencils and masks. Various materials, such as plastic sheets, adhesive vinyl, or even paper, can be used to create stencils. Place the stencil securely on your surface, ensuring there are no gaps or creases.
Spray paint over the stencil using light, even strokes. Remember to remove the stencil while the paint is still wet to avoid peeling or smudging.
– Textures and Patterns
Using objects like crumpled paper, fabric, or even leaves can create unique textures and patterns on your piece. Lay the object on your surface and spray paint over it, using light bursts to avoid oversaturation. Lift the item away to reveal your new pattern.
You can also use a brush or sponge to dab paint onto the surface to create various textured effects.
– Drips and Splatters
Embracing the unpredictable nature of spray paint can lead to exciting results. By spraying closer to your surface, the paint may pool and create drips. Alternatively, flicking the nozzle or tapping the can produces a random splatter effect. These methods can add depth and interest to your work.
• Advanced Spray Paint Techniques
For those looking to push the boundaries of spray paint, the following advanced techniques can lead to impressive effects.
– The Marble Effect
Creating a marbled appearance involves layering and blending different colors. Start by spraying your base color and allow it to dry partly. Apply your second color in patches and quickly blend the two using a brush or sponge.
For added depth, introduce gold or silver highlights by lightly spraying the edges of the blended areas.
– Dry Brushing
Dry brushing refers to using a dry, paint-free brush to manipulate still-wet spray paint. This technique can produce various effects ranging from soft, smudged edges to bold, sharp contrasts.
Apply your paint in a thin layer, then use the dry brush to feather or blend the edges, creating unique textures and shapes.
– The Galaxy Effect
Creating a galaxy-inspired artwork requires a combination of different techniques. Start by spraying a black or dark blue base layer, then add different shades of blue, purple, and pink to simulate deep space.
Blend the colors softly, introducing white or silver to mimic stars and nebulas. A gentle splatter of white paint can produce a starry constellation.
• Final Thoughts
Spray paint is a powerful medium with a diverse range of possibilities when it comes to creating effects. It’s essential to practice patience, experiment, and continually learn from your mistakes.
Moreover, working safely and responsibly is vital, taking appropriate precautions to avoid adverse effects on health and the environment.
For more insights and inspiration, visit the Spray Paint Art World website, where you can connect with other spray paint artists and discover a wealth of resources and tutorials on the topic. Remember, the only limit to what you can create with spray paint is your imagination. Happy painting!
Effect | Description | Technique |
|---|---|---|
Gradient | A smooth transition between two or more colors | Begin with one color and spray along the edge of the surface. Spray the second color next to the first, slightly overlapping. Use feathery, back-and-forth motions to merge the colors together. |
Texture | Creating a tactile surface using spray paint | Spray the paint onto a separate surface (such as plastic wrap or paper), then press it onto the intended surface. Remove the separate material to reveal the textured paint. Experiment with different materials for various textures. |
Stencil | A precise design or pattern created using a cut-out template | Create or purchase a stencil in the desired design. Place the stencil onto the surface and secure it with tape or adhesive. Spray paint over the stencil, ensuring even coverage. Carefully remove the stencil to reveal the design. |
Splatter | A random application of paint droplets on the surface | Using a paintbrush or toothbrush, dip the bristles into the spray paint (spray paint into a container or onto a separate surface first). Flick the bristles against the intended surface to create splatters. Use different colors and flicking motions for various effects. |
Marble | An organic pattern imitating the look of marble or swirling colors | Apply a base coat of spray paint on the surface. Spray 2-3 complementary colors onto a separate sheet of plastic. Press the plastic sheet onto the painted surface and gently move it around to create a marbled effect. Lift the plastic sheet to reveal the design. |
Acrylic Spray Paint Effect: A Step-by-Step Guide
Spray paint effects have become increasingly popular in the world of art and design. The unique texture and style of spray paintings add a beautiful and contemporary feel to any piece, making it a favorite for artists of all skill levels.
While spray paint is often used for these effects, it’s not the only option available. Acrylic paint is a versatile medium and offers a fantastic alternative for creating a spray paint effect.
• Materials and Supplies You’ll Need
Before starting to create a spray paint effect with acrylic paint, make sure you have the following materials and supplies on hand:
- Acrylic paint: Choose high-quality acrylic paint in your desired colors. You can also mix multiple colors to create the perfect shade.
- Palette or mixing tray: You’ll need a surface to mix your paint and water.
- Paintbrush or sponge: You’ll use these tools to apply the paint mixture on the surface.
- Water: You’ll use water to thin out the acrylic paint to achieve the desired consistency.
- Canvas or surface to paint on: Choose a surface suitable for acrylic paint. This could be a canvas, wood panel, or even a piece of paper.
- Protective gear: Wear gloves, a mask, and old clothing or an apron to protect yourself and your clothes from paint splatters.
• Preparing Your Workspace and Paint
Before beginning, make sure to prepare your workspace by ensuring you have enough space to work and protect your surfaces from any accidental paint spills. You should also have all your materials and supplies within reach.
Next, it’s important to mix your acrylic paint with water to achieve the desired consistency. Generally, it’s best to start with a 1:1 ratio of paint and water, but you might need to adjust the ratio depending on the thickness of your paint and the effect you want to achieve.
To create a more translucent look, similar to a traditional spray paint effect, you can add more water. Remember, the more water you add, the more transparent the paint will become.
Keeping in mind that acrylic paint dries quickly, make sure to keep your paint mixture covered when not in use to avoid it drying out.
• Technique 1: Flicking the Brush
One way to achieve a spray paint effect with acrylic paint is by flicking the paintbrush. This method will create a splatter-like design on the surface. Here’s how you can do that:
- Load the brush: Dip your paintbrush or sponge in the paint mixture, ensuring it’s fully saturated.
- Create a test spray: Before applying the paint to your surface, practice flicking the brush on a piece of scrap material to understand the splatter pattern and consistency.
- Begin flicking: Once you’re confident with your technique, flick your paintbrush or sponge in a swift motion toward your canvas or surface, creating a spray of paint splatters.
- Layer the colors: Continue to flick the paint onto the surface in different colors and intensities, layering them on top of each other.
- Allow to dry: Give your work enough time to dry before moving or touching it. Acrylic paint usually dries within 30 minutes, but thicker applications might take longer.
• Technique 2: Using a Toothbrush
Another method for creating a spray paint effect using acrylic paint is by using a toothbrush. This technique produces a finer spray pattern than flicking the brush or sponge.
- Load the toothbrush: Dip the bristles of the toothbrush into the thinned acrylic paint, making sure they are well coated.
- Use your thumb to create a spray: With your thumb or another finger, firmly run it along the bristles of the loaded toothbrush, causing the paint to spray onto the surface.
- Adjust the distance from the surface: To change the size and intensity of the spray, experiment by moving the toothbrush closer to or farther away from the surface.
- Layer the colors: Just like the flicking method, consider layering different colors and intensities to achieve the desired look.
- Allow to dry: Give your painting enough time to dry before touching or moving it.
• Adding Final Touches
Once your spray paint effect is complete and dry, you can further enhance your artwork by adding more elements. You can use a brush or other tools to create additional textures or details or even incorporate other mediums, such as pastels or ink, into your painting.
• Learning More About Acrylic Spray Painting Techniques
Golden Paints offers comprehensive technical information sheets for working with acrylic paints, including advice on achieving various effects and textures.
This information can be invaluable for expanding your artistic skillset and learning more about the possibilities of working with acrylic paint.
• Conclusion
Creating a spray paint effect with acrylic paint is a fun and engaging way to explore the versatility of this medium. Whether you’re a beginner or an experienced artist, acrylic paint offers countless opportunities to create stunning and personalized artwork.
Don’t be afraid to experiment with various techniques and methods. You might just discover a new favorite style!
Crafting a Speckled Look with Spray Paint
A speckled effect in spray painting is a unique and appealing technique that adds texture and character to various surfaces. Whether you’re working on a piece of furniture, a canvas, or a wall, the speckled effect can elevate the visual appeal of your project.
• Essential Materials and Tools
Before starting, gather the necessary materials and tools. Here’s a list of what you need:
- Spray paint: Choose the base and accent color(s) according to your preference.
- Surface to be painted: Ensure it is clean and dust-free.
- Protective gear: Wear a mask, goggles, and gloves for safety.
- Drop cloth, tarp, or newspapers: Use these to protect the surrounding area from paint.
- Painters tape: For masking off sections that should remain paint-free.
• Prepping Your Workspace
To create an ideal workspace, follow these steps:
- Choose a well-ventilated area: Work outdoors, if possible. Suppose you must work indoors, open windows, and use fans to ensure proper ventilation.
- Lay down a drop cloth: Protect the floor or ground where you’re working by placing a drop cloth, tarp, or newspaper beneath the item you’d like to paint.
- Mask off areas: Use painter’s tape to cover hardware or areas you don’t want to paint.
• Preparing Your Surface for Painting
Proper surface preparation is essential for achieving the desired speckled effect. Follow these steps to ensure the surface is clean and ready for painting:
- Clean the surface: Use a damp cloth to remove dust and dirt. Allow the surface to dry completely.
- Sand the surface (optional): Lightly scuff sand the surface, particularly if it’s glossy or has a paint coat. This will help the paint adhere better. Use fine-grit sandpaper and wipe away the dust after sanding.
- Prime the surface (optional): Apply a primer if the surface is porous or if you want better paint adhesion. Follow the manufacturer’s instructions for applying the primer.
• Applying the Base Coat
The base coat lays the foundation for the speckled effect. Follow these steps to apply the base coat:
- Shake the spray paint: Shake the spray paint can for at least a minute to ensure the paint is thoroughly mixed.
- Hold the can approximately 8-12 inches from the surface: Maintaining the appropriate distance will ensure even paint coverage.
- Apply the base coat: Use steady back-and-forth swipes, slightly overlapping each one. Aim for a smooth, even coat. Allow the paint to dry according to the manufacturer’s instructions.
• Creating the Speckled Effect
Now that the base coat is applied, you can create the speckled effect with these steps:
- Choose the accent color(s): Speckled effect can be achieved with one or multiple accent colors.
- Test the speckle technique on a scrap piece: Get a feel for the technique by practicing on a scrap piece of material.
- Hold the spray paint can close to the surface: This helps produce a more concentrated speckle pattern. Be mindful to avoid creating a solid paint layer.
- Spray short bursts: Apply accent color(s) by using quick, controlled bursts while moving the can around the surface. This will create the desired speckled effect. Adjust the distance from the surface and burst duration to get different patterns.
- Stand back and assess: Periodically step back to evaluate the speckling effect. Add more speckles as needed, but remember that less is often more.
• Finishing Touches and Curing Time
Once you are satisfied with the speckled effect, let the paint cure according to the manufacturer’s instructions. This typically ranges from 24 to 48 hours. After the paint has cured, remove the painter’s tape and reattach any hardware previously removed.
• Conclusion
Creating a speckled effect with spray paint is a simple and effective way to add depth and texture to various surfaces. By following the steps and recommendations provided, you can create stunning pieces and transform your projects into eye-catching works of art.
For additional information on spray paint techniques, we recommend visiting Spray Paint Art Secrets, a resourceful website that offers expert tips and tricks for spray painting.
Step | Instructions |
|---|---|
1 | Choose a base color and a speckle color. Make sure the two colors contrast well for a noticeable effect. |
2 | Paint the surface with the base color and let it dry completely. |
3 | Prepare the area for spray painting by covering surrounding surfaces and objects with newspaper or plastic sheets. |
4 | Shake the can of speckle color well for at least a minute to mix the paint properly. |
5 | Hold the can of speckle color about 8-12 inches away from the surface and spray quickly in short bursts to create small droplets of paint. |
6 | Experiment with different angles and distances to achieve the desired speckled effect. |
7 | Allow the speckled layer to dry fully before handling the painted object. |