Eco-Friendly Furniture Makeover With Chalk Paint
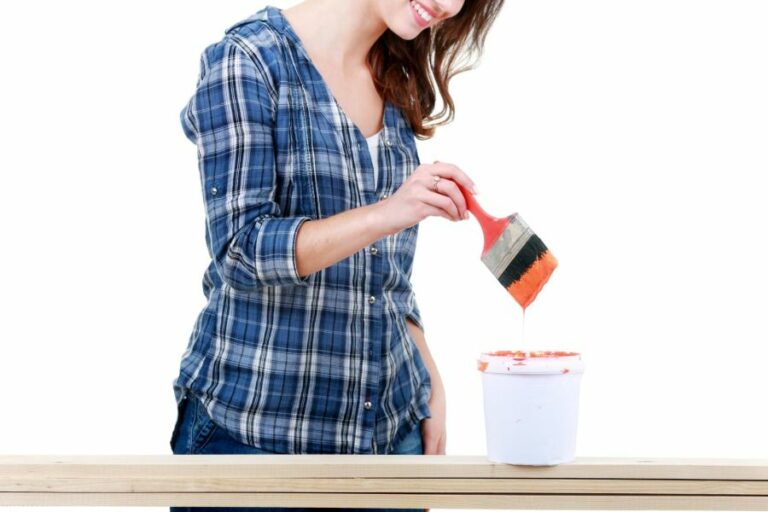
Are you looking to give your old furniture a fresh, new look while making an eco-friendly choice? We have the perfect solution for you: a makeover with chalk paint! Chalk paint is not only user-friendly, but it’s also kind to the environment. Let me guide you through transforming your furniture into stylish, sustainable pieces that will be the envy of your friends and family!
Eco-friendly furniture makeover with chalk paint:
Chalk paint is a water-based, eco-friendly paint that provides a matte finish on various surfaces such as wood, glass, and metal. Its primary ingredient, calcium carbonate, creates a chalk-like texture. Chalk paint is popular for DIY furniture makeovers due to its low VOC content, easy application without priming or sanding, and versatility on different surfaces.

Transform your tired, old furniture into stunning, eco-friendly masterpieces with chalk paint! In this guide, we’ll share how you can revitalize pieces sustainably- and create a refreshing new look. Keep reading to uncover tips, techniques, and inspiration for your furniture makeover journey!
Contents
- 1 Green Furniture Transformation with Chalk Paint
- 2 Chalk Paint: An Eco-Friendly Option?
- 3 Disadvantages of Applying Chalk Paint on Furniture
- 3.1 • Limited Color Choices
- 3.2 • Difficulty in Achieving a Smooth Finish
- 3.3 • Multiple Steps Required
- 3.4 • Lower Durability Compared to Other Paints
- 3.5 • Cost Factor
- 3.6 • Wax or topcoat: Additional Expense and Maintenance
- 3.7 • Not Suitable for All Furniture Items
- 3.8 • Challenging for Chalk Paint Beginners
- 3.9 • Environmental and Health Concerns
- 4 Upcycling Furniture Using Chalk Paint Techniques
- 5 Chalk Painting Furniture: No Sanding Required?
Green Furniture Transformation with Chalk Paint
An eco-friendly furniture makeover can give your old, worn-out pieces a fresh and modern look while being gentle on the environment. Chalk paint is one of the most popular ways to achieve this transformation.
• What is Chalk Paint?
Chalk paint is a type of water-based paint that provides a matte finish when applied to various surfaces, including wood, glass, and metal. The primary ingredient in chalk paint is calcium carbonate, which gives it its signature chalk-like texture.
Chalk paint has become increasingly popular for DIY furniture makeover projects due to its ease of use and versatility.
– Benefits of Chalk Paint for Eco-Friendly Furniture Makeover Projects
Chalk paint offers several advantages over traditional paints, especially when it comes to environmentally friendly furniture makeover projects:
- Eco-friendly Ingredients: Chalk paint is made of natural materials, which means it has a lower impact on the environment as compared to other non-natural paint types. Furthermore, popular chalk paint brands like Annie Sloan are known for their commitment to sustainability and eco-friendly practices.
- Low VOC Content: One of the significant issues with conventional paints is the high levels of volatile organic compounds (VOCs) emitted during painting and drying processes. These compounds can be harmful to both the environment and human health. Chalk paint contains low levels of VOCs, making it a safer alternative for eco-conscious individuals.
- Simple Application Process: No priming or sanding is needed while working with chalk paint, which can save time and resources. This also means a reduction in waste, as sanding produces fine particles that can harm the environment.
- Versatility: Chalk paint can be used on a wide range of surfaces, allowing you to transform various pieces of furniture without the need for multiple paint types. Additionally, by layering different colors or using wax finishes, you can quickly achieve various styles, from vintage to contemporary.
• How to Use Chalk Paint for a Furniture Makeover: Step-by-Step Guide
When working with chalk paint, following a methodical process is essential for achieving professional, long-lasting results. Here is a detailed guide for using chalk paint in your eco-friendly furniture makeover project:
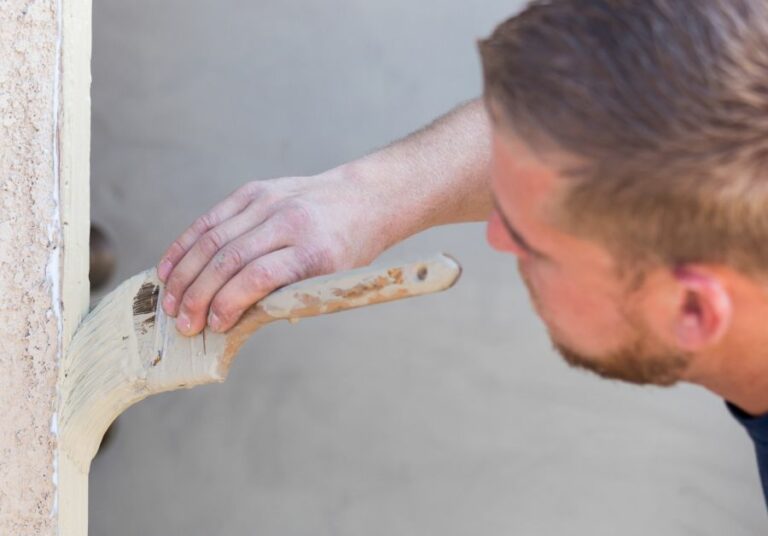
– Step 1: Preparing the Surface
While there’s no need for sanding or priming, it’s crucial to clean your furniture thoroughly to remove any dirt, dust, or grease. Mild soapy water and a soft cloth will do the trick.
– Step 2: Choosing Your Chalk Paint and Brushes
Select your preferred chalk paint color from a reputable brand, like Annie Sloan, to ensure high-quality results. Additionally, choose the right brushes, either natural bristle or synthetic, depending on the type of finish you desire.
Typically, for a smooth finish, a synthetic brush is preferred, while a natural bristle brush is better for a textured look.
– Step 3: Applying the First Coat of Chalk Paint
Start by applying a thin, even layer of chalk paint in your desired direction, either strokes or crosshatch, depending on your preference. Allow the paint to dry for 1-2 hours or as per the manufacturer’s instructions.
– Step 4: Applying the Second Coat (If Needed)
For most projects, a second coat will be necessary to achieve an even, opaque finish. Apply the second coat similarly to the first and allow it to dry completely.
– Step 5: Distressing the Furniture (Optional)
If you’re aiming for a vintage, distressed look, lightly sand the edges and raised areas of your furniture using fine-grit sandpaper or sanding sponge. This will reveal the original wood beneath the paint, achieving an aged effect.
– Step 6: Applying a Protective Finish
Chalk paint, by its nature, is porous and can easily scratch or stain, so it’s essential to seal the surface using a protective top coat. There are two primary options for this:
- Wax: Furniture wax, such as clear or dark wax, is a popular choice for sealing chalk-painted furniture. Apply the wax in thin layers using a soft cloth or brush, allowing it to dry before buffing with a clean cloth to achieve a smooth, satin finish.
- Polyurethane: For a more durable and waterproof seal, consider using a water-based polyurethane varnish. Apply several thin layers, allowing each to dry in between, and finish with a light sanding for a beautiful, resilient finish.
With these steps, your eco-friendly furniture makeover with chalk paint will not only look stunning but also contribute positively to the environment. The transformed piece brings new life to your space while maintaining sustainability and promoting conscious living.
• Final Thoughts: Taking Care of Your Chalk-Painted Furniture
Proper care and maintenance are essential for ensuring the longevity of your newly transformed furniture. Avoid using harsh chemicals or abrasive cleaning materials that may damage the chalk paint finish.
Routine dusting and gentle cleaning with a soft cloth and mild soapy water will keep your eco-friendly, chalk-painted furniture looking beautiful for years to come.
Chalk Paint: An Eco-Friendly Option?
The popularity of chalk paint is undeniable, with its ability to transform old furniture pieces into stunning, vintage-style works of art. But is it environmentally friendly?
• Components of Chalk Paint
Chalk paint is an innovative, water-based paint that typically contains three main components for its characteristic texture and finish:
- Pigments: Color pigments give chalk paint its vibrant hues.
- Binder: The binder, often made from acrylic, latex, or natural resins, helps the pigments adhere to the surface being painted.
- Fillers: Calcium carbonate or other natural fillers contribute to the paint’s matte, chalky finish.
Chalk paint may also contain additional additives like preservatives and fungicides to prolong shelf life and prevent microbiological growth.
– Environmental Impact of Chalk Paint Components
Pigments
Natural pigments derived from minerals or plants have a minimal environmental impact. However, chalk paint often contains synthetic pigments, which have potentially negative effects on the environment.
Manufacturing synthetic pigments can generate hazardous waste, while some pigments may contain heavy metals that can contaminate water sources if not disposed of properly.
Binder
Chalk paint binders are generally made from water-based acrylic, latex, or even natural resins. These materials are low in volatile organic compounds (VOCs), which contribute to air pollution and harm the ozone layer.
Therefore, chalk paint has a lower environmental impact compared to traditional oil-based paints with high VOC levels.
Fillers
Calcium carbonate, the main filler component in chalk paint, is a naturally occurring and abundant material. This filler is relatively safe for the environment as it does not emit harmful byproducts during extraction or production.
– Manufacturing Process and Environmental Impact
The production of chalk paint is a key aspect of its environmental impact. In general, manufacturing water-based paints progresses through three stages:
- Pigment milling: This process grinds and disperses pigments into a fine powder.
- Paint mixing: Pigments, binders, and fillers are combined and thoroughly mixed.
- Packaging: The finished product is packed into containers for distribution to consumers.
Throughout the manufacturing process, producing chalk paint has a substantially lower environmental impact compared to conventional oil-based paints. This is mainly attributed to its water-based formulation, requiring less solvent and generating fewer hazardous byproducts.
Furthermore, energy consumption is substantially lower in the production of water-based paints compared to solvent-based alternatives.
– Disposal and Recycling of Chalk Paint
Proper disposal of leftover chalk paint is crucial to minimizing its environmental impact. Incorrect disposal, such as pouring paint down the drain, can lead to contamination of water supplies and harm aquatic life.
In many communities, local waste management facilities provide specific guidelines on safe disposal methods. Some facilities also offer paint recycling services, where leftover paint can be mixed and repurposed for various applications, such as graffiti abatement and community beautification projects.
For more information on responsible paint disposal, visit the Environmental Protection Agency’s guidelines on household hazardous waste.
• Eco-Friendly Chalk Paint Alternatives
For those seeking environmentally friendly alternatives to conventional chalk paint, consider the following options:
- Low-VOC Chalk Paint: Some brands offer low-VOC or zero-VOC chalk paint options. These products emit fewer pollutants into the atmosphere, protecting both the environment and your indoor air quality. Always check the label or consult the manufacturer for specific VOC levels.
- Natural or Organic Chalk Paint: Several brands now produce chalk paint using natural pigments and binders derived from plant or mineral sources. These products often have a lower environmental impact compared to those containing synthetic ingredients.
- DIY Chalk Paint: Create your own eco-friendly chalk paint using natural ingredients. Combine unsanded grout or calcium carbonate with low-VOC latex paint for a homemade, environmentally friendly alternative.
– Recommendations for Eco-Friendly Chalk Paint Use
- Opt for chalk paint with low VOC levels or natural components.
- Choose high-quality chalk paint to ensure better coverage and minimize waste.
- Follow proper maintenance and cleaning practices to prolong the lifespan of your painted items.
- Ensure responsible disposal or recycling of leftover chalk paint.
• Conclusion
Overall, chalk paint is a more environmentally friendly option compared to traditional oil-based paints. Its water-based formulation, along with its relatively harmless components, food production, and energy consumption, make it a viable choice for eco-conscious consumers.
By implementing responsible usage and disposal practices and exploring eco-friendly alternatives, you can further minimize the environmental impact of chalk paint.
Disadvantages of Applying Chalk Paint on Furniture
As a seasoned furniture painter and artisan, I can attest both to the beauty and performance that chalk paint can deliver when used in appropriate settings. However, this ever-popular paint finish is not without its drawbacks.
• Limited Color Choices
Chalk paint has a distinct color palette that often features muted, pastel shades with a powdery matte finish. These colors can be charming and attractive for some but may not suit the taste of others who prefer a more vibrant or glossy look.
Some well-known chalk paint brands, like Annie Sloan, offer a small range of colors that can be mixed together to create additional shades, but the overall color spectrum remains limited compared to other paint types.
• Difficulty in Achieving a Smooth Finish
Chalk paint is known for its thick and chalky consistency, making it harder to achieve a smooth, even finish compared to traditional latex or oil-based paints. This characteristic may result in the need for additional sanding and leveling, thereby requiring more effort and time.
• Multiple Steps Required
Many prefer chalk paint for its ability to bypass the need for priming before application, but this alternative process does not necessarily translate to a quicker or easier project.
In most cases, multiple coats of chalk paint are necessary for satisfactory coverage, especially on darker furniture pieces. Moreover, chalk paint typically has to be sealed with a wax or a topcoat to maintain its durability and protective qualities, adding further steps and time to the overall process.
• Lower Durability Compared to Other Paints
One of the major drawbacks of using chalk paint is its lower durability relative to other paint types, such as latex or acrylic. While chalk paint’s soft, powdery finish may be appealing, it is also more prone to scuffs and scratches, particularly on surfaces like table tops or frequently-handled items.
Consequently, a protective topcoat is essential to ensure the paint’s longevity.
• Cost Factor
Chalk paint is generally pricier than other available paint options, such as latex, acrylic, or oil-based alternatives. A quart of specialty chalk paint can cost 2 to 3 times more than a similar quantity of standard paint.
While it is possible to create a homemade chalk paint blend by mixing latex paint with calcium carbonate or plaster of Paris agent, the consistency and finish can be less predictable compared to store-bought formulations.
• Wax or topcoat: Additional Expense and Maintenance
A sizable drawback of using chalk paint on furniture is the need for an additional protective layer in the form of wax or topcoat products, which comes at an extra cost.
Furthermore, wax finishes may require reapplication over time to maintain their protective qualities, thereby contributing to ongoing maintenance.
• Not Suitable for All Furniture Items
Chalk paint is ideal for pieces aiming to achieve a farmhouse, shabby chic, or vintage look. However, it might not be the best option for furniture projects that require a sleeker, more modern appearance.
The natural texture of chalk paint could also have a negative impact on fine details and intricate carvings, which might be better suited for lacquer or traditional paint finishes.
• Challenging for Chalk Paint Beginners
First-time chalk paint users may find the learning curve for this product somewhat steep, particularly regarding its unique application techniques and the need to master wax application and buffing.
Inadequate wax application, for instance, can lead to a less-than-durable finish or an undesired look, thus requiring patience and practice to perfect the technique.
• Environmental and Health Concerns
Lastly, while some chalk paint brands tout their eco-friendliness and low VOC content, the additional products, such as wax or topcoat application, may still contain harmful chemicals. It is essential to research these products and their ingredients individually.
The U.S. Environmental Protection Agency offers useful resources on this topic.
In conclusion, although chalk paint has numerous attractive qualities and has grown in popularity for furniture painting and upcycling, it comes with a set of potential disadvantages.
Understanding these limitations allows for informed decision-making, ensuring that the best paint type and technique are employed for each furniture project based on the desired outcome, personal preferences, and practical requirements.
| Cons of Applying Chalk Paint on Furniture |
|---|
| Requires regular waxing or sealing to maintain the finish and protect the surface |
| Results in a matte, flat finish that might not appeal to everyone |
| Can be more expensive than other types of paint |
| Can display brush strokes if not applied properly |
| May require multiple coats for complete coverage |
| Not as durable as some other paint types |
Upcycling Furniture Using Chalk Paint Techniques
If you’ve ever wanted to give your furniture a fresh new look but weren’t quite sure where to start, look no further than chalk paint. This versatile and easy-to-use paint can help you repurpose furniture and create unique pieces that showcase your style.
• Why Chalk Paint?
Chalk paint is a popular choice for furniture repurposing due to its unique finish and easy application. This paint creates a soft, matte texture that is both beautiful and easy to distress, making it perfect for vintage styles and shabby-chic projects.
Moreover, chalk paint adheres well to any surface, making it a versatile option for various furniture materials.
• Choosing the Right Chalk Paint
Before you can begin your project, you’ll need to select the right chalk paint for your furniture. There are several brands available, each with its own unique characteristics and advantages.
- Annie Sloan is the original creator of chalk paint and offers an extensive range of beautiful colors to choose from. This paint is known for its easy application, excellent coverage, and quick drying time.
- Rust-Oleum offers a more budget-friendly option with their Chalked Ultra Matte Paint line. This paint is also easy to apply and available in a variety of colors.
- General Finishes provides water-based paints, known as Milk Paint, that deliver a similar finish to chalk paint. This option is an excellent choice for those who prefer a lower VOC paint or are environmentally conscious.
I recommend starting with one of these trusted brands and selecting a color that complements your furniture piece and personal style.
• Preparing Your Furniture for Chalk Paint
Before diving into the painting process, it’s crucial to prepare your furniture properly. Follow these steps to ensure a smooth application and long-lasting results:
- Clean the surface: Remove any dirt, dust, or grime from your furniture piece by wiping it down with a damp cloth and mild soap. Be sure to dry the surface thoroughly before moving on to the next step.
- Remove any old paint or finish: In some cases, you may need to remove any existing paint or finish to ensure a smooth and even application of chalk paint. You can do this by lightly sanding the surface or using a paint remover like Citristrip. If your furniture has a light varnish or minimal imperfections, this step may not be necessary chalk paint adheres well to most surfaces.
- Make any necessary repairs: Inspect your furniture piece for any cracks, chips, or loose joints that may need fixing before painting. Use a wood filler for minor repairs and ensure that all hardware is tightened and secure.
• Applying Chalk Paint to Your Furniture
Now that your furniture piece is cleaned and prepped, it’s time to start painting! Follow these expert steps to achieve a professional-looking finish:
- Stir your paint: Before opening your paint, give it a good shake to mix in any pigments that may have settled at the bottom of the can. Once opened, stir the paint thoroughly to ensure even color distribution.
- Apply the first coat: Using a quality brush or small foam roller, apply a thin, even coat of chalk paint to your furniture piece. Be mindful of any drips or uneven coverage, and smooth out any imperfections with the brush as you go.
- Let it dry: Allow the first coat of paint to dry completely before applying additional coats. This can typically take anywhere from 1-2 hours, depending on the brand and humidity levels in your workspace.
- Apply additional coats: Repeat steps 2 and 3 until you achieve the desired coverage and color depth. Depending on the color and original furniture finish, this may take 2-3 coats.
- Distress the piece (optional): If you’re looking for a more vintage, shabby-chic look, you can lightly distress the painted furniture with sandpaper after it has completely dried. Focus on the edges and areas where natural wear and tear would occur.
- Protect your work: To ensure the longevity of your repurposed furniture piece, apply a clear wax or sealer after the paint has dried. This will protect the paint from scratches and spills, ensuring your new piece stays looking fabulous for years to come.
• Final Thoughts
Repurposing furniture with chalk paint is an easy and rewarding way to breathe new life into old or dated pieces. With a few simple steps, you can transform your furniture and create unique pieces that showcase your personal style. Happy painting!
Step | Description |
|---|---|
1 | Choose the furniture piece you want to repurpose and gather materials such as chalk paint, paintbrushes, sandpaper, and wax or sealer. |
2 | Clean the furniture thoroughly using a damp cloth to remove any dirt, dust, or grime. |
3 | Lightly sand the furniture to remove any existing paint or finish and to ensure a smooth surface for the chalk paint to adhere to. |
4 | Apply a thin, even coat of chalk paint onto the furniture using a paintbrush or roller, allowing it to dry according to the manufacturer’s instructions. |
5 | Apply additional coats of chalk paint, allowing each coat to dry before applying the next until the desired coverage and finish is reached. |
6 | Once the chalk paint is completely dry, apply a layer of wax or sealer to protect the furniture and enhance the chalk paint’s durability. |
7 | Buff the wax or sealer onto the furniture using a clean, dry cloth to achieve the desired sheen and finish. |
8 | Reassemble the furniture (if necessary) and style it in your desired space, enjoying your newly repurposed and refreshed piece! |
Chalk Painting Furniture: No Sanding Required?
• Introduction
Chalk paining is a popular technique for giving the furniture a rustic, vintage look without the need for heavy sanding or priming. It’s a great way to update and refresh a piece of furniture without the need for professional tools or experience.
• Advantages of Chalk Paint
- Easy to Use: Chalk paint is user-friendly and requires minimal preparation. This makes it perfect for DIY enthusiasts who want a simple and quick way to transform their furniture.
- No Sanding or Priming: Chalk paint adheres to most surfaces, eliminating the need for sanding or priming beforehand.
- Quick Drying: Most chalk paints dry within 1 to 3 hours, allowing multiple coats in one day and speeding up the painting process.
- Versatility: Chalk paint can be used to create a variety of finishes, from distressed and aged to smooth and modern.
- Low VOCs: Chalk paint is low in volatile organic compounds (VOCs), making it an eco-friendly choice for home projects.
• How to Apply Chalk Paint to Furniture Without Sanding
– Step 1: Clean the Surface
It’s essential to work with a clean surface before applying chalk paint. Start by wiping down the furniture piece with a damp cloth to remove any dust, dirt, or debris. For stubborn grime, use a mild soap and water solution. Allow the surface to dry completely before proceeding.
– Step 2: Repair Minor Damage
Examine the piece of furniture for any nicks, dents, or scratches. Fill these imperfections with wood filler, following the manufacturer’s instructions. Allow the filler to dry, then lightly sand the repaired areas to ensure an even surface. Wipe away any sanding dust with a damp cloth.
– Step 3: Choose a High-Quality Chalk Paint
Not all chalk paints are created equal. For the best results, select a high-quality product from a reputable brand. This will ensure superior coverage, adherence, and durability. It is also more likely to produce a smooth, even finish without sanding.
– Step 4: Apply the First Coat
Using a synthetic bristle brush or a foam roller, apply a thin, even coat of chalk paint to the furniture piece. Follow the grain of the wood for the most natural look. Be mindful of drips and pooling, as they can cause an uneven finish. Allow the paint to dry for the recommended time, typically 1 to 3 hours.
– Step 5: Apply Additional Coats (if necessary)
If the furniture piece requires additional coverage, apply a second coat of chalk paint. Allow each coat to dry completely before adding another layer. Two to three coats are usually sufficient for full coverage.
– Step 6: Add Character (Optional)
For a more distressed or rustic look, lightly sand the edges and corners of the furniture piece with a fine-grit sandpaper. This will create a worn, vintage appearance where the natural wood shows through the paint. Be sure to remove any sanding dust with a damp cloth.
– Step 7: Seal with a Protective Finish
To ensure the longevity and durability of your chalk-painted furniture, apply a protective wax or topcoat. This will protect the paint from scratches, stains, and general wear and tear. Follow the manufacturer’s instructions for application and drying time.
• Expert Tips for Chalk Painting Success
- Use the Right Brush: Choose a high-quality synthetic bristle brush or foam roller to ensure a smooth, even application of chalk paint.
- Work in a Well-Ventilated Area: Painting indoors? Open windows and doors to ensure proper ventilation and allow paint fumes to dissipate.
- Store Leftover Chalk Paint Properly: Keep leftover paint in an airtight container and store it in a cool, dry place away from sunlight to prolong its shelf life.
- Test Paint on a Hidden Area: Before applying chalk paint to your entire furniture piece, test the color and finish on a small, inconspicuous area to ensure you are happy with the results.
• Conclusion
In summary, it is possible to achieve a beautiful, lasting finish with chalk paint over furniture without the need for sanding. By following the steps outlined in this guide, even novice painters can transform their old, tired furniture into stunning pieces that will enhance any interior.
For more information on chalk painting techniques and best practices, visit the Annie Sloan website, a leading authority on chalk paint and its various applications.
Topic | Answer |
|---|---|
Chalk paint over furniture without sanding | Yes, one of the advantages of using chalk paint is its ability to adhere well to surfaces without the need for pre-sanding or priming. It can be applied directly over clean and dry furniture, allowing for easy paint application and a smooth finish. |