Chalk Paint Techniques For Indoor Furnishings. What Pros Say
Are you ready to give your indoor furnishings a new life with an exciting and creative twist? Look no further, as we have the answer for you with chalk paint techniques that can transform your furniture into fresh, stylish pieces! We have a plethora of innovative ideas and step-by-step guidance tailored just for you, so you can confidently elevate your home’s aesthetic appeal.
Chalk paint techniques for indoor furnishings:
Chalk paint techniques for indoor furnishings involve preparing the furniture by cleaning, removing hardware, repairing damages, and sanding. Basic chalk paint application includes choosing paint, stirring, applying thin coats, and allowing for drying time. Distressing furniture with chalk paint involves applying base and top paint colors and using various distressing techniques. Other methods include layering colors, creating textures, and using stencils.

Elevate your home decor game with stunning chalk paint techniques for your indoor furniture. Unleash your creativity, transform your furnishings, and uncover the possibilities in the following sections. Read on to learn how to create unique and personalized statement pieces!
Contents
- 1 Chalk Painting Methods for Interior Furniture
- 2 Achieving an Attractive Chalk Paint Finish on Furniture
- 3 Using Chalk Paint on Indoor Furniture: Tips and Tricks
- 4 Secrets to Success: Getting Top-notch Results with Chalk Paint
- 5 Mastering a Smooth and Flawless Chalk Paint Finish
Chalk Painting Methods for Interior Furniture
Chalk paint can transform an old or bland piece of furniture into a beautiful and unique piece, all while providing a cost-effective solution to reinvigorating your indoor spaces.
• Why Use Chalk Paint?
Chalk paint is a versatile choice for refinishing furniture due to its ease of use, quick drying time, and excellent adhesion to virtually any surface. This type of paint also offers a wide variety of color options and can be easily distressed to achieve a vintage or antique look.
• Preparing Your Furniture
Before you dive into painting your piece, it’s important to properly prepare the furniture for the best results:
- Clean the furniture: Remove any dirt, dust, or grime with a damp cloth and mild detergent.
- Remove hardware: Take off any handles, knobs, or other hardware that you don’t want to accidentally paint.
- Repair any damage: Fill in any gouges, scratches, or dents with wood filler and smooth the surface with sandpaper.
- Sand the piece: Lightly sand the entire piece to create a slightly rough surface for the paint to grip, using either 120 or 220 grit sandpaper. If your piece is already painted or varnished, a more thorough sanding is required to remove the existing finish.
- Wipe away dust: After sanding, use a tack cloth or damp rag to remove any remaining dust from the surface.
• Basic Chalk Paint Application
Follow these steps for a simple and effective chalk paint application on your indoor furniture.
- Choose your paint: There are many brands of chalk paint available on the market. I recommend Annie Sloan Chalk Paint or Rust-Oleum Chalked Paint for their variety of colors, consistency, and ease of use.
- Stir the paint: Be sure to thoroughly stir your chalk paint before applying, as it can settle over time.
- Apply the paint: Using a high-quality brush, apply a thin coat of paint in long, even strokes. For best results, apply the paint in the same direction as the wood grain of the furniture.
- Let the paint dry: Chalk paint dries quickly, usually within 30 minutes to an hour. I recommend waiting at least 2 hours between coats to ensure even coverage and color consistency.
- Apply additional coats: Depending on the desired level of coverage, apply one or two more thin coats of paint, allowing ample drying time between each coat.
• Distressing Furniture with Chalk Paint
One of the more popular uses for chalk paint is creating a distressed, vintage look on furniture. Follow these simple steps to achieve the desired distressed look:
- Prepare the furniture: Follow the steps in the “Preparing Your Furniture” section of this article before applying your paint.
- Choose your distressing technique: There are various techniques to distress your furniture (e.g., sandpaper, wet distressing, or using wax). Choose the one that best suits your desired end result.
- Apply your base paint color: This is the color that will show through when the furniture is distressed. Following the steps in the “Basic Chalk Paint Application” section, apply this base color, and allow it to dry completely.
- Apply your top paint color: Once your base color is completely dry, apply your chosen top paint color, again following the “Basic Chalk Paint Application” instructions. I recommend using a contrasting color for a more dramatic distressed look.
- Distress the furniture: Once your top color is dry, use your chosen distressing technique to carefully remove portions of the top paint layer, revealing the base paint color underneath.
- Seal the piece: After distressing the furniture to your desired level, apply a clear wax, such as Annie Sloan’s Clear Chalk Paint Wax, to protect the finish and add a subtle sheen to the piece.
• Other Chalk Paint Techniques
There are countless other unique techniques for using chalk paint on indoor furniture, such as layering multiple colors, creating a textured or weathered look, using stencils to create patterns, or applying specialty topcoats.
For inspiration, visit Annie Sloan’s Techniques page, featuring step-by-step guides on how to create different finishes and effects.
• Final Tips
As with any DIY project, practice makes perfect. Familiarize yourself with the materials and techniques before applying them to your furniture, and don’t be afraid to get creative. Most importantly, have fun exploring the endless possibilities of chalk paint to create a truly one-of-a-kind piece for your home.
Achieving an Attractive Chalk Paint Finish on Furniture
Chalk paint is a versatile and easy-to-use medium that gives new life to old furniture pieces. It creates a stunning matte finish and a professional look even for amateurs.
• Preparation and Cleaning
Before applying the chalk paint, make sure the furniture piece is clean and free of dirt or dust. Use a slightly damp cloth to wipe down the surface. After cleaning, allow the piece to dry completely.
• Choosing the Right Chalk Paint
There are several brands of chalk paint available in the market, each having its own unique properties. Some of the most popular brands include Annie Sloan, Rust-Oleum, and Americana Decor. It’s essential to test out multiple brands and find the one that works best with your furniture and desired finish.
• Applying the Chalk Paint
Before starting the painting process, make sure to have a good quality paintbrush or roller, a container for pouring the paint, and a drop cloth or newspaper to protect your floors.
Apply the chalk paint in thin coats, ensuring complete coverage. Following thin coats will yield the best finish and prevent dripping or uneven coverage.
For an expert look, it’s essential to apply the paint in the direction of the wood grain. This will ensure a consistent and professional finish on the final product.
• Sanding the Chalk Paint
Once the paint has dried completely, it’s time to sand the furniture piece. This step is critical in achieving a smooth and professional finish. Use fine-grade sandpaper (180-grit or higher) and sand the surface gently, following the wood grain.
Pay special attention to any rough spots, raised brushstrokes, or areas where the paint has thickened. For a distressed finish, apply gentle pressure on the edges and corners, revealing some of the wood beneath the paint.
• Waxing the Furniture
After sanding the piece and achieving the desired effect, it’s time to seal and protect the chalk paint finish. Using a wax brush or lint-free cloth, apply a thin coat of furniture wax (such as Annie Sloan Soft Wax or Minwax Paste Finishing Wax) to the entire piece.
Make sure to buff the wax in a circular motion, ensuring an even and thorough application. Allow the wax to dry for at least 24 hours, then buff the surface again with a clean, lint-free cloth. This will give the furniture a smooth and durable finish.
• Distressing Techniques for a Unique Finish
To add more character and an aged look to your chalk paint furniture, here are some popular distressing techniques:
- Two-Tone Distressing: Apply a base coat in a contrasting color; let it dry, then apply the top coat of chalk paint. After the topcoat is dry, gently sand the edges and corners to reveal the base coat color, creating a stunning two-tone effect.
- Dry Brushing: After applying the base coat, dip the tips of a dry brush into the chalk paint, then gently brush the surface, creating subtle streaks and highlights on the furniture piece.
- Wet Distressing: After applying the top coat of paint, immediately use a damp cloth to rub the paint in specific areas and reveal the wood or base coat beneath.
• Additional Tips for a Professional Look
- Practice on a Sample Piece: Before working on your main furniture piece, practice your techniques on a small scrap or sample piece of wood.
- Ensure Proper Lighting: Work in a well-lit space to see the full effect of your painting and distressing techniques.
- Be Patient: Give each layer of paint and wax ample time to dry before proceeding to the next step.
In conclusion, creating beautifully chalk-painted furniture involves a process of preparing, painting, distressing (if desired), and sealing with wax. With practice and patience, anyone can achieve a stunning, professional look on their furniture projects. Happy painting!
Step | Description |
|---|---|
1. Choose the right piece of furniture | Select a piece of furniture that has good bones and will benefit from the transformation provided by chalk paint. |
2. Clean the furniture | Thoroughly clean the furniture by wiping it down with a damp cloth to remove any dirt or dust. |
3. Prepare the surface | Sand any rough spots or previous paint layers to ensure a smooth base for the chalk paint application. |
4. Apply the chalk paint | Using a quality paintbrush or roller, apply the first coat of chalk paint, ensuring even coverage. |
5. Let it dry | Allow the first coat of chalk paint to dry for a minimum of 1-2 hours, or as recommended by the paint manufacturer. |
6. Apply additional coats | If desired, apply additional coats of chalk paint, allowing sufficient drying time between each coat. |
7. Distress the furniture (optional) | If a distressed look is desired, gently sand the edges and corners of the furniture to expose the underlying wood or previous paint layers. |
8. Apply a protective sealer | Finish the furniture with a wax or other protective sealant to keep the chalk paint from chipping and to ensure durability. |
Using Chalk Paint on Indoor Furniture: Tips and Tricks
Chalk paint is a popular choice for furniture makeover enthusiasts due to its versatility and ease of use. But can you chalk paint furniture indoors? The answer is yes! With the proper preparation, technique, and safety measures, chalk painting can be successfully done inside your home.
• Preparing Your Space for Chalk Painting Furniture Indoors
Before you start chalk painting your furniture indoors, it’s essential to get your workspace ready. A well-prepared space will not only make the process smoother and more enjoyable but also help in preventing damage to your home’s surfaces.
– Ventilation and Airflow
Good airflow is crucial for indoor painting projects. Chalk paint can produce fine dust and strong odors that can be harmful to breathe. Make sure to open windows and doors and use fans to promote proper ventilation. It is also recommended to wear a mask while painting for added protection.
– Protective Measures
To avoid damaging your floors and surfaces, it’s essential to protect them. Place a drop cloth or plastic sheet under the piece of furniture you’re working on to catch drips and spills. You could also use painter’s tape to protect the surrounding walls and moldings from accidental paint splatters.
– Work Area Organization
Keep all your painting tools and supplies within easy reach. This will help you maintain a clean and efficient workspace throughout the painting process. Gather essentials like brushes, rollers, paint trays, tape, and paper towels before you begin.
• Chalk Painting Furniture Indoors: Step-by-Step Guide
Now that your space is prepared, it’s time to start chalk-painting your furniture indoors. Follow these steps for the best results:
– Step 1: Cleaning and Preparation
Begin by thoroughly cleaning the furniture piece with a mild cleaner, like soap and water, to remove any dirt, grease, or residues. Allow the furniture to dry completely before moving to the next step.
– Step 2: Sanding
Although chalk paint adheres well to most surfaces without sanding, it’s a good idea to lightly sand furniture with a fine-grit sandpaper. This not only helps the paint adhere better but also gives a smoother finish.
Remember to wipe the furniture with a damp cloth to remove any resulting sanding dust.
– Step 3: Applying Chalk Paint
Stir the chalk paint well before use. Apply the paint to the furniture with a brush or roller, using smooth, even strokes. You may need more than one coat for complete coverage, especially when painting over darker colors. Allow each coat to dry thoroughly before applying the next one.
– Step 4: Finishing Touches
Chalk paint can be easily distressed to create a vintage or aged look by lightly sanding the edges and corners of the furniture. After distressing, apply a sealant, such as clear wax or water-based polyurethane, to protect and enhance the finish.
Follow the manufacturer’s instructions for proper application and drying times.
• The Benefits and Drawbacks of Chalk Painting Furniture Indoors
When considering chalk painting furniture indoors, it’s essential to weigh the benefits and drawbacks of the process.
– Benefits
- Flexibility: Chalk painting allows for easy customization of furniture pieces, with countless color options and design possibilities.
- Easy application: Chalk paint is simple to work with, often adhering without sanding or priming, making it ideal for novice painters.
- Quick drying time: Chalk paint dries quickly, allowing you to finish furniture makeovers in a shorter time frame.
– Drawbacks
- Odor and dust: Chalk paint can produce strong odors and fine dust that may be harmful if inhaled, making proper ventilation and safety precautions essential.
- Potential mess: Indoor painting projects can become messy, requiring diligent protective measures to avoid damage to floors and surfaces.
• Final Thoughts and Recommendations
Chalk painting furniture indoors is a manageable and rewarding process with proper preparation, technique, and safety measures. Keep the following recommendations in mind to achieve the best results:
- Ensure proper ventilation and airflow for a safe and comfortable painting environment.
- Protect surfaces with drop cloths, plastic sheets, and painter’s tape.
- Clean, sand and prepare furniture for better paint adhesion and smoother finishes.
- Test your paint color and technique on a small, inconspicuous area before painting the entire piece.
- Finish with a sealant to protect and enhance your work.
For more advice on chalk painting indoors and to learn about specific techniques, visit a reputable organization’s website, such as The American Coatings Association.
Question | Answer |
|---|---|
Can you chalk paint furniture indoors? | Yes, you can chalk paint furniture indoors. Chalk paint is low odor and has very low volatile organic compounds (VOCs), making it safe to use indoors. However, it’s always best to work in a well-ventilated area to ensure proper drying and to minimize any fumes. |
Secrets to Success: Getting Top-notch Results with Chalk Paint
Chalk paint is a versatile and user-friendly paint option for many home improvement projects. With its unique matte finish and ability to adhere to various surfaces, chalk paint is a popular choice for furniture makeovers, wall treatments, and home decor.
• Choosing the Right Chalk Paint
Before you begin your project, it is essential to choose the right type of chalk paint. While there are many brands available, some well-known brands include Annie Sloan, Rust-Oleum, and Valspar.
I recommend trying a small sample of each brand to determine the one that works best for your project. Additionally, consult the EPA guidelines for maintaining a healthy indoor environment while painting.
• Preparing the Surface
Proper preparation is key to achieving the best results with chalk paint. Depending on the surface you are painting, different preparatory steps may be necessary.
– Furniture
- Cleaning: Remove any dirt, grime, or residue from the surface using a clean cloth and mild soapy water or a specialized cleaner. Ensure the surface is thoroughly dried afterward.
- Sanding: If the surface is glossy or has a previous paint layer, lightly sand to create a smoother finish and improve paint adhesion. Sanding is also essential if the piece has chipping or peeling paint. Use a fine grit sandpaper (around 220 grit) and, if possible, use a handheld orbital sander for even sanding.
- Repairs: Before painting, repair any damaged areas with wood filler or other appropriate materials. Allow the repair to dry according to the product’s instructions before proceeding.
– Walls
- Cleaning: Remove any dirt, grime, or residue from walls using a clean cloth and mild soapy water or a specialized cleaner. Ensure the walls are thoroughly dried afterward.
- Sanding and Smoothing: If the wall has any imperfections or rough spots, sanding with a fine grit sandpaper allows for a smoother finish. Remove any debris after sanding with a clean cloth.
- Priming: If you’re painting a dark color or the wall has been previously painted, it’s crucial to prime the area with a specialized primer for chalk paint.
• Application Techniques
– Brushes and Rollers
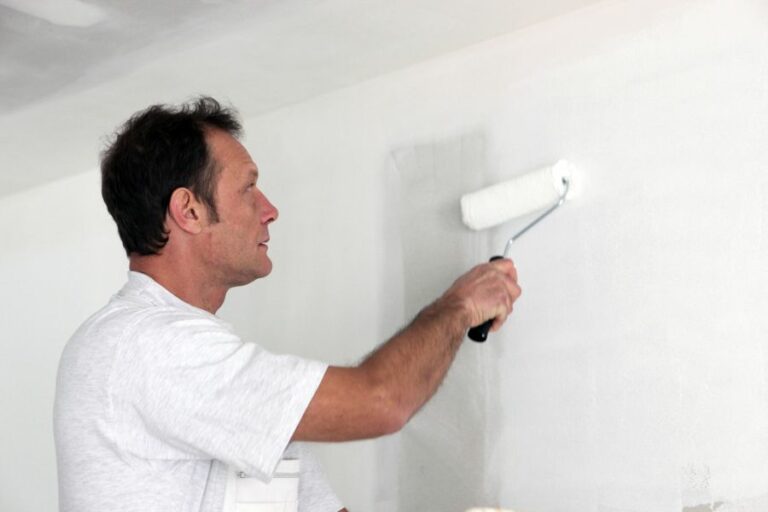
Consider using a combination of brushes and rollers for your chalk paint project. For larger surfaces or walls, use a roller for an even and smooth finish. For smaller surfaces, details, or corners, use a high-quality, fine bristle brush for precise application.
– Consistency
Chalk paint can thicken over time. Before use, give the paint a thorough stir and add a small amount of water, if necessary, to achieve the desired consistency. This ensures smooth and even coverage.
– Building Layers
For optimal durability and coverage, apply multiple thin layers of chalk paint to your surface. Allow each layer to dry completely before adding another. Thin layers provide a smoother finish and minimize brush strokes.
– Sanding Between Coats
For an ultra-smooth finish, lightly sand your surface with fine-grit sandpaper between coats. This removes any residual brush strokes or imperfections and enhances paint adhesion. Remove any sanding residue with a clean cloth before applying the next coat.
• Finishing Touches
– Distressing
If you’re aiming for an antique or rustic look, consider distressing the paint. After your final coat has dried, lightly sand the edges and corners with fine-grit sandpaper to expose the underlying surface. This creates a worn and weathered appearance.
– Sealing
A protective sealant is crucial for maintaining the longevity and durability of your chalk paint project. Common sealants include wax and clear polyurethane topcoats.
- Wax: Apply a thin layer of wax using a lint-free cloth or wax brush. Allow the wax to dry for a few hours, then buff it with a clean cloth for a subtle sheen. Repeat for additional layers of protection.
- Clear Polyurethane: Apply a thin coat of clear polyurethane with a high-quality brush or roller, following the manufacturer’s instructions. Allow the topcoat to dry completely before adding additional coats if needed.
By following these tips and techniques, you’ll be well on your way to achieving professional-quality results with chalk paint. Your project will not only look stunning but stand the test of time.
Step | Action |
|---|---|
1 | Clean the surface to remove dirt and dust. |
2 | Lightly sand the surface for better adhesion. |
3 | Apply the first coat of chalk paint using a high-quality brush or roller. |
4 | Allow the paint to dry for the recommended time on the label. |
5 | Apply a second coat if necessary for full coverage. |
6 | Distress the paint using sandpaper if desired for a vintage look. |
7 | Apply a clear wax or sealant to protect the paint and enhance durability. |
8 | Buff the waxed surface with a clean cloth for a smooth, polished finish. |
Mastering a Smooth and Flawless Chalk Paint Finish
Chalk paint is a versatile and easy-to-use medium that can transform a wide range of surfaces like furniture, walls, and decorative items. However, achieving that smooth, professional finish requires proper technique, patience, and a bit of elbow grease.
• Choose the Right Chalk Paint and Brush
Selecting the appropriate chalk paint is crucial for a smooth finish. High-quality chalk paints, such as Annie Sloan Chalk Paint or other reputable brands, typically offer better coverage, smoother texture, and a more durable finish.
Using inferior-quality paints may require additional sanding and repainting to achieve a smooth surface.
Investing in a good-quality brush made for chalk paint applications is also essential. A high-quality brush features dense bristles that are specifically designed for chalk paint application. These brushes hold paint well and distribute it evenly across the surface while avoiding brush marks.
• Proper Surface Preparation
A smooth surface begins with proper preparation. Before applying chalk paint, make sure the surface is clean and free of dust, dirt, and grease.
Consider using a TSP (trisodium phosphate) solution to thoroughly clean surfaces, especially for repurposing older furniture. Rinse the surface with clean water and let it dry thoroughly before proceeding.
Next, assess the surface for imperfections, such as dents, scratches, or uneven areas. Use fine-grit sandpaper or a sanding sponge for sanding these areas to create a smoother surface. Wipe away any dust created during sanding with a tack cloth.
• Apply Chalk Paint in Thin, Even Coats
When applying chalk paint, remember that thin, even coats are key to achieving a smooth finish. Avoid applying too much paint in one area, as this can create an uneven texture or visible brush marks. Follow these guidelines during painting:
- Dip the brush into the paint, then tap off any excess paint.
- Hold the brush at a slight angle and apply paint using long, even strokes.
- Avoid going over the same area multiple times, as this can create visible brush marks.
- Allow each coat of paint to dry completely before applying the next, typically 1-2 hours, depending on the manufacturer’s instructions.
Two coats of chalk paint are usually adequate to achieve full coverage, but additional coats may be necessary for darker colors or heavily textured surfaces.
• Sand Between Coats and After the Final Coat
Sanding between coats of chalk paint ensures a smooth transition from one coat to another, eliminating visible brush marks or uneven texture. Use fine-grit sandpaper or a sanding sponge (220-400 grit) and sand the surface lightly. Wipe away any dust with a tack cloth and proceed to the next coat.
After the final coat is dry, evaluate the surface for smoothness. If needed, use fine-grit sandpaper or a sanding sponge to gently sand any areas that require further smoothing. Remove any sanding dust with a tack cloth.
• Apply a Protective Finish
To maintain the smooth finish and protect the surface, a protective finish is necessary. Choices include wax, polycrylic, or polyurethane. Each option has its benefits and drawbacks, so it’s essential to choose based on your project’s needs.
- Wax: A soft, natural-looking finish that adds depth to chalk paint. Provides minimal protection and requires frequent reapplication. Apply using a lint-free cloth or specialty wax brush, then buff away excess.
- Polycrylic: A water-based, non-yellowing protective finish that dries clear. Offers more durability than wax but can change the appearance of some colors.
- Polyurethane: Oil-based, highly durable finish that can turn yellow over time. Best for surfaces that require maximum protection but may alter some colors (not recommended for white or light-colored paints).
• Polish Your Surface
Finally, after the protective finish has thoroughly dried, you may use a fine-grit sandpaper or a fine steel wool pad to give the surface a gentle polish. This technique can create an ultra-smooth finish that looks and feels like glass. Remember to remove any dust created by the polishing.
With these tips and tricks in mind, you’ll be able to achieve that smooth, professional, and lasting finish with chalk paint. Whether you’re a beginner or an experienced painter, incorporating these techniques into your chalk painting process will take your projects to the next level.
Step | Description |
|---|---|
1. Surface preparation | Clean the surface thoroughly by removing any dirt, grease, or debris, and make sure the surface is dry before painting. |
2. Sand the surface | Lightly sand the surface using a fine grit sandpaper (e.g., 220 grit) to create a smooth base for the paint to adhere to. |
3. Apply a thin coat of chalk paint | Using a high-quality brush or paint roller, apply a thin, even coat of chalk paint to the surface. Avoid overloading the brush or roller, as this can result in a thick, uneven application. |
4. Allow paint to dry | Allow the paint to dry completely (typically 1-2 hours) before moving on to the next step. |
5. Sand between coats | Lightly sand the dry paint using a fine grit sandpaper (e.g., 220 grit) to remove any brush or roller marks and to create a smooth surface for the next coat of paint. |
6. Apply additional coats as necessary | Repeat steps 3-5 as needed, applying thin, even coats of paint until you achieve the desired coverage and smoothness. Typically, 2-3 coats are recommended for a smooth finish. |
7. Apply clear wax or protective finish | Once your final coat of paint is completely dry, apply a clear wax or protective finish using a high-quality brush or soft cloth. This will help seal the paint and provide additional protection and durability to the surface. |
8. Buff the wax or finish | After the wax or protective finish has dried (typically 24 hours), use a clean, soft cloth to gently buff the surface. This will help create a smooth, polished finish. |

