Vintage Appeal: Chalk Paint For Indoor Antique Furniture. What Pros Say
Are you looking to breathe new life into your indoor antique furniture without losing that special vintage charm? Finding the right balance between preserving the original character and adding a fresh touch to make it suitable for contemporary spaces can be tricky. You’re in luck; I have the perfect solution: chalk paint! This versatile paint has been transforming furniture for years with its easy application process and unique finish.
Vintage appeal: chalk paint for indoor antique furniture:
Chalk paint is a versatile, easy-to-use paint that adds a vintage touch to indoor antique furniture due to its matte finish and adaptability to various surfaces. It requires minimal preparation, can provide customizable finishes, and is available in numerous colors from high-quality brands. With careful selection and application, chalk paint transforms antique furniture into unique, personalized masterpieces.

Discover the magic of chalk paint for your antique furniture! Learn how to create stunning pieces with vintage charm without breaking the bank. There’s more to this versatile paint, so read on and be inspired!
Contents
- 1 Retro Charm: Chalk Paint for Classic Indoor Furniture
- 2 Is Chalk Paint Suitable for Vintage Furniture?
- 3 Applying Chalk Paint on Time-Honored Furniture: A Guide
- 3.0.1 – Step 1: Choose the Right Piece of Furniture
- 3.0.2 – Step 2: Gather the Necessary Materials
- 3.0.3 – Step 3: Prepare Your Workspace
- 3.0.4 – Step 4: Prep Your Antique Furniture
- 3.0.5 – Step 5: Apply Your Chalk Paint
- 3.0.6 – Step 6: Distress Your Furniture (Optional)
- 3.0.7 – Step 7: Apply Wax or Sealer for Finishing
- 3.0.8 – Step 8: Admire Your Handiwork
- 3.1 • Final Tips and Recommendations
- 4 Top Paint Choices for Reviving Antique Furniture
- 5 Achieving a Vintage Aesthetic with Chalk Paint: A Tutorial
Retro Charm: Chalk Paint for Classic Indoor Furniture
• Introduction to Chalk Paint
Chalk paint is a versatile and easy-to-use paint that has gained immense popularity over recent years. Its unique composition and texture make it perfect for adding style and vintage touch to your indoor antique furniture.
What sets it apart from traditional paints is its signature matte finish, which gives the furniture a beautifully aged and distressed appearance without any complicated techniques.
• Why Choose Chalk Paint for Antique Furniture
– Highly Adaptable
One of the primary reasons for choosing chalk paint is its ability to bond well with a wide range of surfaces, including wood, metal, glass, and even fabric.
This adaptability eliminates the need for endless preparations such as sanding, stripping, or priming, making it an excellent choice for refurbishing antique furniture with minimal effort.
– Easy to Use
Chalk paint is incredibly user-friendly, as it tends to be much thicker than conventional paint. This consistency makes it easy to control and apply evenly on the furniture without any drips or brush strokes.
The short drying time is an added advantage, allowing you to move ahead with the project quickly.
– Customizable Finishes
Chalk paint offers endless possibilities to customize the finish of your antique furniture. You can achieve numerous effects like distressing, crackling, or layered looks by playing around with the application and sealing techniques.
As a result, each piece of furniture painted with chalk paint becomes a unique and personalized masterpiece.
• Selecting the Perfect Chalk Paint
– Quality Brands
There are various brands of chalk paint available in the market. Some popular ones include Annie Sloan Chalk Paint, Rust-Oleum Chalked Paint, and FolkArt Home Decor Chalk. It is essential to select a high-quality and trusted brand to ensure a long-lasting and attractive finish for your antique furniture.
– Colors and Shades
Chalk paint comes in a plethora of colors, from rich and vibrant to soft pastels, making it easy for you to choose a color scheme that complements the existing decor of your room. You can also mix different colors to create your unique shade.
It is a good idea to test the paint colors on a small, inconspicuous area of your furniture before committing to the entire piece.
• Essential Tips and Techniques for Using Chalk Paint
– Preparing the Furniture
While chalk paint does not require extensive preparation, it is essential to clean your antique furniture thoroughly before painting. Remove any dust, dirt, or grime, and ensure that it is free of any wax or oil.
A slightly damp cloth should suffice for cleaning, but for more stubborn grime, you can use a mild detergent or TSP cleaner.
– Applying the Paint
To start painting, you would need a good quality brush or roller, preferably one specifically designed for chalk paint. Applying one or two coats should be sufficient for most furniture pieces.
However, the number of coats may vary depending on the desired finish and the color you choose. Lighter colors might need an additional coat for better coverage.
– Distressing the Piece
One of the most popular finishes for antique furniture is the distressed look, which can be easily achieved using chalk paint.
Allow the paint to dry completely, and then use a medium-grit sandpaper to gently sand the areas where natural wear and tear would occur, such as the edges, corners, and raised details. This process would reveal the original wood color, giving the piece a vintage and worn-out appearance.
– Sealing with Wax or Topcoat
Sealing the painted surface with wax or a topcoat is a crucial step to protecting your antique furniture and maintaining its appearance. There are various options available for sealing, such as clear or dark wax, water-based topcoats, and lacquers.
Each finish provides a different look. While clear wax creates a matte finish, dark wax results in an antiqued appearance. Similarly, topcoats and lacquers can provide a slightly glossy or matte finish, depending on your preference.
• Conclusion
Chalk paint is an excellent choice for giving your indoor antique furniture a fresh and unique update.
By understanding the basics of chalk paint, choosing the right product, and following the tips and techniques mentioned in this article, you can transform your antique pieces into beautiful and personalized works of art.
Is Chalk Paint Suitable for Vintage Furniture?
Are you considering giving your antique furniture a makeover? Using chalk paint may be the solution you’re looking for. Chalk paint is a versatile and popular choice for transforming tired-looking furniture into something fresh and stylish.
• The Benefits of Using Chalk Paint on Antique Furniture
Chalk paint offers numerous benefits that make it an attractive choice for use on antique furniture. Here are some of the advantages:
– Easy Application
One of the most significant benefits of chalk paint is the ease with which it can be applied. Unlike traditional paints, there is no need to prime or sand your furniture before applying chalk paint. This saves time and effort and also maintains the integrity of the original finish of your antique piece.
– Quick Drying Time
Chalk paint dries quickly, allowing you to finish your project in a short amount of time. Depending on the humidity and temperature, chalk paint can dry in as little as 30 minutes to an hour. This allows you to move on to the next step of your project quickly and also reduces the chances of dust and debris sticking to the wet paint.
– Versatility
Chalk paint is highly versatile and can be applied to various surfaces, including wood, metal, and even fabric. This versatility makes it an excellent choice for antique furniture, which often consists of different materials.
– Customizable Finish
Another advantage of using chalk paint is that it allows for a customizable finish. You can create a distressed, shabby chic look by sanding the edges of the furniture after the paint has dried or achieve a more aged, time-worn appearance by applying dark wax over the paint.
– Easy to Clean
When it comes to maintenance, chalk paint is easy to clean. You can use a damp cloth to wipe away dust and dirt. Additionally, chalk paint is durable and can withstand everyday wear and tear, making it a practical choice for antique furniture.
• Professional Tips for Using Chalk Paint on Antique Furniture
To achieve the best results when using chalk paint on your antique furniture, follow these professional tips:
– Choose the Right Color
When selecting a color for your chalk paint, consider the existing color palette of the room where the furniture will be placed. Choose a complementary or contrasting color that will enhance the overall aesthetic of the space. You can also mix different chalk paint colors to create a custom shade.
– Use a Quality Brush
To ensure a smooth, even application, use a high-quality brush specifically designed for chalk paint. These brushes typically have dense, natural bristles that allow for better paint pick-up and smoother application.
– Apply Multiple Coats
For a more solid and opaque finish, apply multiple coats of chalk paint. Allow each layer to dry completely before applying the next coat. Typically, two to three coats should be sufficient for full coverage.
– Seal the Paint With Wax
To protect your chalk-painted furniture and achieve a beautiful finish, apply a clear wax or a dark wax over the paint. This will seal the paint and provide extra durability. Use a soft, lint-free cloth or a wax brush to apply the wax in a thin, even layer. Allow the wax to dry before buffing the surface with a clean cloth to achieve your desired sheen.
– Take Your Time
When working with antique furniture, patience is key. Rushing through the process may result in a less-than-desirable final outcome. Take your time to ensure proper application and allow for sufficient drying times between coats for best results.
• Conclusion
In conclusion, you can certainly use chalk paint on antique furniture. Chalk paint offers numerous benefits, such as easy application, quick drying time, and versatility.
By following the professional tips provided in this article, you will be able to achieve beautiful results when using chalk paint on your antique furniture.
For more information on the proper techniques and products for using chalk paint on antique furniture, you can refer to a reputable source like Annie Sloan’s website, which is considered one of the pioneers of chalk paint.
Question | Answer |
|---|---|
Can you use chalk paint on antique furniture? | Yes, chalk paint can be used on antique furniture, as it provides a distressed, vintage look and is easy to apply. However, it’s important to consider the value and condition of the furniture before painting, as it may affect its worth. |
Applying Chalk Paint on Time-Honored Furniture: A Guide
Transforming antique furniture with the use of chalk paint is an increasingly popular home improvement technique. With its versatility and ease of use, chalk paint allows you to create flawless finishes that can revive your old or worn-out pieces.
– Step 1: Choose the Right Piece of Furniture
Before beginning the process, it’s important to select a suitable piece of antique furniture for chalk paint application. Look for items that have interesting details, smooth surfaces, and are structurally sound. Avoid pieces with deep scratches or dents, as chalk paint may not cover these imperfections adequately.
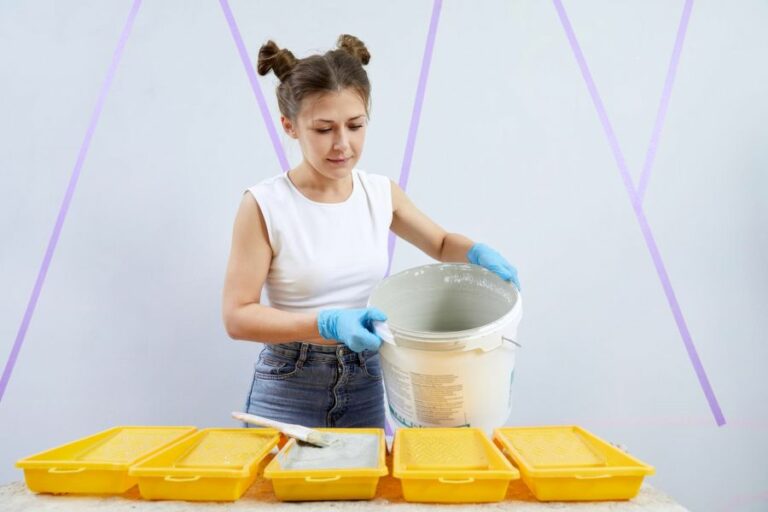
– Step 2: Gather the Necessary Materials
To paint your antique furniture with chalk paint, you will need the following materials:
- Chalk paint
- A paintbrush or roller
- A lint-free cloth
- Fine-grit sandpaper
- A sanding block or electric sander
- Wax or a sealer for finishing
Chalk paint can be purchased in a variety of colors, and you can even mix your own to create custom shades. Choose a quality brand of chalk paint, as it will provide better coverage and durability.
– Step 3: Prepare Your Workspace
Ensure your workspace is well-ventilated and free from dust before beginning. You may also want to lay down a protective covering, such as a drop cloth or old sheets, to prevent paint drips and spills from damaging your floor.
– Step 4: Prep Your Antique Furniture
Preparing your antique furniture for chalk paint application is crucial for a successful outcome. Start by examining the piece for any loose, peeling, or chipped paint or finish. You can remove these imperfections with fine-grit sandpaper or an electric sander.
Be sure to wear a mask to protect yourself from inhaling any dust particles.
Next, clean the surface of your furniture using a lint-free cloth dampened with warm water and mild dish soap. This will remove any dirt, dust, or grime that could affect the paint’s adhesion. Allow the piece to dry completely before proceeding to the next step.
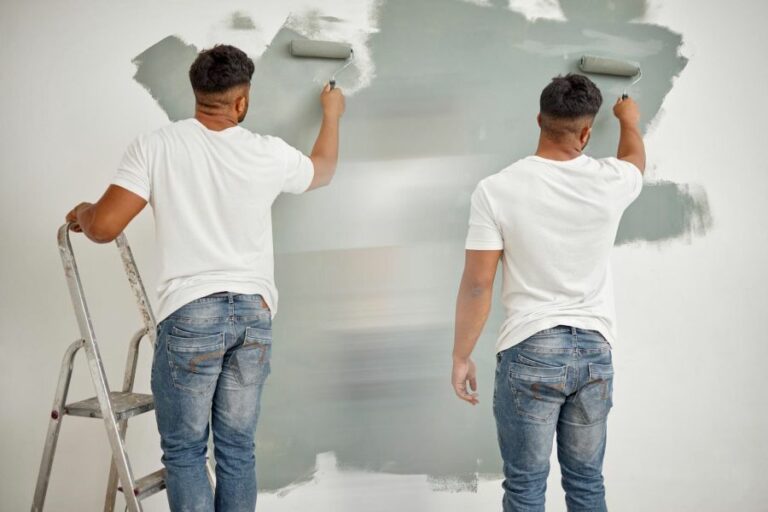
– Step 5: Apply Your Chalk Paint
Once your antique furniture is prepped, it’s time to apply the chalk paint. Shake or stir the paint well before pouring it into a container. Using a paintbrush or roller, apply a thin, even coat of paint to the surface of your furniture.
Allow the first coat to dry for approximately 1-2 hours or according to the manufacturer’s instructions.
After the first coat is dry, evaluate the coverage and determine if a second coat is necessary. If desired, apply additional thin coats, allowing each coat to dry before applying the next. Two to three coats are typically sufficient for satisfactory coverage.
– Step 6: Distress Your Furniture (Optional)
If you want to give your antique furniture a distressed or aged appearance, you can do so by lightly sanding the surface with a fine-grit sandpaper. Focus on areas where natural wear and tear would occur, such as edges, corners, and raised details.
The goal is to subtly remove small amounts of paint, revealing the original wood or previous finish beneath. Be careful not to overdo this process, as it can be difficult to fix if too much paint is removed.
– Step 7: Apply Wax or Sealer for Finishing
Once your chalk paint has dried and you are satisfied with the coverage, it’s time to apply a protective finish. This is an essential step to ensure the longevity of your painted antique furniture.
You can use either a clear wax or a sealer, depending on your preferences and the desired finish. Wax creates a softer, more matte appearance, while a clear sealer will provide a harder, more durable finish.
Apply the wax or sealer according to the manufacturer’s instructions, and allow it to dry completely before using your furniture.
– Step 8: Admire Your Handiwork
After your wax or sealer has dried, your beautifully transformed antique furniture is ready for use. Chalk paint can dramatically change the appearance of your piece, giving it a fresh, updated look while preserving its history and character.
• Final Tips and Recommendations
As you delve into the world of chalk painting antique furniture, keep these additional tips in mind:
- Experiment with different paint colors and techniques on small, inexpensive items before tackling more valuable antiques.
- Don’t be afraid to think outside the box and combine multiple colors or finishes for a unique, one-of-a-kind piece.
- Consult resources such as the Chalk Paint Techniques Guide for additional tips and inspiration.
With patience, practice, and creativity, you can master the art of chalk painting antique furniture and breathe new life into your cherished pieces.
Step | Description |
|---|---|
1 | Clean the piece of furniture with a damp cloth to remove any dirt, dust, or debris. |
2 | Remove any hardware from the furniture, such as handles or knobs. |
3 | Lightly sand the surface of the furniture with fine-grit sandpaper to remove any existing finish and create a smooth surface for the paint to adhere to. |
4 | Wipe down the furniture with a clean, damp cloth to remove any dust from the sanding. |
5 | Apply a thin, even coat of chalk paint to the entire surface of the furniture using a brush or roller, following the grain of the wood. Allow the paint to dry for at least two hours before applying a second coat if necessary. |
6 | Once the paint is dry, use fine-grit sandpaper to lightly distress the edges and corners of the furniture, exposing some of the wood beneath the paint. This will give the furniture an aged, antique appearance. |
7 | Apply a clear wax to protect the finish and add a subtle sheen to the piece. Use a brush or cloth to apply a thin, even coat of wax over the entire piece, then buff the wax with a clean cloth for a smooth, satin finish. |
8 | Reattach any hardware that was removed from the piece, and enjoy your newly painted antique furniture! |
Top Paint Choices for Reviving Antique Furniture
When it comes to antiquing furniture, selecting the right paint is essential for achieving the desired outcome.
• Chalk Paint – A Widely Favored Option
Chalk paint is undoubtedly one of the most popular choices for antiquing furniture. Its matte finish perfectly replicates the look of aged, distressed furniture. Additionally, chalk paint adheres well to most surfaces and requires minimal preparation.
– Advantages of Chalk Paint
There are several reasons why chalk paint is a suitable option for antiquing furniture:
- Minimal prep work: Chalk paint adheres well to surfaces without the need for sanding or priming.
- Versatility: This paint works on various materials, including wood, metal, and even laminate.
- Easy distressing: The chalky texture makes it simple to distress with sandpaper for an aged effect.
- Quick drying: Chalk paint dries rapidly, allowing you to complete your project swiftly.
– Brands to Consider
Here are some reputable brands offering high-quality chalk paint:
- Annie Sloan Chalk Paint: A trusted name in the industry, Annie Sloan offers a range of stylish, easy-to-use paints designed specifically for furniture.
- Rust-Oleum Chalked: Another popular choice, Rust-Oleum’s Chalked line is affordable and available in a wide array of colors.
• Milk Paint – The Authentic Choice
Milk paint has been used for centuries to create an antique, aged appearance on furniture. This environmentally friendly paint option is made from all-natural ingredients, such as milk protein, lime, clay, and pigment.
– Benefits of Milk Paint
Milk paint offers various advantages for antiquing furniture:
- Authenticity: Milk paint creates a genuinely antique appearance, making your furniture look like a true vintage piece.
- Eco-friendly: As a natural, non-toxic paint, milk paint is an environmentally friendly option.
- Durability: Milk paint creates a strong, long-lasting finish that can withstand the test of time.
– Recommended Brands
Here are two well-regarded milk paint brands to consider for your antiquing projects:
- Miss Mustard Seed’s Milk Paint: Miss Mustard Seed offers a range of beautiful, antique-inspired paint colors and finishes.
- Old Fashioned Milk Paint: As the name suggests, this brand provides a traditional, high-quality milk paint suitable for antiquing.
• Acrylic Paint – The Budget-Friendly Alternative
While not specifically designed for antiquing, acrylic paint can be an affordable and versatile alternative. By mixing in a matte medium or using sanding techniques, you can achieve an antique finish with acrylic paint.
– Perks of Acrylic Paint
Acrylic paint has its own set of advantages:
- Cost-effective: Acrylic paint is generally less expensive than specialty paint options.
- Wide color range: Given its widespread use for various projects, acrylic paint is available in numerous colors and finishes.
- Adaptability: Acrylic paint can be modified with mediums to create the desired texture and finish.
– Suggested Brands
For acrylic paint, consider these well-known brands:
- DecoArt Americana: This line of acrylic paint offers a range of colors and finishes, perfect for a variety of artistic projects.
- Liquitex Basics: As a trusted brand in the art world, Liquitex provides a variety of high-quality acrylic paints.
• Tips for Antiquing Furniture
Regardless of which paint you choose, follow these expert tips for a successful antiquing project:
- Thoroughly clean the furniture piece: Before painting, ensure that the furniture is free of dirt, dust, and grime. A clean surface will help the paint adhere better.
- Sand the surface: To improve paint adhesion and remove existing finishes, lightly sand the surface, even if you use chalk paint or milk paint.
- Apply a primer when necessary: If the furniture has visible stains or is made of a laminate material, apply a primer before painting for better results.
- Use proper brushes: Purchase high-quality brushes suitable for the chosen paint type.
- Apply multiple thin coats: Instead of one thick coat, apply multiple thin coats, allowing each coat to dry before applying the next.
For additional tips and techniques, visit The Smithsonian Institution’s guidelines for furniture conservation.
In summary, chalk paint, milk paint, and acrylic paint are all viable options for antiquing furniture. Consider factors such as cost, eco-friendliness, color range, and versatility when selecting the most suitable option for your project.
With the right paint and proper application techniques, you can create a stunning antique masterpiece.
Paint Brand | Type | Description |
|---|---|---|
Chalk Paint by Annie Sloan | Chalk Paint | High-quality chalk paint with a variety of colors; perfect for giving the furniture an aged, distressed look. |
Rust-Oleum Chalked Paint | Chalk Paint | Ultra-matte finish chalk paint, perfect for antiquing furniture; available in a range of colors. |
General Finishes Milk Paint | Milk Paint | Water-based paint with a durable finish and vibrant colors; works well for furniture distressing. |
Amy Howard One Step Paint | Chalk Paint | No sanding, stripping, or priming is required; suitable for creating an aged, worn-out look on furniture. |
Fusion Mineral Paint | Mineral Paint | Reusable, environmentally friendly paint with superior adhesion and coverage; ideal for antiquing projects. |
Achieving a Vintage Aesthetic with Chalk Paint: A Tutorial
Transforming your furniture into a vintage masterpiece is easier than you might think with the help of chalk paint.
• Step 1: Choose the Right Chalk Paint
The first step to creating an antique look on your furniture is to select a suitable chalk paint. Companies like Annie Sloan and Rust-Oleum produce high-quality chalk-style paints designed specifically for creating an antique look.
You can choose from a range of colors; however, I recommend earthy tones, pastels, and muted shades for creating an authentic vintage vibe.
To find inspiration for the right color to choose, the Smithsonian Institution offers a wonderful gallery showcasing furniture styles throughout history.
• Step 2: Gather Your Supplies
Before starting your chalk paint project, you’ll need the following supplies:
- Chalk paint
- A paintbrush (preferably a natural bristle brush)
- Sandpaper (medium grit and fine grit)
- A clean, dry cloth
- Clear wax and dark wax for finishing (optional)
• Step 3: Prepare Your Piece
An essential step in achieving a satisfactory outcome is properly preparing the furniture. Begin by cleaning the surface of your piece with a damp cloth, removing any dirt or grime.
If your furniture has a glossy or shiny finish, lightly sand the surface with medium-grit sandpaper to help the paint adhere better. After sanding, wipe the surface clean with your dry cloth.
• Step 4: Apply the Chalk Paint
Now that your piece is clean and prepared, it’s time to apply the chalk paint. Shake or stir the paint well before opening the container, as some settling may have occurred.
Using a natural bristle brush, apply the paint in thin, even coats, following the grain of the wood. Chalk paint dries relatively quickly, but you should allow at least two hours between coats. I recommend applying two to three coats to achieve a smooth, even finish.
• Step 5: Distress the Piece
For an authentic antique look, you’ll want to distress the piece. This process involves strategically removing paint to create a naturally worn appearance.
Using medium-grit sandpaper, gently sand the areas of the furniture that would naturally experience wear and tear, such as edges, corners, and raised details. The amount of distressing is ultimately a matter of personal preference, but less is often more when it comes to creating a subtle aged look.
After distressing, use a clean cloth to remove any dust.
• Step 6: Apply Wax Finishes (Optional)
If desired, you can finish your piece with clear and dark waxes to add depth and protect the surface. Start by applying a thin coat of clear wax, working in small sections, and wiping away any excess with a clean cloth.
Once the clear wax has dried, you may want to apply dark wax to enhance the distressed areas and add dimension to the piece. Using a small brush or cloth, apply the dark wax to the distressed areas, and then use a clean cloth to remove any excess. Continue this process until you have achieved your desired look.
Always allow your wax to dry completely before using your furniture, ideally waiting at least 24 hours.
• Step 7: Enjoy Your Antique Piece
Congratulations, you have now transformed your furniture into an antique-looking masterpiece that will surely become a beautiful addition to your home. With chalk paint, you can create a stunning, personalized piece that exudes character and history.
Now that you know how to use chalk paint for an antique look, feel free to experiment and develop your unique style. Happy painting!
Step | Description |
|---|---|
1. Gather materials | Chalk paint, brushes, sandpaper or sanding block, clear wax, dark wax, lint-free cloth, and a drop cloth or protective covering for your work area. |
2. Clean your furniture piece | Remove any dirt, dust, or grime from the furniture using a damp cloth and mild soap. Allow the piece to dry thoroughly before proceeding. |
3. Apply chalk paint | Stir the paint well and apply it to the furniture using even strokes. Allow the paint to dry completely before applying additional coats, if desired. |
4. Sand the edges | Use fine-grit sandpaper or a sanding block to gently distress the edges, corners, and areas that would naturally show wear over time. Wipe away any sanding dust with a damp cloth. |
5. Apply clear wax | Using a clean, lint-free cloth or a wax brush, apply a thin layer of clear wax to the entire painted surface. Allow the wax to dry for 15-30 minutes. |
6. Apply dark wax | Using a separate cloth or brush, apply dark wax to the areas you wish to further antique, such as crevices, corners, and detailed areas. Remove excess wax using a clean cloth. |
7. Buff the wax | Once the wax is completely dry, use a clean, lint-free cloth to buff the surface of the furniture. This will create a smooth, durable finish. |