Indoor Paint With Texture – Feature Focused. What Pros Say
Are you looking to transform your home and add a unique touch to your walls? Indoor paint with texture might be the perfect solution you’ve been searching for. I’m here to help you discover the various options and guide you in making the best choice for your space.
Indoor paint with texture – feature focused:
Indoor textured paint, available in premixed and additive forms, enhances a room’s visual appeal by adding depth and dimension, hiding imperfections, and offering durability. Common application techniques include brushing, rolling, and stenciling. Proper selection of paint, tools, and maintenance contributes to the longevity and appearance of textured walls.

Ready to spruce up your home’s interior with textured paint? Discover how to choose the perfect texture, materials, and techniques to create stunning accent walls and eye-catching features! Read on and unleash your creativity.
Contents
- 1 Textured Interior Paint – Exploring Features
- 2 Exploring Textured Wall Paint Options
- 3 The World of Textured Paint: Terminology
- 4 Utilizing Textured Paint for Indoor Spaces
- 5 Techniques for Achieving Textured Wall Effects
Textured Interior Paint – Exploring Features
Indoor paint with texture has been in demand for many years due to its ability to enhance a room’s visual appeal and add depth and dimension to walls.
• Types of Textured Paint
There are primarily two types of textured paints to choose from, premixed and additives. To help you decide which one is suitable for your project, let’s explore each type in detail.
– Premixed Textured Paint
Premixed textured paint contains additives like silica or sand that create a texture without needing any additional components. This type of paint is commonly found in two finishes:
- Smooth Texture Paint: Best used on walls with minor imperfections since it can help to camouflage various flaws.
- Rough Texture Paint: With a thicker consistency, rough texture paint is perfect for hiding prominent cracks or uneven surfaces.
– Paint with Texture Additives
Texture additives are substances mixed with your choice of paint to give it an additional texture. Common additives include sand, textured crystals, and polymers.
• Advantages of Textured Paint
There are several benefits to using textured paint for indoor projects, including:
- Added Visual Appeal: Textured paint gives walls a unique and eye-catching appearance, complimenting various design styles.
- Hide Imperfections: Textured paint is ideal for covering cracks, seams, and uneven surfaces, providing a polished and refined appearance.
- Durability: Textured paint tends to be thicker and more resistant to wear and tear, ensuring your walls look better for longer.
• Application Techniques for Textured Paint
To achieve the desired texture, several application techniques can be used. Some popular methods include:
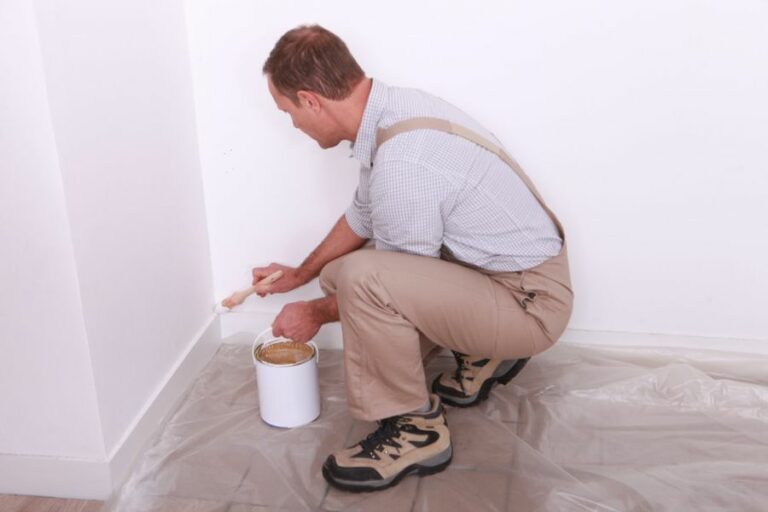
- Brushing: Using a large paintbrush, apply the textured paint on the wall using long strokes. This technique is perfect for small or medium-sized projects.
- Rolling: For larger surfaces, using a paint roller with a thick nap can help achieve a uniform texture. Numerous roller patterns are available, offering creative freedom to experiment with various textures.
- Stenciling: If you prefer a more precise and intricate texture, stencils can be placed on the wall before applying the textured paint, ensuring a patterned finish.
For more detailed information and tutorials on textured paint application methods, refer to the University of Tennessee’s articles on paint techniques.
• Recommendations for Choosing the Right Paint and Tools
To ensure the best results from your textured paint project, consider the following recommendations:
- Quality Paint: Invest in high-quality paint, as it will provide better coverage, last longer, and offer a consistent texture.
- Use the Right Tools: The application technique will dictate the type of tools needed, such as brushes, rollers, or stencils. Make sure to select the appropriate tools for the desired texture and finish.
- Determine the Required Texture: Before purchasing paint or additives, determine the type of texture you want to achieve. This will help you choose the right paint or additives for your desired finish.
- Test on a Small Surface: Before applying the textured paint to your entire wall, test it on a small, inconspicuous area to ensure it produces the desired results.
• Tips for Maintaining Textured Walls
Well-maintained textured walls can retain their beautiful appearance for several years. Here are some tips to keep in mind:
- Dusting: Regularly dust textured walls using a vacuum cleaner with a brush attachment or a microfiber cloth to remove dust and dirt.
- Cleaning: Gently clean textured walls with a mild soap and water solution. Be cautious while scrubbing, as excessive pressure can damage the texture.
- Repairs: If your textured wall sustains damage, assess the type and extent of the damage before deciding whether to call a professional or undertake the repair yourself.
• Conclusion
Indoor paint with texture offers a unique and visually appealing finish, perfect for transforming your living spaces.
By understanding the different types of textured paint available, applying the appropriate techniques, and following maintenance guidelines, you can achieve beautiful, durable, and long-lasting walls.
Remember to research and choose the right products and tools, and don’t hesitate to consult professional advice when needed. Happy painting!
Exploring Textured Wall Paint Options
As a seasoned expert in the field of painting and decorating, I have often been asked if there exists a wall paint with built-in texture. The answer is both yes and no. While there are paints specifically designed to add texture to a wall, there isn’t necessarily a paint that inherently contains texture.
That being said, let’s explore some available options and recommendations for achieving a textured paint finish.
• Textured Paints
Textured paints are formulated with added materials, such as sand, grit, or small particles, that create a rough or raised pattern on the painted surface.
These types of paints have become increasingly popular as they provide an easy way to add dimension and interest to a wall without the need for specialized techniques or tools.
– Premixed Textured Paints
Premixed textured paints, also known as “ready-mixed” or “pretextured” paints, are an excellent option for those seeking a quick and easy way to add texture to their walls.
These paints come pre-mixed with textured materials and can be applied directly to a clean, primed surface. Some popular brands of premixed textured paints include Behr, Valspar, and Homax.
– Paint Additives
For those who prefer a more DIY approach or would like to customize their textured finish, paint additives are an ideal option. These products, often available in powder or liquid form, can be mixed into any standard latex or acrylic paint to create a textured finish.
Popular additives include sand, perlite, and silica-based products.
An example of a reliable paint additive is the Rust-Oleum Paint Plus Texture Additive. This easy-to-use product allows for the customization of paint texture by adjusting the amount of additive used during mixing.
• Textured Painting Techniques
Aside from using textured paints, there are various other techniques one can employ to achieve a textured finish. Some of these methods include:
– Brush and Roller Techniques
Textured finishes can be achieved by using a combination of brushes and rollers. The key is to select the appropriate tool for the desired texture. For example, using a rough texture roller cover or a stippling brush can create a stippled texture on the wall.
– Combing
The combing technique involves using a specialty comb or wide-toothed rake to create organized patterns or lines in wet paint. This method is useful when trying to create a specific, controlled pattern on the wall.
– Ragging and Bagging
The ragging and bagging technique involves the use of a cloth or plastic bag to manipulate the wet paint on the wall. By dabbing, twisting, or rolling the material on the paint, various textured effects can be achieved.
– Sponging
This technique, as the name suggests, involves using a sponge to dab or press the wet paint on the wall. Different sizes and types of sponges can be used to create a variety of textures and patterns.
– Trowel and Spatula Techniques
Using a trowel, spatula, or similar tool, textured finishes can be created by applying joint compound, plaster, or textured paint in a variety of ways. Some popular techniques include the skip trowel, Venetian plaster, and stippling methods.
• Conclusion
In summary, while there isn’t a wall paint that inherently contains texture, there are several options available for those looking to add texture to their walls. From premixed textured paints to paint additives to a wide range of application techniques, the possibilities are endless.
As an experienced professional, I recommend exploring the various options and techniques to find the perfect paint and texture combination for your space.
The World of Textured Paint: Terminology
Textured paint, as the name suggests, is a type of paint that has a rough or textured finished surface. It is specifically designed to add dimension and depth to an otherwise flat surface.
This type of paint has grown in popularity over the years due to its ability to hide flaws and imperfections on walls and ceilings, as well as its aesthetic appeal.
• Different Types of Textured Paint
– Premixed Textured Paint
Premixed textured paint, also known as sand-textured paint or premixed sand finish, contains additives like sand, gypsum, or mica, which give the paint its textured appearance. This type of paint is ready to use and can be applied directly to your surface without any additional preparation.
Premixed textured paint is ideal for smaller projects and DIY enthusiasts, as it is easy to work with and requires less time and effort to achieve a textured finish. The DIY Network offers excellent tutorials and resources for those interested in using premixed textured paint.
– Paint with Added Texturing Agents
Another option for achieving a textured finish is to mix texture agents into standard paint. Texturing agents, such as silica sand, perlite, or gypsum, can be added to a normal paint to create a customized textured paint suited for your specific needs.
This approach allows for greater control over the final appearance of the paint, enabling you to achieve a wide range of textures and effects. When mixing texture agents with paint, follow the manufacturer’s recommendations for the correct ratio of agent to paint.
– Specialized Textured Paint Tools and Techniques
To achieve unique textures and patterns, specialized tools and techniques can be used with standard paint. The following are some examples of creative textured paint techniques:
- Stipple: A stippling brush is used to dab paint onto a surface, creating small dots or stipples. This technique is ideal for creating a subtle texture that is less obvious in its appearance.
- Combing: This technique involves dragging a comb-like tool through wet paint to create parallel lines or patterns. The comb can be notched, serrated, or have multiple rows of teeth for various effects.
- Ragging: This technique uses a cloth or rag to apply and manipulate the paint, creating a soft, textured finish.
- Sponging: Similar to ragging, a sponge is used to apply paint, generating a more dramatic and varied texture.
- Venetian Plaster: This technique involves applying multiple layers of a specialized plaster-like paint product, producing a highly polished and smooth finish with depth and character.
• Tips for Selecting and Applying Textured Paint
– Proper Surface Preparation Is Crucial
To achieve the best results with textured paint, prepare your surface beforehand by cleaning, sanding, and, if necessary, applying a coat of primer. These steps ensure a smooth, clean base for the paint to adhere to and prevent issues such as peeling, chipping, or uneven application.
– Test Your Technique Before Applying to the Entire Surface
Before committing to a specific textured paint product or technique, test your chosen method on a small, inconspicuous area. This will give you a better understanding of the technique and result, avoiding potential mistakes on a larger scale.
– Use Quality Tools and Materials
Investing in high-quality paint, texture agents, and tools can make a significant difference in the final outcome. Low-quality products can lead to unsatisfactory results, requiring additional time and effort to rectify.
Quality tools and materials will provide better coverage, ease of application, and a longer-lasting finish.
– Apply Textured Paint in Consistent Layers
When applying textured paint, be consistent in the thickness of the layers and the direction in which you apply the paint. Inconsistencies can lead to uneven or patchy results, detracting from the desired effect.
– Allow Adequate Drying Time
It is essential to allow the textured paint to dry thoroughly before applying subsequent coats, applying a clear protective coat, or placing furniture against the surface.
Drying times can vary depending on the paint used, so follow the manufacturer’s recommendations. Drying time might be extended when working with textured paint compared to standard paint.
• Conclusion
Textured paint offers an intriguing and eye-catching alternative to traditional flat paint finishes. With a variety of methods to choose from, it is an excellent way to add interest and depth to any room or project.
By understanding the different options and techniques available, as well as following recommended practices, you can successfully achieve a stunning and professional textured finish.
Utilizing Textured Paint for Indoor Spaces
Textured paint is an excellent choice for various indoor applications due to its unique properties and visual appeal.
• Benefits of Textured Paint for Indoor Use
1. Aesthetic Appeal
Textured paint adds depth, interest, and personality to walls and ceilings, helping to transform a flat surface into a more visually engaging space.
With the right technique and color choices, textured paint can create the illusion of various materials, such as stone, wood, or fabric, enhancing any room’s decorative potential.
2. Masking Imperfections
One of the key advantages of textured paint is its ability to hide small imperfections, such as cracks, dents, and nail holes.
The irregular surface created by the added texture disguises these flaws more effectively than a regular flat paint, making it an excellent choice for older homes or walls that have sustained damage.
3. Sound-Absorbing Qualities
Textured paint can also help absorb sound, making rooms quieter and more comfortable. This characteristic is particularly important in areas where noise might be a concern, such as bedrooms, home offices, or living rooms that open onto busy streets.
While textured paint won’t entirely soundproof your space, it can noticeably reduce echoes and reverberations for a more peaceful environment.
• Types of Textured Paint for Indoor Use
There are various types of textured paint on the market, each offering a unique final appearance and application method. Some popular options include:
1. Sand Texture Paint
As the name implies, sand texture paint contains small particles that create a rough, sandy finish once applied to surfaces. This type of textured paint is ideal for creating a rustic or coastal vibe in rooms. It’s a more subtle texture and can be painted over with a different color to achieve a multi-toned effect.
2. Venetian Plaster
Venetian plaster is a technique that uses layers of pigmented plaster to create a smooth, polished, and slightly textured finish. This artisanal approach can lend a luxurious, Old World feel to any space, reminiscent of the walls found in historic Italian buildings.
3. Knockdown Texture
Knockdown texture is achieved by applying paint with a trowel or spray gun, then lightly flattening the peaks of the paint with a float or knife. The result is a mottled surface with various degrees of texture depth, perfect for hiding imperfections or adding dimension to otherwise bland walls.
4. Popcorn Texture
Popcorn texture paint has a thick, stippled appearance, often used on ceilings to help mask imperfections or create visual interest. While it has fallen out of favor in recent years due to its dated appearance, it remains a viable option for those seeking an affordable and effective textured coating.
For further information on different types of textured paint and techniques, consider visiting the US Department of Energy website, where you can find resources on energy-efficient building materials and practices.
• How to Apply Textured Paint Indoors
Proper application is crucial to ensure your textured paint job looks professional and lasts for years to come. Below are the steps involved in applying textured paint to your interior walls:
1. Preparation
Before applying any paint, clean the surface thoroughly and repair any imperfections, such as holes or cracks. Apply primer if needed, and let it dry completely before moving on to the textured paint.
You may also need to protect surrounding surfaces, such as floors and trim, with drop cloths or painter’s tape.
2. Select Your Technique
Choose the textured paint technique you’d like to use and gather the necessary tools, such as rollers, brushes, trowels, or a spray gun. Familiarize yourself with the specific method you’ve chosen, and be prepared to practice your technique on a piece of scrap material before tackling your walls.
3. Application
Apply the textured paint as instructed by the chosen technique, working in small sections to ensure consistency and timely completion. For some techniques, you may need to apply multiple layers to achieve the desired texture.
4. Sealing (Optional)
In high-traffic or moisture-prone areas, such as kitchens or bathrooms, you may want to seal your textured paint with a clear coat to protect it from damage and wear. This step is not necessary for all applications but can be beneficial in prolonging the life and appearance of your textured paint.
• Conclusion
In summary, textured paint is a versatile and functional choice for indoor use, offering numerous benefits in terms of aesthetics, practicality, and sound absorption.
With the right preparation, technique, and application, you can achieve a stunning and durable result that adds depth and intrigue to your home’s interior spaces.
Question | Answer |
|---|---|
Can you use textured paint indoors? | Yes, textured paint can be used indoors to add depth, dimension, and unique aesthetic appeal to a room’s walls and ceiling. |
Techniques for Achieving Textured Wall Effects
The art of adding texture to walls can dramatically transform the appearance of any space.
• Preparing the Walls for Texture
Before adding texture to your walls, proper preparation is crucial to ensure a successful end result. Keep these steps in mind:
- Clean the walls. Remove dirt, dust, and debris by wiping the walls with a damp cloth or sponge. Allow them to dry thoroughly.
- Repair any damaged areas. Fill small holes and cracks with a premixed spackling compound or joint compound. Sand smooth when dry. For larger damages, follow this guide provided by the US Department of Housing and Urban Development.
- Remove any loose or peeling paint. Scrape away any loose paint with a paint scraper, and sand the area smoothly.
- Prime the walls. Apply a coat of primer to ensure better adhesion of the texture material and even absorption.
• Adding Texture with Paint
One simple and cost-effective way to create wall texture is by using paint.
– Combining Paint and Texture Medium
Mixing paint with a texture medium provides additional thickness and structure. These mediums are available in different varieties, from fine to coarse, allowing for various textural outcomes.
- Choose the right paint and texture medium. Water-based paints work best with water-based texture mediums. Follow manufacturer recommendations regarding ratios.
- Mix the paint and texture medium. Combine the two components thoroughly using a paint stirrer.
- Apply the mixture. Use a paint roller or a brush to apply the textured paint on the wall. Experiment with different application techniques, such as dabbing or swirling the brush, to achieve a unique look.
- Allow the paint to dry. It may take longer than usual due to the added thickness of the medium. Follow manufacturer recommendations for drying times.
– Create Texture Using Tools
Another method involves using specialized tools to create patterns and texture on painted walls while they’re still wet. Some popular tools include:
- Stipple brushes: These round, flat brushes help create a dotted, stippled texture.
- Sponges: Natural sea sponges can be used to dab wet paint, creating an organic texture.
- Combs and trowels: Run a comb or notched trowel through wet paint to produce ridges or grooved patterns.
Experiment with various tools and techniques to find the desired texture for your space.
• Adding Texture with Plaster
Plaster is widely used to create textured walls due to its versatility and durability. Several types of plaster, including Venetian plaster and joint compound, can be used to achieve different texture effects.
– Choosing the Right Plaster
Different plasters yield different results. Some popular options include:
- Venetian plaster: A lime-based plaster that produces a polished, marble-like finish.
- Joint compound: A gypsum-based compound that creates heavier textures.
– Applying Plaster Texture
Follow these steps for applying plaster texture to your walls:
- Protect your workspace. Cover any surfaces and objects with drop cloths or tarps to avoid damage from plaster splatters.
- Choose a texturing technique. There are multiple plaster application techniques, such as troweling, stenciling, and “knockdown,” which involves flattening the plaster with a drywall knife. Research each method and select the best one for your desired outcome.
- Apply the plaster. Ensure that the plaster is mixed and applied according to manufacturer recommendations. As with paint, experiment with different tools and techniques.
- Allow the plaster to dry. Follow manufacturer guidelines for drying times. This may take anywhere from a few hours to days, depending on the type of plaster and thickness of the application.
• Maintaining Textured Walls
To ensure the longevity of your textured walls, keep these tips in mind:
- Clean gently. Use a soft cloth or duster to remove dust and debris from textured surfaces. Avoid harsh scrubbing, as it can damage the texture.
- Repair damages promptly. Small cracks and chips can be repaired using a small amount of joint compound or plaster. For larger damages, refer back to the initial preparation steps.
- Reapply texture as needed. Over time, textured surfaces may lose their original appearance. Reapply texture using the same method as before, or try a new technique to refresh the space.
The methods outlined above can help you successfully create texture on your walls, dramatically enhancing the appearance of your space. With proper preparation, technique, and maintenance, your textured walls will look professional and maintain their beauty for years to come.
| How do you make a wall look like it has texture? | ||
|---|---|---|
| Method | Tools Needed | Procedure |
| Stipple Technique | Paint, paint roller, stipple brush | Apply paint with a roller, then gently press and dab stipple brush onto the wet paint. |
| Sponge Painting | Paint, sponge, paint tray | Dip a damp sponge in paint and lightly dab it onto the wall for a textured finish. |
| Color Washing | Paint, glaze, paintbrushes | Mix paint and glaze, then apply in sweeping, overlapping brushstrokes for the desired texture. |
| Rag Rolling | Paint, clean rags, paint roller | Apply a thin layer of paint using a roller, then roll a scrunched-up rag over the wet paint to create a textured pattern. |
| Applying Joint Compound | Joint compound, putty knife, paint | Smooth the joint compound onto the wall using a putty knife, creating texture as desired. Paint over the dried compound to finish. |


