How To Paint Indoor Walls For Beginners, What Pros Say
If you’ve been thinking about giving your indoor walls a fresh look but have never picked up a paintbrush before, fear not! Painting indoor walls for beginners can be an exciting yet achievable project. With a little guidance and enthusiasm, you’ll be amazed at how seamless the process is.
How to paint indoor walls for beginners:
To paint indoor walls for beginners, gather supplies such as high-quality interior paint, primer, brushes, rollers, paint tray, liner, and painter’s tape. Prepare the workspace by removing furniture, protecting the floor, cleaning walls, repairing damage, and applying tape. Prime the walls, then paint by cutting in the edges and using a roller in a zig-zag motion. Apply a second coat if needed, remove the tape, and clean up.

Ready to give your walls a fresh new look? You’ve come to the right place! Read on to learn simple methods, helpful tips, and expert advice for successfully painting your indoor walls. Transform your home like a pro, even if you’re a beginner. Keep reading – your dream interior awaits!
Contents
- 1 Beginner’s Guide to Painting Indoor Walls
- 2 A Complete Guide on the Correct Order to Paint a Room
- 3 Step-by-Step Guide to Interior Wall Painting
- 3.1 • Step 1: Choose the Right Paint
- 3.2 • Step 2: Gather Supplies and Tools
- 3.3 • Step 3: Prepare the Room
- 3.4 • Step 4: Prep the Walls
- 3.5 • Step 5: Tape the Edges
- 3.6 • Step 6: Prime the Walls
- 3.7 • Step 7: Paint the Edges (Cutting In)
- 3.8 • Step 8: Apply the Paint with a Roller
- 3.9 • Step 9: Apply Additional Coats
- 3.10 • Step 10: Remove the Tape and Clean Up
- 4 Painting Walls 101: A Guide for Newbies
- 4.1 • Preparing the Room and Yourself: The Essential First Steps
- 4.2 • Necessary Tools and Materials for a Smooth Painting Process
- 4.3 • Patching Holes and Cracks: Wall Repair Tips
- 4.4 • Masking Your Walls: The Importance of Painter’s Tape
- 4.5 • Applying Primer: The Key to a Long-Lasting Paint Job
- 4.6 • Choosing the Right Brush and Roller: Mastering the Art of Painting
- 4.7 • Painting Techniques: Creating a Beautiful and Even Paint Job
- 4.8 • Cleaning Up and Enjoying the Results
- 5 Quick and Easy Techniques for Interior Wall Painting
Beginner’s Guide to Painting Indoor Walls
Painting indoor walls can seem like a daunting task for beginners, but with the right tools, techniques, and patience, you can achieve a professional-looking finish.
• Choosing the Right Paint and Tools
Before you begin, you will need to gather the necessary supplies for your painting project. These include:
- Paint: Choose a high-quality interior paint with a finish that suits your needs (e.g., matte, eggshell, satin, or gloss). It’s a good idea to consult with a paint expert at your local home improvement store to ensure you get the right product for your project.
- Primer: A primer helps the paint adhere better to the surface and provides a more uniform finish. It is especially important to use a primer on new or porous surfaces or when changing from a dark to a light color.
- Brushes and rollers: Invest in a quality angled brush for cutting edges and a roller with an extension pole for larger wall areas. For smooth surfaces, choose a short-nap roller, while a long-nap roller is better suited for textured surfaces.
- Paint tray and liner: A tray with a liner will make clean-up easier and allow you to switch between colors easily.
- Painter’s tape: Use painter’s tape to protect trim, baseboards, and other adjacent surfaces from accidental paint splatters.
• Preparing the Walls and Workspace
To ensure a smooth and flawless paint job, it’s important to prepare your walls and workspace before painting properly.
- Remove furniture and protect the floor: Clear the room of furniture, or move it to the center and cover it with a drop cloth. Place a drop cloth, plastic sheet, or old newspaper on the floor to catch any drips or spills.
- Clean the walls: Remove any dirt, dust, or grease from the wall surface using mild detergent and warm water. Allow the walls to dry completely before proceeding.
- Repair wall damage: Fill any holes, cracks, or dents in the wall with a patching compound or spackling paste. Once dry, sand the repaired areas smoothly and wipe away any dust.
- Tape off trim and other areas: Apply painter’s tape to the edges of trim, baseboards, and any other surfaces you don’t want to paint accidentally.
• Priming the Walls
If you have chosen to use a primer, now is the time to apply it.
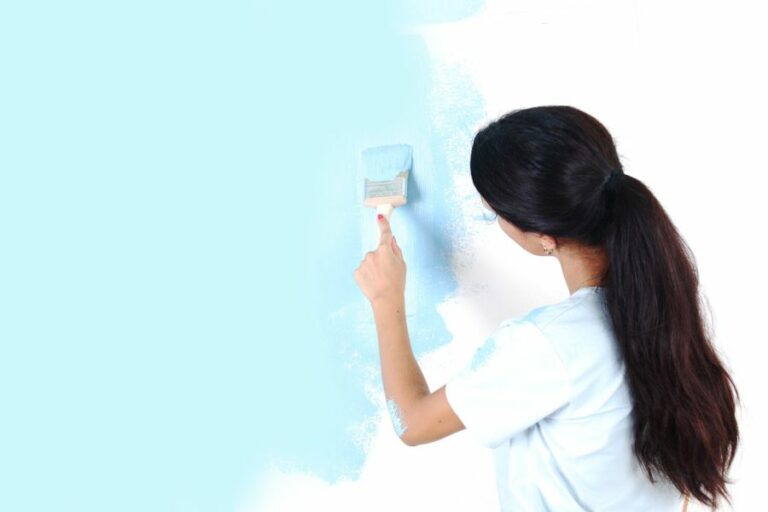
- Cut in the edges: With your angled brush, carefully paint along the edges of the wall where it meets the tape, trim, or adjacent surfaces. This creates a clean border for the rest of the wall.
- Roll the primer: Dip your roller in the paint tray and roll off excess onto the tray’s ridges. Start in a corner of the wall and using a zig-zag motion, roll the primer onto the wall in sections, making sure to overlap the brushed edges.
- Allow to dry: Follow the manufacturer’s recommended drying time before applying your paint color.
• Painting the Walls
It’s finally time to bring some color to your walls.
- Mix the paint: Stir your paint thoroughly with a paint stirrer, making sure to mix any settled pigments or liquids.
- Cut in the edges: Just as you did with the primer, use your angled brush to paint along the edges of the wall carefully.
- Roll the paint: Load your roller with paint and roll off the excess before applying it to the wall. Use a zig-zag motion to apply the paint in sections, making sure to overlap the brushed edges.
- Second coat: After the paint has dried according to the manufacturer’s recommendations, check for any uneven areas and apply a second coat of paint if necessary. Remember to cut in the edges again before rolling.
- Remove the tape: Once the paint is completely dry, carefully remove the painter’s tape to reveal your crisp, clean edges.
• Cleanup and Enjoy Your New Space
Congratulations! You have successfully painted your indoor walls. Make sure to:
- Clean your brushes and rollers by washing them thoroughly with warm, soapy water or according to the manufacturer’s instructions.
- Dispose of any used paint cans, trays, and liners responsibly. Consult your local waste disposal guidelines for proper disposal methods.
- Return your furniture to the room, step back, and admire your freshly painted walls.
By following these expert tips and taking your time, you can transform your indoor space with a professional-quality paint job. For more detailed information on painting techniques, check out this comprehensive guide from This Old House. Happy painting!
Step | Description |
|---|---|
1 | Gather materials such as paint, brushes, rollers, drop cloths, painter’s tape, and a ladder. |
2 | Prepare the room by moving furniture, covering floors with drop cloths, and removing wall decorations. |
3 | Use painter’s tape to protect baseboards, doorframes, and window sills from paint. |
4 | Repair any cracks, dents, or imperfections on the wall by filling them with spackle and sanding them smooth once dry. |
5 | Wipe the walls clean with a damp cloth to remove dust and debris. |
6 | Apply a coat of primer to walls if necessary, particularly if you are covering a darker color or if the wall has never been painted before. |
7 | Open and stir the paint, then pour some into a paint tray. Dip a roller into the paint and start applying paint on the wall using an “M” or “W” pattern. |
8 | Use an angled brush to paint the edges and corners of the wall that the roller cannot reach. |
9 | Allow the paint to dry for at least a few hours, then apply a second coat if needed. |
10 | Once the paint has dried, carefully remove the painter’s tape and reattach wall decorations if desired. |
A Complete Guide on the Correct Order to Paint a Room
• Overview
As a seasoned painting professional, I’ve encountered countless clients who ask: “What is the correct order to paint a room?”. In this comprehensive guide, you’ll find the answer to that question, as well as expert tips and recommendations to ensure a smooth and flawless paint job.
It doesn’t matter if this is your first time holding a paintbrush or if you’re a long-time DIY enthusiast; this guide includes something for everyone.
• Choosing Paint and Supplies
Before diving into the correct order of painting a room, it’s essential to select the right paint and supplies. High-quality paint and materials can make a significant difference in the final result of your paint job. I recommend considering the following factors:
- Room Size
- Surface Material
- Desired Paint Finish
- Paint Durability
These factors can help you choose the most suitable paint for your room. Additionally, make sure to gather your supplies, including paintbrushes, rollers, tape measure, drop cloths, painter’s tape, and a ladder, before you begin painting.
• Prepping the Room
– Clear and Cover Furniture
The first step in painting a room is to remove any obstacles that may hinder your progress. This includes taking down artwork, window treatments, and outlet covers. Move any furniture to the center of the room or remove it from the space entirely if possible. Cover the remaining furniture and the floor with drop cloths to protect them from paint splatters.
– Clean and Repair Walls
Next, clean the walls to remove any dust, debris, or cobwebs. Fill any holes or cracks with spackling paste and sand them down for a smooth finish. If you’re working with wallpapered walls, remove the old wallpaper before painting. Lastly, use painter’s tape to protect surfaces you don’t want to paint, like light switches and baseboards.
• Priming the Walls
Applying a primer is an essential step, especially for new surfaces or surfaces with significant color changes. A primer ensures an even coat of paint, prevents stains from bleeding through, and increases paint adhesion. Use a brush to cut in around the edges and a roller to cover the larger surface areas.
Allow the primer to dry thoroughly, as recommended by the manufacturer.
• Correct Order of Painting a Room
1. Ceiling
Starting with the ceiling allows you to address any paint drips or errors that may occur on the walls below without disrupting your work. Using an extension pole for your roller makes the process easier and more efficient.
Expert Tip: Paint the ceiling in two directions. First, move the roller across the shorter width of the room, then cover the remaining area by rolling along the longer length. This technique ensures you cover all areas evenly and helps to eliminate roller marks.
2. Walls
After the ceiling has dried, you can begin painting the walls. Start by cutting around the edges of the walls with a brush. This includes areas along the ceiling, baseboards, door frames, and window sills, which are challenging to cover with your roller.
Next, apply paint to the larger wall surfaces using a roller. Paint in a “W” or “M” pattern to ensure even coverage, overlapping previous strokes slightly.
Allow the first coat of paint to dry and, if necessary, apply a second coat for full coverage.
3. Doors and Windows
Once the walls are dry, move on to painting the doors and windows. Use a brush for door frames, window frames, and casings. Start at the top and work your way down to ensure even coverage.
4. Baseboards, Trim, and Molding
Finally, paint the baseboards, trim, and molding. Use a brush, applying paint in a horizontal fashion, ensuring you have a steady hand to avoid dripping onto the freshly painted walls.
Expert Tip: When painting trim or molding, it’s best to start with the longest piece and work your way toward the shorter ones.
• Cleanup and Final Touches
Once all of the paint is dry, carefully remove the painter’s tape and reattach any outlet covers, artwork, or window treatments. Return your furniture to its original position, and you’re all set.
Following the correct order of painting a room as outlined in this guide guarantees a successful and flawless paint job. With these expert tips and recommendations, your freshly painted room will look stunning and last for years.
Step-by-Step Guide to Interior Wall Painting
Painting interior walls can refresh and transform your living space. Done correctly, it is an inexpensive way to modernize your home or change it to suit your desired design aesthetic. Here is a comprehensive guide, broken down into steps, on how to paint your interior walls like a pro.
• Step 1: Choose the Right Paint
When painting interior walls, you need quality paint that will last longer and won’t peel over time. With various finishes, colors, and quality levels available, it is essential to research your options.
A reliable resource from This Old House provides useful insights when selecting the best paint for your needs, from budget to durability.
• Step 2: Gather Supplies and Tools
Before beginning the project, make sure you have all the necessary tools and materials, including:
- Paint roller
- Roller cover
- Roller tray
- Paint brush (angled is best for cutting in)
- Painters tape
- Drop cloths
- Paint (use a paint calculator to determine how much you need)
- Ladder
- Stir sticks
- Sandpaper
- Spackle
- Putty knife
- Damp cloth
- Gloves and protective eyewear
• Step 3: Prepare the Room
Before starting, remove all furniture or move it to the center of the room and cover it with drop cloths. Remove outlet covers and switch plates, and tape over electrical sockets.
Protect any fixtures that cannot be removed, like chandeliers or ceiling fans, by wrapping them in a plastic bag and sealing the top with tape.
• Step 4: Prep the Walls
Examine the walls for cracks, holes, or imperfections. Fill them with spackle using the putty knife, and let it dry according to the manufacturer’s instructions. Once dry, sand the patched areas with sandpaper to create a smooth surface. Wipe down the walls with a damp cloth to remove dust and dirt.
• Step 5: Tape the Edges
Using painter’s tape, mask off the areas where the walls meet the ceiling, floor, and adjacent surfaces that should not get painted. Press down firmly on the edges of the tape to create a seal and prevent paint from seeping underneath.
• Step 6: Prime the Walls
Priming the walls before painting creates a clean, uniform canvas and ensures proper adhesion. Some paints include primer, but if not, choose a primer that is compatible with your selected paint. Apply the primer with a roller or brush, allowing it to dry completely.
• Step 7: Paint the Edges (Cutting In)
Start the painting process by cutting in the edges. Use an angled brush to paint a three-inch wide strip along the edges of the walls where they meet the ceiling, floor, and adjacent surfaces. This process prepares the area for the paint roller and minimizes visible brush strokes.
• Step 8: Apply the Paint with a Roller
Pour paint into the roller tray, and load the roller by rolling it back and forth in the shallow section. Begin in one corner of the wall and work in a “W” or “M” pattern, making sure to overlap each section as you progress. Avoid applying too much pressure on the roller to prevent streaks and ridges.
• Step 9: Apply Additional Coats
Let the first coat dry according to the manufacturer’s recommendations, usually 2-4 hours. Check the wall for any imperfections or areas where the primer may still show through. If necessary, lightly sand and clean the wall, and then apply a second coat.
For a smooth finish, use the same painting technique as before.
• Step 10: Remove the Tape and Clean Up
After the final coat is dry, carefully remove the painter’s tape by slowly pulling it back on itself at a 45-degree angle. If the paint has slightly bled under the tape, carefully use a razor blade to score the paint line before removing the tape.
Finally, clean up by disposing of used materials, cleaning brushes and rollers, and replacing light switch plates and outlet covers.
With these steps, your walls should be beautifully transformed. Enjoy your freshly painted space, and remember these expert tips for your next painting project.
Step | Description |
|---|---|
Step 1 | Choose the paint color and finish. |
Step 2 | Gather necessary materials, such as paint, brushes, rollers, drop cloths, painter’s tape, and a ladder. |
Step 3 | Prepare the room by moving furniture, covering floors and fixtures with drop cloths, and removing or protecting any outlet and switch covers. |
Step 4 | Clean the walls by wiping them down with a damp cloth, and patch any holes or imperfections with spackling, then sand smooth once dry. |
Step 5 | Use painter’s tape to protect baseboards, trim, and other surfaces you don’t want to paint. |
Step 6 | Prime the walls if necessary, especially if you are covering a dark color or if the wall has stains. |
Step 7 | Begin painting by cutting in around the edges and the trim with a brush. |
Step 8 | Use a roller to paint the main surface of the wall in a “W” or “N” pattern, then fill in the gaps, maintaining a wet edge to avoid streaks and lap marks. |
Step 9 | Allow the paint to dry for the recommended time, and apply a second coat if necessary. |
Step 10 | Once the paint is dry, carefully remove the painter’s tape, install outlet and switch covers, and return the furniture to its original position. |
Painting Walls 101: A Guide for Newbies
• Preparing the Room and Yourself: The Essential First Steps
Before diving into the painting process, the initial step is to prepare the room and yourself. It is important to remove furniture and delicate items from the area or cover them with a drop cloth.
Preparing the room also involves protecting the floor by laying down a heavy-duty canvas or plastic drop sheet.
I highly recommend dedicating some time to clean the walls before applying paint. A simple solution of water and mild detergent will be effective in removing any dust, dirt, or stains.
Safety is crucial. Make sure you are wearing appropriate clothing to avoid any paint splatters and ensure that you have proper ventilation in the room while painting.
• Necessary Tools and Materials for a Smooth Painting Process
Having the right tools and materials can make the process easier and improve the results. Here is a list of essentials:
- Paint
- Primer
- Paint trays
- Paint rollers
- Paint brushes (various sizes)
- Painter’s tape
- Drop cloths or sheets
- Ladder or step stool
- Paint stirrer and can opener
- Sandpaper (optional for smoothing surfaces)
- Wall repair materials (if necessary)
Take your time to choose the right paint finish for your project. Beginners can benefit from using paint-and-primer-in-one products, saving time and effort.
• Patching Holes and Cracks: Wall Repair Tips
Before painting, it is essential to repair any dents, holes, or cracks in your walls. Depending on the damage, you can use spackle, joint compound, or a more robust patching material. After applying the filling compound, use a putty knife to smooth it out and remove excess material.
Allow the patched area to dry completely before sanding it down with fine-grit sandpaper. Wipe clean any dust before moving to the next step.
• Masking Your Walls: The Importance of Painter’s Tape
Applying painter’s tape is crucial for achieving professional results. The tape should be placed on every edge or surface where you want to prevent paint from reaching, such as moldings, trim, and electrical outlets.
When applying painter’s tape, ensure the edges are evenly aligned and straight, and press down firmly to create a smooth seal. This way, you can avoid paint bleeding under the tape, resulting in clean and crisp lines.
• Applying Primer: The Key to a Long-Lasting Paint Job
Primer is crucial in providing an even, long-lasting paint finish. For most projects, one coat of primer is sufficient. Use a roller for larger areas and a brush for cutting around edges and corners.
Allow the primer to dry fully according to the manufacturer’s recommendations before starting with the paint.
• Choosing the Right Brush and Roller: Mastering the Art of Painting
Selecting the appropriate brush and roller will greatly impact your painting outcome. For smooth and flat surfaces, use rollers with short nap lengths, while thicker naps are apt for textured surfaces.
For brushes, synthetic bristles work best with water-based paints, while natural bristles are ideal for oil-based paints. It is advisable to keep multiple brush sizes on hand for diverse areas and edges.
• Painting Techniques: Creating a Beautiful and Even Paint Job
Before beginning, mix the paint thoroughly with a stirrer. For uniform color and consistency, blend all cans of paint in a large bucket.
– Cutting In
“Cutting in” refers to painting those areas where rollers cannot reach, such as corners, edges, and around trim. Use a high-quality brush with a tapered edge for precise control. Hold the brush like a pencil, dip it into the paint, and carefully apply it along the edges.
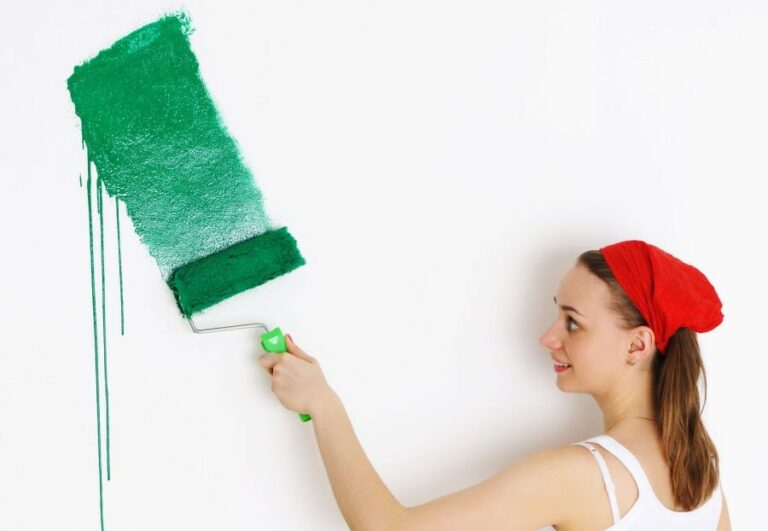
– Rolling
To begin, saturate the roller by rolling it back and forth over the paint tray. Remove excess paint and then work in a “W” or “M” pattern, distributing the paint evenly across the wall. Continue to paint in small sections, blending the edges to maintain a uniform finish.
– Adding Additional Coats
After allowing the first coat of paint to dry, check for complete and even coverage. If necessary, apply additional coats, following the same techniques as before.
• Cleaning Up and Enjoying the Results
Once you’ve completed your paint job, carefully remove the painter’s tape before the paint has completely dried to avoid peeling it away with the tape. If any minor touch-ups are necessary, use a small brush to make adjustments.
To maintain and clean painted walls, a simple solution of water and mild detergent, as mentioned earlier, can be used periodically. This will keep the walls looking fresh and extend the longevity of the paint.
With proper preparation, correct tools, and helpful techniques, you can transform any space with a beautiful and professional-looking paint job. Good luck, and enjoy your refreshed walls!
Quick and Easy Techniques for Interior Wall Painting
Painting the interior walls of your home can be a daunting task, especially if you’re pressed for time. However, there are numerous tips and techniques that can help you save time and achieve a professional finish.
• Preparing the Room
Before you begin painting, proper preparation is essential to ensure a smooth process and professional results.
– Clear the Space
Remove all furniture, decorations, and electrical outlet covers from the room. Alternatively, place furniture in the center of the room and cover it with plastic sheets or drop cloths to protect it from paint splatters.
– Clean the Walls
Wipe down the walls with a damp cloth to remove any dust, dirt, or grime. This ensures that the paint adheres properly to the surface. For more information on cleaning walls, visit the EPA’s guide on maintaining good indoor air quality.
– Repair Any Imperfections
Fill in any holes or cracks with a high-quality filler. Once the filler is dry, sand the area until it is smooth and flush with the rest of the wall.
– Protect Surfaces
Use painter’s tape to protect baseboards, trim, and adjacent surfaces from accidental paint splatters or brush strokes.
• Choosing the Right Tools and Materials
Selecting the proper tools and materials can be the difference between a quick and easy paint job and a frustrating experience.
– Select Quality Paint
Choose a high-quality paint that offers good coverage and durability. A paint and primer in one can save time and effort by eliminating the need for a separate primer coat.
– Use the Right Brushes and Rollers
Invest in quality brushes and rollers to ensure a smooth and even paint application. A 2 to 2.5-inch angled brush is suitable for cutting in, while a 9-inch roller works well for larger wall areas.
– Opt for an Extension Pole
An extension pole allows you to reach higher wall sections without the need for a ladder, speeding up the painting process.
• Painting Techniques for Speed and Efficiency
Utilizing proper painting methods can help to expedite the process while producing a flawless finish.
– Roll the Walls Before Cutting In
Begin by applying paint to the main areas of the wall with a roller. This allows for a quicker overall process, as you can then cut in the edges and corners with a brush while the rolled paint is still wet, preventing visible lines or streaks.
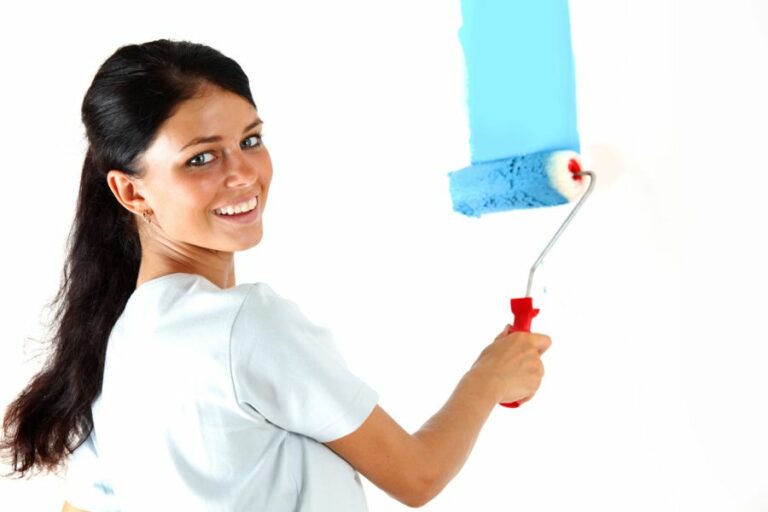
– Use the “W” Technique
When applying paint with a roller, use a “W” pattern to distribute the paint evenly across the wall. Fill in the “W” by rolling up and down, ensuring the paint is applied smoothly and consistently.
– Cutting In Efficiently
When cutting in, it’s essential to work quickly to avoid creating visible lines along the edges of the wall. Hold your brush at an angle, and apply paint in long, steady strokes. This will allow you to achieve a clean, sharp edge along baseboards and trim.
• Cleaning Up and Inspecting the Finished Results
Once you’ve completed the painting process, it’s vital to clean up and inspect the walls to ensure the best possible result.
– Remove Painter’s Tape Carefully
When removing the painter’s tape, pull it off at a 45-degree angle to produce a clean, straight line.
– Inspect the Walls for Flaws
Examine the walls for any imperfections, such as missed spots or uneven paint application. Touch up any areas that require attention using a small brush.
– Clean and Store Your Tools
Properly clean and store brushes, rollers, and other tools used during the painting process. This will extend their lifespan, ensuring they are ready for future projects.
By following these tips and techniques, you can quickly and easily paint the interior walls of your home, achieving professional results with minimal effort. Armed with these recommendations, you can transform your living space and enjoy a freshly painted, beautiful interior.