Pro Tips For Indoor Painting Beginners, 25 Things You Should Know
Diving into the world of indoor painting can be overwhelming for beginners, but fear not. I’ve got you covered! With my pro tips, you can easily navigate your first painting project like a pro. From selecting the right tools to mastering different techniques, we will help you transform your space into a work of art.
Pro tips for indoor painting beginners:
Pro tips for indoor painting beginners include selecting the right paint color using swatches and online tools, investing in quality paint and equipment, preparing the work area, taping off areas, applying primer, mixing and thinning paint, cutting in and rolling for even coverage, drying and recoating, and performing cleanup and touch-ups for a professional finish.

Excited to start your indoor painting project but unsure where to begin? I’ve got you covered! Read on to discover pro tips for beginners, including preparation, technique, and cleanup advice designed to help you achieve the professional results you’ve always wanted. Don’t miss out!
Contents
- 1 Expert Advice for Novice Indoor Painters
- 2 Mastering the Art of House Interior Painting
- 3 Quick Room Painting Techniques from Professionals
- 4 Step-by-Step Guide to Paint Your Home’s Interior
- 5 Preparations to Make Before Painting Any Room
Expert Advice for Novice Indoor Painters
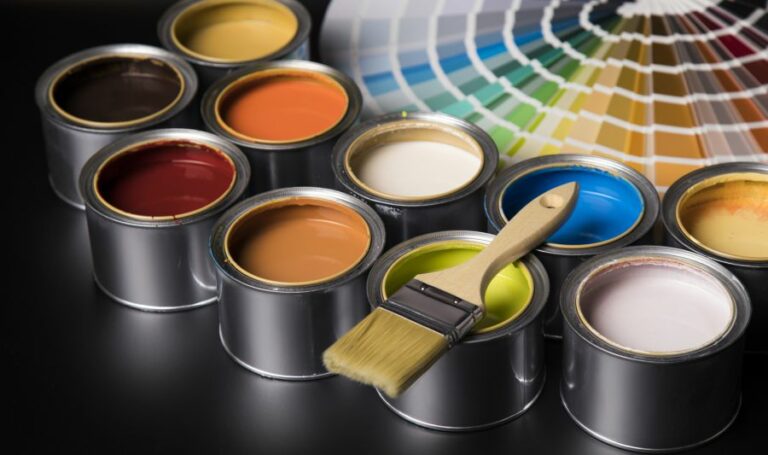
• Choose the Right Paint Color
Selecting the perfect paint color is a crucial step in the painting process. I recommend using sample swatches and testing patches on your walls before committing to an entire paint job. This will give you an accurate representation of how the color will look in your space.
You can also use online tools like Behr’s ColorSmart to test colors virtually.
• Quality Paint and Equipment
Investing in high-quality paint and equipment is essential for a professional-looking finish. Quality paint will provide better coverage and be more durable. I recommend using quality paint designed for indoor use, such as low VOC (Volatile Organic Compounds) paint.
Furthermore, durable tools like a sturdy paintbrush, roller, and paint tray are essential. A paint roller extension pole is also useful for reaching high areas.
• Prepare Your Work Area
Before starting your painting project, it’s vital to prepare your work area. Remove any furniture or items from the room, or push them to the center and cover them with drop cloths. Don’t forget to protect your floors with drop cloths as well.
To avoid unsightly gaps or rough edges, fill any holes or cracks in your walls with a suitable filler. A light sanding with fine-grit sandpaper will give your walls a smoother finish. Finally, clean your walls with a damp cloth or sponge to remove any dust and debris.
• Tape Off Areas
Taping off areas like windows, door frames, and trim can save time and ensure a cleaner finish. Use painter’s tape to create a barrier between the surfaces you want to paint and those you wish to protect. Make sure the tape is securely attached to the surface to prevent any paint bleeding.
• Primer Application
Priming your walls before applying paint ensures better paint adhesion and can save you time and money in the long run. A quality primer can also help mask imperfections in your wall, creating smoother paint application.
Once your walls are prepped, apply the primer using a roller or brush. Follow the manufacturer’s instructions for drying time, and don’t rush to paint over it.
• Mixing and Thinning Paint
To achieve an even and consistent color throughout your room, mix all your paint together in a large container before starting. This eliminates any slight color variations between individual cans of paint.
Some paints may require thinning for proper consistency. Check the manufacturer’s instructions for thinning paint, and adjust the consistency accordingly using water or the appropriate paint thinner.
• Cutting in and Rolling
Cutting in involves painting edges or corners where a roller can’t reach. Use a high-quality angle brush to create a straight line between the wall and the trim or other adjacent surfaces. I recommend starting in a corner or at the top of a wall, then working your way down.
Once your cutting-in is complete, use a roller to fill in the remaining wall space. Roll the paint in a “W” or “M” pattern to ensure even coverage, then fill in the gaps with horizontal strokes. Make sure to overlap the cut-in areas slightly to blend the brush and roller marks.
• Drying and Recoating
Allow the paint to dry thoroughly before applying any additional coats. Dry times vary based on factors like temperature and humidity, but always follow the paint manufacturer’s guidelines. Remember, patience is key here; rushing can lead to an unsatisfactory finish.
When applying additional coats, lightly sand the surface between coats to ensure better adhesion and a smoother final result.
• Cleanup and Touch-ups
After completing your painting project, take the time to remove the tape, clean up any spills or drips, and put everything away. Store leftover paint in a sealed container for future touch-ups.
Inspect your freshly painted walls for any imperfections, and use a small brush to touch up areas where the paint may have bled or not fully covered.
By following these pro tips for indoor painting beginners, your painting project will feel less overwhelming, and you’ll achieve a professional-looking result in no time. Happy painting!
Mastering the Art of House Interior Painting
• Preparation is Key
Before you start painting, it’s essential to prepare the area thoroughly. This will ensure a smooth, professional finish and will help prevent any issues during the painting process. Here’s what you need to do:
- Clear the room: Remove furniture or place it in the center of the room and cover it with plastic drop cloths. This will protect your belongings from paint splatters.
- Clean the walls: Use a sponge and warm soapy water to remove dirt, grime, and any other contaminants from the surface. Allow the walls to dry completely before moving on to the next steps.
- Repair any defects: Fill in cracks, nail holes, and other imperfections using a spackling compound, a putty knife, and fine-grit sandpaper. Once the repairs have dried, sand the area smoothly and remove any excess dust with a clean cloth.
- Tape-off areas: Use painter’s tape to protect any areas that you don’t want to be painted, such as trim, molding, and outlets. Press the tape firmly against the surface to ensure a tight seal.
- Prime the walls: If you’re painting over a dark color or new drywall, it’s crucial to apply a primer before painting. This will help the paint adhere better and improve its coverage. Opt for a high-quality primer, as it can make a significant difference in the final result.
• Choose the Right Paint and Tools
Selecting the appropriate paint and tools is essential for achieving a professional paint job. Here are some tips to help you make the right choices:
- Choose the paint: Consider factors such as room size, light exposure, and existing color when selecting a paint color. Use a satin or semi-gloss finish in high-traffic areas like kitchens or bathrooms, while a flat or matte finish is suitable for bedrooms and living areas.
- Calculate the required amount of paint: To avoid running out of paint halfway through your project, or purchasing too much, use a paint calculator available on most paint company websites.
- Invest in quality brushes and rollers: High-quality brushes and rollers will provide excellent coverage and a smoother finish.
- Select the right roller nap: The roller’s nap determines the amount of paint it holds and how smoothly it’s applied. A 3/8-inch nap is suitable for most surfaces, while a 1/2-inch nap is ideal for textured surfaces.
- Gather other necessities: In addition to paint, brushes, and rollers, you’ll need a paint tray, drop cloths, a ladder or step stool, and a paint can opener.
• Master the Painting Techniques
Achieve that professional finish by following these best practices:
- Mix your paint: To ensure color uniformity, mix all cans of paint together in a large container.
- Cut in first: With a 2-inch angled brush, apply paint along the edges of the walls, trim, and ceiling. This technique, called “cutting in,” will help create a crisp, clean finish.
- Use the “W” technique: Dip the roller into the paint and remove any excess by rolling it on the ridges of the paint tray. To distribute paint evenly, start by applying it in a “W” shape, then fill in the remaining areas with parallel strokes. Maintain consistent pressure and avoid overloading the roller with paint.
- Apply multiple coats: For an even, well-covered finish, apply at least two coats of paint. Be sure to let each coat dry according to the manufacturer’s instructions before starting the next one.
- Maintain a wet edge: To avoid visible lap marks or streaks, always maintain a wet edge while painting. This means starting at an unpainted area and working back into the wet paint.
- Paint trim last: Begin with the ceiling, followed by the walls, and finish with the trim. Use painter’s tape, if needed, to protect wall surfaces when painting the trim.
• Cleanup and Finishing Touches
Once your painting project is complete, follow these steps for a clean, polished appearance:
- Remove painter’s tape slowly: Pull the tape off at a 45-degree angle and replace any outlet covers or fixtures.
- Clean brushes and rollers: Use warm, soapy water to clean brushes, and follow the recommended method for cleaning rollers based on the type of paint you use.
- Touch up any imperfections: If you notice any minor flaws or missed spots, use a small brush to do touch-ups.
With proper preparation, the right tools and materials, and careful attention to detail, you can paint your house interior like a pro. Remember that practice makes perfect; the more you paint, the more confident and skilled you’ll become. So, grab your brush and get started on your next painting project!
Quick Room Painting Techniques from Professionals
Painting a room can be a daunting task, especially if you’re a beginner or pressed for time. However, by adhering to several tips and tricks, you can achieve professional results and complete the job much faster.
• Gather All Necessary Materials
Before starting any painting project, it’s essential to gather all the necessary tools and materials. This will save you considerable time and effort. Here is a list of items you’ll need:
- Paint
- Primer
- Paint roller and an extension pole
- Angled paintbrush
- Paint tray
- Stir stick
- Paint can opener
- Painter’s tape
- Drop cloth
- Ladder
- Sandpaper
- Cleaning supplies (cloth, sponge, and vacuum cleaner)
- Putty knife and spackle
- Step stool (if necessary)
• Prepare the Room
Before diving into the painting process, it’s crucial to prepare your workspace. [
- Remove furniture and other items: Clear the room of furniture, curtains, and wall hangings. If some items cannot be removed, cover them with plastic sheeting or drop cloths to prevent paint splatters.
- Clean the walls: Using a sponge or cloth, clean the walls with a mixture of mild soap and water. This step is essential to remove any dirt, dust, or debris that may hinder the paint from adhering properly. Allow the walls to dry completely before moving on to the next step.
- Repair any imperfections: Inspect the walls for cracks, holes, or other damages. Use a putty knife and spackle to fill any imperfections, then sand the area smoothly with sandpaper. Check out this guide from Bob Vila for detailed instructions on repairing wall damages.
- Protect trim and other surfaces: Apply painter’s tape along baseboards, window frames, and other areas you do not want to be painted. Make sure the tape is pressed down firmly to prevent paint from seeping underneath.
• Prime and Paint
Now that your room is prepped and ready, it’s time to start priming and painting. Following these steps will ensure a professional quality finish.
- Select the right paint and primer: It’s crucial to choose high-quality paint and primer for your project. Good quality products will adhere better, provide a smoother finish, and last longer. Also, make sure to choose the appropriate sheen (matte, eggshell, satin, semi-gloss, or gloss) depending on your desired outcome.
- Start with priming: Priming is an essential step, especially if you’re painting over a darker color or covering imperfections. Apply primer with a roller, cutting in along the edges with an angled brush. Be sure to follow the recommended drying time on the primer’s label.
- Mix paint thoroughly: Use a stir stick to mix your paint well, which will ensure the paint’s consistency and color. If using multiple cans of the same color, pour them into a larger container and mix them together to guarantee an even hue.
- Use the right techniques: Start by painting the edges and corners with an angled brush. Next, use a roller to paint the larger wall surfaces in a “W” or “M” pattern. This technique helps to distribute the paint evenly without leaving roller marks.
- Establish a system for efficiency: To ensure a faster process while still achieving professional results, paint one wall at a time. By focusing on one area, you can avoid the need for constant ladder adjustments, making your work more efficient.
- Apply multiple coats: Two thin coats of paint are better than one thick coat. The first coat may not fully cover the previous color or imperfections. Allow the paint to dry between coats, following the manufacturer’s recommendations.
- Clean up and remove tape: Once the final coat is dry, carefully remove the painter’s tape. Use a damp cloth to clean up any paint drips or smudges.
• Final Touches and Clean-up
Now that the painting is complete, it’s time to put the room back together.
- Reinstall fixtures and furniture: Carefully rehang curtains and wall art, and reinstall electrical outlet covers. Move the furniture back into position, being mindful of the freshly painted walls.
- Clean and store painting supplies: Thoroughly clean brushes, rollers, and other tools, following proper cleaning guidelines, and store them for future use.
- Dispose of paint responsibly: Never pour unused paint down the drain or throw it in the trash. Check local ordinances or earth911.com to find the correct paint disposal and recycling options near you.
By following these steps and recommendations, you can achieve professional painting results while maintaining efficiency. Your freshly painted room will look fantastic, and you’ll have completed the project without breaking a sweat!
Steps | Description |
|---|---|
1. Prepare the room | Remove all furniture, cover the floor with drop cloths, and clean the walls and baseboards. |
2. Choose the right tools | Select high-quality brushes, rollers, and paint for a smoother and faster painting process. |
3. Tape off the edges | Use painter’s tape around windows, door frames, and baseboards to protect them from paint drips and achieve clean lines. |
4. Prime the walls | Apply a coat of primer to the walls to ensure better paint adhesion and coverage, especially when painting over dark colors. |
5. Cut in the edges | Paint along the edges and corners of the room with a brush before using a roller on the larger areas. |
6. Use a paint roller | Fill in the larger areas with a paint roller, working in “W” or “M” shaped patterns to ensure even coverage. |
7. Apply multiple coats | Allow the first coat of paint to dry according to the manufacturer’s recommendation, then apply a second coat for better coverage and durability. |
8. Clean up | Remove painter’s tape, clean brushes, and rollers, and replace any furniture and decor in the room. |
Step-by-Step Guide to Paint Your Home’s Interior
Painting the inside of your house can be a daunting task, especially for those who have little to no experience in home improvement.
• Preparation: Give Yourself a Clean Slate
– Clear the Space
Before you start painting, make sure to clear your space by removing all furniture, curtains, and wall decorations. If you can’t remove some large furniture pieces, move them to the center of the room and cover them with a drop cloth. This will protect your valuable items from paint drips and spills.
– Clean the Walls
A clean surface is essential for a smooth, even paint job. First, use a vacuum cleaner with a brush attachment to remove any dust and cobwebs from the walls. Next, mix a solution of warm water and mild detergent and use a sponge or cloth to wipe down your walls.
This will remove stains, dirt, and grease, which can prevent paint from adhering properly. Allow the walls to dry completely before proceeding.
– Repair Damaged Surfaces
Inspect the walls for any cracks, holes, or other imperfections. Use a putty knife and spackle to fill in small holes or cracks. For larger repairs or drywall damage, consider hiring a professional, as these issues can be difficult to fix correctly without the necessary expertise.
– Protect Your Floors and Trim
Lay down drop cloths on your floors to protect them from paint drips and spills. Use masking tape to protect trims, baseboards, and other surfaces you don’t want to paint. Make sure the tape is pressed firmly into place to prevent paint from seeping beneath it.
• Choose Your Paint and Supplies: The Key to a Professional-Looking Paint Job
– Choose the Right Paint
There are numerous paint types and finishes available, so be sure to choose the one that best suits your needs. A useful resource for understanding the various types of paint is the website of The Paint Quality Institute.
It has a wealth of information on paint formulations and best practices for application. Most rooms in your home will benefit from water-based paint with a satin or eggshell finish, as these finishes offer a nice balance of durability and an attractive appearance.
– Gather Your Supplies
To achieve a professional-looking paint job, you’ll need the following supplies:
- High-quality synthetic-bristle brushes (2-3 inches wide)
- A paint roller with an extension pole
- A roller cover with the appropriate nap (thickness) for your paint type and the texture of your walls
- A paint tray and liners
- A step ladder or platform, if needed
- A putty knife and spackle (for prep work)
- A stir stick and paint can opener
- Masking tape and drop cloths (as mentioned earlier)
• Time to Paint: Achieve a Flawless Finish with Proper Technique
– Prime Your Walls
Priming is a crucial step that ensures the best possible paint adhesion and increases the durability of your paint job. Applying a coat of primer will also help conceal any repairs and provide a more even and uniform color across your walls. Allow the primer to dry according to the manufacturer’s instructions.
– Mix Your Paint
Stir your paint thoroughly, making sure there are no lumps or inconsistencies. Use a paint stick or a drill with a mixing attachment. If using multiple cans of paint of the same color, it’s a good idea to mix them together in a larger container to ensure uniform color.
– Cut in the Edges
Using a high-quality brush, paint a 2-3 inch border around the edges of your walls, ceiling, and trim. This technique, known as “cutting in,” will create a clean edge and make it easier to use a roller for the rest of the wall.
Take your time with this step, as a neat cut-in line will significantly improve the overall look of your paint job.
– Roll the Walls
Load your roller with paint by dipping it into the tray and rolling it back and forth until it’s evenly coated. Begin by rolling paint onto the wall in a “W” or “M” pattern, then gently roll over that area in straight, vertical strokes to spread the paint across the wall evenly.
Make sure not to press too hard, as this can cause drips and other imperfections. Be sure to reload your roller with paint frequently to keep a wet edge, as this will help the paint blend together more seamlessly.
Allow the first coat of paint to dry according to the manufacturer’s instructions, then apply a second coat following the same technique.
• Finishing Touches: Clean Up and Admire Your Work
Once your paint has dried completely, carefully remove any masking tape and drop cloths. Clean your brushes, roller covers, and paint tray with warm water and mild detergent. Dispose of used paint cans and other materials according to your local waste disposal regulations.
Finally, arrange your furniture, curtains, and wall decorations back in place and enjoy the fresh, new look of your beautifully painted interior.
In conclusion, proper preparation, high-quality supplies, and patience are the keys to a professional-looking interior paint job. Follow these steps, and you’ll be well on your way to achieving a stunning result that will transform the look and feel of your home.
Preparations to Make Before Painting Any Room
Painting a room is a significant home improvement project and can completely transform the look and feel of a space. However, to achieve a professional finish, it’s crucial to follow the correct steps and take your time preparing the room. Here are the key tasks to tackle first for a successful painting job.
• Clearing the Room
Before beginning the painting process, it’s essential to remove furniture and other belongings from the room. This will give you plenty of space to work and help prevent any accidental paint spills or damage to your valuables.
Pro Tip: If it’s not possible to remove all furniture from the room, make sure to move the remaining pieces to the center and cover them with durable plastic sheeting or drop cloths to protect them from paint splatters.
• Protecting Floors and Baseboards
After clearing the room, your next step is to protect your floors and baseboards from paint splatters and spills. To do this, first vacuum or sweep the floors to ensure no debris is left behind. Then, use painter’s tape and drop cloths or plastic sheeting to cover the floors properly.
I Recommend: Placing painter’s tape along the baseboards and any other surfaces you don’t want to paint, such as door and window frames. This ensures clean lines and easy removal once the painting is complete.
• Repairing Walls
Before you can start painting, it’s crucial to address any imperfections on your walls to achieve a smooth finish. This may include filling any holes or cracks with spackling paste, sanding down rough spots, and removing old wallpaper if necessary.
Pro Tip: Use a putty knife to apply the spackling paste and follow up by sanding the area once it has dried. If you have to remove wallpaper, a steamer can make the task much easier.
• Cleaning the Walls
After repairing any wall imperfections, it’s crucial to clean the walls to ensure proper paint adhesion. Use a mild detergent and water to wipe down the walls, then rinse with clean water and allow them to dry completely.
I Recommend: Using a sponge or a soft cloth to avoid scratching the surfaces when cleaning.
• Priming the Walls
The next essential step when painting a room is to prime the walls. Priming helps the paint adhere better and provides a consistent base, ensuring a professional and long-lasting result.
Choose a primer based on the type of paint you plan to use (e.g., water-based, latex, or oil-based). Paint the primer onto the walls using a brush or roller, making sure to cover the entire surface evenly.
Pro Tip: If your walls are heavily stained, a stain-blocking primer may be necessary to ensure the stains don’t bleed through the new paint.
• Choosing the Right Paint
Selecting high-quality paint is crucial for a professional and long-lasting finish. Take into consideration factors such as the color, finish, and type of paint when making your choice.
I Recommend: Visiting a local paint store to discuss your needs with an expert who can help recommend the best paint for your project. Additionally, consider purchasing sample sizes to test the colors on your walls before committing to a specific shade.
• Gather the Proper Tools
Having the right tools at hand can make the painting process more manageable and ensure a professional-looking result. Some essential tools for painting a room include:
- Paintbrushes (angled and flat)
- Paint rollers
- Extension poles
- Paint trays
- Paint can opener
- Stir sticks
- Ladder or step stool
- Rags or cloths for clean-up
• Cutting In and Rolling
Once the room is prepared and the proper tools are gathered, it’s finally time to start painting. Use a paintbrush to “cut in” the edges of the room, carefully painting around baseboards, door frames, and window frames.
Then, use a roller to paint larger areas of the wall. Start from the top and work your way down in a “W” pattern to ensure evenly distributed paint coverage.
• Final Touches and Clean-Up
After completing the painting, carefully remove the painter’s tape before the paint dries to avoid peeling off any of the new paint. Next, clean your brushes, rollers, and other tools with the appropriate solvents for the type of paint used.
Once the paint has dried completely, inspect your work for any touch-ups needed, and then put your room back together, reinstalling any hardware or fixtures removed and moving the furniture back in.
By following these steps, you’ll be well on your way to a beautifully painted room that you can enjoy for years to come.
Steps | Description |
|---|---|
1. Clear the room | Remove furniture and other items from the room to prevent them from getting paint on them. |
2. Clean the walls | Wipe down the walls with a damp cloth to remove dirt and dust. |
3. Lay down drop cloths | Place drop cloths or tarps on the floor to protect it from paint drips. |
4. Tape off areas not to be painted | Use painter’s tape to cover baseboards, trim, and electrical outlets. |
5. Repair any wall damage | Fill any holes or cracks with spackling compound and sand the surface smoothly. |
6. Prime the walls | Apply a coat of primer to the walls to ensure better paint adhesion and coverage. |