DIY Indoor Painting Primer, 25 Things You Should Know
Are you ready to transform your space with a fresh coat of paint but unsure where to start? Look no further! DIY indoor painting primer is here to guide you through the entire process, making it as seamless and enjoyable as possible. With these step-by-step instructions and expert tips, you’ll be well on your way to creating the perfect look for your home in no time.
Diy indoor painting primer:
DIY indoor painting primer involves preparing surfaces by cleaning, repairing damage, and sanding. Choose a suitable primer type: oil-based for wood surfaces, latex for new drywall, and shellac for stain-blocking. Apply the primer using a roller, brush, or small roller, ensuring proper ventilation and thorough drying before applying the topcoat. Following these tips will ensure a flawless and long-lasting paint job.

Ready to give your interior a fresh look with a DIY paint job? This comprehensive indoor painting primer has got you covered! From choosing the right paint to pro tips for a flawless finish, read on to master the art of transforming your space with ease and confidence.
Contents
- 1 Guide to Interior Painting: DIY Primer Tips
- 2 Alternative Solutions for Absent Paint Primer
- 3 Creating Your Own Paint Primer at Home
- 4 Is Indoor Painting Complete Without Primer?
- 5 Substituting Primer with Double Paint Coats
Guide to Interior Painting: DIY Primer Tips
• Why Use a Primer?
Primer is an essential element of the painting process, having a significant impact on the final appearance and longevity of the paint job. Primers provide a bond between the surface being painted and the topcoat of paint, ensuring proper adhesion and preventing peeling, flaking, and blistering.
They also seal porous surfaces, extending the coverage of the topcoat and providing even color consistency. Priming helps prevent stains and tannins from bleeding through, ensuring a flawless finish.
• Types of Primers
Primers can be divided into three main categories: oil-based, latex, and shellac. Each type has specific traits and advantages that make them suitable for different surfaces and situations.
- Oil-Based Primers: This type of primer is optimal for wood surfaces due to its penetration and sealing capabilities. They work well on both interior and exterior applications and can be used on various surfaces, including wood, metal, and previously painted surfaces.
- Latex Primers: They are water-based, making them easier to clean and an excellent choice for interior projects. Latex primers are suitable for drywall, wood, and previously painted surfaces. They also offer flexibility and dry quickly, reducing the waiting time between coats.
- Shellac Primers: These primers are renowned for their stain-blocking capabilities, particularly for wood with high tannin content, such as cedar or redwood. They can be used for both interior and exterior applications, and you can even paint over them with oil-based or latex paints.
• Preparing Your Space and Surfaces
Before beginning any painting project, appropriate preparation of the space and surfaces is crucial to achieving a desirable outcome. Here are the steps to follow:
- Clear the Room: Removing all furniture and fixtures from the space ensures maximum accessibility and minimizes the risk of contamination or damage.
- Clean the Surfaces: Use a mild detergent to clean away any grease, dirt, or grime to avoid adhesion issues. For mold or mildew, use a solution of bleach and water. Make sure the surface is completely dry before moving on to the next step.
- Repair Surface Damage: Fill any holes, cracks, or dents with a suitable filler or patching compound. After the filler has dried, sand the repaired areas until smooth.
- Sand and Clean Wood Surfaces: For wood surfaces, sand with medium-grit sandpaper to provide a rough surface for the primer to adhere to. Remove any residual dust with a vacuum or tack cloth.
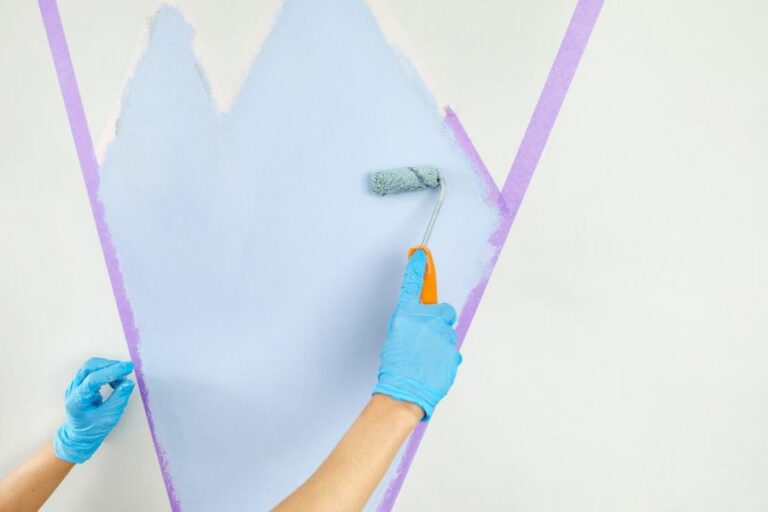
- Mask Off Adjacent Surfaces: Use painter’s tape to mask off any surfaces you wish to protect, such as baseboards, window frames, and trim.
• Choosing the Right Primer
The choice of primer depends on the type of surface being painted and the desired finish.
- New Drywall: A latex primer is ideal for new drywall, providing a uniform finish and sealing any joint compounds.
- Wood Surfaces: For wood surfaces, an oil-based primer should be your go-to choice. It penetrates and seals well, preventing tannin bleed-through.
- Stain Blocking: If dealing with previous water damage, smoke, or tannin bleeding from wood, choose a shellac primer for its stain-blocking capabilities.
For further guidance on choosing the best primer for your specific project, the U.S Environmental Protection Agency offers resources and recommendations.
• Application Tips for Priming
Follow these tips to apply primer effectively and efficiently:
- Applying primer to walls: Use a roller with an extension pole to reach higher areas. Use a zigzag pattern and overlap each stroke to ensure complete coverage.
- Priming small or detailed areas: Use a brush or a small roller to reach tight spaces, edges, and intricate details, making sure each area is adequately coated.
- Proper ventilation: Make sure the room has ample ventilation during the priming process to ensure proper drying and reduce the risk of inhaling fumes, especially when working with oil-based or shellac primers.
- Allow the primer to dry thoroughly: Follow the manufacturer’s instructions regarding drying times. Resist the urge to rush, as a fully cured primer is a must for optimal adhesion and coverage.
• Conclusion
A successful paint job starts with the right foundation: a properly primed surface. From preparing your space and surfaces to selecting the ideal primer and applying it correctly, following these guidelines ensures a beautiful and long-lasting finish.
Armed with these DIY indoor painting primer tips, you’re primed for painting success!
Alternative Solutions for Absent Paint Primer
Paint primer is an essential pre-coating layer that provides a smooth and ideal surface for the final paint application. However, sometimes you might not have access to a primer or want to explore alternative options for preparing surfaces.
• Latex-Based Paints
Latex-based paints can be applied directly to various surfaces without the need for a primer. This type of paint is water-based and often self-priming, which means it adheres to surfaces without the need for an additional primer layer.
Additionally, latex paints tend to provide a consistent finish on a wide range of surface types, from drywall to concrete. Therefore, switching to latex paint as an alternative solution can be highly effective.
• Gesso
Gesso is an acrylic paint-like substance that is commonly used as a primer for canvas paintings. Gesso can be used on a variety of surfaces, including wood, metal, and drywall. It offers a smooth, even base for applying paint and can be sanded after drying to achieve the desired level of smoothness.
Though gesso is often associated with acrylic and oil painting, it can also be a valuable alternative when preparing surfaces for latex or enamel-based paint.
Learn more about Gesso and its application techniques from Golden Paints.
• Tinted Primer Alternatives
If you don’t want to invest in separate primer and paint products, consider using high-quality paint and primer in one. These products come with primer and paint mixed together, available in various colors.
When using this type of product, it’s essential to select a high-quality option to ensure proper adhesion and coverage.
Make sure to follow the manufacturer’s instructions and apply the recommended number of coats for the specific paint and primer in one product.
• Proper Surface Preparation
While skipping the primer is not always recommended, ensuring proper surface preparation will significantly impact the final result. Some important steps to consider when preparing a surface for painting without primer include:
– Cleaning the Surface
Make sure the surface is free of dirt, debris, dust, and grease. Use a mild detergent and water to clean the surface thoroughly and allow it to dry completely before proceeding with the painting process.
– Sanding the Surface
Sanding the surface is crucial to create a proper bond between the paint and the surface. Sand the surface using medium-grit sandpaper (120-150 grit), then use a fine-grit sandpaper (180-220 grit) to create a smooth finish.
Remember to wipe the surface clean of any sanding residue before applying paint.
– Repairing Imperfections
Inspect the surface for any cracks, holes, or imperfections that need repair before painting. Use appropriate filler material (such as spackle or wood filler) to address these issues, and sand the surface smoothly once the filler is dry.
– Deglossing
If you’re painting over a glossy surface, it’s crucial to degloss the surface to promote proper paint adhesion. Use a liquid deglosser (also known as liquid sandpaper) or fine-grit sandpaper and follow the product instructions for a well-prepared surface.
• Alternative Paint Systems
Consider using a paint system specifically designed for the surface you’re working on. For example, specialty metal paints often contain rust inhibitors and do not require a separate primer.
There are also paint products designed for use on unprimed drywall or masonry that might be suitable alternatives in the absence of a traditional paint primer.
Make sure to read product labels carefully to ensure compatibility with your specific surface.
• Final Thoughts
Though primer is always recommended for the best results, there are alternative solutions when you don’t have access to it.
By preparing the surface correctly and selecting the right alternative products like latex-based paints, gesso, tinted primer alternatives, or specialty paint systems, you can achieve successful painting results without using a traditional primer.
Always follow the manufacturer’s instructions and best practices to ensure a durable, professional finish.
Creating Your Own Paint Primer at Home
• Introduction to Homemade Paint Primer
Paint primer is an essential component of any painting project, providing a base coat that prepares the surface and enhances paint adhesion. While store-bought primers are readily available, making your own homemade primer can be cost-effective and environmentally friendly.
– Benefits of Homemade Primer
Homemade primers offer various advantages compared to commercial paint primers:
- Cost-effective: Making your primer can save you money as you can utilize household ingredients or recycled materials.
- Environmentally friendly: By using natural ingredients, you reduce your carbon footprint and prevent harmful chemicals from entering the environment.
- Customizable: You can adjust the primer’s composition to suit specific surfaces and painting requirements.
• Ingredients and Tools for Homemade Paint Primer
To create a homemade paint primer, you will need the following ingredients and tools:
- Gesso or chalk
- Acrylic paint or pigment
- Water
- White glue (optional)
- A container for mixing
- A mixing utensil (spoon or spatula)
- A paintbrush
– Choosing the Right Base for Homemade Primer
Depending on your requirements, you can select one of the following bases to create your homemade primer:
- Gesso: Gesso is a mix of chalk or gypsum, white pigment, and a binder, typically used to prepare surfaces for painting. You can use gesso as a base for your homemade primer, making it ideal for canvas painting. Purchase a gesso from an art supply store or create your own gesso from household items like baking soda, glue, and water.
- Chalk: Chalk is an excellent substitute for gypsum, a natural mineral commonly found in commercial primers. You can create homemade chalk powder by crushing pieces of regular chalk or purchasing chalk powder directly from stores or online.
- Acrylic Paint: Acrylic paints are water-based, fast-drying, and suitable for various surfaces like canvas, wood, or metal. You can use acrylic paint as a base for your homemade primer by diluting it with water.
- Pigment: You can use powdered pigment to create your homemade primer, although this option might be less accessible for some users. Pigments are pure color particles used in various paint types and can be purchased from art supply stores or online.
• Steps to Make Homemade Paint Primer
Follow these simple steps to create a homemade primer suitable for various surfaces:
– Step 1: Select the Base
Choose the base for your homemade primer. If you are using gesso, chalk, or powdered pigment, move on to step 2. If you are using acrylic paint, dilute the paint with water in your mixing container until you reach a consistency suitable for priming.
Apply the diluted acrylic paint to the surface with a paintbrush and let it dry before painting.
– Step 2: Mix the Gesso, Chalk, or Pigment with Water
Pour a small amount of gesso, chalk powder, or pigment into your mixing container. Slowly add water to create a smooth, paste-like consistency. Remove any lumps or impurities using your mixing utensil.
– Step 3 (Optional): Add White Glue
Adding white glue can improve your primer’s adhesion and durability. If desired, mix equal parts white glue and water, then add the mixture to your base. Ensure the consistency remains smooth without becoming too thick or runny.
– Step 4: Apply the Homemade Paint Primer
Using a paintbrush, evenly apply your homemade primer to the surface you wish to paint. Allow the primer to dry completely before applying the paint.
– Step 5: Clean Up
Once you have completed your priming, clean your tools and the mixing container with warm water and soap.
• Tips for Using Homemade Paint Primer
- Test your homemade primer on a small, inconspicuous area before applying it to your entire project to ensure compatibility and desired results.
- Apply multiple thin coats of primer as needed, allowing each coat to dry thoroughly before applying the next.
- Adjust the consistency of your primer depending on the surface and project requirements. Thin layers are suitable for smooth textures, while a thicker primer can help conceal surface imperfections and provide additional adhesion.
• Conclusion
Homemade paint primer offers a cost-effective, environmentally friendly alternative to store-bought primers while providing similar results. By using ingredients like gesso, chalk, or acrylic paint, you can create a customized primer tailored to specific surfaces and painting requirements.
Remember to test your homemade primer before applying it to the entire surface, and adjust the consistency and composition as needed. With proper application and drying time, your homemade primer will provide a stable base coat for a professional-looking paint job.
Step | Procedure |
|---|---|
1 | Gather your materials: Plaster of Paris, fine white sand, white glue, water, and a mixing container. |
2 | Measure 1 part Plaster of Paris, 1 part fine white sand, and 2 parts white glue. Pour them into a mixing container. |
3 | Add water to the mixing container, around half the total volume of the combined dry ingredients and glue. Start with a smaller amount of water and adjust the consistency as needed. |
4 | Use a mixing stick or an electric drill with a mixing attachment to blend the ingredients until they form a smooth, thick consistency similar to pancake batter. |
5 | Apply the homemade paint primer to the surface you want to paint using a brush, roller, or paint sprayer. Make sure the surface is clean, dry, and free of dust and debris before applying the primer. |
6 | Allow the primer to dry completely before applying your desired paint. The drying time may vary depending on the thickness of the applied primer and the humidity of the environment. |
Is Indoor Painting Complete Without Primer?
Primer is an essential component in the painting process, especially when painting indoors. It ensures that the paint adheres properly to the surfaces, improves the durability of the paint job, and provides a uniform finish.
• What is Primer and Why Should You Use It?
Primer is a type of paint that is specifically designed to prepare surfaces before applying the topcoat of paint. It has a thicker consistency than regular paint and serves several purposes, such as:
- Sealing porous surfaces
- Improving paint adhesion
- Enhancing paint durability
- Hiding stains, discolorations, and imperfections
- Providing a uniform finish
Using primer when painting indoors is essential because it ensures that your paint job lasts longer and appears more professional.
• Different Types of Primer
There are various types of primers suited for different surfaces and purposes. Here are the main types of primer that you may need when painting indoors:
– Oil-Based Primer
Oil-based primers are suitable for wood surfaces and provide excellent adhesion, stain-blocking, and durability. They are best used on unfinished wood or surfaces with heavy stains.
– Latex-Based Primer
Latex-based or water-based primers are suitable for most surfaces, including drywall and plaster. They provide excellent adhesion, low odor, and quick-drying properties.
– Shellac-Based Primer
Shellac-based primers offer unparalleled stain-blocking capabilities, making them ideal for surfaces with severe stains or water damage. They are also suitable for sealing wood knot-bleeding.
It is essential to choose the appropriate primer for the specific surface you are painting to ensure optimal results.
• Suitable Surfaces for Primer Application
Using a primer is crucial when painting the following surfaces:
– Bare Wood
Unfinished wood is porous and can absorb the paint, leading to an uneven finish. Applying a primer seals the wood, ensuring consistent paint absorption and a smooth finish.
– Drywall
New or patched drywall is highly absorbent, and a primer ensures the topcoat of paint will adhere properly, preventing peeling or flaking over time. The Paint Quality Institute recommends using a high-quality latex primer for new drywall.
– Previously Painted Surfaces
If you are painting over a surface previously painted with a high-gloss or semi-gloss paint, using a primer will improve the adhesion of the new paint, especially if the existing paint is oil-based and you are switching to latex-based paint.
– Stained or Damaged Surfaces
Primer is essential for covering stains, water damage, or other imperfections on the surfaces to ensure a consistent finish with the topcoat.
• When Can You Skip Primer?
In certain situations, you might not need primer when painting indoors. These scenarios include:
- Painting over a surface with the same type and color of paint
- Painting light colors over light-colored surfaces
- The surface is in excellent condition without stains or imperfections
It is important to note that skipping primer in these cases might still lead to a less durable and potentially uneven finish.
• Expert Recommendations
Based on my experience, using primer when painting indoors is generally a good practice that can improve the overall appearance and longevity of your paint job. If you are working with surfaces such as bare wood or drywall, primer application is essential.
Skipping primer might be an option in specific cases, but it is often better to prioritize the long-lasting quality of your paint job by using an appropriate primer.
In conclusion, primer plays a crucial role in ensuring a successful and durable paint job when painting indoors. Taking the time to properly prime surfaces before applying the topcoat of paint can save you time and money in the long run and lead to a more professional-looking result.
Considerations | Description |
|---|---|
Surface type | Primer may not be necessary on previously painted surfaces. However, for new, unsealed drywall or bare wood, using a primer is recommended. |
Change in paint color | If you’re painting over a darker color with a lighter one, using a primer can help improve coverage and require fewer coats of paint. |
Stains and odors | Primer can help cover up stains, seal in odors, and prevent them from bleeding through the new paint. |
Longevity and durability | Using a primer can help the paint adhere better to the surface, providing a more durable and longer-lasting finish. |
Substituting Primer with Double Paint Coats
When it comes to painting projects, the common question arises: “Can I use two coats of paint instead of primer?” To answer this question, it is essential to understand the purpose of primer and how it contributes to the painting process.
• The Purpose of the Primer
Primer is a preparatory coating applied to surfaces before painting to ensure proper adhesion and long-lasting results. By sealing porous surfaces, it equalizes the absorption properties of various materials, such as bare wood or unpainted drywall.
It also helps to cover stains and can improve paint coverage, meaning you will need fewer coats of paint to achieve the desired finish.
– Benefits of Using Primer
- Adhesion: Primer helps the paint bond with the surface, providing a solid foundation for the paint to stick to, reducing the risk of peeling and flaking.
- Durability: A properly prepared surface using a primer will lead to a more durable and long-lasting finish, which means your hard work will stand the test of time.
- Even coverage: Primer helps to create a uniform surface for your paint, which will result in a more even and consistent finish. This is especially helpful when working with porous materials like wood or plaster.
- Stain blocking: Primer can act as a barrier against stains, preventing them from bleeding through and affecting the final appearance of your paint job.
- Efficiency: In many cases, using primer can reduce the number of coats of paint needed, saving time and paint costs in the long run.
• Using 2 Coats of Paint Instead of Primer
While primers offer valuable benefits, there may be situations when you are considering using two coats of paint instead of primer. One reason to do so will be if the surface you are working on is already in relatively good condition, with minimal imperfections or stains.
– Potential Drawbacks
Though two coats of paint might seem like a more straightforward approach, there are potential drawbacks to skipping the primer:
- Uneven color: Not using primer can result in an uneven paint job. The first coat of paint may be absorbed differently by different parts of the surface, leading to uneven coverage.
- Reduced adhesion: Without primer, the paint might not adhere well to the surface, which could lead to flaking, peeling, or chipping of the paint job down the line.
- Less durability: Skipping primer increases the chance of your paint job showing wear and tear faster. Paint applied directly to a surface without primer might not be as durable or long-lasting.
- Increased work: In some cases, using two coats of paint without primer might require more work since additional coats may be needed to achieve the desired coverage and finish. Alternatively, proper surface preparation and primer application could have minimized the number of necessary coats.
• Tips for Success
If you decide to use two coats of paint instead of primer, consider the following tips for better results:
- Clean the surface: Cleaning the surface thoroughly is crucial for proper paint adhesion. Remove any dirt, dust, or grease, and allow the surface to dry before painting.
- Sanding: Lightly sanding the surface and removing dust will help promote better paint adhesion.
- Use high-quality paint: High-quality paint with built-in primer properties can help compensate for the absence of an initial coat of primer, but it may be worth considering using a separate primer to guarantee the best results.
- Allow adequate drying time: Allow the first coat of paint to dry completely, as recommended by the manufacturer, before applying the second coat. This will minimize the chance of streaking or uneven coverage.
• Final thoughts
While using two coats of paint without a primer can work in some cases, most professional painters would advise against it. The potential drawbacks, such as uneven coverage or reduced durability, make using primer a wise investment.
To ensure the best possible results, follow proper surface preparation procedures and consider using a primer tailored to the specific surface and desired finish.
Following these steps will help to ensure a durable and professional-looking paint job that lasts. For more information on the importance of primer in a paint project, visit the Paint Quality Institute’s website.

