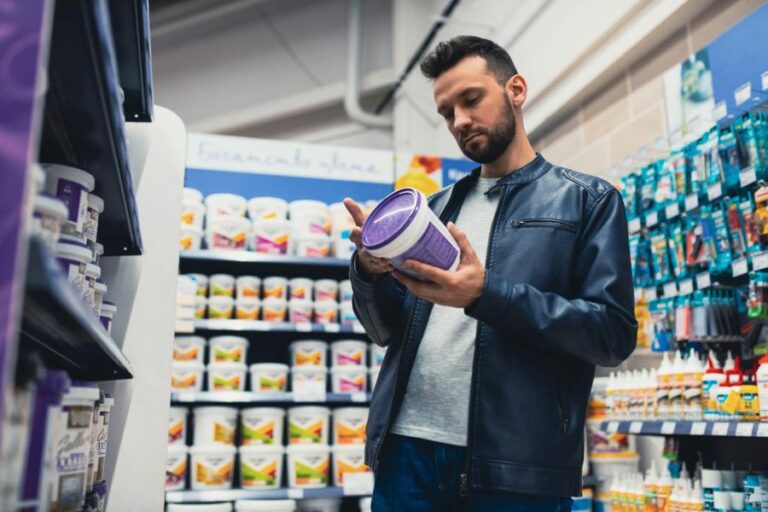
Quick Dry Indoor Painting Primer, 25 Things You Should Know
Are you tired of waiting hours for your indoor painting primer to dry before moving on to the next project? What if I told you that there’s a solution to speed up the process without sacrificing quality? Look no further, as I am about to introduce you to the game-changing quick dry indoor painting primer.
Quick dry indoor painting primer:
Quick dry indoor painting primer is a fast-drying primer that offers numerous benefits, like time-saving, less debris collection, improved adhesion, and enhanced stain-blocking properties. Ideal for DIY enthusiasts and professional painters, there are three types: latex-based, oil-based, and shellac-based. Prior to application, ensure proper surface preparation, including cleaning, sanding, repair, and masking. Apply the primer using brushes, rollers, or sprayers, ensuring adequate ventilation and safety precautions.

Discover the benefits and features of quick-dry indoor painting primer, and learn how it revolutionizes your painting projects by speeding up the process. Read on as we dive into the world of fast-drying primers, sharing tips, techniques, and insights!
Contents
- 1 Rapid-Drying Interior Paint Primer
- 2 Masking a Fast-Drying Primer?
- 3 Indoor Paint Primer Drying Duration
- 4 Top-Notch Primers for Indoor Use
- 5 Kilz Primer: Swift Drying Time?
Rapid-Drying Interior Paint Primer
Quick dry indoor painting primer, also known as fast-drying or rapid-drying primer, is a must-have for any DIY enthusiast or professional painter who wants to save time and effort during their painting projects.
• Why Use a Quick Dry Indoor Painting Primer?
A fast-drying primer offers a plethora of benefits for both homeowners and professional painters. Some of the main advantages include:
- Time-saving: Quick dry primers have faster drying times than traditional primers, allowing you to complete your painting project more quickly. This means that you can apply the topcoat of paint sooner, which is ideal for those with tight deadlines or limited time frames.
- Less chance of dust and debris: As a fast-drying primer dries quicker, it is less prone to collecting dust, dirt, and debris during the drying process. This results in a cleaner and smoother topcoat.
- Improved adhesion: Quick dry indoor painting primers increase paint adhesion, ensuring a longer-lasting and more durable finish.
- Enhanced stain-blocking properties: Many fast-drying primers are specifically formulated to block stains and provide better coverage of previously painted surfaces.
• Types of Quick Dry Indoor Painting Primers
There are various types of fast-drying primers available in the market, each designed to cater to different requirements and surface types.
- Latex-Based Primer: This water-based primer is ideal for use on drywall, plasterboard, brick, and masonry surfaces. Latex-based primers are fast drying, provide good adhesion, and offer easy clean-up with water.
- Oil-Based Primer: Suitable for a variety of surfaces, including wood, metal, and previously painted surfaces, oil-based primers offer excellent adhesion and stain-blocking properties, and give a smooth, even finish. However, they have a longer drying time compared to water-based primers and require mineral spirits for cleanup.
- Shellac-Based Primer: Known for their superior stain-blocking abilities, shellac-based primers are alcohol-based and dry extremely fast. They are ideal for use on smoke or water-damaged surfaces and provide excellent adhesion on most surfaces. However, they have a strong odor and require denatured alcohol for cleanup.
• Preparing the Surface for Primer Application
Before applying a quick dry indoor painting primer, proper surface preparation is essential to ensure the primer forms a strong bond and lays a strong foundation for the topcoat.
Here are some steps to prepare your surface:
- Cleaning: This is the first step in preparing any surface for painting. Remove dirt, dust, grease, and other contaminants using a mild detergent and water. Rinse well and allow the surface to dry before continuing.
- Sanding: For smoother surfaces like wood or previously painted surfaces, lightly sand the surface with fine-grit sandpaper to create a slightly rough texture for better primer adhesion. Be sure to remove sanding dust using a tack cloth or vacuum with a brush attachment.
- Repair: Fill any holes, dents, or imperfections with the appropriate patching compound or wood filler. Once dried, sand the area smooth and remove dust.
- Masking: Protect adjacent surfaces, such as trim, windows, and doors, by applying painter’s tape and covering them with drop cloths or plastic sheeting.
• Applying Quick Dry Indoor Painting Primer
Proper application of your chosen quick-dry indoor painting primer is essential to maximize its benefits and achieve a flawless finish.
- Stirring the primer: Before applying, ensure the primer is well-stirred to mix any components that may have settled at the bottom of the container.
- Application tools: Quick dry indoor painting primers can be applied using brushes, rollers, or sprayers. Choose the appropriate applicator for your project and surface type.
- Starting at the top: When applying primer, always start at the top and work your way down to avoid drips or runs.
- Thinner coats: Apply thin coats of primer to promote faster drying and better adhesion. If necessary, apply multiple coats to achieve the desired coverage.
- Proper ventilation: Since quick-dry indoor painting primers can emit strong odors, ensure that the area is well-ventilated while working and during the drying process.
- Drying time: Depending on the type of primer you choose, drying times may vary. Refer to the primer’s label or technical data sheet for specific drying and recoating times.
• Safety Tips for Using Quick Dry Indoor Painting Primer
- Ensure good ventilation while working with quick dry indoor painting primer to avoid respiratory issues.
- Wear protective clothing, gloves, and eyewear to protect yourself from any spills or splatters.
- Store primer containers in a cool, dry place, away from heat sources and direct sunlight.
- Dispose of paint-soaked rags and applicators responsibly, as they can pose a fire hazard.
In conclusion, quick dry indoor painting primer is an essential product for any painting project, as it can save time and improve the quality of your work.
By knowing the types of primers available, preparing your surface well, and applying the primer correctly, you can enjoy the benefits of a fast-drying primer and achieve professional-looking results.
For more information on painting techniques and products, consider visiting the Painting and Decorating Contractors of America’s website for expert advice and guidance.
Masking a Fast-Drying Primer?
In the world of painting and refinishing, time is often a crucial factor. That’s why the existence of a quick-dry primer has become increasingly essential for many DIYers and professionals. Let’s dive deep into the world of a quick-drying primer to understand its importance, benefits, and practical applications.
• Quick-Dry Primer: What It Is and How It Works
Quick-dry primer is a specially-formulated paint primer designed to dry faster than traditional primers. It generally takes less than an hour to become tack-free or ready for a recoat.
These primers achieve their rapid drying capabilities by utilizing a combination of solvent-based, water-based, or hybrid technologies.
Quick-drying primers, also known as fast-drying primers, are popular in various applications, such as automotive refinishing, woodworking, metalworking, and even home painting projects. Many reputable manufacturers offer quick-dry primer products that cater to specific substrates and surfaces.
The Forest Products Laboratory has resources detailing more information on quick-drying paint technologies.
• The Advantages of Using a Quick-Dry Primer
There are several advantages to using quick-dry primers over traditional primers, which are essential for different projects and applications. Some of these benefits include:
– Speed
As the name suggests, the most obvious advantage of quick-dry primers is their ability to dry faster, which can save a significant amount of time in the overall painting process. In many cases, this fast-drying time enables users to complete several coating layers within a single day.
– Improved Adhesion
Fast-drying primers are known for their strong adhesion properties, ensuring that the paint will stick to the surface better and last longer. This is particularly useful when painting surfaces that require a high level of durability and protection, such as vehicles or industrial equipment.
– Ease of Use
Many quick-dry primers come in easy-to-use aerosol cans, allowing for even distribution of the primer without the need for brushes, rollers, or sprayers. This can help reduce messes and cleanup time, making the overall painting process more efficient.
– Versatility
Quick-dry primers are available for various surfaces and applications, ensuring that you can find a product suitable for your specific project. Whether you’re refinishing a piece of furniture or retouching a car fender, chances are there’s a quick-dry primer designed for your needs.
• Tips for Using Quick-Dry Primers Effectively
To ensure the best results when using a fast-drying primer, consider the following expert recommendations:
– Proper Surface Preparation
As with any painting project, ensuring the surface is clean, dry, and free of any contaminants like grease or dust is critical for optimal adhesion. Using proper cleaning techniques and degreasers will help improve the bond between the primer and the substrate.
– Environmental Factors
Temperature and humidity can affect the drying time and performance of a quick-dry primer. As a general rule, these primers work best in temperatures between 60F and 80F, with a relative humidity of no more than 50%.
Avoid using fast-drying primers in extreme temperatures or high humidity levels, as it may compromise their performance.
– Recoating Time
While quick-dry primers are designed to be recoated within an hour or less, it’s essential to follow the manufacturer’s recommendations regarding recoat windows. Failure to follow these guidelines could result in improper bonding between the primer and paint layers.
– Adequate Ventilation
Proper ventilation is crucial when using any paint or primer, but it’s particularly important with quick-dry primers, as some may contain higher levels of volatile organic compounds (VOCs). Make sure to work in a well-ventilated area and use appropriate personal protective equipment, such as masks and gloves.
• Popular Quick-Dry Primer Products
There are numerous quick-dry primer products available on the market, catering to various applications and surfaces. Some popular options include:
- Rust-Oleum Painter’s Touch 2X Ultra Cover Primer
- KILZ Fast-Drying Interior/Exterior Primer
- Sherwin-Williams ProMar Fast-Dry Primer
Keep the specific needs of your project in mind when choosing a fast-drying primer, as each product may have unique features or benefits suited to your application.
In conclusion, quick-dry primers can be an invaluable tool for any painting job, offering faster drying times, improved adhesion, and a streamlined application process.
By selecting the appropriate product for your project and following the expert recommendations for surface prep and application, you can ensure successful results and save time in the painting process.
Indoor Paint Primer Drying Duration
When it comes to painting your home, there’s more to it than just slapping a coat of paint on the walls. One of the most important factors to consider is the primer layer, which helps ensure that the paint adheres to the surface and provides a smooth, even finish.
• What is Primer, and Why is it Important?
Primer is a preparatory coating that is applied to surfaces before painting. It creates a uniform surface, ensures proper adhesion of the paint, and helps to extend the life of your paint job.
Primer also prevents stains and discoloration from bleeding through the finished coat of paint, which is especially important when painting over previously painted or stained surfaces.
A helpful resource about the importance of primer can be found on the website of The Painting and Decorating Contractors of America.
• Typical Drying Time for Indoor Paint Primer
The drying time for an indoor paint primer can vary depending on the type of primer being used, as well as environmental factors like temperature and humidity. As a general rule of thumb:
- Water-based or latex primers typically take 1 to 4 hours to dry to the touch and can be recoated within 2 to 4 hours.
- Oil-based primers generally take longer to dry, between 4 and 24 hours, and can often be recoated within 24 hours.
It’s important to remember that these are average drying times, and drying times may be affected by various factors, which we’ll discuss further in the next section.
• Factors That Affect Indoor Paint Primer Drying Time
There are several factors that can impact the drying time of your primer, including:
1. Temperature & Humidity
Higher temperatures can speed up primer drying time, while colder temperatures can slow it down. Similarly, high humidity may prolong the drying process, while low humidity environments can help the primer dry more quickly.
It’s generally recommended to apply primer when the temperature is between 50 and 90 degrees Fahrenheit and when the relative humidity is below 70%.
2. Ventilation & Airflow
Proper ventilation and airflow are crucial for both your safety and the drying process. They can help the primer dry more quickly by providing a constant supply of fresh air and by allowing moisture to dissipate.
It’s essential to ensure that the room you are working in is well-ventilated and to use fans if needed to improve air circulation.
3. Thickness of the Primer Coat
The thickness of the primer coat you apply will affect the drying time. A thicker coat may take longer to dry compared to a thin, even coat. It’s generally best to apply multiple thin coats of primer to get the desired coverage rather than trying to achieve full coverage with one thick coat.
4. Type & Porosity of the Surface
The type of surface you’re painting, and its porosity can impact the drying time of your primer. For example, a porous surface like bare wood or concrete is likely to absorb primer more quickly, leading to shorter drying times.
On the other hand, less porous surfaces, such as previously painted walls or sealed surfaces, may take longer to dry as the primer has less to grip onto and takes more time to settle.
• Testing Dryness of Indoor Paint Primer
To determine if your primer is dry and ready for a topcoat, you can perform a simple touch test. Gently press your finger against the primed surface. If it feels dry to the touch and doesn’t leave any residue on your finger, the primer is most likely ready for the next step.
However, if the primer feels tacky or leaves a mark, it may need additional drying time.
• In Conclusion
Allowing enough time for your indoor paint primer to dry is essential for a successful paint job. On average, water-based primers take 1 to 4 hours to dry, while oil-based primers may need up to 24 hours.
Keep environmental factors like temperature, humidity, and ventilation in mind, as well as the thickness of your coat and the type of surface you’re working on, to ensure optimal results.
With patience and attention to detail, you’ll be able to achieve a beautifully primed surface that results in an exceptional paint job.
Type of Primer | Drying Time |
|---|---|
Oil-based primer | 8 hours |
Latex-based primer | 1 to 4 hours |
Shellac-based primer | 1 to 2 hours |
Top-Notch Primers for Indoor Use
Priming your walls before painting is an essential step in ensuring a professional, long-lasting finish. A good primer helps the paint adhere to the wall and makes the color more vibrant.
Not only that, but it also improves the durability of your paint job. But with so many options available, how do you know which primer is the best for your needs?
• Types of Indoor Primers
Primers are generally categorized into three main types: oil-based, latex (water-based), and shellac-based. Each type has its specific benefits, depending on the surface you are priming and your desired outcome.
– Oil-Based Primers
Oil-based primers are known for their excellent adhesion and stain-blocking properties. They are also great for sealing porous surfaces, providing a smooth base for the paint. These primers are ideal for:
- Bare wood, as they prevent the paint from soaking into the surface
- Stained surfaces, due to their stain-blocking properties
- Metal surfaces, as they prevent rust formation
- Previously painted surfaces that have chipped or peeling paint
However, oil-based primers do have a few drawbacks. They require longer drying time and have a strong odor, necessitating proper ventilation during application. Additionally, these primers are not as environmentally friendly as other options.
– Latex (Water-Based) Primers
Water-based primers, also known as latex primers, are a popular choice for residential painting projects due to their ease of use, quick drying time, and lower odor. They are ideal for:
- Drywall, as they are less likely to raise the grain
- Softwood, such as pine or spruce
- Non-glossy painted surfaces
Their main drawback is they are not as effective at blocking stains as oil-based primers. However, newer formulations are constantly improving, and many now offer impressive stain-blocking abilities.
– Shellac-Based Primers
Shellac-based primers are renowned for their superb stain-blocking properties. They work well on both interior and exterior surfaces, providing excellent adhesion and preventing bleed-through from water and smoke stains. These primers are ideal for:
- Sealing knots and stains on wood surfaces
- Covering severe water, smoke, or nicotine damage
- Adhering to glossy surfaces, such as trim, cabinetry, and previously painted walls
Despite their stain-blocking abilities, shellac primers have a relatively strong odor and are more difficult to clean up, requiring denatured alcohol or an ammonia solution.
• How to Choose the Right Primer
Before choosing a primer, consider the following factors:
- Surface Material: Identify the material you will be priming, such as drywall, wood, or metal. This will often dictate the type of primer you should use.
- Condition of the Surface: Assess the surface for potential issues, such as stains, odors, or peeling paint, which may require a primer with specific properties.
- Paint Type: Determine whether you will be using oil-based, latex, or shellac-based paint, as some primers may be less compatible with certain paint types.
• Our Recommendations
In our experience, these primers have shown great results for indoor use:
– Best Overall: Benjamin Moore Fresh Start Multi-Purpose Primer
This latex primer offers excellent adhesion, stain-blocking, and mildew resistance. It is suitable for a wide range of surfaces and works well with both latex and oil-based paints.(source)
– Best for Stain Blocking: Zinsser B-I-N Shellac-Base Primer
As a shellac-based primer, B-I-N by Zinsser provides unparalleled stain-blocking abilities, especially for hard-to-cover stains, such as nicotine or smoke damage. Due to its quick drying time, you can proceed to paint the surface within an hour of application.(source)
– Best for Drywall: Glidden PVA Drywall Interior Primer
Specifically designed for new or uncoated drywall, this PVA (polyvinyl acetate) primer is an excellent choice for sealing the surface and providing a smooth base for painting. It dries quickly and has a low odor, making it an excellent option for new construction or renovation projects.
In conclusion, the best primer for your indoor project will depend on the specific needs of your surface, the paint you intend to use, and your personal preferences. Consider the factors discussed in this article to help you make an informed decision and achieve a professional, long-lasting finish.
| What is the best primer to use indoors? | ||
|---|---|---|
| Primer Type | Best For | Advantages |
| Latex Primer | Drywall, plaster, wood, and masonry surfaces | Easy to clean up, quick-drying, low odor, and less likely to cause allergic reactions. |
| Oil-Based Primer | Wood, metal, and masonry surfaces | Long-lasting, excellent adhesion, and seals stains better than latex primer. |
| Shellac-Based Primer | Wood, plaster, metal, and masonry surfaces with severe stains, odors, or damage | Unparalleled stain and odor-blocking capabilities, quick drying, and great adhesion. |
Kilz Primer: Swift Drying Time?
Kilz primer is a well-known brand in the paint industry, recognized by professionals and homeowners for its coverage, durability, and drying speed.
It’s a versatile primer that can be used on various surfaces such as wood, drywall, plaster, metal, and more. Its primary goal is to seal porous surfaces and cover stains to create a smooth, even base for the topcoat.
• Factors Affecting Drying Time
Several factors can impact the drying time when using Kilz primer:
– Type of Primer
Kilz offers multiple types of primer, including oil-based, water-based, and shellac-based versions. The drying time varies depending on which Kilz primer you’re using:
- Kilz Original (oil-based): On average, it dries to touch in approximately 30 minutes and can be recoated in 1 hour.
- Kilz 2 (water-based): It usually dries to touch in about 30 minutes, with a recoat time of 1 hour.
- Kilz Restoration (water-based with shellac): The drying time is about one hour to touch and a recoat time of 4 hours.
– Environmental Conditions
Factors like temperature, humidity, and air circulation can also have a significant influence on the drying time:
- Temperature: Kilz primer dries faster in warmer conditions, ideally between 50F and 90F.
- Humidity: High humidity levels can slow down the drying time, while low humidity can speed it up.
- Air circulation: Proper air circulation helps evaporate the solvents faster, resulting in quicker drying time.
From personal experience, I recommend painting in well-ventilated areas and using a fan or air conditioning unit to maintain adequate air circulation for optimal drying conditions.
• Tips for Faster Drying
To ensure that your Kilz primer dries fast, follow these useful tips:
– Apply Thin Coats
One of the key factors that can affect the drying time is the thickness of the primer application. Applying thin, even coats will allow the primer to dry faster and more uniformly. Using a high-quality roller, brush, or spray gun can help achieve the desired level of coverage without applying excessive primer.
– Manage Humidity
Controlling the humidity inside the painting area can greatly speed up the drying time. As mentioned earlier, high humidity can delay drying, so using a dehumidifier or an air-conditioning unit can help remove excess moisture from the air and promote faster drying.
– Ensure Proper Ventilation
Bringing fresh air into the space can improve air circulation, which in turn assists in drying the primer more quickly. Opening windows and doors or using fans can be effective ways to facilitate air exchange in the painting area.
– Follow the Product Instructions
Following the manufacturer’s instructions for surface preparation, application, and drying time is crucial. Kilz provides detailed guidelines on its products’ labels, ensuring optimal performance and drying efficiency.
• Factors to Consider When Choosing Kilz Primer
While the speed of drying is an important aspect to consider when choosing a primer, other factors should also be taken into account to determine the most suitable product for your specific project:
- Surface type: Evaluate the type of surface you plan to paint, as different primers are designed for various surfaces.
- Stain-blocking ability: Make sure to choose a primer that offers strong adhesion and the ability to cover stains or previously painted surfaces effectively.
- Odor: Some Kilz primers may have a strong odor, especially oil-based ones. If odor is a concern, consider using a low-odor, water-based primer.
- VOC content: Volatile Organic Compounds (VOCs) can be harmful to the environment and human health. Choosing a low-VOC or zero-VOC primer can be a more eco-friendly option.
Based on personal experience, I recommend thoroughly analyzing your painting situation and desired results to choose the most suitable Kilz primer for your project.
• Conclusion
Overall, Kilz primer is well-regarded for its relatively fast drying time, especially considering its exceptional coverage and stain-blocking abilities.
By carefully considering the type of primer, environmental conditions, and application methods, you can maximize the speed of drying for your next painting project.
For more information about Kilz primers and their properties, the Environmental Protection Agency’s (EPA) website can provide further insight into the importance of low-VOC and eco-friendly painting products.