Steps For Indoor Painting Primer, 25 Things You Should Know
Are you ready to give your walls a fresh look with a new coat of paint? Don’t fret! We’re here to guide you through the crucial first step: applying a painting primer. With our straightforward approach, you’ll soon be able to bring new life to any room in your home. Just follow these steps for indoor painting primer, and you’ll find that this home improvement project is a breeze.
Steps for indoor painting primer:rong>
When applying indoor painting primer, choose the appropriate primer for the surface. Prepare the surface by cleaning, sanding, filling, and repairing damages, and taping off areas. Apply primer by stirring, loading brush/roller, cutting in edges, rolling primer onto the main section, and allowing it to dry. Sand (if needed) and apply a second coat if necessary. After the primer dries, paint over it with suitable paint.

Ready to give your home a fresh new look with a beautiful paint job? Read on to discover the essential steps for proper indoor painting primer application. We’ve got you covered with expert tips and tricks to ensure a smooth and flawless finish for your walls. Don’t miss out. Keep reading!
Contents
- 1 Indoor Painting Primer: Essential Steps to Follow
- 2 Is Priming Necessary for Indoor Painting Projects?
- 3 Applying Interior Paint Primer: A Step-by-Step Guide
- 4 Determining the Ideal Number of Primer Coats for Interior Paint
- 5 Mastering the Proper Sequence for Room Painting Success
Indoor Painting Primer: Essential Steps to Follow
A primer is a preparatory coating that is applied to surfaces before painting to ensure better adhesion of the paint, improved durability, and protection for the surface being painted.
When painting walls, ceilings, or other surfaces, the primer is an essential step to guarantee a professional and long-lasting finish.
• Choosing the Right Primer
There are several types of primers available in the market, such as oil-based, latex, shellac, and others. Each type of primer serves a specific purpose and works best for particular surfaces. It is essential to choose the right primer for your painting project for the best results.
Oil-based primers are suitable for surfaces with heavy stains or tannin bleeding, while latex primers are water-based primers that work best on unfinished drywall and other porous surfaces. Shellac primers are used for sealing tough stains and odors and can be used on almost any surface.
Here is a list of surfaces and the recommended primer for each:
- Unfinished drywall: Latex-based primer
- Unfinished wood: Oil-based primer
- Stained surfaces: Oil or shellac-based primer
- Previously painted surfaces: Latex or oil-based primer
For more information on selecting the appropriate primer, check this article from an expert in the field, Bob Vila.
• Preparing the Surface
Before applying the primer, the surface must be cleaned and prepared. The preparation process involves the following steps:
- Cleaning: Remove dust, dirt, and debris from the surface using a vacuum cleaner, dry cloth, or duster. For surfaces with stubborn dirt or stains, use a damp cloth with mild detergent.
- Sanding: Lightly sand the surface to even out any rough patches, bumps, or old paint. Ensure that the surface is smooth and free from any unevenness. Use fine-grit sandpaper (120 to 150 grit) for this purpose.
- Filling and repair: Inspect the surface for any cracks, holes, or damages that need to be fixed before applying the primer. Fill small holes and cracks with a suitable filler or joint compound, and allow it to dry according to the manufacturer’s instructions. Sand the area once again to achieve a smooth surface.
- Dusting: After sanding, ensure that you remove all traces of sanding dust using a vacuum cleaner or tack cloth.
- Tape and cover: Use painter’s tape to mask off any areas, trim, or fixtures that you do not intend to paint. Cover the floor and furniture with drop cloths to protect them from spills and drips.
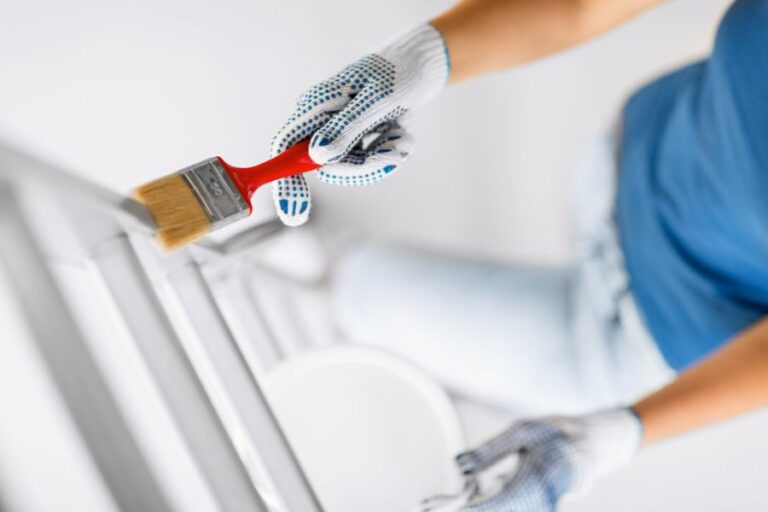
• Applying the Primer
Once the surface is prepared, you can proceed with applying the primer. Below are the steps to apply the primer effectively:
- Stir the primer: Before using the primer, mix it thoroughly using a paint stirrer. This will ensure even consistency and better bonding with the surface.
- Load the brush or roller: Pour some primer into a paint tray, and load your brush or roller with primer. Tap the brush against the side of the tray to remove excess primer or roll the roller back and forth a few times to distribute the primer evenly.
- Paint the edges: Start by painting the edges and corners of the surface using a brush. This is called “cutting in” and allows for more precise application around trim, fixtures, and other detailed areas.
- Roll the primer: After cutting in, use a roller to apply the primer to the main section of the surface. Roll the primer in a zigzag pattern, working in small sections at a time. Reload the roller as needed, and be sure to overlap each new section to maintain even coverage.
- Allow to dry: Let the primer dry according to the manufacturer’s recommendations. Drying times may vary based on the type of primer used, humidity, and temperature.
- Sanding (optional): Some surfaces may require light sanding after the primer has dried to achieve an ultra-smooth finish. Use fine-grit sandpaper (220 grit or higher) to lightly sand the primed surface, and remove any sanding dust with a tack cloth.
- Apply a second coat (if needed): If the surface still appears uneven or the original color or stains are visible, you may need to apply a second coat of primer. Follow the same steps as above and allow the second coat to dry completely.
• Painting Over the Primer
After the primer has dried and you are satisfied with the coverage, you are ready to proceed with painting the surface. Choose a high-quality, durable paint that is suitable for your needs, and follow the manufacturer’s instructions for application and drying times.
By following these steps for indoor painting primer, you can ensure a professional-looking, durable finish that will last for years to come.
Is Priming Necessary for Indoor Painting Projects?
Priming is a crucial step in the painting process that ensures longevity, adherence, and overall finish of the paint. However, whether or not to prime before painting indoors depends on various factors, such as the type of surface, previous paint job, the state of the surface, and the paint in use.
• Surface Type Matters
Different materials have varying characteristics, such as absorption and adhesion properties, which ultimately affect the paint job. Let’s dive into a few common surface types.
– Drywall
New drywall or an area in your home with patches and repairs requires a primer. Priming ensures a more uniform finish and limits the absorption of paint into the porous surface. A guide by Purdue University suggests using a water-based (latex) primer for new drywall.
– Wood
Untreated wood, particularly new or stained, also requires priming. Using a wood primer will provide a proper seal, avoiding any bleeding of the wood color or stains into the paint. Look for a dedicated wood primer for optimal results.
– Masonry
Concrete, brick, and other similar surfaces need a special masonry primer. This type of primer prevents alkali burn on your paint, reducing the risk of paint discoloration and ensuring proper adherence.
• The State of the Surface
In addition to the type of material, the current condition of the surface is another factor in determining the need for priming before painting. Generally, the surface state falls into three categories: clean and well-maintained, stained or damaged, and previously painted with an oil-based paint.
– Clean and Well-maintained Surfaces
If the surface is in good condition without any stains or damage, you may not need a primer if you’re using high-quality paint containing a self-primer. However, it’s still good practice to apply a primer, as it guarantees better paint adhesion and longevity.
– Stained or Damaged Surfaces
Surfaces with water stains, smoke damage, or uneven texture should be primed. A stain-blocking primer helps conceal these types of imperfections and ensures a smoother finish.
– Previously Painted with Oil-based Paint
When painting over oil-based paint with latex paint, priming is essential. If you skip this step, the new paint may not adhere well, leading to unwanted peeling and cracking. Use an oil-based or bonding primer for the best results.
• Choosing the Right Primer
Now that we have established the scenarios where you should prime before painting, let’s discuss the types of primers available, their benefits, and recommendations.
– Latex (Water-based) Primers
These primers are suitable for drywall, softwoods, and brick. Latex primers provide excellent surface adherence and are easy to clean. They dry more quickly, allowing you to apply paint sooner.
– Oil-based Primers
Ideal for raw woods and surfaces previously painted with oil-based paint, oil-based primers provide superior stain-blocking properties. However, they take longer to dry and have a strong odor during application.
– Shellac Primers
Shellac primers work well on stained or damaged surfaces, offering a high level of stain-blocking performance. They dry quickly but have a strong smell.
– Bonding Primers
These versatile primers are suitable for various surfaces, including glossy or slippery ones, ensuring proper paint adhesion.
• Conclusion
In summary, priming before painting indoors is highly recommended, especially for porous or stained surfaces or when changing paint type (e.g., from oil-based to latex paint). Priming ensures proper paint adhesion, provides a more uniform finish, and extends the life of your paint job.
Assess the material and condition of the surface you plan to paint to select the perfect primer for your needs. By investing in proper surface preparation, including priming, you ensure the best possible outcome for your indoor painting project.
Surface Condition | Should Prime |
|---|---|
New, unpainted drywall | Yes |
Previously painted, in good condition | No, but recommended to ensure even coverage |
Stained or smoke-damaged | Yes |
Glossy surfaces | Yes, to help with adhesion |
Darker color painted over with lighter color | Yes, to prevent the darker color from showing through |
Paneling or other textured surfaces | Yes, to ensure even coverage |
Applying Interior Paint Primer: A Step-by-Step Guide
Painting the interior of a home can be a rewarding and cost-effective way to refresh and update its appearance.
However, for the best possible results, it’s essential to use the right tools and techniques. One step that many people may overlook or not know how to do properly is applying interior paint primer.
• The Importance of Using Interior Paint Primer
Primer is a critical part of the painting process, helping to achieve an even, consistent, and durable finish. It serves multiple purposes, including:
- Sealing porous surfaces: Primer helps to seal porous surfaces like drywall, ensuring that the paint adheres evenly and does not get absorbed unevenly.
- Improving adhesion: Primer increases the bond between the surface being painted and the topcoat, helping the paint stick better and last longer.
- Enhancing coverage: Primer can also help to neutralize color differences in the material being painted, reducing the number of topcoats needed for complete coverage.
- Preventing stains: Some primers contain stain-blocking formulas that prevent stains from showing through the paint.
• Choosing the Right Primer for Your Painting Project
There are several types of primer available on the market, each with its own specific purpose and advantages. Some of the most common types include:
- Water-based or Latex Primer: Water-based primers are generally easy to clean up, dry quickly, and are ideal for most interior surfaces, including drywall, plaster, and wood.
- Oil-based Primer: Oil-based primers provide excellent adhesion and stain-blocking properties but may have a strong odor and longer drying times. They are best suited for unfinished wood or surfaces with heavy staining.
- Shellac Primer: Shellac primers are known for their exceptional stain-blocking abilities, including difficult stains like water damage or smoke. They dry quickly but have a strong odor and are more challenging to clean up.
Consider the surface you’re painting, existing stains or discolorations, and your preferred drying time to choose the right primer for your project. Consult with experts at your local paint store for product recommendations.
• Prepping the Surface for Primer Application
Preparation is a crucial step in ensuring the paint primer will adhere well to the surface. Follow these steps for proper surface preparation:
- Clean the surface: Remove any dirt, grease, or dust from the surface by cleaning it with a mild detergent and water. Allow the surface to dry completely.
- Repair any damage: Patch holes, cracks, or other imperfections with the appropriate filler (e.g., spackling, wood filler), and sand the surface smooth when the filler is dry.
- Remove loose paint: On previously painted surfaces, remove any loose or peeling paint with a scraper, wire brush, or sandpaper.
- Sand the surface: Lightly sand the entire surface to ensure proper adhesion. Use a fine-grit sandpaper (120-grit or higher) for best results. Wipe off any sanding dust with a clean, damp cloth.
• Primer Application Techniques
After prepping the surface, you’re ready to apply the interior paint primer. Follow these professional tips to achieve a smooth, even finish:
- Use the right tools: Choose a high-quality roller, brush, or paint sprayer designed for the specific type of primer you’re using. This guide from Consumer Reports can help with choosing the right tools for your project.
- Apply an even coat: Start by applying a thin, even coat of primer, working in a “W” pattern to ensure proper coverage. Then, go back over the initial “W” pattern with vertical, overlapping strokes to smooth out the primer and eliminate any streaks or ridges.
- Start at the top: Begin applying primer at the highest part of the room, such as the ceiling or upper wall, and work your way downwards.
- Take your time: Don’t rush the priming process, as this can lead to an uneven finish or other issues. Allow the primer to dry according to the manufacturer’s recommendations before applying additional coats or the topcoat of paint.
- Use proper ventilation: Ventilation is essential when using any primer, but especially when using oil-based or shellac primers, which emit strong odors. Open windows and use fans to provide adequate airflow during the application and drying process.
• Wrapping Up: Wait for the Primer to Dry Before Applying Paint
Once the primer has been applied, it’s essential to wait for it to dry fully before applying the topcoat of paint. Drying times can vary depending on the type of primer used, so be sure to follow the manufacturer’s recommendations for dry times.
Using interior paint primer as part of your painting project may take a bit more time and effort, but the results are well worth it. By following these steps and recommendations, you can achieve a professional-looking, long-lasting paint job that will enhance the look and feel of your home.
Determining the Ideal Number of Primer Coats for Interior Paint
When it comes to planning your interior painting project, it’s important to consider how many coats of primer will be required to get the job done. Understanding the ideal number of primer coats to apply will ensure that your paint adheres well and lasts longer on your walls.
• Understanding the Role of Primer
Primer is an essential component of the painting process that serves to prepare the surface for the final coat of paint. It essentially acts as a foundation that ensures better adhesion of the paint, improves coverage, and provides additional protection to the wall surface.
– Benefits of Using Primer
- Increases paint adhesion: Primer helps the paint to stick better on the surface, preventing peeling and chipping.
- Provides a uniform base: Primer evens out the surface, so the top coat of paint has an even appearance.
- Enhances coverage: Primer can help to cover stains, discoloration, and other imperfections on the wall.
- Allows for better color presentation: The right primer can enhance the true color of the paint applied on top.
• Determining the Number of Primer Coats to Apply
As a general rule, one coat of primer is usually sufficient for most interior painting projects. However, there are circumstances where more than one coat may be necessary. Here are a few examples:
– New Drywall or Unfinished Wood
If you are painting over new drywall or unfinished wood, it is highly recommended to apply one to two coats of primer. This is because these surfaces are highly absorbent and may require additional coats to ensure a smooth and even finish.
A primer specifically designed for new drywall or wood surfaces is recommended to create an ideal painting foundation.
– Dark to Light Color Transition
If you are attempting to change the color of a room from dark to light, you’ll likely benefit from applying two coats of primer. This will help create a neutral base and ensure that the old, dark color does not bleed through the new paint color.
– Stained or Highly Porous Surfaces
In cases where the surface has significant stains, or odors, or if it’s highly porous, a stain-blocking primer should be used. This type of primer is designed to seal the surface and prevent stains and odors from seeping through the paint.
Two coats of this primer may be necessary to adequately cover problematic areas.
– Glossy Surfaces
When painting over glossy surfaces, such as glossy paint, tile, or metal, you should use a bonding primer. This specialized primer is designed to help the paint adhere better to slick surfaces. One coat is typically sufficient, but two coats may be necessary for very slick or difficult-to-paint surfaces.
• Tips and Tricks for Applying Primer
- Choose the right primer: Select a good-quality primer appropriate for your specific surface and paint type. This may include oil-based or latex-based primers, as well as specialty primers for specific surfaces.
- Properly prepare the surface: Make sure to clean, sand, and patch any existing imperfections on the surface before applying primer. This will ensure a smooth and even finish.
- Use a tinted primer: For those changing the color of a room, consider using a primer that has been tinted to match the final paint color. This can help provide better coverage and potentially reduce the number of primer coats needed.
- Follow the recommended drying times: Allow adequate drying time between coats of primer and before applying the final paint coat. Rushing this process can result in an uneven finish and poor paint adhesion.
• Primer Recommendations from Experience
Taking into account the numerous factors discussed above, my general recommendation is one coat of primer for most interior painting projects, with some exceptions requiring two coats.
Prioritizing proper surface preparation, using the appropriate type of primer, and following recommended application tips will go a long way in ensuring a successful painting project.
For further information and detailed guidance on optimal interior painting preparation and primer application, refer to resources from reputable institutions, such as the US Environmental Protection Agency and paint manufacturers’ websites.
This will ensure that you have a clear understanding of the full process and can avoid unnecessary pitfalls along the way.
Mastering the Proper Sequence for Room Painting Success
A fresh coat of paint can completely transform a room, but the success of the paint job depends on following the correct order of operations.
• Clearing and Prepping the Room
Before you can begin painting, it’s essential to prepare the space.
- Remove all furniture and decorative items from the room. If this is not possible, move everything to the center of the room and cover it with plastic or drop cloths to protect it from paint and dust.
- Turn off the electricity in the room and remove any light fixtures, switch plates, and outlet covers. This will allow you to paint around these areas more easily.
- Thoroughly clean the walls and trim with a mixture of mild detergent and water, removing any dirt, grease, or dust. This step is crucial for ensuring the paint adheres properly to the surface. Allow the walls and trim to dry completely before proceeding.
- Assess the walls and trim for any damage or cracks that need repair. Fill any holes or cracks with a patching compound, and then sand the repairs smoothly. Wipe down the walls again to remove any dust from the sanding.
- Apply painter’s tape to any areas you don’t want to be painted, such as the edges of windows, door frames, and baseboards. This step is crucial for achieving clean lines and a professional finish.
• Priming the Walls
Priming is a critical step in the painting process. It provides a uniform base for the paint and helps it adhere better, resulting in a smoother and more durable finish. Follow these steps to prime the walls:
- Choose a high-quality primer that is appropriate for your wall material and the paint you plan to use. Some primers are specifically designed for use with latex or oil-based paints, while others are formulated for drywall, plaster, or other surface types.
- Use a wide brush, roller, or paint sprayer to apply the primer to the entire wall area. Start at the top and work your way down, using long, even strokes. Make sure you cover every inch of the wall with a thin, even layer of primer.
- Allow the primer to dry according to the manufacturer’s instructions, typically between 1-4 hours.
• Painting the Ceiling
After priming the walls, it’s time to paint the ceiling. This step should always be completed before painting the walls to avoid drips and splatters landing on freshly painted walls.
- Choose your ceiling paint. Flat or matte finishes are recommended for ceilings, as they can hide small imperfections and uneven surfaces.
- Use a wide brush or roller specifically designed for ceilings or a paint sprayer to apply the paint. Start in one corner and work your way across the room in overlapping sections. Make sure to apply the paint evenly and avoid leaving streaks or thick spots.
- Allow the ceiling paint to dry completely before moving on to the walls. This may take anywhere from a few hours to overnight, depending on the paint and environmental conditions.
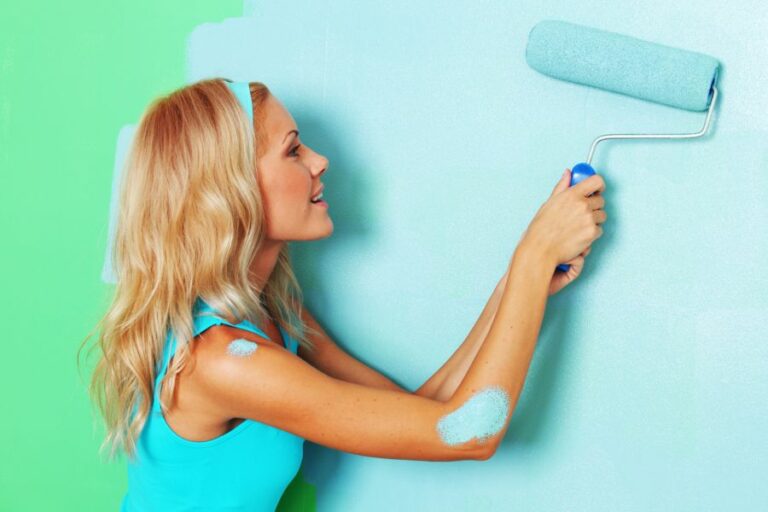
• Painting the Walls
Now that your ceiling is painted, it’s time to paint the walls. Follow these steps for a smooth, even finish.
- Choose a high-quality interior paint in your desired finish (e.g., flat, eggshell, satin, semi-gloss, or gloss) and color.
- Pour the paint into a paint tray, and use a roller to apply the paint to the walls, starting from the top and working your way down. Use long, even strokes and overlap your paint lines to avoid streaks or missed spots.
- Use a brush to “cut in” the paint along the edges of the walls, where the roller cannot reach. Be careful not to get paint on the trim or other areas taped off with painter’s tape.
- Depending on the paint color and coverage, you may need to apply a second coat of paint. Make sure the first coat is entirely dry before applying the second coat.
• Painting the Trim
The final step in painting a room is to paint the trim. This includes baseboards, door frames, window frames, and any crown molding.
- Choose a paint finish that complements your wall paint. For example, if you have flat or eggshell finish walls, consider using a semi-gloss or gloss finish for the trim. This provides contrast and makes the trim easier to clean.
- Use a high-quality brush to apply the trim paint, being careful not to get paint on the freshly painted walls or other surfaces. Start at one end of the trim and work your way down, using smooth, even strokes.
- Remove the painter’s tape carefully when the trim paint is still slightly wet to avoid pulling off any paint with it. This will help ensure a clean, crisp edge.
- Allow the trim paint to dry according to the manufacturer’s instructions.
• Final Touches and Clean Up
Once everything is dry, you can put the room back together.
- Reinstall any light fixtures, switch plates, and outlet covers you removed earlier.
- Replace the furniture and decorative items in the room.
- Clean and store your painting supplies for future use.
By following these steps in the correct order, you’ll achieve a professional-quality paint job that will enhance your living space for years to come.