A Step-By-Step Guide To Indoor Painting, 25 Things You Should Know
Are you looking to refresh your home with a new coat of paint but unsure how to get started? Look no further! I understand that painting a room can seem daunting, but it doesn’t have to be. With our step-by-step guide to indoor painting, I’ll provide you with all the essential tips and tricks to make the process smooth and enjoyable.
A step-by-step guide to indoor painting:
A step-by-step guide to indoor painting includes preparing the room, cleaning and repairing walls, applying painter’s tape, priming the walls, and painting with a brush and roller. Once the paint is dry, cleanup includes removing the tape, reinstalling outlet covers, and addressing imperfections. Using high-quality materials and following professional recommendations ensures a successful paint job.

Ready to transform your home with a fresh coat of paint? Our step-by-step guide to indoor painting will teach you everything you need to know – from selecting the right colors and tools to mastering the proper techniques. Keep reading to unlock your inner Picasso and breathe new life into your living space.
Contents
- 1 Comprehensive Guide to Interior Painting: Step-by-Step
- 2 Proper Sequence for Painting a Room: Expert Tips
- 3 Room Painting Basics for Novice DIYers
Comprehensive Guide to Interior Painting: Step-by-Step
A fresh coat of paint can transform the look of a room and improve the atmosphere of your living space.
• Materials You Will Need
- Paint (latex or oil-based, depending on your preference)
- Primer (if necessary)
- Paintbrushes (a variety of sizes)
- Paint roller and roller cover
- Paint tray
- Painter’s tape
- Drop cloths or plastic sheeting
- Ladder or step stool
- Sandpaper or sanding blocks
- Putty knife/scraper
- Patching compound (if needed)
- Rags and/or tack cloth
- Screwdriver (for removing outlet covers and switch plates)
- Safety gear (goggles, gloves, mask)
Pro Tip: Always choose high-quality paint and painting materials, as they provide better coverage and a more uniform result.
• Step 1: Preparation
– Remove Furniture and Cover Floors
Remove as much furniture as possible from the room. Cover any remaining items with plastic sheeting or drop cloths to protect them from paint splatter. Lay down drop cloths or plastic sheeting on the floor.
– Clean the Walls
Wipe down the walls with a damp cloth or sponge to remove any dirt, dust, or debris. This will ensure better paint adhesion.
– Repair Damaged Areas
Examine the walls for any cracks, holes, or imperfections. Use a putty knife and patching compound to fill these areas. Once it has dried, sand the patched areas smoothly.
Pro Tip: For additional guidance, consider consulting professional resources on wall repair.
– Tape Off Areas
Apply painter’s tape along the edges of trim, baseboards, and any other areas you don’t want to paint. Make sure the tape is pressed down firmly to prevent paint seepage.
• Step 2: Priming
Primer is essential for creating a uniform base and ensuring the best possible paint adhesion. If your walls are significantly discolored, stained, or have never been painted before, apply a coat of primer with a brush or roller. Allow the primer to dry according to the manufacturer’s instructions.
Pro Tip: When using a brush, apply the primer using long, smooth strokes in one direction to minimize visible brush marks.
• Step 3: Painting
– Mix the Paint
Stir the paint thoroughly to ensure even color distribution.
– Cutting In
Using a brush, paint a 2-3 inch band around the edges of the walls, ceiling, and trim. This is called “cutting in” and creates a clean edge.
Pro Tip: Use a high-quality angled brush for precision when cutting in.
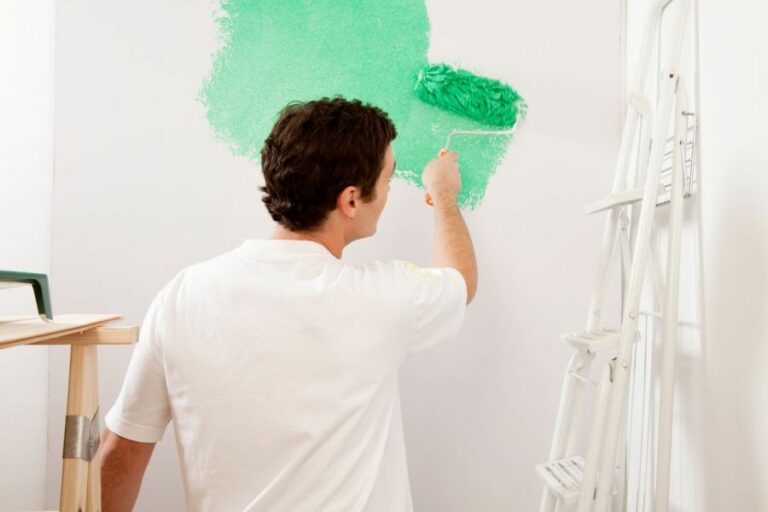
– Rolling the Walls
Load your paint roller with paint by rolling it back and forth in a paint tray. Apply the paint to the wall using a “W” or “M” shaped pattern. Fill in the remaining space with overlapping paint roller strokes, working from the top of the wall down to the bottom.
Pro Tip: Do not over-saturate your paint roller. Doing so can lead to drips and uneven paint coverage.
– Multiple Coats
Allow the first coat of paint to dry according to the manufacturer’s instructions. If necessary, apply additional coats until you achieve the desired coverage and finish, allowing each coat to dry before applying the next one.
• Step 4: Cleanup and Finishing Touches
– Remove Painter’s Tape
Carefully remove the painter’s tape while the paint is still slightly damp.
– Reinstall Outlet Covers and Switch Plates
Once the paint is completely dry, use a screwdriver to reinstall any outlet covers or switch plates that were removed.
– Inspect the Room
Check for any imperfections or touch-ups that need to be addressed. If needed, use a small paintbrush to make minor corrections.
• Conclusion
Freshening up a room with a new coat of paint can instantly improve the ambiance of your home. Following this step-by-step guide, along with considering professional recommendations, will help ensure a successful and beautiful outcome.
With a bit of patience, proper preparation, and quality materials, you can transform your living space with a stunning new color.
Proper Sequence for Painting a Room: Expert Tips
Painting a room can be a daunting task, especially for beginners. However, with the right knowledge and guidance, you can achieve professional results without breaking the bank. This comprehensive guide will help you understand the correct order to paint a room and make your painting project a success.
• Step 1: Plan and Prepare the Room
Before dipping your paintbrush, you must plan and prepare the room. Remove all furniture, decorations, and electrical fixtures. If you can’t move some items, cover them with plastic sheets or drop cloths to protect them from paint splatters.
Inspect the walls and ceiling for holes, cracks, and other imperfections. It would be best if you filled these with a suitable filler, such as spackling paste or joint compound. Sand the repaired areas and wipe down the walls to remove dust and debris.
After proper preparation, use painter’s tape to mask off baseboards, moldings, doorframes, and window sills to prevent accidental paint application.
• Step 2: Prime the Room
Priming is essential, especially when painting over dark colors, stains, or fresh drywall. It creates a smooth, evenly-toned surface for the paint to adhere to and increases the durability of the finish. Start by selecting a high-quality interior primer that matches your paint type (water-based or oil-based).
Apply the primer with a paint roller to the walls and ceiling, using a brush to cut in around edges and tight corners. Allow the primer to dry according to the manufacturer’s instructions.
• Step 3: Begin with the Ceiling
Painting the ceiling first helps prevent drips and splatters from ruining freshly painted walls. Use a roller with a long handle for easier application and a stepladder to reach the edges. Move-in parallel sections across the ceiling, overlapping each roller pass slightly to prevent missed spots.
Maintain a “wet edge” to blend each segment seamlessly. After completing the first coat, allow it to dry before applying the second coat if necessary.
• Step 4: Paint the Walls
Begin by cutting in around the edges of the room with a 2-3 inch angled brush. Use your brush to create a border approximately 2 inches wide along the baseboards, moldings, doorframes, and window sills. This border allows for smoother blending when using the roller.
Next, switch to a roller with an extension pole to paint the walls. Start in the top corner of the wall and work your way down in parallel sections, overlapping each stroke for even coverage. Apply a second coat if needed, allowing the paint to dry between coats.
• Step 5: Finish with Trim, Baseboards, and Doors
Once the walls are completely dry, focus on the trim, baseboards, and doors. Remove the painter’s tape and apply fresh tape to protect the wall’s freshly painted edges. Use a fine-bristle brush to paint these details carefully.
Start at the top of the room with the crown molding (if applicable) and work your way down to the baseboards. If you’re painting doors, remove the hardware and lay them flat to avoid drips. Allow the paint to dry, and apply a second coat if necessary.
• Step 6: Clean Up and Reassemble the Room
After the paint has dried completely, it’s time to clean up and put the room back together. Carefully remove all painter’s tape, being mindful not to damage the paint.
Reinstall electrical fixtures, wall decorations, and furniture. Use a damp cloth to remove any remaining dust or debris before replacing your room’s belongings.
• Expert Recommendations
When undertaking a painting project, investing in high-quality tools and materials is essential for achieving professional results. High-quality paint and rollers ensure even coverage and durability, while a quality brush aids in precise edge work.
Additionally, using an extension pole for the roller makes the task more manageable and alleviates the need for constant ladder adjustments.
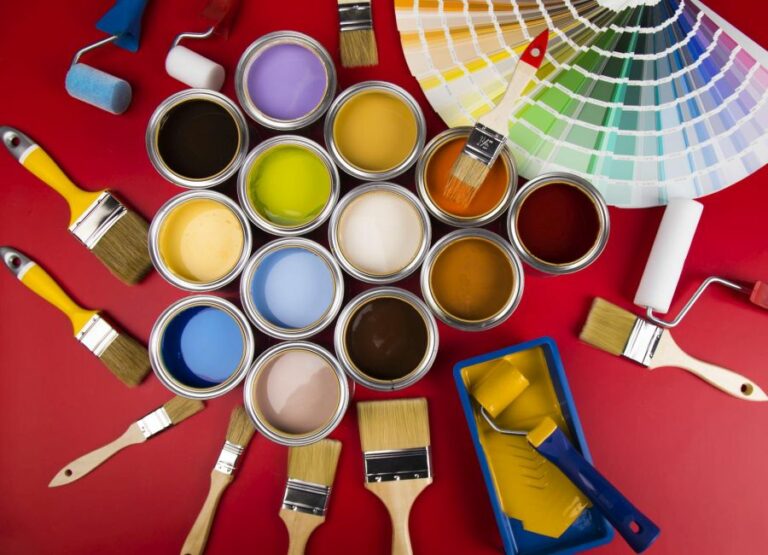
When selecting paint colors, consider the room’s size and lighting. Lighter colors can make a room appear more spacious, while darker hues create a cozy atmosphere. Test your chosen colors with sample swatches before committing to a large paint purchase.
Finally, patience is critical when painting a room. Rushing the process can result in drips, streaks, and uneven coverage. Following these steps and taking your time will yield the best results and leave you with a beautifully painted room that you can enjoy for years to come.
Happy painting!
Room Painting Basics for Novice DIYers
Painting a room can seem like a daunting task for beginners, but with the right tools, techniques, and patience, you can achieve professional-looking results.
• Tools and Materials Needed for Painting a Room
Before you begin, gather the necessary tools and materials for the job. This will help streamline the painting process and ensure that you have everything you need.
- Paint
- Paint primer (if needed)
- Paintbrushes
- Paint roller and tray
- Extension pole (for high walls or ceilings)
- Drop cloths or plastic sheeting
- Painter’s tape
- Sandpaper (120-grit)
- Putty knife
- Spackling compound
- Ladder
- Screwdriver (for removing hardware)
- Rags or paper towels
- Paint can opener and stirring stick
- Bucket (for mixing paint)
- Empty container (for pouring smaller amounts of paint)
• Preparing the Room for Painting
Before you begin painting, it’s essential to prepare the room thoroughly. This will ensure a smooth and clean surface for the paint to adhere to, resulting in a professional-quality finish.
– Step 1: Remove Furniture and Protect Floors
Empty the room of furniture, or if that’s not possible, move items to the center and cover them with drop cloths or plastic sheeting. Protect the floors by laying down drop cloths or plastic sheeting, and securing the edges with painter’s tape.
– Step 2: Clean the Walls
Use a mild detergent and water solution to clean the walls, removing any dirt, grease, or grime that could affect paint adhesion. Rinse the walls with clean water and then let them dry completely.
– Step 3: Repair Surface Imperfections
Examine the walls for any cracks, holes, or other imperfections that need repair. You can use a putty knife and spackling compound to fill these areas, following the manufacturer’s instructions. After the repairs have dried, use sandpaper to smooth the surface and then wipe away any dust.
– Step 4: Remove Hardware and Apply Painter’s Tape
Remove any wall plates or hardware that might get in the way while painting. Apply painter’s tape around the edges of the areas you don’t want to be painted, like baseboards, doors, and windows. Make sure the tape is pressed down firmly to prevent paint from seeping underneath.
• Primer and Paint Selection
Choosing the right primer and paint is crucial for achieving professional results. Primer helps to create a smooth and even surface for the paint to adhere to, while the quality of paint can greatly impact the final finish.
– Primer: To Prime or Not to Prime
If you’re painting a light color over a darker one, priming the walls can help you achieve better color coverage. Additionally, using a primer can be beneficial if you’re painting over a new drywall or a repaired surface. It’s also helpful if the walls are stained or if you’re using paint with a glossy finish.
– Paint: Quality Matters
The quality of paint you choose can significantly impact the final look and durability of your paint job. Higher-quality paints typically provide better coverage, fewer coats needed, and are more resistant to fading, chipping, and peeling. As a result, they tend to be more cost-effective in the long run.
• Painting Techniques for a Flawless Finish
Follow these tried and tested techniques to ensure a professional-looking finish without any visible brushstrokes or roller marks.
– Step 1: Use the “W” Technique
When rolling paint onto walls, use the “W” technique. Start by applying paint in the shape of a “W” in a roughly 3×3-foot section. Then, fill in the area using horizontal and vertical strokes. This ensures that the paint is distributed evenly and minimizes roller marks.
– Step 2: Cutting In
Before using the roller, it’s essential to “cut in.” This involves using a paintbrush to paint the edges of the walls, about 1-2 inches away from the baseboards, door frames, and windows. This technique allows for a seamless transition between the roller-applied paint and the brushed areas.
– Step 3: Paint in the Proper Order
Always paint the ceiling first, followed by the walls, doors, and finally, the trim. This order helps prevent any drips or smudges from ruining freshly painted surfaces.
– Step 4: Allow Adequate Drying Time
Allow enough time for the paint to dry before applying a second coat or removing the painter’s tape. Drying times can vary depending on the type of paint used, humidity, and temperature.
• Clean-Up and Final Touches
After the paint is completely dry, carefully remove the painter’s tape at a 45-degree angle to prevent any damage to the new paint. Reinstall any hardware or wall plates, and move the furniture back into place.
Finally, step back and admire your freshly painted room, knowing that you achieved professional-looking results.
For more tips on painting, check out this helpful guide from Cornell University.
Step | Description |
|---|---|
1. Gather materials | Collect paint, brushes, rollers, painter’s tape, drop cloths, and a ladder. |
2. Prepare the room | Remove or cover furniture, take off outlet covers and light switches, and lay down drop cloths to protect the floor. |
3. Clean and repair walls | Wipe away dirt and dust, and patch any holes or cracks with spackle. |
4. Apply painter’s tape | Use painter’s tape to protect baseboards, trims, and other areas you don’t want to paint. |
5. Prime the walls (optional) | Apply a coat of primer if you are painting over a dark color, using a new drywall, or covering stains. |
6. Paint the edges | Using a brush, carefully paint a 2-3 inch border around the edges of the walls, ceiling, and trim. |
7. Roll on the paint | Fill in the large areas using a roller, working in a “W” or “M” pattern to distribute the paint evenly. |
8. Apply additional coats | Allow the paint to dry, then apply additional coats as needed until the desired coverage is achieved. |
9. Remove painter’s tape | Peel off the painter’s tape while the paint is still slightly wet to ensure clean lines. |
10. Clean up | Dispose of used materials, clean brushes and rollers, and put the room back together. |