Spray Paint Plastic: A Step-By-Step Guide For Success
Are you looking to transform that old plastic furniture or give your outdoor decorations a fresh new look? You’ve come to the right place! With our easy-to-follow, step-by-step guide, we’ll teach you how to successfully spray paint plastic and achieve a stunning, long-lasting finish. No more wondering how to make spray paint stick to plastic or dealing with uneven, chipping results.
Spray paint plastic: a step-by-step guide for success:
To successfully spray paint plastic, follow these steps: 1) Clean the surface with mild dish soap and water, 2) Sand the surface using 220-grit sandpaper, 3) Prepare the area for painting, 4) Spray paint the object in smooth, even strokes, applying multiple thin coats, and 5) Allow the paint to dry and cure as per the manufacturer’s instructions.

Ready to transform your old plastic items with a fresh coat of spray paint? Stick around as we unveil the secrets to achieving a perfect finish, from proper preparation to sealing the deal. Read on!
Contents
- 1 Achieve Perfect Plastic Spray Painting: Step-by-Step Guide
- 1.1 • Necessary Materials for Spray Painting Plastic
- 1.2 • Step 1: Thoroughly Clean the Plastic Surface
- 1.3 • Step 2: Sand the Object’s Surface
- 1.4 • Step 3: Prepare the Area for Painting
- 1.5 • Step 4: Spray Painting the Object
- 1.6 • Step 5: Allow the Paint to Dry and Cure
- 1.7 • Final Thoughts on Spray Painting Plastic
- 2 Mastering the Art of Spray Painting Plastic: Step-by-Step
- 3 Permanent Spray Painting on Plastic: Essential Techniques
- 4 Prepping Plastic for Spray Painting: Necessary Steps
- 4.1 • The Importance of Prepping Plastic for Spray Painting
- 4.2 • Step 1: Choose the Right Spray Paint
- 4.3 • Step 2: Clean the Surface
- 4.4 • Step 3: Sand the Surface
- 4.5 • Step 4: Wipe Away Sanding Dust
- 4.6 • Step 5: Apply a Plastic Primer
- 4.7 • Step 6: Spray Paint the Surface
- 4.8 • Step 7: Apply a Clear Coat
- 5 Determining the Ideal Number of Spray Paint Coats on Plastic
Achieve Perfect Plastic Spray Painting: Step-by-Step Guide
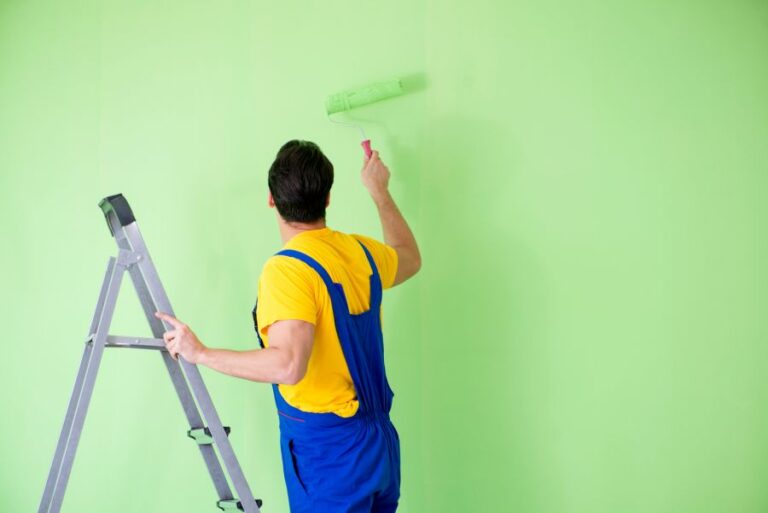
Spray painting plastic is a convenient and affordable way to transform the appearance of different surfaces. Not only can you achieve an entirely new look, but it also extends the lifespan of various items.
• Necessary Materials for Spray Painting Plastic
Before we dive into the step-by-step process, let’s first discuss the essential materials you will need for your spray paint project.
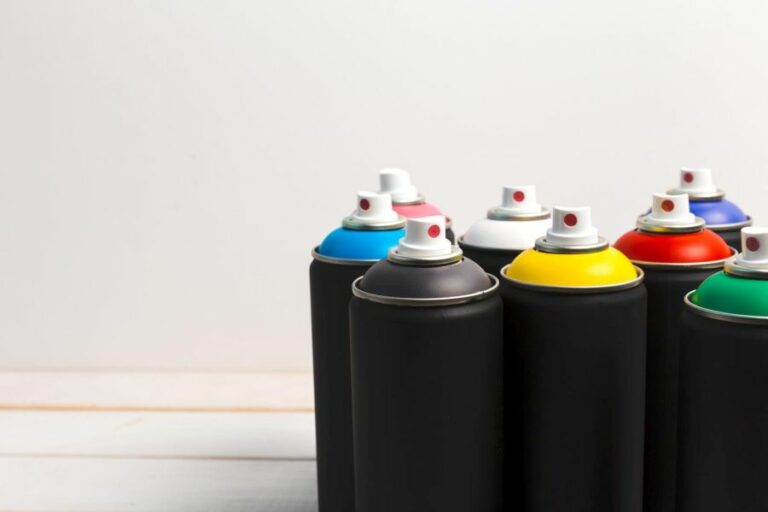
- Quality plastic spray paint
- Sandpaper (220 grit)
- Dedusted and clean microfiber cloth
- Mild dish soap
- Sponge
- Bucket
- Rubber gloves
- Newspaper or drop cloth
- Painter’s tape
- Respiratory mask and safety glasses
As you can see, having the right materials is crucial for the success of your project. It not only ensures perfect results but also protects you from any harmful substances.
• Step 1: Thoroughly Clean the Plastic Surface
One of the most significant factors contributing to successful spray paint adherence is a clean surface. When it comes to plastic surfaces, consider using mild dish soap and water. In a bucket, mix the dish soap and water until you create a simple cleaning solution.
Dip the sponge into the solution, wring it out, and gently clean the surface. Make sure to scrub off any dirt, grease, or grime that might interfere with the paint’s adhesion. Give the surface some time to air-dry, or speed up the process by wiping it with a microfiber cloth.
• Step 2: Sand the Object’s Surface
Sanding the plastic surface is essential for achieving a proper paint bond. Using the 220-grit sandpaper, gently sand the entire surface in a circular motion to create a slightly rough texture, which will help the paint stick.
Remember not to apply too much pressure, as this may cause the plastic to scratch and damage. After sanding the surface, use a microfiber cloth to remove any residual dust or debris that can negatively affect the paint’s adherence.
• Step 3: Prepare the Area for Painting
Spray painting can easily become a messy process, so it is vital to protect the surrounding area. Choose a well-ventilated location, ideally outdoors or in a garage, to execute your project. Lay down newspapers or a drop cloth on the painting surface to catch any paint drips or overspray.
If necessary, use painter’s tape to secure the protective layer or to mask off any areas you don’t want to paint.
• Step 4: Spray Painting the Object
Before you begin, it is crucial to don your respiratory mask and safety glasses to protect yourself from any potential hazards.
Follow the manufacturer’s instructions on the spray paint can. It is often advised to shake the can for around one minute to ensure the paint is well-mixed. Test the spray paint on a piece of cardboard to get a feel for the pressure and coverage.
Hold the spray paint can at a distance of approximately 8-12 inches from the surface, and apply smooth, even strokes. Start your strokes slightly off the edge of the plastic and gradually cover the entire surface. If possible, apply several thin coats instead of one thick coat to achieve a more even finish.
Allow the paint to dry completely (based on the manufacturers drying time recommendations) before applying additional coats.
• Step 5: Allow the Paint to Dry and Cure
It is essential to give the paint sufficient time to dry and cure before putting the object to use. Refer to the manufacturer’s instructions for the recommended drying time, which can vary depending on the type of spray paint.
Typically, it’s best to avoid touching or handling the item for at least 24 hours to ensure a durable finish.
• Final Thoughts on Spray Painting Plastic
By following this step-by-step guide, you will achieve a successful transformation of your plastic surface with ease. Remember that the key to success lies in thorough surface preparation and patience throughout the drying process.
Mastering the Art of Spray Painting Plastic: Step-by-Step
Spray painting plastic is a convenient and affordable way to give a new life to old or outdated items. Whether it’s a toy, a piece of furniture, or even your car’s interior, spray paint can be a fast and effective method for a DIY transformation.
Here is a detailed guide on how to achieve a professional outcome when spray painting plastic.
• Supplies Needed
- Plastic item you intend to paint
- Sandpaper (220 to 400 grit)
- Clean cloth or tack cloth
- Alcohol or ammonia-free window cleaner
- Plastic primer
- Spray paint suitable for plastic
- Clear coat (optional)
- Rubber gloves
- Respiratory mask
- Protective goggles
• Step 1: Prep Your Workspace
Choose a well-ventilated area for your spray painting project, such as outdoors or in a garage with the door open.
You will need a flat surface like a workbench or a table covered with newspaper or plastic sheets to protect it from paint. Make sure you have enough space around your item for efficient spray painting.
Expert Tip:
Spray painting should be done in a controlled environment, ideally at a temperature between 50-90F (10-32°C) and humidity below 85%. High humidity levels can cause paint to have a cloudy finish or take longer to dry.
• Step 2: Sanding the Surface
Before you paint, it is essential to smoothen the surface of the plastic item. Sanding will remove dirt, dust, and any glossiness, allowing better paint adhesion. Wearing rubber gloves, start with 220 to 400 grit sandpaper and gently sand in a circular motion.
It is important to be thorough yet gentle to avoid scratching the plastic.
• Step 3: Cleaning the Surface
After sanding, remove any dust using a clean cloth or tack cloth. Next, use an alcohol or ammonia-free window cleaner to thoroughly clean the surface. These types of cleaners will not leave a residue that could interfere with paint adhesion.
Allow the plastic to air-dry and ensure that it is completely free of moisture before moving on to the next step.
• Step 4: Applying Plastic Primer
Using a high-quality primer specifically designed for plastics is crucial for the successful adhesion of the paint. Shake the primer can vigorously for 1 minute, and then spray a light, even coat from a distance of 10-12 inches (25-30 cm).
Avoid holding the can too close to the surface to prevent drips and unevenness. Follow the instructions on the primer can for the recommended drying time, usually around 1 hour.
Expert Tip:
Primer can be tinted to better match your chosen spray paint color. Consult your local paint store for guidance on tinting primer.
• Step 5: Spray Painting the Plastic
First, shake the spray paint can for 1 minute to ensure proper color and texture mixing. Then, using a sweeping motion, evenly apply the paint at a distance of 10-12 inches (25-30 cm) from the surface. Start and end each sweep off the edges of the item to prevent overspray and unevenness.
Apply multiple light coats, waiting for the recommended drying time between each application (usually 5-10 minutes).
Expert Tip:
Test the spray paint on a piece of cardboard or scrap plastic before applying it to your project. This will help you achieve a better feel for your paint’s consistency, color, and finish.
• Step 6: Applying Clear Coat (Optional)
To protect the paint finish and add an extra shine, you can apply a clear coat designed for plastic. Shake the clear coat can for 1 minute, and then spray an even layer from a distance of 10-12 inches (25-30 cm). Apply multiple light coats, allowing drying time between each (usually 5-10 minutes).
Finally, wait for the clear coat to cure before touching or using the item, which may take up to 24 hours.
• Step 7: Proper Care for Painted Plastic
Ensure your painted plastic item has completely dried and cured before exposing it to daily use, extreme temperatures, or harsh chemicals. Keeping your painted plastic item clean and dust-free will help maintain its new finish. To clean, use a soft cloth and gentle soap and water.
In conclusion, with proper preparation, the right materials, and patience, spray painting plastic can produce professional results with a smooth, durable finish.
Step | Description |
|---|---|
Step 1: | Clean the plastic piece thoroughly with soap and water to remove any dirt or grease. |
Step 2: | Rinse the plastic piece with clean water and dry it completely using a soft cloth. |
Step 3: | Lightly sand the plastic surface using fine-grit sandpaper (between 180 and 220 grit) to create a slightly rough surface for better paint adhesion. |
Step 4: | Wipe the plastic piece with a tack cloth to remove any sanding dust. |
Step 5: | Apply a thin coat of plastic primer using smooth, even strokes. Allow the primer to dry according to the manufacturer’s instructions. |
Step 6: | Shake the spray paint can vigorously for about one minute to mix the paint properly. |
Step 7: | Hold the spray paint can about 12 inches away from the plastic piece and apply a thin, even coat of paint using smooth, sweeping motions. Allow the first coat to dry for the recommended time.< /td>
|
Step 8: | Apply additional coats of spray paint, allowing each coat to dry before applying the next one, until you achieve the desired coverage and finish. |
Step 9: | Allow the spray paint to dry and cure completely according to the manufacturer’s instructions before handling or using the plastic piece. |
Permanent Spray Painting on Plastic: Essential Techniques
Spray painting plastic is a popular and cost-effective method to give new life to various items, such as furniture, toys, and automotive parts.
• Proper Preparation is Key
Before starting the spray painting process, you must prepare the plastic surface properly. Cleanliness and a smooth surface will significantly affect the paint’s adhesion and overall durability.
– Cleaning the Surface
First, remove all dirt, dust, and oily residues using a mild dish soap and water solution. Scrub the surface with a soft brush or cloth, then rinse thoroughly with clean water.
For more thorough cleaning, you can use a plastic cleaner or isopropyl alcohol. After cleaning, allow the plastic to dry completely.
– Sanding the Surface
For optimal adhesion, it is essential to sand the surface lightly. Start with 220-grit sandpaper and sand the entire area in a circular motion. This step will create small scratches that will enable the primer and paint to grip better.
After sanding, wipe the surface with a tack cloth to remove any dust or debris.
• Choosing the Right Materials
Selecting the right primer, paint, and clear coat specifically designed for plastics is crucial for a permanent and durable finish.
– Plastic Primer
For better adhesion and durability, apply a plastic primer before painting. Primers specifically formulated for plastic surfaces are available in most hardware stores. These primers create a solid bond between the plastic and the paint, preventing peeling and flaking.
– Spray Paint on Plastic
When choosing spray paint, look for products specifically designed for plastic applications. These paints usually contain special additives to improve adhesion and flexibility on plastic surfaces.
One popular choice among professionals is Krylon Fusion, which is formulated to bond directly to most plastics without the need for a primer.
– Clear Coat
To add extra protection and enhance the appearance of your painted plastic, you can apply a clear coat after the paint has fully cured.
This additional layer will help protect the paint from scratches and UV damage, ensuring a longer-lasting finish. Look for clear coats specifically designed for plastic surfaces for optimal results.
• Applying the Primer, Paint, and Clear Coat
Achieving a professional-looking finish requires proper technique and patience. Here are some tips to ensure your plastic receives a smooth, even, and long-lasting coat of paint.
– Primer Application
- Shake the primer can for at least one minute to mix the contents thoroughly.
- Hold the can 10-12 inches away from the surface, and apply a thin and even layer in a sweeping side-to-side motion.
- Start and stop spraying off the edges of the plastic to prevent buildup.
- Allow the primer to dry according to the manufacturer’s instructions, typically between 30 min to 1 hour.
– Spray Painting Tips
- Shake the spray paint can for at least one minute before use.
- Test the spray on a piece of cardboard to get a feel for the flow and pressure.
- Apply multiple thin coats instead of one thick coat to avoid drips and runs.
- Allow each coat to dry for the recommended drying time stated on the can, typically between 10 to 20 minutes.
- After applying the final coat, let the paint cure for at least 24 hours or as directed by the manufacturer.
– Clear Coat Application
- Shake the clear coat can for at least one minute to mix the contents.
- Hold the can 10-12 inches away from the surface and apply a thin, even layer in a side-to-side motion.
- Apply two or more coats, allowing each coat to dry according to the manufacturer’s recommended time.
- Let the clear coat fully cure for at least 24 hours before handling the painted plastic.
• Curing and Aftercare
Proper curing is essential for ensuring the paint’s durability and longevity. After allowing the paint and clear coat to dry for the recommended duration, it’s best to let the item cure in a well-ventilated, dust-free area for 5-7 days.
During this time, avoid touching, moving, or exposing the painted plastic to harsh conditions.
Once fully cured, taking care of the painted plastic can help prolong the paint’s lifespan. Clean the item gently using a mild soap and water solution, and avoid abrasive or harsh tools that could scratch or damage the paint.
• Conclusion
Achieving a high-quality, long-lasting finish on plastic surfaces requires proper preparation, selecting the right materials, and applying the paint with proper technique and care.
By following the steps outlined in this comprehensive guide, you can successfully and permanently spray paint plastic items, giving them a fresh and attractive new look.
Step | Instruction |
|---|---|
1 | Clean the plastic surface with soap and water, and dry thoroughly. |
2 | Lightly sand the surface with fine-grit sandpaper to remove any gloss and help the paint adhere. |
3 | Apply a coat of plastic primer to the surface, following the manufacturer’s directions. Allow it to dry completely. |
4 | Shake the spray paint can well, and spray a light coat of paint onto the plastic, holding the can about 12 inches away. Apply multiple thin coats, allowing each coat to dry before applying the next one. |
5 | Allow the paint to dry completely, which may take 24 to 48 hours. |
6 | Apply a clear sealer, if desired, to protect the paint and increase its durability. Allow it to dry according to the manufacturer’s directions. |
Prepping Plastic for Spray Painting: Necessary Steps
Spray painting plastic materials can be a challenge due to the smooth and non-porous nature of the surfaces. However, thorough preparation is essential to achieve the desired results, as it prevents peeling, chipping, and poor adhesion.
• The Importance of Prepping Plastic for Spray Painting
Preparation is key to a successful paint job on plastic materials. Some of the reasons why prepping plastic before spray painting is essential include:
- Better paint adhesion: Proper preparation ensures that the paint adheres well to the surface, reducing the likelihood of peeling and chipping.
- Smoother finish: Cleaning and sanding the plastic surface before painting help achieve a more professional-looking, even finish.
- Increased durability: Taking the time to prepare your plastic surface significantly increases the longevity of the paint job.
• Step 1: Choose the Right Spray Paint
Selecting the appropriate spray paint for plastics is crucial. Look for products specifically designed for plastic surfaces, as these paints contain additives that improve adhesion and durability.
Many manufacturers offer paints formulated for use on plastics, such as Krylon Fusion and Rust-Oleum Plastic Primer. Always read and follow the manufacturer’s instructions for the best results.
• Step 2: Clean the Surface
Before you start spray painting, ensure that the plastic surface is clean and free of dust, dirt, grease, or any other contaminants. Use warm, soapy water and a soft cloth or sponge to clean the surface.
After cleaning, thoroughly rinse the plastic to remove any soap residue and allow it to air dry, or use a lint-free cloth to dry it.
• Step 3: Sand the Surface
Sanding is a critical step in the pre-painting process, as it promotes better paint adhesion and a smoother finish. Start by using 220-grit sandpaper to lightly sand the entire surface of the plastic. This will create a rough texture, allowing the paint to bond more effectively.
• Step 4: Wipe Away Sanding Dust
After sanding the plastic surface, it is crucial to remove any sanding dust before painting. Use a tack cloth or a clean, damp cloth to wipe away dust and debris from the surface. Ensure that the plastic is completely dry before advancing to the next step.
• Step 5: Apply a Plastic Primer
Applying a plastic primer before spray painting significantly improves paint adhesion and increases the durability of the final paint job. Use a spray primer designed specifically for plastic surfaces and follow the manufacturer’s instructions for application.
Allow the primer to dry for the recommended time before proceeding to spray paint. The drying time may vary depending on the brand and environmental conditions.
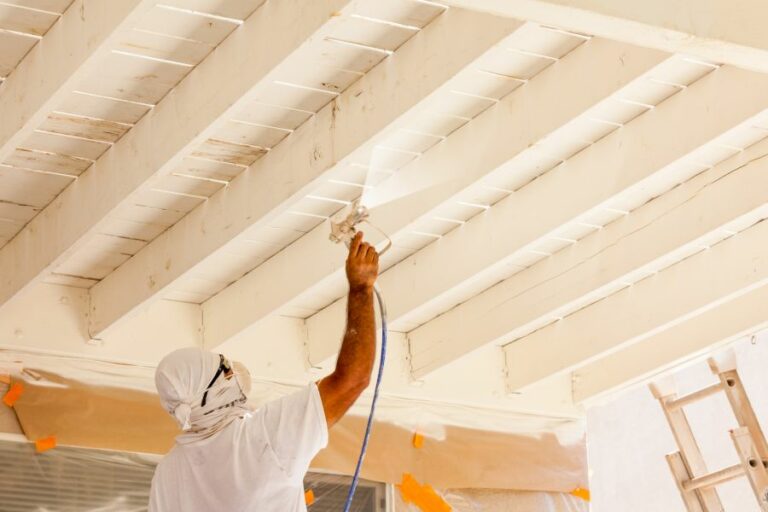
• Step 6: Spray Paint the Surface
With the surface prepped and primed, you can now proceed to spray paint the plastic. Hold the can about 8-12 inches away from the surface and apply thin, even coats using a side-to-side sweeping motion.
It is essential to apply multiple light coats rather than a single heavy coat to avoid dripping or uneven coverage.
Allow each coat to dry for the recommended time before applying the next. The number of coats required will depend on the desired opacity and the specific spray paint used.
• Step 7: Apply a Clear Coat
To enhance the durability and glossiness of the paint job, apply a clear protective coat over the dried paint. Look for spray clear coats specifically designed for plastic surfaces and follow the manufacturer’s instructions for application.
Allow the clear coat to dry for the recommended time before handling or reassembling the painted plastic object.
In conclusion, properly preparing plastic surfaces before spray painting is essential for achieving a professional, durable, and smooth finish. By following these step-by-step instructions, you can ensure that your paint job will look its best and last for an extended period.
Question | Answer |
|---|---|
Do you need to prep plastic before spray painting? | Yes, prepping plastic before spray painting is essential to ensure proper adhesion and a smooth finish. This process typically includes cleaning the surface with soap and water, lightly sanding or scuffing the plastic, and using a primer specifically designed for plastic. |
Determining the Ideal Number of Spray Paint Coats on Plastic
Spraying paint onto plastic can be a tricky endeavor. However, with the right preparation, materials, and technique, you can achieve professional results. One of the key questions when approaching this type of project is, “How many coats of spray paint on plastic should be applied?”
• Surface Preparation is Key
Before you even think about applying any coats of spray paint to your plastic item, it’s essential that you prepare the surface properly. Remember that paint will adhere better to a clean, rough surface. Be sure to follow these steps to prepare your plastic item:
- Clean the surface: Remove all dirt, grime, and oils from the plastic surface by washing it with a mild dish soap and warm water solution. Allow it to dry completely before proceeding.
- Remove any glossy finish: Many plastics have a shiny, smooth finish that can prevent the paint from properly adhering. Lightly sand the surface with fine-grit sandpaper (around 220-grit) until the gloss is gone. Be sure not to sand too vigorously, as you want to avoid scratching the plastic.
- Prime the surface: Apply a coat of plastic-specific primer to the surface. This will help the spray paint adhere properly and provide a more even finish. Be sure to follow the manufacturer’s instructions for the primer you choose, as drying times and application methods can vary.
• Choosing the Right Spray Paint
Not all spray paints are created equal, especially when painting plastic. It’s important to choose a spray paint specifically formulated for use on plastics. These paints contain chemicals that will properly bond to the plastic surface and ensure a more durable finish.
Look for products labeled as “plastic” or “multi-surface” paint. In addition, consider opting for a paint with a built-in primer; this can simplify the process and provide excellent results.
• The Proper Technique for Applying Spray Paint
Even with a properly prepared surface and the right paint, your results can fall short if your painting technique is lacking. Follow these best practices for applying spray paint to your plastic item:
- Shake the can well: Shake the spray paint can for at least one minute to ensure the contents are properly mixed.
- Spray from a distance: Hold the can approximately 10-12 inches (25-30 cm) from the plastic surface while spraying. This allows the paint to disperse evenly and prevents sagging or dripping.
- Apply thin coats: When applying spray paint, it’s better to use multiple thin coats instead of trying to achieve full coverage with a single thick coat. This helps to reduce the risk of drips and provides a more even, professional-looking finish.
- Use a sweeping motion: Move the can in a steady, sweeping motion across the surface, overlapping each pass by about one-third. This helps to ensure complete coverage and reduces the risk of uneven paint application.
• How Many Coats Should You Apply?
Now that you know the proper technique for applying spray paint to plastic, it’s time to address the question of how many coats are needed. The general rule of thumb is to apply 2-3 coats of spray paint for adequate coverage and optimal durability.
However, this number can vary depending on the specific paint you’re using, the color you’re applying, and the surface being painted.
For example, if you’re applying a light color over a dark plastic surface, you may need additional coats to achieve full coverage. Conversely, if you’re using paint with a built-in primer, you may find that two coats are more than enough.
Here is a general guideline for applying coats:
- Apply the first coat: Once your primer is dry, apply your first coat of spray paint using the proper technique described earlier. Allow the paint to dry according to the manufacturer’s instructions. In most cases, this will be around 20-30 minutes.
- Inspect the coverage: After the first coat has dried, assess the level of coverage. If it appears even and fully covers the surface, you may only need one more coat. However, if you can still see the primer or original plastic color through the paint, you’ll likely need at least two more coats.
- Apply additional coats as needed: Continue applying thin, even coats of paint until you achieve the desired coverage. Be sure to allow each coat to dry fully before applying the next one, as this prevents the paint from becoming too thick or uneven.
- Protect your paint job: After your final coat has dried, consider applying a clear coat or sealant to protect your paint job. This will give your plastic item a professional, long-lasting finish. Be sure to choose a clear coat compatible with your spray paint.
• Conclusion
When painting plastic, remember that proper surface preparation, choosing the right spray paint, and utilizing the proper technique are all essential for achieving excellent results. Generally, applying 2-3 coats of spray paint will provide the best coverage and durability.
However, always consider the specific products you’re using, as well as the color and surface being painted, to determine the optimal number of coats for your project.