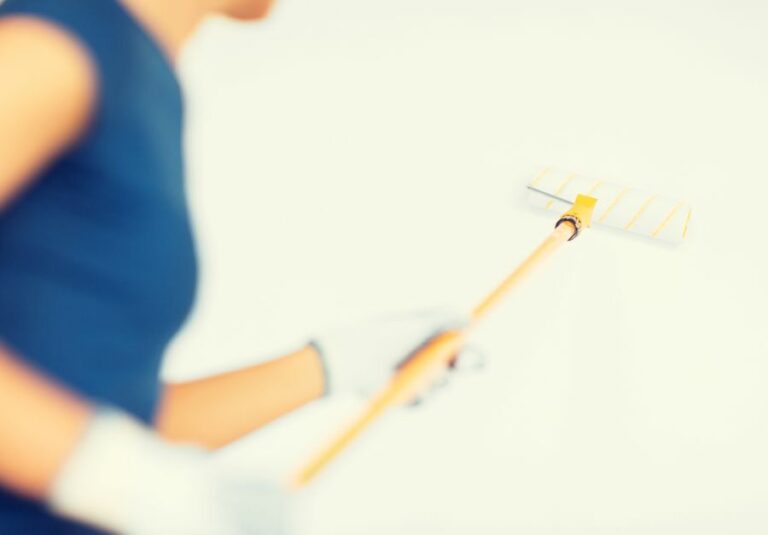
How To Apply Indoor Painting Primer, 25 Things You Should Know
Are you ready to give your indoor space a fresh look with a coat of paint but unsure how to start with a primer application? Fear not! We have got you covered with simple yet effective guidance on how to apply indoor painting primer like a pro. With these tips, you’ll confidently set the foundation for a flawless painting job in no time.
How to apply indoor painting primer:
To apply indoor painting primer, choose the right primer based on the surface and VOC content. Prepare the surface by cleaning, repairing, sanding, and masking. Stir the primer well, cut in the edges with a brush, and then use a medium nap roller for even coverage. Allow the primer to dry according to the manufacturer’s instructions, maintain proper ventilation, and use high-quality tools for the best results.

Discover the secrets to a flawless, long-lasting paint job! Our guide on ‘How to apply indoor painting primer’ will walk you through the process step-by-step, with tips and tricks from the pros. Let’s dive in and transform your space with the perfect base for your new color. Keep reading!
Contents
Indoor Painting Primer Application Tips
• Selecting the Right Primer
Before starting any indoor painting project, it is crucial to select the appropriate primer. Primers are formulated for a variety of purposes, such as providing a smooth finish, protecting against stains, and promoting adhesion.
I recommend using a high-quality primer for the best results, ensuring proper coverage and durability.
- All-Purpose Primer: Ideal for a wide range of surfaces, including drywall, wood, and plaster.
- Drywall Primer: Specifically designed for use on new or previously painted drywall surfaces.
- Stain-Blocking Primer: Suitable for surfaces with water or oil-based stains, like wood knots or nicotine stains.
- Bonding Primer: Used to promote adhesion on challenging surfaces like glossy paint, tile, or plastic.
When choosing a primer, consider its VOC (Volatile Organic Compounds) content. Low-VOC or no-VOC primers are generally better for indoor use, as they have minimal odor and dry faster.
The Environmental Protection Agency (EPA) offers a comprehensive guide on VOC levels and their impact on indoor air quality. See EPA’s Indoor Air Quality page for more information.
• Preparing the Surface
Proper surface preparation is essential to ensure the primer adheres correctly and provides a smooth foundation for your paint.
- Cleaning: Remove any dirt, dust, grease, or mildew from the surface. If necessary, use a paint degreaser to clean greasy surfaces. Allow the surface to dry completely before applying primer.
- Repairing: Fill any gaps, dents, or cracks on the surface using a suitable filler, like a joint compound or wood putty. Once dry, sand the repaired areas until smooth and even with the surrounding surface. For detailed instructions on surface repairs, refer to this guide from Family Handyman.
- Sanding: Lightly sand the entire surface, especially if it is glossy or has a rough texture. This helps create a better bond between the primer and the surface. After sanding, wipe the surface clean with a damp cloth to remove any dust.
- Masking: Protect any areas you do not wish to paint with painter’s tape, such as trim, electrical outlets, and windows. Also, cover the floor and furniture with drop cloths to prevent primer and paint drips.
• Applying the Primer
Once your surface is clean, repaired, and ready, it is time to apply the primer.
- Stirring: Stir the primer well before use. This ensures a consistent, smooth texture, making it easier to apply and providing better results.
- Cutting in: Using a brush or small roller, apply primer around the edges of the surface. This creates a border, making it easier to roll primer onto the larger areas without overlapping with adjacent surfaces.
- Rolling: Pour the primer into a paint tray, and using a medium nap roller, apply the primer to the surface in a consistent, even pattern. Begin at one corner of the room, moving in sections to cover the entire surface. Overlap each section slightly to avoid visible seams.
- Drying: Allow the primer to dry according to the manufacturer’s instructions. This ensures a proper bond between the primer and the surface and provides an optimal surface for your paint.
• A Few Tips for a Successful Priming Project
- Maintain proper ventilation: Always ensure that the room is well-ventilated before, during, and after the priming process. Open windows and doors, and use fans to improve air circulation. This helps reduce fumes and speeds up the drying process.
- Use the right tools: Invest in high-quality brushes, rollers, and paint trays. This will provide better coverage and a smoother finish, ultimately making your painting project easier and more successful.
- Don’t rush the process: Take your time applying the primer, ensuring even coverage and avoiding drips or runs. Remember that a properly primed surface will make your final paint job easier and more beautiful in the long run.
By following these steps and tips, you can achieve professional results when applying indoor painting primer. With a well-primed surface as your foundation, your paint job will look better, last longer, and provide greater satisfaction with your indoor painting project.
Step | Description |
|---|---|
1 | Prepare the surface by cleaning and fixing any imperfections. |
2 | Choose the right primer for your surface (e.g., drywall, wood, or masonry). |
3 | Protect your floors and furniture by laying drop cloths and taping off areas if necessary. |
4 | Stir the primer with a paint stick until it’s mixed consistently. |
5 | Use a brush to cut in around edges, corners, and trim, then fill in the rest with a roller. |
6 | Apply a second coat if necessary after allowing the first coat to dry completely. |
7 | Clean your brushes and tools, then let the primer dry according to the instructions on the can. |
8 | Once the primer is completely dry, you’re ready to paint! |
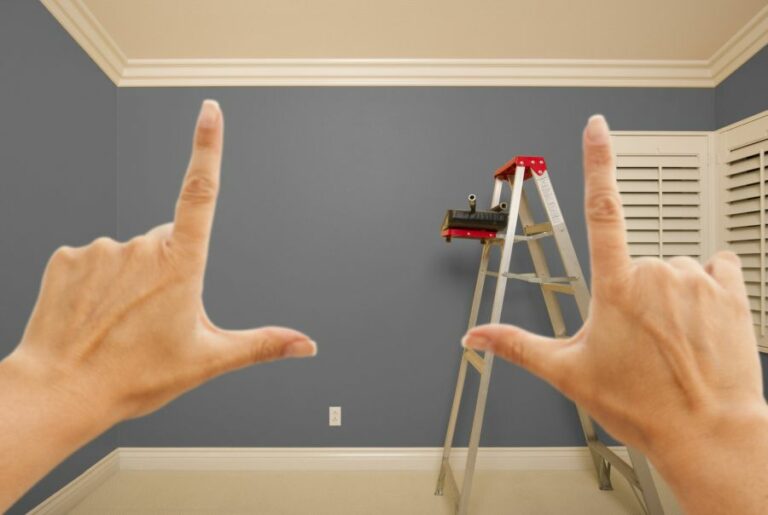
Using Interior Paint Primer: A Guide
Applying a paint primer is an essential step in achieving excellent painting results for your home’s interior walls. It ensures your paint adheres correctly, doesn’t peel or crack, and leaves a professional finish.
• The Importance of Using Interior Paint Primer
Interior paint primer should not be overlooked, as it has specific benefits:
- Enhances Adhesion: Primer makes sure the paint sticks better to the surface.
- Seals Porous Surfaces: Primer fills in any small holes, gaps, or pores on the surface.
- Provides a Uniform Finish: Primer offers a consistent base color that helps paint cover evenly.
- Improves Durability: Primer helps the topcoat of paint last longer and resist wear and tear.
- Reduces the Number of Paint Coats Needed: A primed surface can often require fewer coats of paint.
• Choosing the Right Primer
Selecting the appropriate primer is just as important as using it. Here are the main types of primers available:
– Latex Primers
Latex primers are water-based and suitable for most surfaces, including drywall, plaster, and masonry. They are easy to apply, dry relatively quickly, and are an excellent choice for inexperienced painters. They can also be cleaned up quickly with soap and water.
– Oil-Based Primers
Oil-based primers offer better adhesion, which is ideal for surfaces like bare wood, stained areas, or surfaces that could bleed through paint. They take longer to dry but cover stains well and provide a smooth finish.
However, they emit more volatile organic compounds (VOCs), which is something to consider if you are sensitive to strong odors.
– Shellac Primers
Shellac primers are known for their ability to prevent stains, knots, and sap streaks from bleeding through the paint. They dry fast and are suitable for intense stain-blocking jobs. However, they have a high odor, and removing them requires denatured alcohol.
• Preparing Your Walls
Before applying primer, it’s essential to prepare your walls:
- Clean: Start by cleaning any dirt, grease, or dust from the wall’s surface. You can use a sponge and warm, soapy water for this step.
- Patch: Fill in any small cracks or holes with a patching compound like spackling paste. Allow it to dry completely before proceeding.
- Sand: Lightly sand the entire wall to ensure a smooth surface. Use a fine-grit sandpaper (120 to 150 grit) to avoid causing damage. Wipe or vacuum up the resulting dust.
- Remove Wallpaper: If applicable, remove any existing wallpaper using a wallpaper remover or steamer. Clean the walls thoroughly to remove any wallpaper adhesive residue.
• Applying the Primer
Once your walls are prepared, you can begin the priming process:
- Protect Your Space: Apply painter’s tape along baseboards, window and door trim, and light switches. Lay down drop cloths to protect your floors.
- Stir the Primer: Stir the primer well to ensure a uniform consistency, using a paint stick or paddle attachment for a power drill.
- Pour the Primer: Pour the primer into a painting tray, filling the tray’s deeper end approximately half full.
- Choose Your Application Method: For smooth surfaces, a high-quality roller with the appropriate nap length is advised. For intricate or detailed areas, a brush or foam applicator is recommended.
- Apply the Primer: Load your roller, brush, or applicator with primer and apply it evenly to the wall using vertical strokes for rollers and even, consistent brush strokes for brushes or foam applicators.
- Let it Dry: Allow the primer to dry completely according to the manufacturer’s recommendations. This can vary from 1-4 hours, depending on the primer type and environmental factors.
• After Priming: Applying Your Paint
After your primer has dried and you’re satisfied with the wall’s surface, you can proceed with the topcoat of paint:
- Choose the Right Paint: Select a high-quality paint that is suitable for your interior surfaces and needs. Consider washability, durability, and VOC levels.
- Paint the Edges: Begin by cutting in along the edges of the wall, ceiling, baseboards, and any window and door trim using a paintbrush or edger.
- Roll the Walls: Using a roller, apply the paint in a vertical “W” pattern, and then spread it out evenly using horizontal strokes. Continue this process until the entire wall is painted.
- Apply Multiple Coats: Allow the first coat to dry completely, and then assess if additional coats are needed to achieve the desired color and finish.
By following these steps and using a high-quality primer, your interior painting project can achieve the professional results you desire. For more information and guidance on interior paint primers, visit the American Coatings Association website.
Step | Description |
|---|---|
1. Prepare the Surface | Ensure that the surface is clean and free of dirt, dust, and grease. Repair any imperfections and sand the surface until smooth. |
2. Choose the Right Primer | Select an appropriate primer based on your specific needs, such as a stain-blocking primer or a bonding primer for surfaces with a glossy finish. |
3. Protect Surrounding Areas | Use drop cloths or plastic sheeting to protect floors and furniture, and apply painter’s tape along edges to ensure clean lines and avoid paint bleed. |
4. Stir the Primer | Stir the primer thoroughly to ensure even consistency, using a paint stick or a drill attachment for a larger container. |
5. Apply the Primer | Use a brush or roller to apply the primer in a consistent manner, following the manufacturer’s recommendations for coverage and application technique. |
6. Allow the Primer to Dry | Let the primer dry according to the manufacturer’s instructions. The drying time can vary depending on factors such as humidity and temperature. |
7. Inspect and Address Any Issues | After the primer has dried, check for any imperfections or areas that need additional coverage. If needed, apply a second coat of primer. |
8. Proceed with Painting | Once the primer is dry and any issues have been addressed, you’re ready to paint your chosen color on your prepared surface. |
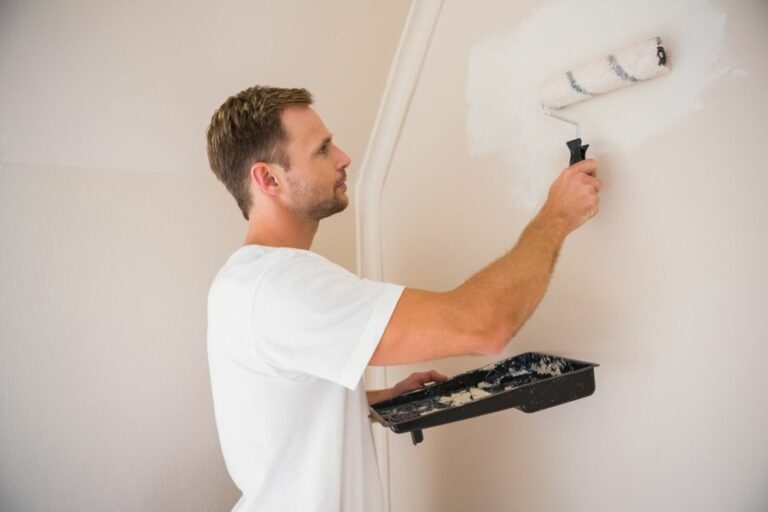
Proper Application Techniques for Paint Primer
Paint primer serves as a foundation on which the actual paint color adheres. It is essential for ensuring the longevity of the paint, preventing any stains or discoloration, and achieving a smooth, even finish.
• Choosing the Right Primer
Before diving into the application process, it is important to choose the correct type of primer for the specific surface you are working on. Here are the most common types of paint primers and their uses:
- Latex primer: Ideal for drywall, softwood, and brick surfaces. It has excellent adhesion, dries quickly, and is easy to clean up with water.
- Oil-based primer: Suitable for bare wood, metal, and surfaces with existing paint layers. It is highly durable and offers excellent stain-blocking properties but requires more time to dry and a solvent for cleanup.
- Shellac primer: Often used for sealing knots and stains on wood and is effective on smoke and water-damaged surfaces. It dries quickly and has strong adhesion, but it may not be suitable for all surfaces.
You can consult a painting professional or research through reputable sources to decide which primer is the recommended choice for your specific project.
• Preparing the Surface
A vital part of successful paint primer application involves proper surface preparation. Follow these steps for an optimum painting surface:
- Clean: Ensure the surface is free from dirt, grease, and dust by using a damp cloth or sponge with a mild detergent solution. Rinse thoroughly and allow the surface to dry.
- Repair: Fill any holes or cracks using an appropriate filler, following the manufacturer’s instructions. Sand the filled areas smoothly and wipe away any excess dust.
- Remove old paint: In case of peeling or flaking paint on the surface, use a scraper, sandpaper, or a paint remover to eradicate the loosened paint. This step is crucial for the primer to adhere well to the surface.
• Primer Application Tips
Here are some practical tips to keep in mind while applying paint primer:
– Use the Proper Tools
Select the appropriate tools for your project, such as brushes, rollers, or paint sprayers. For smaller areas and edges, a brush is suitable, while a roller or paint sprayer may be more efficient for larger surfaces. Ensure that you are using high-quality tools to prevent bristle loss and achieve a professional result.
– Maintain a Consistent Coverage
Apply an even coat of primer across the surface, maintaining a consistent thickness to avoid any patchiness. Overlapping roller strokes and smooth brushwork can help in achieving a uniform layer of primer.
– Allow for Adequate Drying Time
Before applying your paint color, allow the primer to dry completely. Drying times differ based on the type of primer used and various environmental factors.
Generally, latex primers take about an hour to dry, while oil-based and shellac primers require more time, which could be up to 24 hours. Refer to the manufacturer’s instructions for the specific drying time needed.
– Sand the Primer
After the primer is thoroughly dry, use fine-grit sandpaper to lightly sand the surface for a smoother final finish. This also enhances the adhesion of the topcoat. Wipe away any dust particles using a soft cloth or vacuum.
• Applying the Paint
With a properly primed surface, you can now apply your desired paint color. Use the same techniques and precautions as with the primer application to attain a smooth, even finish.
You may need to apply multiple coats to achieve the desired coverage and appearance, allowing for the manufacturer’s recommended drying time between coats.
• Conclusion
A well-applied paint primer is the key to a successful and long-lasting paint job. By following the right steps and using quality tools, your paint project is bound to have a professional and polished appearance.
Investing time and effort in the primer application process ensures a durable and appealing result, making it well worth the effort.
Brush vs. Roller: Applying Paint Primer Correctly
Before diving into the details, let’s understand the primary purpose of a paint primer. Primers are essential in preparing the surface for painting by providing an appropriate base, ensuring durability, and improving the appearance of the paint.
Now, the question arises – do you apply paint primer with a brush or roller? The answer depends on the type of surface and personal preferences.
• Using a Brush for Applying Paint Primer
– Advantages of Using a Brush
- Precise Application: Brushes offer better control and accuracy when applying primer, particularly on intricate surfaces or tight corners. This ensures complete and even coverage.
- No Splattering: Brushes reduce the chances of paint splatter or drips, keeping your workspace clean and tidy.
- Versatile: Brushes come in various sizes and shapes, catering to the requirements of different surfaces and projects.
– Disadvantages of Using a Brush
- Time-consuming: Applying primer using a brush may take longer compared to using a roller, especially for large surfaces.
- Brush Strokes: Brushes often leave visible brush marks or streaks on the surface, leading to an uneven finish.
- More Effort: Using a brush for applying primer requires more effort and skill to attain a smooth, even, and consistent application.
Despite the disadvantages, brushes are still a popular choice for applying primer. They are recommended for smaller surfaces, detailed elements, or tight corners. Brushes are also the best option when working on textured surfaces, as they ensure the primer gets into every nook and cranny.
• Using a Roller for Applying Paint Primer
– Advantages of Using a Roller
- Quicker Application: Rollers cover large surfaces more quickly, significantly reducing the time and effort required for primer application.
- Smooth Finish: Rollers provide a smooth and even finish without visible brush marks or strokes.
- Less Fatigue: Using a roller requires less physical effort, leading to less fatigue during the painting process.
– Disadvantages of Using a Roller
- Less Accurate: Rollers may struggle to apply the primer evenly on intricate or tight surfaces, making it challenging to achieve precise coverage.
- Splatter and Drips: Rollers can create paint splatter and drips during the application, leading to a messier workspace.
- Limited Options: Rollers are available in a limited range of sizes and may not fit every surface requirement.
While there are some disadvantages, rollers remain an excellent option for applying paint primer, especially on large or flat surfaces. Rollers work well on walls, ceilings, and doors, providing a smooth and consistent finish.
• So, Brush or Roller?
As mentioned earlier, the choice between brushes and rollers depends on the surface and personal preferences. For detailed surfaces or tight corners, a brush is recommended, while a roller is ideal for large, flat surfaces.
It’s not uncommon for painters to use both brushes and rollers for a single project. For instance, a brush can be used for cutting in edges or outlining intricate details, followed by a roller for filling in larger areas.
Before you start your painting project, consider the tips mentioned in this article and choose the one that suits your needs, preferences, and the type of surface you’re working on. With the right application method, you can achieve a professional-looking finish and ensure a long-lasting paint job.
For more information on surface preparation and painting techniques, refer to the U.S. Environmental Protection Agency’s guide on renovation, repair, and painting.
Question | Answer |
|---|---|
Do you apply paint primer with a brush or roller? | Both methods can be used to apply paint primer, depending on the size and type of surface. A brush is suitable for small areas or detailed work, while a roller is useful for larger, flat surfaces. |
Determining the Necessary Primer Coats for Interior Painting
Primer is a crucial component in repainting interior walls, as it helps create an even and consistent finish, improving the adherence and durability of the topcoat of paint.
• Types of Primers and Their Coverage
When selecting a primer, it is essential to know the various options available and choose the right one for your specific application.
– Latex Primers
Latex primers are water-based, easy to clean, and suitable for various surfaces, including drywall, plaster, and masonry. These primers typically provide good adhesion, resulting in fewer coats needed.
– Oil-Based Primers
Oil-based primers offer excellent sealing and stain-blocking qualities, making them ideal for surfaces with stains, water damage, or heavy smoke. However, they usually require more coats for optimal coverage.
– Shellac Primers
Shellac primers are alcohol-based primers known for their fast-drying and superb stain-blocking properties. They work well on stained or odorous surfaces, though they are more difficult to clean and can be more expensive.
Depending on the type of primer, coverage may vary. Consult the manufacturer’s guidelines for specific coverage rates and recommendations. Most primers will cover between 200-400 square feet per gallon.
• Determining the Number of Primer Coats Needed
Several factors can influence the number of primer coats required for your interior painting project.
– Surface Color
When painting over a dark color with a lighter color, it is advisable to apply at least two coats of primer. This ensures that the original color does not show through the new paint and helps create a consistent, uniform finish.
– Surface Material
Different surfaces require different amounts of primer for optimal results.
- New Drywall: New drywall is highly porous and will absorb paint inconsistently. For a smooth, even finish, apply at least two coats of latex primer.
- Bare Wood: Bare wood will absorb primer more quickly, with knots and grains appearing darker. Apply two coats of oil-based primer to seal the wood and prevent bleed-through.
- Masonry: Surfaces such as brick and concrete can be highly porous and may require additional coats of primer to achieve proper adhesion and an even finish. Use a high-quality masonry primer, applying two or more coats as needed.
– Surface Condition
The surface condition plays a significant role in determining the number of primer coats needed.
- Smooth and Clean Surfaces: If the surface is in excellent condition (clean, with no stains or damage), one coat of primer may be sufficient for most applications.
- Stained or Damaged Surfaces: Surfaces with stains, water damage, or smoke damage will typically require two or more coats of primer to ensure proper sealing and coverage.
• Expert Tips for Successful Priming
Following are some expert tips to ensure a successful priming experience:
- Clean the Surface: Thoroughly clean the surface before applying primer, removing dirt, grease, and residue. This ensures proper adhesion and an even finish.
- Sand the Surface: Lightly sand glossy or uneven surfaces to guarantee proper adhesion of the primer.
- Temperature and Humidity: Follow the manufacturer’s recommendations for temperature and humidity during the application, as extreme conditions can affect primer drying and adhesion.
- Test the Primer: Before starting, test the primer on a small section of the surface to ensure proper coverage and adhesion.
- Dry Time: Allow sufficient drying time between coats, as recommended by the primer manufacturer. Applying additional coats too soon may cause issues with adhesion and finish quality.
- Use Quality Materials: Investing in high-quality primer and paint can result in better coverage, requiring fewer coats and providing a more professional finish.
In summary, the number of primer coats needed for interior painting projects can vary depending on surface color, material, and condition.
By understanding these factors and following expert recommendations, you can ensure a successful, high-quality interior painting project that stands the test of time.
Condition | Number of Coats of Primer |
|---|---|
Smooth & Clean Surface | 1 Coat |
Bare or Unpainted Surface | 2 Coats |
Dark Color Paint or Stain | 2 Coats of Tinted Primer |
New Drywall, Textured Walls or Ceilings | 1-2 Coats (depending on the condition) |
Unfinished or Damaged Surface | 2 Coats or More (Depending on the extent of damage) |