Indoor Painting For First-Timers, 25 Things You Should Know
Are you ready to take on your first indoor painting project but feeling a tad overwhelmed? We’ve got you covered! Our comprehensive guide and expert tips enable you to tackle and ace that painting job, even as a first-timer.
Indoor painting for first-timers:
Indoor painting for first-timers involves proper preparation, gathering necessary supplies, choosing and applying primer, using professional painting techniques, and adequate clean-up. Key supplies include paint, primer, brushes, rollers, tape, and drop cloths. Prepare by cleaning walls, patching holes, and taping off areas. Use cutting-in and rolling techniques for a professional finish, and practice patience and attention to detail.

Looking to transform your space with a fresh coat of paint? Don’t let the thought of tackling this DIY project overwhelm you. Read on as we break down the process, share our best tips, and reveal the secret to a successful indoor painting experience for first-timers! Trust us. You’ve got this.
Contents
- 1 Beginner’s Guide to Indoor Painting
- 2 Step-by-Step Process for Room Painting
- 3 Starting Your Home’s Interior Painting Project
- 4 Room Painting: Walls First or Not?
- 5 Is One-Day Room Painting Possible?
Beginner’s Guide to Indoor Painting
Painting the interior of your home can be a rewarding but challenging task, especially for first-time painters.
• The Importance of Preparation
Before embarking on your painting project, it’s important to prepare the space and gather the necessary supplies. Adequate preparation not only ensures a smooth, flawless finish but also minimizes potential accidents and mess.
– Gathering Supplies
To achieve a successful paint job, you’ll need the following supplies:
- Paint
- Primer (if needed)
- Paintbrushes and rollers
- Paint tray and liners
- Painter’s tape
- Drop cloths or plastic sheets
- Ladder
- Sandpaper
- Putty knife and spackling compound (for patching holes)
- Screwdriver (for removing outlet covers and switch plates)
- Rags
– Preparing the Room
Before you start painting, take the necessary steps to prepare your room:
- Remove furniture: Clear the room of as much furniture as possible. If some pieces cannot be moved, cover them with drop cloths or plastic sheets to protect them from paint splatters.
- Cover floors: Protect your floors by laying down drop cloths or plastic sheets, and secure them with painter’s tape to prevent them from shifting.
- Clean walls: Wipe down the walls with a damp cloth to remove dust and dirt that may hinder paint adhesion.
- Patch holes and cracks: Use a putty knife to apply spackling compound to any holes or cracks in the walls. Once the compound has dried, sand it until smooth and wipe away any remaining dust.
- Remove outlet covers and switch plates: Use a screwdriver to remove outlet covers and switch plates, and place the screws in a labeled container to avoid misplacement.
- Tape off areas: Apply painter’s tape along baseboards, molding, door and window frames, and other non-painted areas to create clean, precise edges.
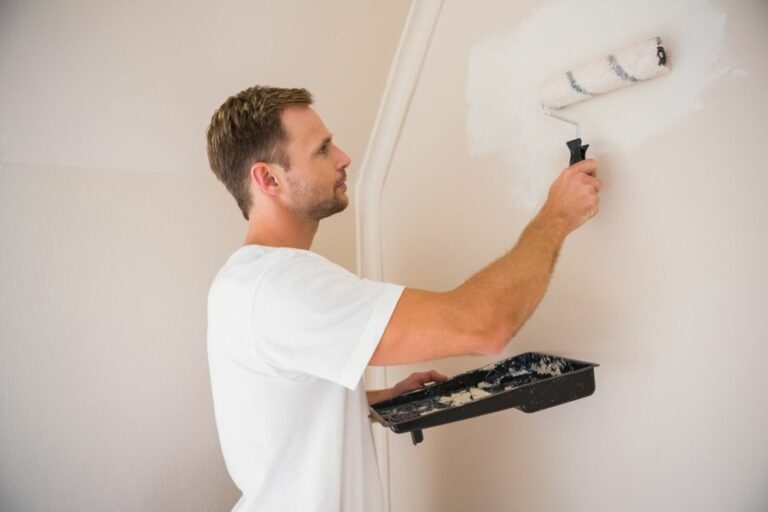
• Choosing and Applying Primer
Depending on your painting project, you may need to apply a coat of primer before painting. Primer is essential when:
- Painting over a dark-colored wall with a lighter color
- Painting over a glossy finish
- Painting new or repaired drywall
To apply primer:
- Pour the primer into a paint tray and coat your roller evenly.
- Apply the primer in a “W” or “M” pattern on the wall, working your way from top to bottom.
- Smooth out the primer by rolling back over the area in the opposite direction.
Tip: Allow the primer to dry for the recommended time stated on the product label before applying paint.
• Painting Techniques for a Professional Finish
Now that your room and walls are ready, it’s time to start painting! Follow these expert painting techniques for a smooth, professional-looking paint job:
– Cutting In
“Cutting in” is the process of painting the edges of the wall with a brush that a roller cannot reach. It’s crucial to do this before using a roller to ensure clean, crisp lines.
- Dip your paintbrush about 2-3 inches into the paint, then tap off excess paint on both sides of the brush.
- Hold the brush at an angle to the wall, with the bristle tips closest to the taped-off area.
- Smooth out the paint using long, steady strokes parallel to the edge.
- Keep cutting-in width at 2-3 inches to avoid visible brush strokes or texture differences.
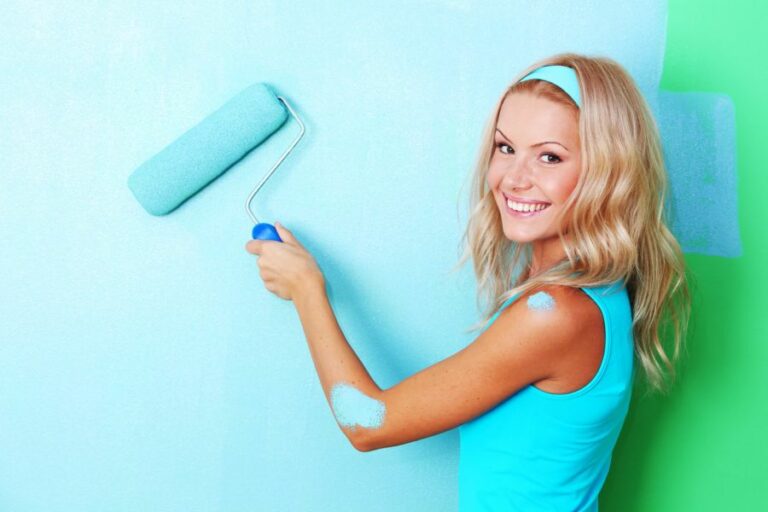
– Rolling
After cutting in, it’s time to use a roller to paint the larger areas of the wall. Use the following steps for the best results:
- Dip the roller into the paint tray and roll it back and forth on the ridged part of the tray to remove excess paint.
- Start by rolling the paint onto the wall in a “W” or “M” pattern, covering approximately 3-4 feet square.
- Fill in the gaps using downward and upward strokes, making sure to overlap the edges of each area slightly.
- Always maintain a “wet edge” by keeping the roller well-coated in paint and working quickly.
Tip: To avoid visible roller marks, always finish each section with a final smooth roll in one direction.
• Clean-Up and Final Tips
Once you’ve completed painting, follow these steps for proper clean-up and finishing touches:
- Remove painter’s tape: Carefully and slowly remove the painter’s tape at a 45-degree angle before the paint fully dries to avoid peeling.
- Install outlet covers and switch plates: Once the paint is fully dry, reinstall the outlet covers and switch plates.
- Touch-up paint: If you notice any imperfections or missed spots, use a small brush with a light touch to apply touch-up paint.
- Clean brushes and rollers: Rinse brushes and rollers in water (for latex paint) or paint thinner (for oil-based paint), and store them properly for future use.
With these expert tips and techniques, even first-time painters can achieve a professional-looking indoor paint job. Patience, proper preparation, and attention to detail are the keys to success. Happy painting!
Step-by-Step Process for Room Painting
Painting a room can be a refreshing and transformative experience that can give new life to any living space. Unfortunately, many people find the task of painting a room intimidating, not knowing where or how to start.
• Step 1: Selecting the Right Paint
Choosing the right paint for your room is crucial to achieving your desired results. While selecting the color comes down to personal preference, you must also consider factors such as paint quality, finish, and durability.
Opt for high-quality paint as it usually covers better, lasts longer, and is easier to maintain.
• Step 2: Prepping the Room
Before you begin the actual painting process, you must prepare the room. Ensuring a clean surface and removing any obstructions will make the painting process more efficient and effective. Here’s how to prep the area:
– Clearing the Space
Make sure to remove all furniture, rugs, and decor from the room, or at least move them to the center, away from the walls. Cover anything you can’t move with plastic sheeting or drop cloths to protect it from paint splatters and spills.
– Cleaning the Walls
Clean the walls thoroughly, as dirt and grime can cause paint to adhere poorly. Use a damp cloth or sponge and a mild detergent and cover the entire surface, including trims and baseboards. Let the walls dry completely before moving on to the next step.
– Repairing Imperfections
Inspect the walls for any cracks, holes, or dents, and repair them using a putty knife and spackling compound. Follow the instructions provided by the spackling compound manufacturer and sand the repaired areas until they are smooth and even with the rest of the wall.
For more significant structural repairs, consult a professional.
– Masking and Covering
Use painter’s tape to mask off any areas you don’t want to paint, such as electrical outlets, light switches, window frames, and baseboards. Lay down drop cloths or plastic sheeting on the floor to protect it from paint spills and splatters.
• Step 3: Priming the Walls
Priming the walls with a high-quality primer is an essential step when painting a room. Primer ensures a uniform surface for the paint to adhere to and will help prevent any existing stains or imperfections from bleeding through the new coat of paint.
Begin by stirring the primer to ensure even consistency throughout the can. Then, use a paint roller or brush to apply the primer evenly across the walls. Pay close attention to corners and edges. These areas may require a smaller brush for accurate application.
Allow the primer to dry completely according to the manufacturer’s recommendations before proceeding to the next step.
• Step 4: Painting the Ceiling (Optional)
If you plan to paint the ceiling, it’s best to do so before working on the walls. This way, any paint drips or splatter on the walls can be painted over later. Make sure you have a sturdy ladder and use a roller with an extension handle to make this task safer and more comfortable.
• Step 5: Painting the Walls
Once the primer has dried, it’s time to paint the walls. Start by cutting in along the edges and corners of the room. Cutting in is the process of painting a straight line between the wall and adjacent surfaces, like the ceiling or trim, using a small brush.
This step ensures a clean finish and makes the job easier when you begin using a roller for the larger areas.
Once the edges are complete, you can start painting the main part of the walls. Use a paint roller for even and efficient coverage, working in a “W” pattern to distribute the paint evenly. Make sure to overlap the painted areas as you move along the wall to avoid any visible lines or streaks.
Applying at least two coats of paint to achieve a uniform finish waiting for the first coat to dry before starting the second.
• Step 6: Painting the Trims and Baseboards (Optional)
Once the walls are dry, you can paint the trims and baseboards if desired. Use a small brush and a steady hand to ensure clean lines between the painted trims and the walls. Remove the painter’s tape once the paint has dried completely.
• Step 7: Clean up and Reassemble
After the paint is dry, remove any remaining painter’s tape and drop cloths. Reinstall any outlet covers, light switches, and other fixtures you may have removed. Move your furniture and belongings back into the room, and admire your freshly painted space.
By following these steps, you can confidently tackle any room painting project. The key is to properly prepare the space, use high-quality materials, and apply the paint with care and precision. Now that you know where to start when painting a room. Happy painting!
Starting Your Home’s Interior Painting Project
A fresh coat of paint can transform the look and feel of your home’s interior. Whether you’re a seasoned DIYer or a first-time painter, there are certain steps and best practices you should follow to achieve professional results.
• Choosing the Right Paint and Materials
The first step in any painting project is selecting the appropriate materials. Choosing the best paint and tools can make the difference between a successful paint job and a frustrating experience.
– Types of Paint
There are two main types of paint to consider when painting your home’s interior: water-based (latex) paint and oil-based (alkyd) paint. Both have their pros and cons, but water-based paint is more commonly used for interior walls.
- Water-based paint is easy to clean up, dries quickly, and has lower levels of volatile organic compounds (VOCs), making it more environmentally friendly. It is generally recommended for interior walls and ceilings.
- Oil-based paint is known for its durability and can withstand scrubbing, making it suitable for high-traffic areas like kitchens, bathrooms, and trim. However, it has a longer drying time and produces higher levels of VOCs.
– Paint Finish
Selecting the right paint finish is also an important aspect of the painting process. There are various paint finishes to choose from, including:
- Flat or Matte: ideal for low-traffic areas and ceilings, as they hide imperfections well but are less resistant to dirt and moisture.
- Eggshell: best for living rooms, bedrooms, and dining rooms, offering a slight sheen while being easy to clean.
- Satin: a common choice for kitchens, bathrooms, and hallways, as they are easy to clean and have a slight sheen.
- Semi-gloss and Gloss: best for trim, cabinets, and doors, as they provide a high shine and are more durable.
– Essential Painting Tools
Along with choosing the right paint, you’ll need the proper tools to ensure a smooth paint job. Some essential painting tools include:
- Paintbrushes (angled and flat)
- Paint rollers (with different nap lengths)
- A 3/8-inch to 1/2-inch nap works well for smooth surfaces
- A 3/4-inch to 1-inch nap is suitable for rough surfaces
- Paint trays and liners
- Painter’s tape
- Drop cloths or plastic sheeting to protect your floors
- Extension pole for reaching high areas
- Putty knife and spackle for filling in holes or cracks
- Sandpaper for smoothing surfaces
• Prepping the Painting Area
Before diving into painting, it’s important to properly prepare the room and surfaces to ensure the best results.
– Clear the Room
Remove as much furniture as possible from the room. For large pieces that cannot be moved, cover them with plastic sheeting or drop cloths. Lastly, remove any wall decorations and outlet covers to prevent paint splatter.
– Clean and Prepare Surfaces
To ensure proper paint adhesion, make sure the surfaces are clean and free of dirt, grease, and dust. You can use a mixture of water and mild detergent to clean the walls. Allow the walls to dry completely before proceeding.
Next, fill any holes, cracks, or imperfections with a spackle using a putty knife. Once the spackle has dried, sand these areas smoothly. Remove any dust residue with a damp cloth or tack cloth.
– Apply Painter’s Tape
To protect areas you don’t want to be painted, such as baseboards, trim, and outlets, apply painter’s tape along the edges. Press the tape tightly against the surface to prevent paint from seeping underneath.
• Painting Techniques and Best Practices
Now that the room is prepped, it’s time to paint. Follow these expert techniques and best practices for a professional-looking result.
– Cutting In
Begin by “cutting in,” which means painting the edges and corners of a room with a paintbrush. This technique requires a steady hand; however, it ensures a crisp, clean edge, especially where a roller cannot reach.
Use an angled brush to apply a 2-3 inch strip of paint along the edges, starting from the top and working your way down. This will make blending with the roller easier.
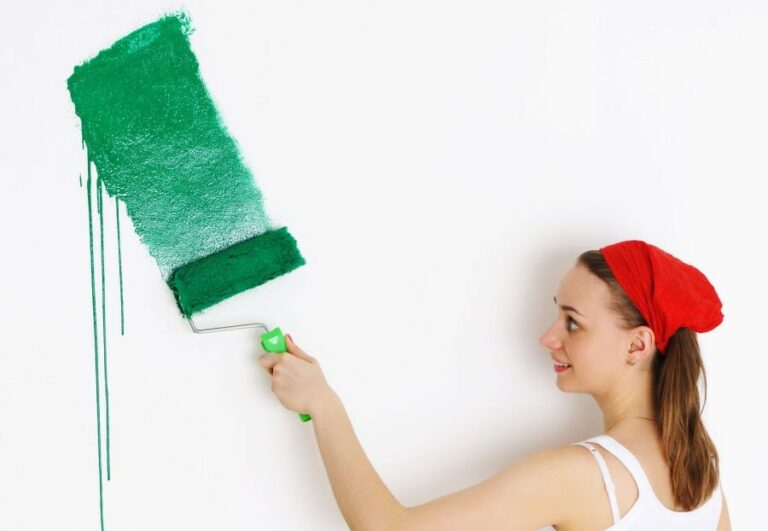
– Rolling
To load your roller, dip it into the paint tray and roll it back and forth on the tray’s slope to remove excess paint evenly. Begin by painting a “W” or “M” shaped pattern on the wall, then fill in the remaining area with even, overlapping strokes. Always work in sections to maintain a wet edge, preventing visible roller marks.
– Additional Coats and Drying
Check the paint manufacturer’s instructions for drying times and the recommended number of coats. Generally, at least two coats of paint are necessary for even coverage.
After the final coat, allow the paint to dry completely before removing the painter’s tape. To avoid peeling the paint, remove the tape slowly and at a 45-degree angle.
• Cleanup and Maintenance
Once the painting is done, clean up your materials properly to prolong their lifespan.
- For water-based paint, clean brushes and rollers in warm, soapy water. Rinse thoroughly and allow them to air dry.
- For oil-based paint, use mineral spirits or paint thinner to clean your tools.
Lastly, store any leftover paint in airtight containers for future touch-ups or color matching.
By following these steps, you’ll be well on your way to achieving professional results when painting the inside of your house. Happy painting!
Step | Description |
|---|---|
1 | Choose the paint color and finish. |
2 | Gather all necessary painting supplies. |
3 | Remove or cover furniture and other items in the room. |
4 | Clean the walls and fix any imperfections. |
5 | Apply painter’s tape to protect edges and trim. |
6 | Prime the walls, if necessary. |
7 | Start painting the walls, starting from the top and working your way down. |
8 | Paint the trim, baseboards, and any other areas that need touch-ups. |
9 | Allow the paint to dry completely. |
10 | Remove painter’s tape and clean up the area. |
Room Painting: Walls First or Not?
A common question many people ask when it comes to painting a room is whether they should paint the walls first or focus on other parts, such as the ceiling and trim, before tackling the walls.
This is an important aspect to consider as the order in which you paint a room can have a significant impact on the efficiency of the project and the quality of the finished product.
• Starting with the Ceiling
Before painting the walls, it’s actually recommended to begin with the ceiling. The reasons for this are two-fold:
- Gravity: As you paint the ceiling, dripping and splattering can occur, which can result in paint landing on the walls below. By painting the ceiling first, you can avoid having to re-paint sections of your freshly painted walls due to accidental drips.
- Access: Painting a ceiling typically requires the use of a ladder or an extension pole, which can make it difficult to navigate around a room that already has painted walls. By starting with the ceiling, you eliminate the risk of accidentally bumping into a painted wall and causing smudges or damage.
To paint a ceiling efficiently, use a combination of paint rollers and brushes. While an extension pole with a roller attached can cover a large area of the ceiling quickly, a brush may be necessary for cutting in around lighting fixtures or other obstacles.
• Moving on to the Trim
After completing the ceiling, the next step is to paint the trim, which includes baseboards, door frames, window frames, and any other decorative molding. There are several advantages to painting the trim before the walls:
- Precision: Painting trim requires a steady hand and careful attention to detail, as you want to ensure clean lines and avoid paint getting on the adjacent walls. By painting the trim first, you can ensure a crisp, clean edge without worrying about ruining your freshly painted walls.
- Ease of application: When painting trim, it is easier to let a small amount of paint get on the adjacent walls, knowing that the walls will be painted next. This makes the process of painting the trim less tedious and time-consuming.
For best results, use a high-quality brush specifically designed for cutting in and trim work. You may also want to use painter’s tape to help maintain clean lines and protect the walls from any stray paint.
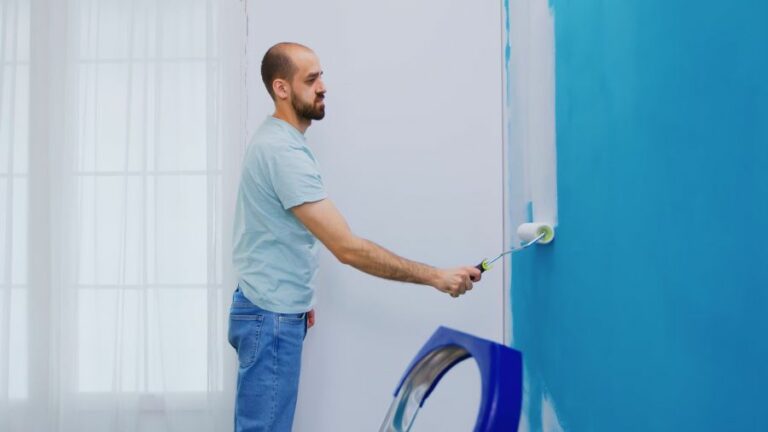
• Finally, the Walls
Once the ceiling and trim are painted, it’s time to move on to the walls. By saving the walls for last, you can easily touch up any areas where paint may have accidentally dripped, splattered, or bled onto the walls from the ceiling and trim work.
When painting walls, use a paint roller for larger areas and a brush for cutting in around the edges and any obstacles, such as electrical outlets or light switches. For best results, apply two coats of paint, allowing the first coat to dry completely before applying the second coat.
• Other Considerations
In addition to determining the proper order for painting a room, there are a few other important factors to keep in mind:
- Preparation: Before starting any painting project, it is crucial to properly prepare the surfaces by cleaning them thoroughly, repairing any damage or imperfections, and applying a coat of primer if necessary.
- Ventilation: Ensure adequate ventilation in the room to minimize fumes and speed up the drying process. Open windows and doors or use a fan if necessary.
- Quality: Use high-quality paint and painting tools for the best results. Properly maintained brushes and rollers will yield a more professional-looking finish.
- Timing: Plan your painting project in advance and give yourself plenty of time to complete each stage, allowing for drying time between layers.
By following the proper order of painting a room and keeping these considerations in mind, you can achieve a beautifully finished space with minimal stress and maximum satisfaction.
Step | Description |
|---|---|
1 | Clear the room and prep the walls |
2 | Protect the trim, baseboards, and other surfaces |
3 | Prime the walls if needed |
4 | Paint the walls first |
5 | Paint the trim and baseboards after the walls have dried |
6 | Touch up any areas as needed |
7 | Clean up and replace furniture |
Is One-Day Room Painting Possible?
Painting a room can be an exhausting and time-consuming task, especially for those who have never done it before. A common question that arises is whether you have to paint the whole room in one day.
The simple answer is no, but there are factors to consider if you want to achieve professional-looking results.
• Importance of Consistency and Timing
One critical aspect of painting is maintaining consistent timing, especially when using fast-drying paint. If you take too long between coats or if your drying times vary considerably, you may end up with visible lines and uneven color distribution.
To avoid this, it’s essential to apply each coat within the recommended time frame, typically a few hours, and avoid extending the process over several days.
– Recommendations for a Consistent Finish
- Plan the project in advance
- Allocate specific time periods for each stage
- Follow the paint manufacturer’s instructions for drying times
- Minimize distractions to stay on schedule
• Dealing with Challenges and Interruptions
Sometimes, issues may arise that prevent you from finishing the paint job in one day. These can include:
- Running out of paint or supplies
- Underestimating the time required to complete the task
- Personal emergencies or unforeseen interruptions
In these cases, you should still strive for consistency by following these tips:
- Make a note of the time you stopped painting and plan to resume at the same stage in the painting process the next day
- Store paint and supplies carefully to avoid damage or contamination
- Clean up any spills or messes promptly to prevent them from drying or causing issues down the line
• Can You Stop Painting Mid-Wall?
If you must stop painting mid-wall, it’s best to feather out the edges of the wet paint to create an inconspicuous stopping point. This technique, known as “boxing,” can help blend the two sections without visible overlap. However, be aware that new applications may be slightly noticeable.
– Steps for a Seamless Transition
- Apply paint to the remaining section
- Feather out the wet edge by lightly brushing the paint in the direction of the unpainted area
- When resuming painting, start slightly before the feathered edge and continue with the new section
- Blend the wet paint with the previous edge for a seamless finish
• The Benefits of Painting on One Day
While time constraints may require you to break up your painting project, there are advantages to completing the job in one day:
- The paint color remains consistent throughout the entire room
- You avoid the hassle of cleaning up and storing supplies multiple times
- Reduced likelihood of visible lines and other imperfections that can occur when the paint dries unevenly
• In Conclusion
Ultimately, whether or not you have to paint the whole room in one day depends on your circumstances and the finished look you want to achieve. While it’s not mandatory, completing the job in one day can offer the benefits of consistency, easier clean-up, and a more professional appearance.
However, if undertaking the project over several days is necessary, proper planning and technique can still help ensure a high-quality result that will leave you satisfied with your newly painted room.