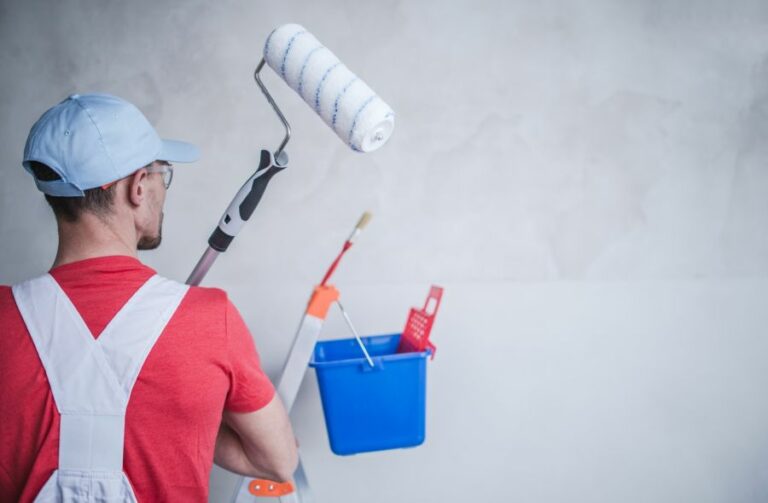
Chalk Paint For Shabby Chic Indoor Furniture. What Pros Say
If you want to give your indoor furniture a charming shabby chic makeover, look no further than chalk paint. With its exceptional versatility, ease of application, and ability to create that beautifully weathered look, it’s the go-to choice of many DIY enthusiasts.
Chalk paint for shabby chic indoor furniture:
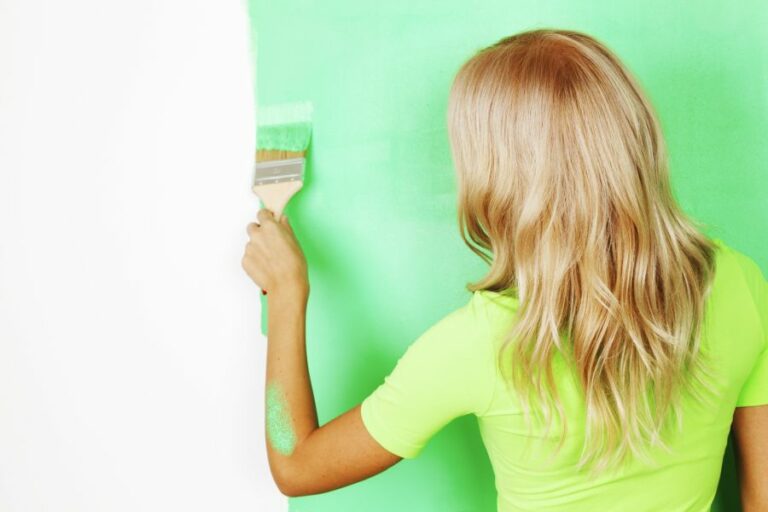
Chalk paint is a versatile and decorative paint ideal for creating vintage or shabby chic finishes on indoor furniture. It requires no sanding or priming, offers a wide range of colors, easy to apply, is quick-drying, and has low odor. To use, clean surfaces thoroughly, apply thin coats, distress if desired, and seal with clear wax for a lasting finish.

Discover the magic of chalk paint for achieving that shabby chic look on your indoor furniture. Unleash your creativity and transform old pieces into unique, eye-catching masterpieces. Read on for expert tips, techniques, and inspiration in taking your DIY projects to new heights!
Contents
- 1 Chic Chalk Paint for Stylish Indoor Furnishings
- 2 Recommended Paint Types for Shabby Chic Pieces
- 3 Creating Shabby Chic Furniture with Chalk Paint
- 4 Potential Drawbacks of Chalk Paint on Furnishings
- 5 Using Chalk Paint for Interior Furniture
- 6 Crafting Shabby Chic Furniture with Paint
- 7 Top Distressed Furniture Paint Options
Chic Chalk Paint for Stylish Indoor Furnishings
• Introduction to Chalk Paint
Chalk paint is a decorative paint that creates beautiful finishes on furniture and home decor. It can be used on various surfaces without the need for sanding or priming. The versatility, texture, and matte finish of chalk paint make it a popular choice for vintage or shabby chic furniture.
• Advantages of Using Chalk Paint
– No Need for Sanding or Priming
One of the main draws of chalk paint is that there is no need to sand or prime your furniture before you start painting. This saves you time and effort, making the painting process much more enjoyable.
It also means that you can easily apply chalk paint to smooth surfaces or surfaces painted with oil-based or latex paints for a smooth finish without peeling or flaking.
– Wide Range of Colors and Customization
Chalk paint offers a variety of color options, and you can choose from shades such as earthy neutrals, soft pastels, or bold and bright hues.
You can also mix colors to create custom shades and experiment with different techniques to achieve decorative effects, such as distressing, layering, and stenciling.
– Easy to Apply and Blends Well
The thick texture of chalk paint makes it easy to apply, and it goes on smoothly, adhering well to most surfaces. It also blends and dries quickly, making it suitable for multi-color layering and creating visually appealing patterns.
– Low VOCs and Odor
Chalk paint typically has low amounts of volatile organic compounds (VOCs), which are responsible for paint fumes and harmful effects on the environment. This makes it a safer option for indoor painting and is suitable for people with allergies or sensitivities to strong odors.
• Expert Tips for Using Chalk Paint on Indoor Furniture
– Prepping the Surface
While you don’t need to sand or prime your furniture, it’s essential to clean the surface thoroughly to remove any dust, dirt, or grime. You can use a damp cloth or a mild cleaner, such as a water and white vinegar mixture, to wipe down the surface. Make sure it’s completely dry before you start painting.
– Applying the First Coat
For the best results, use a high-quality brush or roller designed for chalk paint. Begin by applying a thin, even coat of paint in the same direction as the wood grain. Allow the first coat to dry completely according to the manufacturer’s recommendations, usually between 1-2 hours.
– Assess the Need for Additional Coats
Depending on the color and finish you’re going for, you may need to apply additional coats. Generally, lighter colors require more coverage, while darker shades usually need fewer coats. For a more distressed or shabby chic look, a single coat might suffice.
– Distressing the Furniture
To create a distressed look, use a fine-grit sanding sponge or sandpaper and lightly sand down the edges and corners of the furniture after the paint has thoroughly dried. The goal is to remove some of the paint and reveal the original wood or underlying paint color.
– Clear Wax for Protection
After the paint has dried and you’re satisfied with the finish, apply a clear wax to protect and seal the surface. Use a lint-free cloth to apply a thin layer of wax, working in small sections and buffing the wax until it’s no longer tacky. Allow the wax to dry for at least 24 hours before using your furniture.
– Maintaining Your Chalk Painted Furniture
To maintain your chalk-painted furniture, regularly dust and clean it using a soft, damp cloth. Avoid using strong chemicals or abrasive cleaning materials to preserve the finish. For additional protection, reapply a thin layer of clear wax every 12-18 months.
• Considerations While Buying Chalk Paint
While chalk paint is known for its easy application and impressive results, not all chalk paints are created equal. It’s essential to choose high-quality paint with good coverage and a smooth finish, such as Annie Sloan’s Chalk Paint or Rust-Oleum’s Chalked Paint.
These brands have earned positive reviews and recommendations from experts and DIY enthusiasts alike.
• More Resources and Inspiration
For more information and inspiration for using chalk paint on your indoor furniture, check out the Annie Sloan website, which offers tutorials, color charts, and a user gallery of chalk paint projects.
To sum up, chalk paint is an excellent option for those looking to update and enhance their indoor furniture with a shabby chic finish. With its ease of use, versatile finishes, and low VOC levels, chalk paint can transform your furniture and give it a new lease on life.
Recommended Paint Types for Shabby Chic Pieces
– Chalk Paint: A Popular Choice for Shabby Chic
One of the most popular options for painting shabby chic furniture is using chalk paint. This type of paint creates a matte finish, which gives it a vintage and worn-out appearance.
Chalk paint is easy to work with and requires minimal surface preparation, making it an excellent option for beginners. I recommend using brands like Annie Sloan or Rust-Oleum for quality chalk paints.
Pros
- Low VOCs (Volatile Organic Compounds) make it eco-friendly and safe for indoor use
- Excellent adhesion means minimal surface preparation required
- Can be easily distressed to create a worn effect
- Can to create a worn effect
- Can be sealed with wax or polyurethane for protection
Cons
- May not adhere as well to certain surfaces, such as laminate or high-gloss finishes
- Can be expensive compared to other paint options
– Milk Paint: An Eco-friendly Option
Milk paint is another excellent option for shabby chic furniture. Made from natural ingredients like milk protein, limestone, and clay, it is an eco-friendly and non-toxic paint with a matte finish similar to chalk paint.
Milk paint can be found through brands like The Real Milk Paint Co. and Miss Mustard Seed’s Milk Paint.
Pros
- Non-toxic and eco-friendly
- Delivers a matte finish
- Can be easily distressed
- A good choice for traditional or antique pieces
Cons
- Requires surface preparation, such as sanding or applying a bonding agent
- Can be hard to mix and may require multiple layers
- May not adhere as well to some surfaces, like laminate or high-gloss finishes
– Acrylic Paint: A Versatile Option
Acrylic paint is another option for shabby chic furniture that offers versatility and durability. It is a water-based paint with low VOCs, which makes it safe for indoor use.
Acrylic paint can be easily mixed or thinned with water to achieve the desired consistency and look. Brands like Behr or Benjamin Moore provide high-quality acrylic paints in a wide range of colors.
Pros
- Water-based and low VOCs make it eco-friendly and safe for indoor use
- Adheres well to various surfaces
- Can be easily mixed or thinned with water
- Dries quickly, making it ideal for multiple layers or quick projects
- Can be sealed with wax or polyurethane for added protection
Cons
- May not provide the same vintage appearance as chalk or milk paint
- Can sometimes have a slight sheen or gloss, which may not be ideal for shabby chic finishes
- May require more surface preparation
– Latex Paint: An Affordable Alternative
Latex paint is a more affordable alternative for shabby chic furniture projects. It is a water-based paint that provides a smooth, semi-gloss finish. Latex paint can be found at most hardware or paint stores and is available in a wide range of colors. Opt for brands like Sherwin-Williams or Valspar for reliable latex paint options.
Pros
- Affordable compared to chalk or milk paint
- Water-based and low VOCs
- Adheres well to various surfaces
- Can be sealed with wax or polyurethane
Cons
- May not deliver the same sought-after vintage appearance as chalk or milk paint
- May require more surface preparation
- Drying time can be longer, making it less ideal for quick projects
• Final Thoughts
Choosing the right paint for your shabby chic furniture project will ultimately depend on the desired look, your budget, and the level of experience you have working with paints. Chalk paint is a popular and beginner-friendly option, while milk paint provides an eco-friendly and traditional choice.
Acrylic and latex paints offer versatility and affordability, respectively. Whichever option you choose, ensure you follow the manufacturer’s guidelines and use proper surface preparation and sealing techniques for the best results. Happy painting!
Paint Type | Benefits |
|---|---|
Chalk Paint | Easy to use, no need to sand or prime, provides a matte finish, water-resistant |
Milk Paint | Eco-friendly, non-toxic, dries quickly, creates a vintage distressed look |
Acrylic Latex Paint | Low odor, easy clean-up, durable, provides a satin or gloss finish |
Enamel Paint | Provides a hard and glossy finish, long-lasting, suitable for high-traffic areas |
Spray Paint | Quick and even coverage, wide range of colors and finishes, easy application |
Creating Shabby Chic Furniture with Chalk Paint
Creating shabby chic furniture with chalk paint is an easy and cost-effective way to transform your old furniture pieces into beautiful, vintage-inspired treasures. Chalk paint allows you to achieve that rustic, distressed look without the need for expert painting skills, and the results can look truly stunning.
• 1. Choosing the Right Furniture Piece
The first step in making shabby chic furniture is selecting a suitable piece to work on. Ideal items for this style would be antique or vintage pieces made of solid wood, such as dressers, bookshelves, side tables, and chairs.
It is essential to pick a sturdy furniture piece that is not damaged beyond repair. If needed, make any necessary repairs before starting the painting process.
• 2. Prepping the Furniture
Before applying chalk paint, ensure the furniture is clean and free of any dust or debris. Use warm soapy water and a soft sponge to clean the surface, and then allow it to dry thoroughly. Remove any existing hardware (handles, knobs, etc.), and keep them aside if you plan to reuse them later.
– Sanding (Optional)
Sanding the furniture before painting is not necessary when using chalk paint. However, if you are working with a glossy or smooth surface, lightly sand it with fine-grit sandpaper (220-grit) to help the paint adhere better. Remember to wipe the surface with a damp cloth to remove any sanding dust.
• 3. Choosing the Perfect Chalk Paint
Chalk paint is available in various colors and brands, such as Annie Sloan and Rust-Oleum. You can also create your own chalk paint by mixing latex paint with a chalky paint additive, like calcium carbonate or plaster of Paris.
When selecting a color, consider the overall look you want to achieve and how well it will complement the rest of your home’s decor.
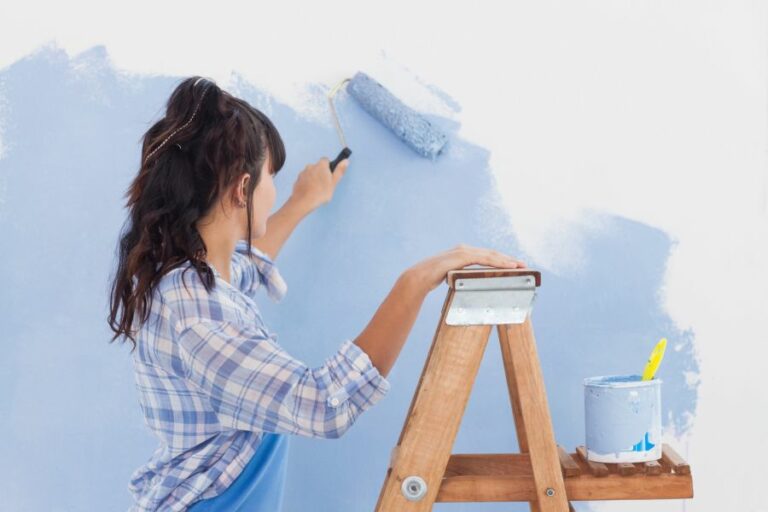
• 4. Applying the Chalk Paint
To apply the chalk paint, you can use either a foam roller, a paintbrush, or a spray gun, depending on the design and details of the furniture. For a more textured finish, opt for a paintbrush, while a foam roller or spray gun will provide a smoother application.
– Painting Technique
When painting with chalk paint, refrain from applying the paint in long, even strokes. Instead, use short, random, and crosshatch strokes to create a more authentic shabby chic look. Allow the first coat to dry completely before applying additional layers as needed for full coverage.
• 5. Creating a Distressed Effect
Once your chalk paint has dried, it’s time to distress the furniture piece using sandpaper. This step will reveal the original wood or underlying paint layers, giving the furniture a well-worn, vintage appearance.
– Sanding Method
Using fine-grit sandpaper (220-grit), gently sand the areas of the furniture where natural wear and tear would occur, such as the edges, corners, and raised details. Be cautious not to overdo the distressing, as a subtle effect often looks more authentic.
• 6. Applying a Protective Finish
To protect your shabby chic furniture and ensure the paint’s longevity, apply a clear wax or a water-based polyurethane protective finish.
Both options will provide a durable and water-resistant surface, with the wax providing a more matte finish and the polyurethane giving a slightly more glossy appearance.
– Wax Application
Apply a thin layer of clear wax to the entire furniture piece using a clean, lint-free cloth or a wax brush. Ensure that you are working in small sections and immediately removing any excess wax. Allow the wax to dry and buff it with another lint-free cloth to achieve a smooth finish.
– Polyurethane Application
Following the manufacturer’s instructions, apply a thin coat of water-based polyurethane using a brush, foam roller, or spray gun. Allow the first coat to dry, lightly sand the surface with fine-grit sandpaper, and repeat the process for one or two additional coats for maximum protection.
• 7. Reattaching Hardware and Enjoying Your Shabby Chic Furniture
Once the protective finish has dried, reattach any hardware (handles, knobs, etc.), and admire your transformed shabby chic furniture piece. This unique and stylish look will surely add character and charm to any room in your home.
To keep your shabby chic furniture looking its best, dust frequently and gently clean with a damp cloth when needed. Avoid using harsh chemicals or abrasive cleaning tools, as they can damage the paint and protective finish.
With proper care, your shabby chic furniture will remain a beautiful and timeless addition to your home for years to come.
Step | Description |
|---|---|
1 | Choose a piece of furniture that you want to transform into a shabby chic masterpiece. |
2 | Prepare the furniture by cleaning it thoroughly and removing any hardware, if necessary. |
3 | Select a Chalk Paint color to match your desired shabby chic look. Popular choices include pastel shades and off-whites. |
4 | Apply a thin, even coat of Chalk Paint on the furniture using a brush or roller. Allow it to dry completely. |
5 | Apply a second coat of Chalk Paint if necessary, allowing it to dry completely. This will provide better coverage and a more even finish. |
6 | Use sandpaper to distress the furniture by lightly sanding areas that would naturally receive wear and tear like edges, corners, and raised details. |
7 | Remove any dust from the sanding and apply a clear wax using a wax brush or lint-free cloth to seal and protect the paint. |
8 | Buff the waxed surface with a clean cloth to achieve a smooth, semi-gloss finish. |
9 | Reattach any hardware and enjoy your beautiful shabby chic furniture piece. |
Potential Drawbacks of Chalk Paint on Furnishings
Chalk paint is a popular option for those looking to give their furniture a fresh, new look. The appeal of this type of paint lies in its versatility, ease of use, and unique matte finish. However, there are some downsides to using chalk paint on furniture that you should be aware of before starting your project.
• Limited Color Range
One significant disadvantage of chalk paint is the limited selection of colors developers have to offer. These paints tend to come in muted, pastel shades, which might not suit everyone’s taste.
It may also be challenging for interior decorators to perfectly match the colors of chalk paint with the palette of the entire room.
If you’re looking for a wider range of colors, it’s worth considering alternative paint options or looking into custom-mixing your shades. For more information on selecting the right paint colors, you can refer to this Color Theory guide from Color Matters.
• Input Required for Prepping and Sealing
Chalk paint does not require major surface preparation before application, like sanding or priming. However, any surface imperfections will be highlighted by the paint’s matte finish, so addressing them before painting is essential.
After painting, it’s crucial to seal the chalk paint with either wax or water-based polyurethane. Wax protects the paint and gives it a lustrous sheen when buffed, but it may need to be reapplied periodically.
Also, some may find applying wax to be labor-intensive; it needs to be applied in thin layers, left to dry for a day, and then buffed, which can be exhausting.
If you use polyurethane as a sealant, you’ll avoid physically exhausting tasks. However, it can be an additional expense and may require two or more coats for adequate protection.
• Low Durability and Scratch Resistance
Although chalk paint is generally a quick and easy solution for updating furniture, it’s not the most durable option. It can chip or scratch easily, especially on high-traffic surfaces like chairs or tables.
Sealing the paint with wax or polyurethane can help with durability, but it’s not enough to make it as resilient as other paint types.
When selecting furniture paint, consider the item’s intended use. For pieces that come into regular contact, like everyday seating, hall tables, or bedroom dressers, other types of paint, like latex or enamel, may be a better choice.
• Uneven Paint Coverage
The matte finish of chalk paint is one of its major selling points, but this finish can also emphasize brush strokes and roller marks more than other paint types. This issue can make achieving a smooth finish challenging, particularly for inexperienced painters.
To minimize brush strokes and roller marks, use multiple thin layers of paint, waiting for each coat to dry thoroughly before applying the next. You can also try using a high-quality synthetic brush for better results.
• Potential for Wax Yellowing Over Time
After sealing chalk paint with wax can be a nearly foolproof solution as long as you’re gentle with your furniture. However, with limited durability, yellowing can occur over time, particularly if your piece is exposed to direct sunlight or in a humid environment.
For a more long-lasting and less maintenance-intensive finish, consider using a water-based polyurethane sealant instead of wax (as mentioned earlier in this article).
• Limited Versatility on Non-Wood Surfaces
Chalk paint is specifically designed for wood furniture, so it may not adhere as effectively to non-wood surfaces like metal or plastic. If you’re planning to paint items made of other materials or surfaces that are more susceptible to wear and tear, you might have to look into alternative options.
Before committing to chalk paint, thoroughly research and test how well it will work on the specific material and surface.
• Conclusion
Chalk paint can be a wonderful option for giving your furniture a fresh and unique look, but it’s crucial to be aware of its limitations in color range, durability, and versatility on non-wood surfaces.
By considering these downsides and opting for alternatives like latex or enamel paint when appropriate, you can successfully avoid disappointments in your next furniture painting project.
Using Chalk Paint for Interior Furniture
Chalk paint is a versatile and popular choice for painting furniture, offering a matte finish and a unique texture that can transform outdated or worn items. However, some may wonder whether it’s advisable to chalk-paint furniture indoors or if it’s best to tackle these projects outside.
In short, yes, you can safely chalk-paint furniture indoors. Nevertheless, there are considerations to keep in mind, such as providing proper ventilation, protecting surfaces, and choosing the right paint for the job.
• Proper Ventilation
While chalk paint is relatively safe and low in volatile organic compounds (VOCs), ensuring proper ventilation when painting furniture indoors is vital. Ventilation helps to eliminate paint fumes and to accelerate the drying process. When working with chalk paint indoors, follow these recommendations:
- Choose a well-ventilated area: Pick a room with ample airflow, ideally with windows or doors that can be opened. This helps to disperse fumes and minimize lingering paint odors.
- Utilize fans: If the room lacks sufficient natural ventilation, place fans near open windows or doors to encourage air circulation.
- Take breaks: Step outside periodically to enjoy the fresh air while your furniture is drying, particularly if the room isn’t well-ventilated.
• Protection and Prep Work
Chalk painting furniture indoors typically presents minimal risks in terms of paint spills or messes. However, proper protection will ensure a neat and hassle-free experience. Here’s what to remember when preparing for indoor chalk painting:
- Cover floors: Place protective plastic sheeting, a drop cloth, or even old newspapers on the floor beneath your project. This protects your floor from paint splatters and spills.
- Protect surrounding areas: Remove or cover any wall hangings and nearby furniture to avoid accidental paint damage.
- Prep the furniture: Before starting, thoroughly clean the piece of furniture you’ll be painting. A simple microfiber cloth or vacuum with a brush attachment should remove dirt and dust.
• Choosing the Right Chalk Paint
Many chalk paint products on the market boast low VOC content and are labeled as non-toxic. However, it is essential to read and follow the information provided by the paint manufacturer. For indoor projects, opting for a low-VOC, water-based chalk paint is the best option.
These types of paint will produce minimal fumes and are less likely to cause respiratory or health issues while painting indoors. Some reputable brands include Annie Sloan, CeCe Caldwell, and Rust-Oleum. Always follow the manufacturer’s instructions and guidelines to ensure optimal results.
• Benefits of Chalk Painting Furniture Indoors
When deciding whether to chalk paint furniture indoors, consider these potential advantages:
- Controlled environment: Indoor painting allows better control over temperature, humidity, and air quality, all of which can affect the paint’s performance.
- Weather protection: Outdoor painting can expose your project to the elements, such as rain or direct sunlight. Painting indoors eliminates these concerns.
- Convenience: Working indoors can offer more flexibility in terms of time, as projects can be done in stages without having to worry about transporting furniture or materials from inside to outside.
• Wrapping Up
Chalk painting furniture indoors is not only feasible but also offers several advantages for both convenience and the final outcome. With proper ventilation, adequate protection, and the right paint, you can efficiently complete your chalk-painting project in the comfort of your home.
Keep in mind that chalk paint’s unique finish typically requires sealing and protecting, most commonly with wax or a top coat (such as a clear coat or polyurethane). For more information on applying these finishes, check out the Annie Sloan website for tutorials and expert advice. Happy painting!
| Question | Can you chalk-paint indoor furniture? |
|---|---|
| Answer | Yes, you can. Chalk paint has low volatile organic compounds (VOCs) and is water-based, which makes it safe to use indoors. However, it is essential to ensure proper ventilation and take necessary precautions while painting. |
Crafting Shabby Chic Furniture with Paint
Furniture painting in a shabby chic style is all about creating a vintage, worn-out look that adds character and personality to any piece of furniture.
This popular style can be seen as a budget-friendly and sustainable way to update an old piece or simply change the ambiance of a room. Following these simple steps, anyone can achieve a beautiful shabby chic transformation.
• Choosing the Right Furniture
The type of furniture suitable for shabby chic painting can be easily found in thrift stores, garage sales, or even your attic. Look for pieces that have detailed carvings or interesting shapes to create an eye-catching focal point in your room.
– Recommendations
- Solid wood furniture works best for this style, as it can withstand the paint and distressing process more effectively than a veneer or particle board.
- Look for pieces that are sturdy and in good condition to ensure a successful and enduring makeover.
• Preparing the Furniture
– Cleaning
Before painting, it’s crucial to clean the furniture thoroughly to remove any dirt, grease, or dust. A simple solution of warm water and mild soap is highly effective for this task. After cleaning, ensure the piece is dried completely before proceeding.
– Sanding
Sanding is an essential step in preparing the furniture for painting. Gently sand the entire surface of the piece with 120-grit sandpaper, enough to remove any glossy finish while leaving a smooth, even surface. Then, wipe down the piece with a clean, dry cloth to remove any sanding residue.
• Priming and Painting
– Primer
Applying a coat of primer can make the paint adhere more effectively to the furniture surface. Choose a high-quality, oil-based primer for the best results. Using a good quality paintbrush or foam roller, apply the primer in one thin, even coat, and leave it to dry according to the manufacturer’s instructions.
– Paint Selection
While any paint can be used for shabby chic furniture painting, chalk paint is highly recommended due to its ease of application, minimal preparation requirements, and variety of finishes. Chalk paint is available in a wide range of colors, from muted pastels to bold shades.
– Applying the Paint
For shabby chic furniture painting, it’s advisable to apply two thin coats of paint to achieve a more even and durable finish.
Use a high-quality synthetic paintbrush or foam roller for better coverage and minimal brushstroke marks. Allow the paint to dry completely between coats, as per the manufacturer’s instructions.
• Distressing the Furniture
Once the final coat of paint is dry, it’s time to distress the furniture to create the signature shabby chic look. The purpose of distressing is to reveal the original finish or wood beneath the paint, giving the impression of aged and well-loved furniture.
– Recommendations
- 120-grit sandpaper works well for distressing, while a sanding block or electric sander can be more efficient for larger projects.
- Focus on areas that would naturally experience wear and tear, such as edges, corners, carvings, and handles.
• Applying a Protective Finish
After distressing the furniture to your desired level of shabby chic, it’s essential to protect the surface using clear wax or sealer. This step not only prolongs the life of your project but enhances the look by adding depth and richness to the color.
– Recommendations
- Choose a clear, matte wax or sealer specifically designed for chalk-painted furniture for excellent durability and protection.
- Follow the manufacturer’s instructions for application and drying times. Typically, one to two thin coats are sufficient for adequate protection.
Finally, your new piece of shabby chic furniture is ready to be displayed and admired. With a little patience, creativity, and effort, you can transform any old or outdated piece of furniture into a charming work of art, adding a touch of vintage character to your home.
Step | Instructions |
|---|---|
1 | Choose a piece of furniture to paint. |
2 | Remove any hardware, such as handles or knobs, and clean the furniture thoroughly, allowing it to dry completely. |
3 | Sand any glossy or rough surfaces on the furniture to create a smooth surface for painting. |
4 | Apply a layer of primer to the furniture, ensuring even coverage. Allow the primer to dry completely. |
5 | Paint the furniture with your chosen base color, using either a brush or roller for larger surfaces. Allow the paint to dry completely. |
6 | Optionally, apply a second layer of paint in a contrasting color. Allow the paint to dry completely. |
7 | Use sandpaper to gently distress areas of the furniture that would naturally become worn over time, such as edges, corners, and raised details. This will reveal the base color underneath and create a worn, shabby chic look. |
8 | Seal the furniture with a clear furniture wax or water-based polyurethane, following the manufacturer’s instructions for application and drying times. |
9 | Reattach any hardware, such as handles or knobs, and enjoy your beautifully painted shabby chic piece of furniture. |
Top Distressed Furniture Paint Options
Distressed furniture offers a unique way to breathe new life into old or boring pieces. With the right paint, you can create a vintage, chic, or rustic look that’s perfect for any space.
• Chalk Paint: A Popular Choice for Distressing
Chalk paint is a highly popular choice when distressing furniture, thanks to its thick coverage, easy-to-work-with consistency, and stunning matte finish. This paint adheres well to a variety of surfaces, and it’s ideal for creating the textured, antique look that distressed furniture is known for.
While many brands offer chalk paint, the most well-known and highly recommended is Annie Sloan chalk paint, recognized for its high quality and an impressive selection of colors.
To achieve the best results with chalk paint, make sure to follow these tips:
- Clean your furniture: Ensure your piece is free of dust, dirt, and grime before you start painting.
- Light sanding: If your furniture has a glossy finish, lightly sand it to ensure the paint adheres properly.
- Apply the paint: Chalk paint is typically thick, so use a good-quality brush to ensure even coverage.
• Milk Paint: An Eco-Friendly Option for Distressing
Milk paint is another excellent option for distressed furniture, and it’s favored for its eco-friendly, non-toxic properties. Made from natural ingredients like casein, lime, and pigments, milk paint has been used for centuries to create durable, long-lasting finishes. It’s available in both powdered and pre-mixed forms.
For a reputable milk paint brand, consider Miss Mustard Seed’s Milk Paint, which offers a wide array of beautiful colors and environmentally-friendly options.
When using milk paint, keep these tips in mind:
- Prep your surface: Lightly sand glossy surfaces and ensure your furniture is clean and dry.
- Mix your paint: If using powdered milk paint, mix it with water according to the manufacturer’s instructions. It should resemble a thick, creamy consistency.
- Apply in thin layers: Milk paint is thinner than chalk paint, so apply in thin layers and allow each coat to dry before adding additional layers.
• Latex Paint: A Versatile Choice for Distressed Furniture
Latex paint is a widely-available, versatile option for distressed furniture. Though it lacks the unique texture and matte finish that chalk paint and milk paint offer, you can achieve a distressed look with latex paint by manipulating its texture and using various distressing techniques.
For a trusted brand of latex paint, turn to Valspar for their high-quality Signature Series, available in countless colors and finishes.
Before painting with latex paint, follow these steps:
- Prep your furniture: Clean the surface, and lightly sand if necessary to remove any gloss.
- Use a bonding primer: To ensure the paint adheres well and has a smooth finish, apply a bonding primer like Zinsser Bulls Eye 1-2-3 Primer.
- Apply the paint: Opt for a high-quality brush or roller, and apply thin coats of paint, allowing each layer to dry fully.
• Final Touches: Techniques for Achieving the Perfect Distressed Finish
After applying your chosen paint, use these techniques to create a beautifully distressed piece:
- Sanding: Lightly sand the edges and areas of the furniture where natural wear and tear would occur, revealing the underlying wood or previous paint layers.
- Dry brushing: Apply a small amount of contrasting paint color to your brush, removing most of the paint before brushing onto your furniture. This technique adds subtle texture and dimension.
- Waxing: Apply a dark wax, like Annie Sloan’s Dark Wax, to the distressed areas for a more aged, antique appearance.
With the right paint and techniques, you can transform any piece of furniture into a stunning distressed masterpiece.
Whether you choose chalk paint, milk paint, or latex paint, remember to properly prepare your surface, apply thin coats, and use a variety of distressing techniques to achieve the perfect worn-out, vintage look.
Brand | Type | Description |
|---|---|---|
Chalk Paint by Annie Sloan | Chalk paint | A popular choice for painting distressed furniture, offers a matte, chalky finish and easy to apply |
Milk Paint by General Finishes | Milk paint | Environmentally friendly paint, gives a vintage look to furniture with a deeper, richer finish |
Rust-Oleum Chalked Paint | Chalk paint | Ultra-matte finish, easily distressed for a vintage, aged look. Adheres to most surfaces |
Acrylic Paint by FolkArt Home Decor | Acrylic paint | Water-based, non-toxic acrylic paint specifically designed for vintage, distressed look on furniture |
Latex Paint | Water-based paint | Multi-use and versatile, available in various sheens and finishes, can be used to create a distressed look on furniture |