Beginners Guide To Chalk-Painted Indoor Furniture. What Pros Say
Have you ever looked around your home and realized that your furniture could use a fresh, new look? Are you eager to dive into the world of DIY and upcycle your pieces but don’t know where to start? Allow me to share the answer you’ve been searching for – chalk paint! With its versatility and simplicity, chalk painting your indoor furniture is the perfect project for any beginner.
Beginner’s guide to chalk-painted indoor furniture:
Chalk paint is a versatile, user-friendly paint ideal for upcycling old indoor furniture. To begin, choose a high-quality chalk paint brand, gather the necessary supplies, and clean the furniture. Lightly sand the surface, apply painter’s tape, and apply 1-2 coats of paint. Optionally, distress the piece by lightly sanding worn areas. Finally, seal the paint with a clear wax or water-based sealant, depending on the color of your furniture.

Ready to breathe new life into your old furniture? Discover the world of chalk paint and learn how to transform your outdated pieces into modern masterpieces. Read on to explore easy techniques and expert tips for stunning results!
Contents
- 1 Introductory Guide to Chalk Painting Indoor Furnishings
- 2 Chalk Painting Furniture: A Beginner’s Tutorial
- 2.1 • What is Chalk Paint?
- 2.2 • Essential Materials for Chalk Painting Furniture
- 2.3 • Step-by-Step Guide to Chalk Painting Furniture
- 2.3.1 – Step 1: Choose Your Furniture Piece
- 2.3.2 – Step 2: Clean and Prepare the Surface
- 2.3.3 – Step 3: Apply the First Coat of Chalk Paint
- 2.3.4 – Step 4: Apply the Second Coat of Chalk Paint
- 2.3.5 – Step 5: Distress the Furniture (Optional)
- 2.3.6 – Step 6: Apply Wax or Sealer
- 2.3.7 – Step 7: Replace Hardware and Enjoy Your Chalk-Painted Furniture
- 2.4 • Tips and Tricks for the Best Chalk Paint Results
- 3 Chalk Painting Furniture Indoors: Is It Possible?
- 4 Is Priming Necessary Before Applying Chalk Paint to Furniture?
- 5 Furniture Prep: What Goes on Before Chalk Paint?
Introductory Guide to Chalk Painting Indoor Furnishings
• Introduction to Chalk Paint
Chalk paint is a versatile and user-friendly paint that is ideal for upcycling and transforming old indoor furniture. It requires minimal preparation and has a matte, chalky finish, hence the name. It can be used on various surfaces, including wood, metal, laminate, and even fabric.
Chalk paint has gained popularity in recent years not only for its ease of use but also for its unique and trendy appearance.
Before diving into your first chalk paint project, it is essential to understand the basics of this amazing paint.
• Choosing the Right Chalk Paint
When selecting chalk paint for your project, look for a high-quality brand. Some popular options are Annie Sloan, Rust-Oleum Chalked, FolkArt Home Decor Chalk Paint, and Americana Decor Chalky Finish.
These brands have a range of beautiful colors to choose from; however, you can also create your own chalk paint using latex paint and calcium carbonate, plaster of Paris, or unsanded grout as per your preference.
Recommendation: I recommend starting with a reputable brand, as making your own chalk paint can be more complicated for beginners.
• Gather Your Supplies
Before starting your chalk paint project, gather all the necessary supplies. This may include:
- Chalk paint
- Clear-finishing wax or sealant
- Brushes
- Sandpaper (100-150 grit)
- Lint-free cloth (microfiber cloths work well)
- Painter’s tape
- Drop cloth or newspaper to protect your workspace
• Preparing the Furniture Piece
- Clean the furniture: Before starting, thoroughly clean your furniture with a lint-free cloth and warm soapy water to remove any dirt, dust, or grime. Be sure to remove any drawers or hardware as well.
- Lightly sand: Sand the furniture piece lightly to create a rough surface for better paint adhesion. After sanding, wipe off any dust with a clean, lint-free cloth.
Recommendation: Although many chalk paint brands claim that there’s no need for sanding, I recommend this step for a better finish.
- Tape off: Use painter’s tape to cover any areas where you do not want the chalk paint to be applied, such as hardware, glass, or other decorative elements.
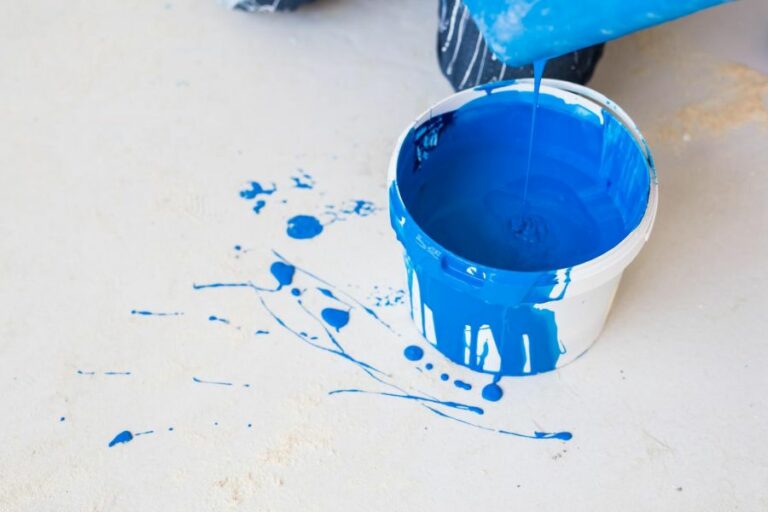
• Applying Chalk Paint
- Stir the paint: Before application, stir the chalk paint thoroughly to create a smooth consistency.
- Apply the first coat: Using a brush, start applying the chalk paint to your furniture piece. You can apply it in any direction and use different brush strokes for a unique texture.
Tip: Work quickly, as chalk paint dries faster than regular paint.
- Let it dry: Allow the first coat of paint to dry completely. Depending on the brand of paint and the environment where you are working, drying times vary (generally 1-4 hours).
- Apply the second coat: After the first coat has dried, apply a second coat of chalk paint for full coverage. You may need additional coats depending on the color and coverage desired.
- Dry completely: Once the final coat has been applied, allow it to dry fully before proceeding to the sealing step.
• Sanding and Distressing (Optional)
If you would like a distressed or aged look to your furniture, this can be achieved by lightly sanding areas where natural wear and tear would usually occur, such as edges, corners, and raised details. This will create a ‘worn’ effect on the finished piece.
• Sealing the Chalk Paint
To protect your chalk-painted furniture and ensure its longevity, apply a suitable sealant. These sealants typically come in the form of clear wax or a water-based sealant. Using a lint-free cloth or a brush, apply the sealant in a thin layer following the manufacturer’s directions.
Allow the sealant to dry fully, usually 24 hours, and buff with a clean, lint-free cloth for a smooth finish.
Recommendation: I recommend using clear wax for dark-colored furniture and water-based sealants for lighter-colored furniture, as wax may slightly darken the color.
• Final Thoughts
Using this beginner’s guide, you can transform any indoor furniture piece into a beautiful chalk-painted masterpiece. The versatility and ease of use make chalk paint an excellent choice for all DIY enthusiasts. Remember to experiment, take your time, and have fun with your chalk paint projects.
For more information on chalk paint and DIY home projects, check out DIY Network.
Chalk Painting Furniture: A Beginner’s Tutorial
Chalk paint has become increasingly popular among furniture enthusiasts due to its easy application, affordable price, and unique, distressed look. If you are a beginner looking to dive into the world of chalk paint furniture, this guide is for you.
Let’s explore the steps, techniques, and essential materials needed to create a stunning piece of chalk-painted furniture.
• What is Chalk Paint?
Chalk paint is a unique, water-based paint that is specifically designed for painting furniture. It was created by Annie Sloan in 1990 and is known for its versatile, matte finish. Chalk paint is easy to use, requires minimal preparation, and adheres well to a variety of surfaces, making it perfect for beginners.
• Essential Materials for Chalk Painting Furniture
Before you begin, gather the following essential materials:
- Chalk paint
- A good-quality paintbrush (preferably a synthetic bristle brush)
- A clean, lint-free cloth or rag
- Fine-grit sandpaper (220 to 320 grit)
- Furniture wax or a water-based sealer
- A wax brush or lint-free cloth (for applying wax or sealer)
• Step-by-Step Guide to Chalk Painting Furniture
– Step 1: Choose Your Furniture Piece
Select a piece of furniture that you want to paint. Chalk paint works best on wood furniture but can also be used on metal, glass, and fabric surfaces. For beginners, it’s best to start with a simple, small piece of furniture like a side table, stool, or picture frame.
– Step 2: Clean and Prepare the Surface
Properly clean the furniture piece to ensure the paint adheres well. Remove any dirt, dust, or grime using a damp cloth, and allow it to dry completely.
Minimal surface preparation is required for chalk paint; however, if the surface is shiny, lightly scuff it with fine-grit sandpaper for better adhesion. Always remember to remove any hardware from the furniture before painting.
– Step 3: Apply the First Coat of Chalk Paint
Stir the paint well before using it. Apply the first coat of chalk paint using your paintbrush. Use long, smooth strokes following the grain of the wood. The first coat may look streaky, but don’t worry, the second coat will provide better coverage.
Allow the first coat of paint to dry thoroughly (usually around 1-2 hours, but check the manufacturer’s instructions). Chalk paints generally dry quite quickly.
– Step 4: Apply the Second Coat of Chalk Paint
Apply the second coat of paint using the same technique as in step 3. Allow it to dry completely. If needed, apply a third coat for complete coverage.
– Step 5: Distress the Furniture (Optional)
Distressing the furniture is an optional step that gives it a vintage, shabby-chic look. Use fine-grit sandpaper to lightly sand the edges and corners of the furniture, revealing the underlying wood or previous finish.
You can also gently sand randomly on flat surfaces for a more distressed look. Wipe off any dust with a clean, lint-free cloth.
– Step 6: Apply Wax or Sealer
To protect your chalk paint furniture and ensure its durability, apply a layer of furniture wax or a water-based sealer. Use a wax brush or lint-free cloth to apply the wax or sealer in a thin, even layer, following the grain of the wood.
Allow the wax to dry for 10-15 minutes, and then buff it with a clean, lint-free cloth to achieve a smooth finish. For water-based sealers, follow the manufacturer’s instructions for drying time and application method.
– Step 7: Replace Hardware and Enjoy Your Chalk-Painted Furniture
Once the wax or sealer has dried completely, reattach any hardware you removed earlier. Your beautifully chalk-painted furniture is now ready for use!
• Tips and Tricks for the Best Chalk Paint Results
- Practice your painting technique on a spare piece of wood or cardboard before starting on the actual furniture.
- Invest in good-quality brushes for better paint application and smoother finishes.
- Store leftover chalk paint in an airtight container to prevent it from drying out.
- Experiment with mixing different chalk paint colors to create custom shades.
In conclusion, chalk paint is an excellent choice for beginners looking to transform old or worn furniture pieces into unique, eye-catching statements. With minimal preparation and simple application techniques, even first-timers can achieve professional-looking results.
So, gather your materials, choose your project, and delve into the world of chalk paint furniture!
Step | Description |
|---|---|
1 | Choose your furniture piece and prep the surface by cleaning it thoroughly and removing any hardware or accessories. |
2 | Select the chalk paint color and brushes that you would like to use. |
3 | Apply a thin layer of chalk paint with a brush, moving in the direction of the wood grain. |
4 | Let the first coat dry completely before applying a second coat if necessary. |
5 | Distress the painted surface by using a fine-grit sandpaper on the edges and raised details of the furniture. |
6 | Wipe off any dust and dirt from the sanding process. |
7 | Apply a clear wax or a colored wax to seal and protect the painted surface. |
8 | Buff the waxed surface with a clean cloth to achieve your desired sheen. |
9 | Reattach any hardware and accessories that you removed in the beginning. |
Chalk Painting Furniture Indoors: Is It Possible?
Chalk painting furniture indoors is not only possible, but it is also a popular choice for many DIY enthusiasts and professional interior designers. This versatile painting technique can give an old piece of furniture a new life while allowing for a personalized touch that matches any interior decor style.
• Why Chalk Paint Furniture Indoors?
Chalk paint has gained popularity as a furniture painting solution for several reasons, some of which include:
– Easy Application
Chalk paint is easy to apply, even for beginners, as it adheres to various surfaces without the need for priming or sanding. This feature saves time and effort, making it an excellent option for those looking to transform their furniture quickly.
– Eco-Friendly
Chalk paint is water-based and contains low levels of volatile organic compounds (VOCs), making it a more environmentally friendly choice compared to oil-based paints. Indoor air quality is crucial for our health, and using eco-friendly materials helps to ensure a safe and comfortable living space.
Visit the United States Environmental Protection Agency’s (EPA) website for more information.
– Versatile Finishes
Chalk paint offers a wide range of finishes, from matte to semi-gloss, depending on the amount of wax or sealant applied. This versatile finish allows you to customize the final look of your furniture based on your personal preferences.
• What to Consider Before Chalk Painting Furniture Indoors?
Although chalk paint is generally safe for indoor use, there are essential factors to take into consideration when painting furniture inside your home.
– Ventilation and Air Quality
Ensure that the room you are working in is well-ventilated to reduce potential exposure to paint fumes. Open windows and doors or use fans to promote air circulation. Additionally, consider using a face mask, particularly if you suffer from allergies or are sensitive to smells.
– Workspace Preparation
Protect your floors and surrounding surfaces by covering them with drop cloths or plastic sheeting to avoid paint drips and spills. Additionally, position the furniture on risers or wooden blocks to make work comfortable and improve paint coverage on the legs or lower parts of the piece.
– Time and Patience
Indoor chalk painting may take longer to dry, considering factors such as limited air circulation and temperature. Be patient and wait for the paint to dry before applying additional coats or finishes, as this will prevent smudging or sticking.
• Expert Tips for Chalk Painting Furniture Indoors
Follow these expert recommendations to achieve the best results when chalk painting furniture indoors:
– Clean the Surface
Wipe down the furniture with a damp cloth to remove dirt, dust, or residues. You may also use a mild cleaning solution if necessary, but ensure the surface is dry before applying the chalk paint.
– Test the Paint
Before painting the entire piece of furniture, do a test patch on an inconspicuous area to ensure color and coverage meet your expectations.
– Use a Quality Brush
Invest in a quality brush that works well with chalk paint to achieve a smooth and streak-free application. A natural-bristle brush or a synthetic brush specifically designed for chalk paint is recommended.
– Thin Layers and Multiple Coats
For indoor chalk painting, it is better to apply thin layers and build up the coverage with multiple coats. This method not only reduces drying time but also results in a more even finish.
– Sanding for Distressed Effects
If you want to achieve a distressed or aged effect, use a fine-grit sandpaper to gently sand the edges and raised areas of the furniture after the paint has dried. Be sure to remove any dust with a cloth before applying a sealant.
– Seal and Protect the Finish
Applying a wax or sealant will protect your furniture from stains, scratches, and moisture. Be sure to follow the manufacturer’s instructions for best results.
In conclusion, chalk painting furniture indoors is an achievable and beneficial option for those looking to revamp their home decor.
By taking the necessary precautions regarding ventilation, workspace preparation, and drying times, along with following expert tips, you can successfully and safely transform your furniture pieces. Happy painting!
Question | Answer |
|---|---|
Can you chalk paint furniture indoors? | Yes, you can. Chalk paint is a low odor and low VOC paint, making it suitable for indoor use. Just make sure the area is well-ventilated and follow the manufacturer’s instructions for proper application and drying times. |
Is Priming Necessary Before Applying Chalk Paint to Furniture?
When it comes to transforming furniture, chalk paint is a go-to choice for many DIY enthusiasts due to its ease of use, versatility, and ability to adhere to various surfaces. However, the question often arises whether or not priming is necessary before applying chalk paint on furniture.
• The Purpose of Priming
Priming serves as a preparatory step that creates a barrier between the original surface and the new paint, ensuring better adhesion and durability. It also helps to:
- Create a smooth and uniform surface.
- Seal porous materials, such as wood.
- Prevent stains and knots from bleeding through the paint.
- Allow for better coverage, which may reduce the number of paint coats needed.
So, do you need to prime furniture before using chalk paint? The short answer is: it depends.
• When to Prime Before Using Chalk Paint
1. Slick, Glossy, or Laminate Surfaces
Chalk paint is known for its ability to adhere well to most surfaces without the need for priming. However, in some cases, applying a primer may be necessary to ensure proper adhesion, especially if the furniture has a slick or glossy finish.
For laminate surfaces, in particular, priming is crucial. This is because laminate furniture has a plastic coating that makes it difficult for paint to adhere to without primer. In such cases, using a high-quality primer designed for laminate surfaces is essential, like Zinsser BIN Shellac-Based Primer.
2. Strong Colors, Stains, or Knots
If the furniture has deep colors, stains, or wood knots, using a primer can help prevent them from bleeding through the paint.
In these instances, we recommend using a stain-blocking primer, such as KILZ Premium Primer, to create a barrier that prevents the original color or stains from ruining your chalk paint finish.
3. Unfinished Wood Furniture
Although chalk paint works well on most wood surfaces, priming is recommended for unfinished wood furniture.
Priming helps to seal the wood, ensuring a smooth and even paint finish. It can also prevent tannin bleed, which can cause discoloration of the paint. In this case, using an oil-based primer can be an effective choice.
• When You Can Skip Priming
1. Pre-Painted or Varnished Furniture
Typically, chalk paint adheres well to painted or varnished furniture. In this case, you can skip the priming step, especially if the existing finish is in good condition. However, it’s essential to clean the surface thoroughly and sand lightly if needed, to create a slightly rough texture for better paint adhesion.
2. Distressed or Aged Look
If you plan to create a distressed or aged look on your furniture (where parts of the original wood or previous paint color show through), you can skip priming. The aim here is to let the original surface contribute to the overall aesthetic, and priming would only cover up the features you want to showcase.
• Final Thoughts
Overall, whether or not to prime furniture before using chalk paint is a matter of personal preference and specific project requirements.
Assessing the type of surface you will be working on, your desired outcome, and carefully following the manufacturer’s instructions on both the primer and chalk paint products will ensure a successful and lasting transformation of your furniture piece.
Remember, while chalk paint is well-known for its ability to adhere to many surfaces without priming, some situations, like glossy finishes or unfinished wood, may require preparation to achieve a professional and durable finish.
Taking the extra time to prime when necessary will ensure the best results for your furniture makeover project.
Furniture Prep: What Goes on Before Chalk Paint?
Chalk paint is a popular choice for transforming furniture, as it requires little to no preparation and adheres well to various surfaces. However, properly preparing your furniture can ensure the best results and longevity.
• Cleaning the Surface
Before applying paint, it’s essential to thoroughly clean the furniture to remove dirt, grime, and residue. Use a mild soap or a furniture cleaner, such as Murphy’s Oil Soap, to gently scrub the surface. Be sure to rinse well with clean water and let the furniture dry completely.
• Assessing the Surface and Repairing Damage
Inspect the furniture for any damage, such as chipping, scratching, or dents. Fill in any holes, gouges, or deep scratches with wood filler.
Allow the filler to dry thoroughly, and then sand the area smoothly using fine-grit sandpaper (220-grit or higher). For minor imperfections, gently sand the surface to create a smooth finish.
• Deglossing the Surface
If the furniture has a glossy finish, it’s necessary to degloss the surface to ensure proper adhesion of the chalk paint. Use a liquid deglosser or sandpaper to remove the gloss. When using sandpaper, be mindful not to sand too aggressively, as it can damage the wood.
– Liquid Deglosser
A liquid deglosser, such as Klean-Strip Easy Liquid Sander, can quickly and efficiently remove the glossy finish from the furniture. Follow the manufacturer’s instructions and apply the deglosser using a clean, lint-free cloth.
Allow the deglosser to work for the recommended time and then wipe down the surface with a damp cloth.
– Sanding
For those who prefer a more hands-on approach, sanding is an excellent option for deglossing the surface. Use fine-grit sandpaper (220-grit or higher) and lightly sand the entire surface of the furniture, focusing on any glossy areas.
Wipe down the furniture with a damp cloth or tack cloth to remove any dust.
• Applying a Primer
While it’s not always necessary to prime before applying chalk paint, it can ensure a consistent finish and improve durability. Priming is particularly recommended for dark or stained wood to prevent tannin bleed-through into the paint.
– Types of Primers
- Oil-based primers are best for preventing stains from bleeding through the paint. These primers can block tannin and provide excellent adhesion for the chalk paint. However, they have a longer drying time and require mineral spirits for clean-up.
- Water-based primers, such as Zinsser Bulls Eye 1-2-3, are a more eco-friendly option and can be used on most surfaces. They have a quicker drying time and can be cleaned with soap and water.
- Shellac-based primers are ideal for blocking stubborn stains and odors, such as nicotine or heavy tannin bleed. These primers dry quickly but have a stronger odor and require denatured alcohol for clean-up.
– Applying the Primer
Choose a primer that suits your needs and follow the manufacturer’s instructions for application. Apply with a brush or roller, and allow it to dry completely before applying chalk paint.
• Final Tips Before Applying Chalk Paint
- Ensure the furniture is completely dry before applying chalk paint. Damp surfaces can cause the paint to peel or chip.
- Always work in a well-ventilated area, particularly when using oil-based or shellac-based primers.
- Consider testing a small area of the furniture to ensure compatibility with the primer and chalk paint.
By following these steps and guidelines, you’ll create the perfect surface for applying chalk paint, ensuring a beautiful and long-lasting finish. Happy painting!
Step | Material/Procedure |
|---|---|
1 | Clean the furniture with soap and warm water to remove dirt and grime. |
2 | Lightly sand the surface to remove any glossy finish and to provide a better surface for the chalk paint to adhere. |
3 | Remove any dust or debris left by sanding with a tack cloth or damp cloth. |
4 | Apply a layer of primer to the furniture to ensure a smooth and even coverage of chalk paint. A stain-blocking primer can also help to prevent any stains from bleeding through the paint. |
5 | Allow the primer to dry properly before applying chalk paint. |