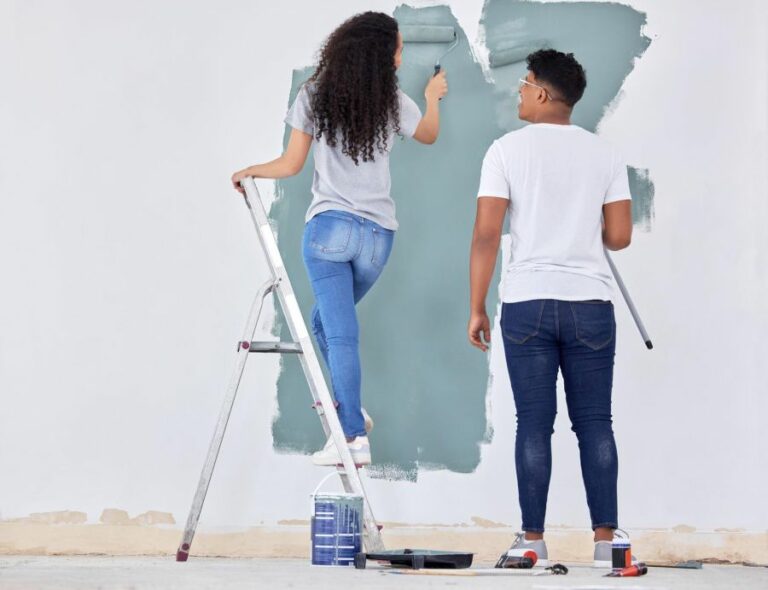
Best Indoor Paint For Rooms With High Humidity
Navigating the world of indoor paint can be overwhelming, especially when you’re trying to find the perfect fit for rooms with high humidity levels, like bathrooms and kitchens. But fear not because we’ve got you covered! In this discussion, we will dive into the top-tested and most reliable paint options that are specifically designed to withstand moisture and prevent issues like mold and mildew.
Best indoor paint for rooms with high humidity:
The best indoor paint for rooms with high humidity should be moisture-resistant, contain anti-microbial additives, and have a protective sheen. Top recommended brands include Benjamin Moore Aura Bath & Spa, Sherwin-Williams Duration Home, Zinsser Perma-White Mold-Resistant Interior Paint, and BEHR Premium Plus Ultra. Opt for acrylic or latex paints with high-gloss or semi-gloss finishes for superior durability and resistance.

Discover the top indoor paints specifically designed for rooms with high humidity. Learn about their unique features, benefits, and application tips to create a durable, mold-resistant living space. Dive into our comprehensive guide and transform your humid room into a fresh and vibrant haven. Read on!
Contents
- 1 Top Interior Paints for High Humidity Rooms
- 2 Is Painting Indoors with High Humidity Possible?
- 3 Moisture-Resistant Paint Options
- 4 Tips for Painting in Humid Rooms
- 5 Painting Techniques for Highly Humid Spaces
- 6 Paint Selection for High-Condensation Areas
- 7 Wall Protection Against High Humidity
- 7.1 • Why Humidity Matters
- 7.2 • Identify Problem Areas
- 7.3 • Proper Ventilation
- 7.4 • Use Water-Resistant Paint
- 7.5 • Insulate Your Home Properly
- 7.6 • Maintain Gutters and Downspouts
- 7.7 • Waterproofing
- 7.8 • Monitor Humidity Levels
- 7.9 • Address Any Existing Mold and Mildew Problems
- 7.10 • Maintain Your Air Conditioning System
Top Interior Paints for High Humidity Rooms
When it comes to selecting the best indoor paint for rooms with high humidity, such as bathrooms or kitchens, it is crucial to choose a paint specifically designed to withstand moisture and resist mold growth.
High-quality paints containing anti-microbial additives, moisture-resistant properties, and protective sheen can make a significant difference in the longevity and appearance of your walls.
• Top Factors to Consider When Choosing a Paint for Humid Rooms
1. Durability and Moisture Resistance
For areas that frequently experience high humidity, it’s essential to choose a paint that can withstand a damp environment without peeling or blistering.
Opt for a high-quality acrylic or latex paint, as these are commonly more resistant to moisture than their oil-based counterparts and will offer a longer-lasting, more durable finish.
2. Anti-Microbial Additives
Rooms with high humidity can be particularly susceptible to mold and mildew growth. To prevent this, look for paint products specifically formulated with anti-microbial additives or mildew-resistant properties.
These additives, such as zinc oxide or fungicides, will help inhibit the growth of mold and mildew on the paint’s surface, ensuring a healthier environment and a better aesthetic appearance.
3. Sheen
Both the sheen and the finish of the paint play a crucial role in providing a moisture-resistant barrier for your walls. High-gloss and semi-gloss finishes provide superior durability, easy cleaning, and moisture resistance, making them an ideal choice for rooms with high humidity.
Satin or eggshell finishes can also be suitable options but may not offer the same level of protection as high-gloss or semi-gloss varieties.
• Recommended Paint Brands for Humid Rooms
There are several top-notch paint brands on the market that offer excellent moisture resistance and anti-microbial properties.
1. Benjamin Moore Aura Bath & Spa
Benjamin Moore’s Aura Bath & Spa paint is specifically formulated for high-humidity environments, featuring both moisture resistance and mildew resistance. Furthermore, its matte finish offers a stunning appearance that holds up well in damp conditions.
2. Sherwin-Williams Duration Home
The Sherwin-Williams Duration Home line of paints is well-regarded for its durable, moisture-resistant properties. In addition, it contains anti-microbial additives that help prevent mold and mildew growth.
3. Zinsser Perma-White Mold-Resistant Interior Paint
Zinsser Perma-White Mold-Resistant Interior Paint is an excellent option for high-humidity rooms, as it offers premium moisture resistance and a guarantee to prevent mold and mildew growth for up to five years.
4. BEHR Premium Plus Ultra
BEHR Premium Plus Ultra is another excellent moisture-resistant paint option, as it combines both primer and paint in one product for optimal protection. It also has zero VOC (volatile organic compounds), making it an environmentally friendly choice.
• Expert Tips for Painting High-Humidity Rooms
Beyond selecting the best paint for high-humidity areas, consider these expert tips to ensure a successful and long-lasting paint job:
- Begin by ensuring the surface is clean, dry, and free from any existing mold, mildew, or other contaminants. If any mold or mildew is present, clean the affected area with a suitable mold-removing product before applying paint.
- Priming is essential when painting high-humidity rooms. Opt for a moisture-resistant primer to provide an extra layer of protection against moisture and mold growth.
- Maintain proper ventilation in high-humidity rooms, both during painting and afterward, to decrease the risk of mold growth and to promote faster paint curing times.
Choosing the right paint for rooms with high humidity is crucial for ensuring durability and maintaining a mold-free, aesthetically pleasing environment.
By keeping these factors in mind and selecting high-quality, moisture-resistant paint with anti-microbial additives, you’ll be well on your way to a beautiful and long-lasting paint job in any high-humidity space.
Brand | Product Name | Type | Features |
|---|---|---|---|
Benjamin Moore | Aura Bath & Spa | Acrylic Latex Paint | Mildew resistant, long-lasting finish, matte sheen |
Zinsser | Perma-White Mold & Mildew-Proof Satin Paint | Water-based Acrylic Paint | Satin finish, mold and mildew proof, washable |
Sherwin-Williams | Emerald Interior Acrylic Latex Paint | Acrylic Latex Paint | Moisture and mildew resistant, smooth finish |
Behr | Marquee Interior Semi-Gloss Enamel | Enamel Paint | Mildew resistant, stain-blocking, easy to clean |
Glidden | HydroResist Interior Latex Semi-Gloss | Latex Paint | Moisture resistant, tough, long lasting finish |
Is Painting Indoors with High Humidity Possible?
High humidity can create multiple challenges for painting the interior of your home or office. It is crucial to understand the potential problems that may arise, as well as the best strategies for dealing with these issues.
• Effects of High Humidity on Interior Painting
High humidity levels can negatively impact the painting process and the quality of the finished paint job. Some common issues include:
1. Slower Drying Time
When the air is humid, water-based paints tend to take longer to dry. This increases the risk of dust, insects, and other contaminants sticking to the wet paint surface.
2. Uneven Paint Application
High humidity can cause the paint to become thinner or thicker in certain areas, leading to an uneven finish. Areas that are thicker may be prone to sagging or dripping.
3. Poor Adhesion
High humidity can prevent the paint from properly adhering to the surface, leading to peeling, blistering, or a weak bond between the paint and the surface.
4. Mold and Mildew Growth
Areas with high humidity can promote the growth of mold and mildew on paint surfaces over time.
• Ideal Conditions for Interior Painting
– Recommended Temperature Range
The optimal temperature range for applying most types of paint is between 50F to 90F (10C to 32C). Warmer temperatures can cause the paint to dry too quickly, while cooler temperatures can lead to slower drying times and potential issues with adhesion.
– Recommended Humidity Level
A relative humidity level of 40% to 70% is typically recommended for interior painting projects. Higher humidity levels can cause the issues mentioned previously, while lower humidity levels can lead to paint drying too quickly, preventing proper leveling or brush stroke elimination.
• Steps for a Successful Paint Job in High Humidity
1. Prepare the Surface
Properly preparing the surface is crucial for a successful paint job, regardless of humidity levels. This includes cleaning the surface of dirt, dust, and debris and repairing any cracks or holes. Use a primer if necessary to promote better adhesion.
2. Choose the Right Paint
Some paints are formulated to perform better in high-humidity environments. Consider using a paint that is specifically designed for humid areas, such as mildew-resistant paint or paints with added fungicides.
3. Control Humidity Levels
If possible, use a dehumidifier to help reduce the humidity levels in the room while painting. Ventilating the area by opening windows and doors can also help to improve air circulation and reduce humidity.
4. Follow the Manufacturer’s Instructions
Always read and follow the manufacturer’s instructions for the specific paint product you are using, as these guidelines will provide specific recommendations for application and drying times based on the formulation.
– 5. Allow for Additional Drying Time
When painting in high humidity conditions, it is important to allow for additional drying time between coats. Be patient and allow each coat to dry thoroughly before applying the next one.
• Alternative Solutions for Painting in High Humidity Environments
If you cannot control the humidity levels during your painting project, consider waiting for a day with lower humidity levels to paint.
Alternatively, you can look into using low-VOC (volatile organic compound) waterborne alkyd or acrylic-alkyd hybrid paints, which can offer better adhesion and drying properties in high humidity conditions.
The U.S. Environmental Protection Agency ([EPA])(https://www.epa.gov/indoor-air-quality-iaq/what-are-volatile-organic-compounds-vocs) provides additional information about low-VOC paints and the potential benefits for indoor air quality.
In conclusion, while it is possible to paint inside when humidity is high, it does present multiple challenges that can negatively impact the quality of the paint job.
Being aware of these issues and implementing the necessary precautions can ensure a successful and long-lasting paint job, even in high-humidity environments.
High Humidity | Painting Inside |
|---|---|
Yes | It is possible, but the drying time may be longer, and the quality of the paint job may be affected. |
No | Painting inside is easier, and the paint job quality will be better under normal or low humidity conditions. |
Moisture-Resistant Paint Options
Let’s discuss various types of paint that are designed not to hold moisture, making them perfect choices for damp-prone environments or as a preventative measure in construction and renovation.
We’ll walk through the key benefits of these paints and their relevant applications and provide product recommendations to help you select the perfect paint for your project.
• Breathable Paints: An Excellent Solution
Breathable paints are a top choice when it comes to moisture-resistant coatings. These paints allow for moisture to evaporate from a surface, reducing the risk of damp-related issues such as mold, mildew, and peeling paint.
They are ideal for rooms that are exposed to high humidity, like bathrooms, kitchens, and basements.
– Benefits of Breathable Paints
- Improved moisture management: A breathable paint’s micro-porous nature allows water vapor to pass through it, resulting in reduced condensation and dampness.
- Prevention of mold and mildew growth: As breathable paints facilitate the evaporation of excess moisture, they reduce the likelihood of mold and mildew growth.
- Enhanced durability: Moisture-resistant paints are typically formulated with additional binders that improve adhesion and provide a long-lasting finish.
– Popular Breathable Paint Options
- Silicate Paints: A mineral-based paint, silicate paint forms a strong bond with the substrate, making it extremely durable and long-lasting. It is also resistant to UV rays, making it ideal for exterior applications. KEIM, a German brand, offers a variety of silicate paint products link.
- Lime Paint: Lime paint is a traditional paint option that consists of lime putty and natural pigments. It offers excellent breathability and is eco-friendly. Farrow & Ball is a notable brand offering lime-based paints.
- Clay Paint: Made from natural clay, this type of paint offers breathability and a unique matte finish. An example of a clay paint manufacturer is Earthborn Paints.
• Acrylic Paints: Versatile and Moisture-Resistant
Acrylic paints are another excellent option for moisture-prone environments. They are made of synthetic resins, which provide a moisture-resistant barrier that is easy to clean and maintain.
– Advantages of Acrylic Paints
- Adaptable to various surfaces: Acrylic paint is suitable for a wide range of surfaces, such as wood, metal, and masonry.
- Quick drying: Acrylic paint dries quickly, reducing the risk of moisture-related issues and allowing for multiple coats to be applied in a single day.
- Protective coating: Acrylic paints create a barrier on the surface that protects against moisture, UV rays, and other environmental factors.
– Recommended Acrylic Paints
- Benjamin Moore Aura: This premium acrylic paint from Benjamin Moore is known for its excellent moisture resistance, making it ideal for both interior and exterior applications. It also features low VOC content and excellent color retention.
- Sherwin-Williams Duration Acrylic: This high-performance paint provides a durable finish that will withstand moisture and weather exposure. With its self-priming capabilities, this paint also streamlines the painting process. Learn more at Sherwin-Williams’ website.
• Applying Moisture-Resistant Paints
To ensure long-lasting protection from moisture, follow these application tips:
– Proper Surface Preparation
- Clean the surface: Remove any dust, dirt, and debris from the surface to ensure proper adhesion.
- Repair defects: Seal any gaps or cracks and repair any damage before applying the paint.
- Apply a primer: If you’re working with a porous surface, apply an appropriate primer before painting to increase adhesion and improve moisture resistance. For silicate paints, use a silicate primer, whereas for acrylic paints, choose an acrylic primer.
– Optimum Painting Conditions
- Temperature: Paints are best applied in moderate temperatures between 50 to 80 degrees Fahrenheit.
- Humidity: Low to medium humidity is ideal for painting, as it allows for proper evaporation of water and solvents.
- Ventilation: Ensure proper airflow in enclosed spaces to facilitate drying and minimize the risk of condensation.
In conclusion, breathable paints like silicate, lime, and clay-based paints, as well as acrylic paints, provide excellent moisture-resistant properties. Choosing the right paint for your project is crucial to mitigating damp and moisture-related issues.
Always follow proper surface preparation and application techniques to ensure a long-lasting, protective finish.
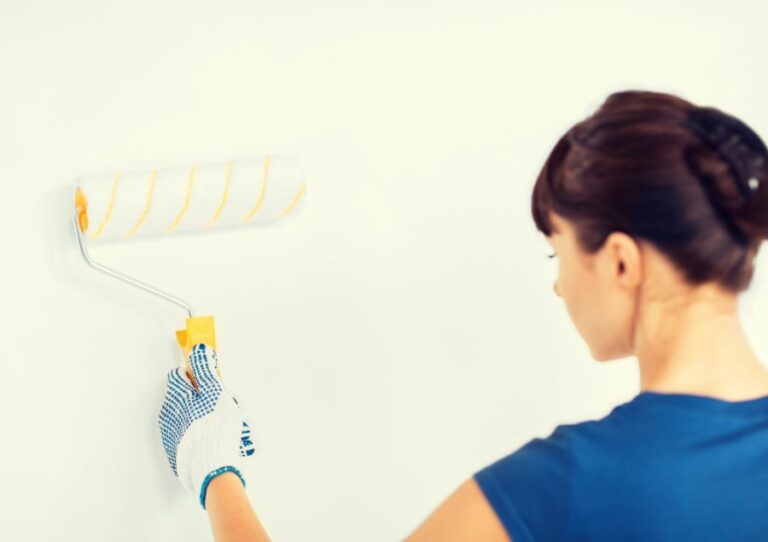
Tips for Painting in Humid Rooms
Painting a humid room can prove to be a challenging task. Moisture and high humidity levels present unique obstacles when it comes to achieving long-lasting results.
However, with the proper preparation, materials, and techniques, you can successfully paint a humid room and enjoy a beautifully finished space.
• Assessing Humidity Levels and Potential Issues
High humidity in a room can be caused by various factors, such as poor ventilation, plumbing leaks, or environmental factors. It is crucial to identify and address these issues before starting the painting process, as moisture problems can lead to peeling paint, mold, and damage to your wall surfaces.
To assess humidity levels in your space, consider using a humidity meter or hygrometer, available at most hardware stores. The Environmental Protection Agency recommends maintaining indoor humidity levels between 30% and 60% for optimal comfort and mold prevention.
• Addressing Underlying Moisture Issues
Once you have identified any moisture problems, take the necessary steps to address them before painting. For instance:
- Improve ventilation in the room by adding exhaust fans or vents or by opening windows when weather permits.
- Repair any plumbing leaks or water damage.
- Install a dehumidifier to help control humidity levels in the space.
• Preparing the Room for Painting
Proper preparation is crucial for achieving a professional-looking paint job, especially in humid environments. Make sure to follow these steps:
– Clean and Dry Walls
Use a mild detergent and a sponge or cloth to clean your walls, removing any dirt, grease, or debris. Ensure there are no traces of mold or mildew that may have formed as a result of the rooms humidity. If you do find mold or mildew, be sure to treat the area with a mold removal solution.
Allow the walls to dry thoroughly before proceeding, ideally waiting 24 hours to ensure that all moisture has evaporated.
– Repair Damaged Areas
Inspect walls for any signs of damage, such as cracks, holes, or peeling paint. Use a putty knife to apply a patching compound to these areas, smoothing the surface as much as possible.
Once the patching compound has dried, sand the area smooth using fine-grit sandpaper before wiping away any dust with a damp cloth.
– Apply a Primer
Choose a water-resistant primer specifically designed for high-humidity environments. These primers contain additives that help inhibit mold and mildew growth and provide a durable base for your paint.
Apply the primer smoothly and evenly using a brush, roller, or paint sprayer. Allow the primer to dry completely, usually taking several hours or up to a full day, depending on the manufacturer’s recommendations.
• Choose the Right Paint and Tools for Humid Rooms
Your choice of paint and tools can make a significant difference in the success of your humid room painting project.
– Selecting a Moisture-Resistant Paint
Opt for paints labeled as moisture-resistant or mildew-resistant. These specially formulated paints contain additives that help prevent mold and mildew growth and are ideal for humid environments.
Choose a paint with a satin or semi-gloss finish, as these finishes are more resistant to moisture than flat or matte finishes.
– Invest in Quality Brushes and Rollers
High-quality brushes and rollers will help ensure a smooth, even application of your paint. Make sure to choose brushes with synthetic bristles, as these are more resistant to moisture, and opt for rollers with a short nap for a smoother finish.
• Applying Paint in a Humid Room
When painting a humid room, make sure to follow these essential tips to achieve the best results:
- Check the weather forecast and plan to paint on days when humidity levels are lower, if possible.
- Apply at least two coats of paint, allowing each coat to dry completely before applying the next. Drying times may be longer in humid environments, so be patient and give the paint ample time to set.
- Keep the room well-ventilated during and after painting to help speed up drying times and reduce humidity levels in the room.
- Maintain even, consistent strokes while applying the paint to avoid streaks or lap marks.
• Maintaining Your Newly Painted Room
Once you’ve successfully painted your humid room, take the necessary steps to maintain your paint job and prevent future moisture-related issues:
- Regularly dust and clean your walls to help prevent mold and mildew growth.
- Monitor humidity levels in the room and use a dehumidifier as needed to maintain optimal conditions.
- Ensure proper ventilation by using exhaust fans or opening windows when possible.
By following these expert tips and recommendations, you can confidently paint a humid room and enjoy a beautiful, long-lasting finish.
Step | Description |
|---|---|
1 | Choose the right paint. Opt for moisture-resistant, mildew-resistant, and fast-drying paint specifically designed for humid areas. |
2 | Prepare the room. Remove furniture, cover the floor with drop cloths, and tape off any areas you don’t want to paint. |
3 | Clean the walls. Remove any dirt, grease, or mildew with a sponge and mild detergent or a mold and mildew remover, then allow the walls to dry completely. |
4 | Reduce humidity. Use a dehumidifier or an air conditioner, open windows, or use fans to improve ventilation. |
5 | Prime the walls. Apply a high-quality, moisture-resistant primer evenly to the walls and allow it to dry completely before painting. |
6 | Paint the walls. Apply at least two coats of your chosen paint, allowing it to dry completely between coats. |
7 | Monitor humidity levels. Keep an eye on the humidity in the room while the paint dries. Ensure proper ventilation and use a dehumidifier if necessary. |
8 | Clean up. Carefully remove any tape, drop cloths, and painting supplies, then return the furniture to the room. |
Painting Techniques for Highly Humid Spaces
Painting walls in areas with high humidity can be a challenging task. It requires extra effort and patience to achieve a professional-looking result.
• Understand the Effects of High Humidity on Paint
High humidity can have a significant impact on the way paint dries and adheres to walls. Moisture in the air can cause paint to dry more slowly, leading to issues such as sagging, blistering, and peeling. To tackle this challenge, you need to be prepared with the right approach and materials.
• Choose the Right Paint and Tools
Selecting the appropriate paint and tools is crucial when painting in high-humidity conditions. Here are the essential items you’ll need:
– Paint
Choose a high-quality latex-based paint that is formulated for humid environments. These paints usually have mildew-resistant additives and faster drying times, which can make a significant difference in the final outcome.
It is also recommended to avoid oil-based paints, as they tend to dry slower, and their performance may be adversely affected by humidity.
– Primer
A moisture-resistant primer will help create a solid foundation for your paint job. It will prevent moisture from seeping through the walls, mitigating issues such as peeling paint and mold growth. Apply the primer and let it dry thoroughly before starting the painting process.
– Tools
Invest in high-quality brushes, rollers, and painting tools that will ensure a smooth and even application of the paint. Synthetic bristles are typically better for latex-based paints, as they have better pickup and release characteristics.
• Prepare the Surface
Properly preparing the surface is a critical step in ensuring a successful paint job in high humidity conditions. Follow these steps:
- Clean the walls thoroughly with a damp cloth to remove dust, dirt, and grease.
- Check for any damages or cracks that need to be repaired. If necessary, use a high-quality, quick-drying filler or patching compound to repair the surface.
- Allow the walls to dry completely before moving on to the next step.
• Monitor the Weather
Keep an eye on the weather forecast when planning your painting project. Ideally, choose a day with a relative humidity level between 40% and 70%. Avoid painting on extremely humid or rainy days, as this can prolong the drying time and negatively affect the paint’s adhesion.
• Control the Indoor Environment
To ensure optimum painting conditions, take measures to control the indoor environment during your project. Here are some tips to help regulate humidity and temperature:
- Run a dehumidifier to remove moisture from the air, maintaining a comfortable humidity level.
- Use fans to improve air circulation and speed up the drying process.
- If possible, adjust your air conditioning settings to a cooler temperature to help control the humidity.
• Apply the Paint
Follow the recommendations below for applying the paint in high-humidity environments:
- Apply thin, even coats of paint. This will allow the paint to dry faster and prevent sagging and running.
- Allow each coat to dry thoroughly before applying the next one. This may take longer than usual due to the high humidity, so be patient and avoid applying additional coats too soon.
- Use a technique called “boxing” to ensure color consistency throughout the room. To do this, mix all paint cans together in a large container before starting, then portion it out into smaller containers as needed.
• Protect the Freshly Painted Surface
Once you have completed your painting project, take steps to protect the freshly painted surface from damage due to high humidity:
- Maintain proper air circulation using fans and air conditioners.
- Regularly monitor and control the humidity level in the room.
- Avoid placing furniture and other objects against the walls until they have had time to fully dry and cure.
By following these tips and recommendations, you can successfully paint your walls in high humidity conditions, achieving a professional and long-lasting result.
| How to Paint Walls in High Humidity | |
|---|---|
| 1. Choose the right paint | Opt for paints with anti-mildew and anti-mold properties, which are specifically designed for high-humidity areas. |
| 2. Check the weather | Plan to paint on days with relatively low humidity and no rain to ensure proper drying time. |
| 3. Prepare the surface properly | Clean and dry the walls thoroughly, and repair any cracks, holes, or imperfections before painting. |
| 4. Apply primer | Use a high-quality primer that is suitable for humid environments to ensure proper adhesion of the paint. |
| 5. Ventilate the area | Open windows and doors, use fans for air circulation, or run a dehumidifier to reduce the humidity in the room while painting and drying. |
| 6. Allow ample drying time | Paint dries slower in high humidity, so give each coat enough time to dry before applying the next one. |
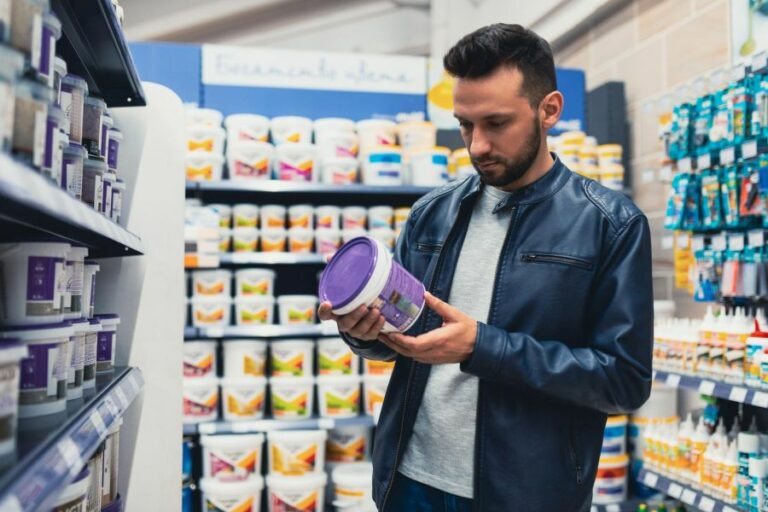
Paint Selection for High-Condensation Areas
High-condensation areas, such as bathrooms, kitchens, and laundry rooms, are places where moisture levels are consistently high, which can lead to various problems, including mold and mildew growth, peeling paint, and even structural damage.
• Factors to Consider When Choosing Paint for High-Condensation Areas
Before diving into specific paint options, let’s first consider the factors that make a paint suitable for high-condensation areas.
1. Mold and Mildew Resistance
The growth of mold and mildew is a significant concern in high-condensation areas, as it can cause health problems and damage surfaces. Paint with mold and mildew-resistant properties is essential for preventing the growth of these harmful microorganisms.
2. Moisture Resistance
High levels of moisture in the air can lead to paint peeling, blistering, or even lifting off the surfaces. Look for paint with excellent moisture-resistant properties to ensure its longevity in a high-condensation area.
3. Easy to Clean
In high-condensation areas, surfaces often get dirty, and frequent cleaning is required. Choose a paint that is easy to clean without damaging its finish.
4. Durability
A durable paint will endure constant exposure to moisture and withstand the wear and tear that comes with the frequent cleaning of these areas.
• Top Paint Options for High-Condensation Areas
Now that we have discussed the factors to consider, let’s explore some of the best paint options for high-condensation areas.
1. Semi-Gloss and Gloss Paints
Semi-gloss and gloss paints are highly recommended for high-condensation areas due to their excellent water-resistant properties. These types of paint also have a high sheen, making them easy to clean and maintain.
They are commonly used in bathrooms and kitchens, as they can effectively withstand moisture and resist mold and mildew growth.
2. Specialty Bathroom and Kitchen Paints
There are specially formulated paints for use in high-moisture areas like bathrooms and kitchens that offer unique properties such as mold and mildew resistance, stain resistance, and moisture resistance.
One example of this type of paint is Zinsser Perma-White, which is highly durable and resistant to moisture and stains. The Environmental Protection Agency (EPA) also provides helpful information on how to prevent mold and moisture problems in your home.
3. Water-Resistant Paints
Water-resistant paints have been specifically designed to protect surfaces exposed to high levels of moisture. These paints are often used in exterior applications and swimming pool areas, and they can also work well in high-condensation areas within the home.
Examples of water-resistant paints include epoxy-based paints and elastomeric paints.
4. Mildew-Resistant Paints
Mildew-resistant paints contain additives that help prevent and inhibit the growth of mold and mildew.
While most high-quality paints now come with some level of mildew resistance, selecting a paint explicitly labeled as mildew-resistant or containing anti-microbial properties will provide additional protection in high-condensation areas.
• Application Tips for Painting High-Condensation Areas
In addition to selecting the best paint for your high-condensation area, proper application is crucial for achieving a lasting, professional finish. Here are some essential tips to consider:
1. Proper Surface Preparation
Before applying paint, it’s essential to ensure that the surfaces are clean, dry, and free from any mildew or peeling paint. You may need to prime the surface, especially if there are any stains or if you are changing the paint color drastically.
2. Ventilation
Proper ventilation is crucial in high-condensation areas to remove excess moisture and promote the drying process during and after painting. Use exhaust fans if available, or open windows and doors to create sufficient airflow.
3. Apply Multiple Coats
For the best protection in high-condensation areas, apply at least two coats of paint, allowing sufficient drying time between coats.
4. Follow Manufacturer Instructions
Always read and follow the manufacturer’s instructions for the chosen paint to ensure you are using the correct application techniques and allowing the proper drying time between coats.
• In Conclusion
Choosing the right paint for high-condensation areas is crucial for maintaining a healthy, functional, and visually appealing space. By considering factors such as durability, moisture resistance, and ease of cleaning, you can select the best paint for your specific situation.
Some of the top paint options include semi-gloss and gloss paints, specialty bathroom and kitchen paints, water-resistant paints, and mildew-resistant paints. Remember to prepare the surfaces properly and follow the manufacturer’s instructions for optimal results.
Wall Protection Against High Humidity
High humidity levels can cause serious damage to the walls in your home. For this reason, it is essential to take proactive measures to protect your walls from high humidity.
• Why Humidity Matters
High humidity levels can cause mold, mildew, and other moisture-related issues. Mold can not only damage your walls but also pose health risks for the inhabitants of the house.
Therefore, it is essential to maintain appropriate levels of humidity in your home as recommended by the Environmental Protection Agency (EPA).
• Identify Problem Areas
Before taking any protective measures, it is essential to identify areas in your home that are prone to high humidity levels. These areas may include:
- Bathrooms
- Kitchens
- Laundry rooms
- Basements
By identifying these areas, you can take targeted measures to prevent humidity-related issues in these specific spaces.
• Proper Ventilation
Improving ventilation is a crucial step in maintaining appropriate humidity levels. Ensure that your home has adequate air circulation by installing exhaust fans in high-moisture areas. Keep doors and windows open whenever possible to allow fresh air to circulate throughout your home.
Additionally, you can use air purifiers and dehumidifiers to maintain ideal humidity levels further.
• Use Water-Resistant Paint
When it comes to protecting your walls from high humidity, using water-resistant paint can be a game-changer. Quality water-resistant paint creates a protective barrier on the wall surface to prevent moisture infiltration. While repainting walls, it is advisable to opt for paints with mildew-resistant additives.
• Insulate Your Home Properly
Insulating your home is essential for maintaining a comfortable living environment and preventing humidity problems. Proper insulation not only helps regulate temperature but also reduces condensation on walls. Ensure that your attic, basement, and walls are adequately insulated to prevent moisture issues.
• Maintain Gutters and Downspouts
Regularly inspect and clean your gutters and downspouts to ensure that water is effectively removed from your home. Blocked gutters can lead to water seeping into your walls, causing significant damage.
Additionally, extend downspouts away from your home’s foundation to prevent water from pooling around your house.
• Waterproofing
Waterproofing your walls can provide an extra layer of protection against high humidity. Applying a waterproof coating on the exterior walls of your home can help prevent moisture from entering your home.
For basements and other below-ground spaces, consider applying a waterproof membrane to the walls and floors.
• Monitor Humidity Levels
Keeping track of the humidity levels in your home is crucial for avoiding high humidity issues. Invest in a hygrometer to measure the humidity level in each room, especially in areas prone to moisture. The ideal humidity level in your home should be between 30% and 60%, according to the EPA.
• Address Any Existing Mold and Mildew Problems
If you have noticed mold or mildew growth on your walls, it is crucial to address these issues promptly. Removing existing mold and mildew not only protects your walls but also helps prevent the spread of these harmful organisms. Consult a professional for proper mold removal and remediation if necessary.
• Maintain Your Air Conditioning System
Your air conditioning system plays a crucial role in regulating humidity levels. Regularly inspect, clean, and maintain your air conditioning unit to ensure it is functioning optimally. Replace air filters as needed to prevent mold growth within the system and improve overall air quality in your home.
In conclusion, taking proactive measures to protect your walls from high humidity is necessary for maintaining a healthy and comfortable living environment.
By following the recommendations mentioned above and regularly monitoring humidity levels, you can safeguard your home from moisture-related problems.
Step | Description |
|---|---|
1. Ventilate | Provide proper ventilation in the room to allow air circulation and prevent moisture buildup. |
2. Use a dehumidifier | Employ a dehumidifier to reduce humidity levels in the room. |
3. Insulate properly | Make sure the walls are well insulated to minimize condensation and moisture accumulation. |
4. Use water-resistant paint | Apply water-resistant paint on the walls to help repel moisture. |
5. Repair leaks and cracks | Fix any water leaks or cracks in the walls that may cause increased humidity levels. |
6. Maintain indoor plants | Keep a careful watch on the number and types of indoor plants since they can release moisture into the air. |
7. Use moisture-absorbing products | Place moisture-absorbing products, such as silica gel, in the room to help reduce humidity levels. |