Ready Your Wall For A Paint Job, 25 Things You Should Know
Are you looking to give your walls a fresh, new look with a paint job? You’ve come to the right place! We understand that preparing your walls for painting can be a bit daunting, but don’t worry; we have the perfect guide to help you get started.
Ready your wall for a paint job:
To prepare your wall for a perfect paint finish, assess the wall’s condition and address any imperfections such as cracks, holes, peeling paint, or wallpaper. Thoroughly clean the walls by dusting, washing, rinsing, and drying. Protect nearby surfaces with drop cloths and painter’s tape. Prime the walls with a suitable primer, followed by sanding and cleaning. This ensures a smooth, flawless paint job.

Want a flawless, professional-looking paint job for your walls? It all starts with the perfect preparation. Read on to discover essential tips and tricks to ensure your wall is ready to wow with a fresh layer of paint. Don’t miss out on these expert secrets!
Contents
- 1 Preparing Your Wall for a Perfect Paint Finish
- 2 Steps to Prepare a Wall for Painting
- 3 Interior Wall Cleaning: A Pre-Painting Must for Professionals
- 4 Washing Walls Before Painting: A Necessary Step?
- 5 The Importance of Wall Preparation in Painting
Preparing Your Wall for a Perfect Paint Finish
A well-executed paint job can effectively transform any room in your home. However, the key to achieving that perfect finish lies in the preparation.
• Assessing the Condition of the Wall
First, you need to carefully examine the walls for any imperfections or signs of damage. Some common issues include:
– Cracks and Holes
Cracks or small holes in the wall can prevent the new paint from adhering properly, so it’s essential to address these issues before starting. Use a putty knife to apply a patching compound, following the product’s instructions.
For larger holes, you may need a patch kit from your local hardware store. Be sure to sand the patched areas until they’re smooth and even with the rest of the surface.
– Peeling Paint
If your wall has old, peeling paint, you’ll need to remove it before painting. A paint scraper or a wire brush can be used to carefully remove loose paint without damaging the wall. If the peeling paint persists over large areas, consider using a chemical paint stripper.
This Old House has a helpful guide on using paint strippers safely and effectively.
– Wallpaper
If your wall is covered in wallpaper, you’ll need to remove it before painting. Use a wallpaper steamer or a spray-on wallpaper remover to loosen the adhesive, then carefully peel off the wallpaper in complete strips.
After the wallpaper is removed, wash the walls with a solution of warm water and a mild detergent to remove any remaining adhesive.
• Cleaning the Walls
After addressing any imperfections, the next step is to clean the walls thoroughly. Even the slightest layer of dust or dirt can affect the paint’s adhesion, resulting in an uneven and patchy finish.
– Dusting
Use a dry cloth or a vacuum cleaner with a soft brush attachment to remove any dust or cobwebs from the walls.
– Washing
Mix a solution of warm water and mild detergent, such as dish soap. Using a sponge or a soft cloth, wash the walls in a gentle circular motion. Be sure to wring out the cloth or sponge to avoid saturating the wall with water, as this can damage the surface.
– Rinsing
Using a clean, damp cloth, wipe down the walls to remove any soap residue. Again, avoid saturating the wall with water.
– Drying
Allow the walls to air-dry completely before proceeding to the next step. This may take up to 24 hours, depending on the room’s humidity and temperature.
• Protecting Nearby Surfaces
Before you start to paint, take some time to protect any surfaces you don’t want to get paint on, such as:
- Flooring: Lay down a drop cloth or plastic sheeting to protect your floors.
- Trim and Baseboards: Apply painter’s tape along the edge of the trim and baseboards to ensure clean lines when painting the walls.
- Electrical Outlets and Switches: Turn off the power to the room for safety, and use a screwdriver to remove the outlet or switch plates. Cover the exposed switches and outlets with painter’s tape.
• Priming the Walls
Priming your walls is an important step, as it helps the new paint adhere better and provides a consistent base color. Be sure to choose a primer that is suitable for your wall type and the type of paint you plan to use.
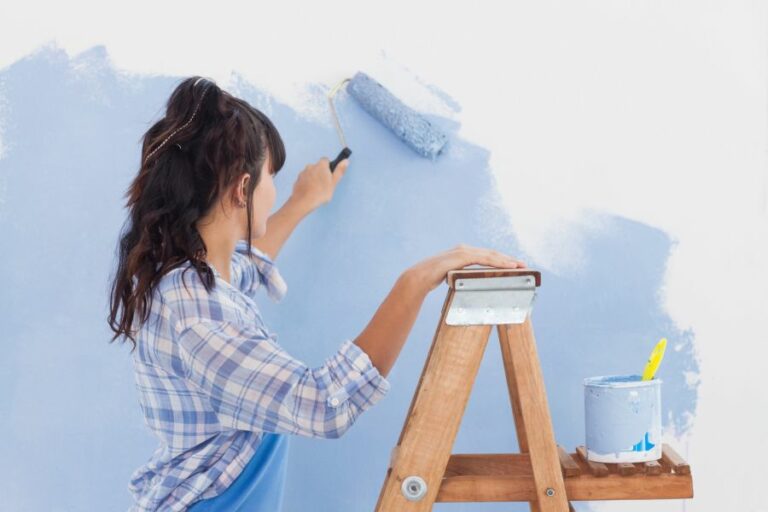
– Application
Using a brush, roller, or paint sprayer, apply the primer to the walls in smooth, even strokes. Be sure to cover the entire surface, including any patched areas. Allow the primer to dry according to the manufacturer’s recommendations.
– Sanding
Once the primer is dry, lightly sand the walls with fine-grit sandpaper to create a smooth surface. Be careful not to sand through the primer or damage the wall.
– Cleaning
Use a tack cloth or a damp cloth to remove any dust from the sanding process.
• Final Thoughts
By following these steps, you’ll be well on your way to preparing your walls for a flawless paint job. Remember, investing time and effort in the preparation stage can make all the difference in your final result. Happy painting!
Steps to Prepare a Wall for Painting
Painting a wall may seem like a straightforward task, but the key to a flawless and long-lasting paint job is preparation.
• Cleaning the Wall Surface
- Remove Dust and Dirt: Begin by removing any dust, cobwebs, and debris from the surfaces using a broom or vacuum cleaner with an attachment brush. Remember to clean edges and corners thoroughly, as they tend to collect more dirt.
- Washing the Walls: Wash the walls with a sponge or cloth and a mixture of water and mild dish soap. This will remove grease, stains, and dirt that can affect paint adhesion. Rinse the walls thoroughly with clean water, then allow them to dry completely before proceeding. For stubborn stains or mold issues, you can use a specialized cleaning product or consult a professional for advice.
Tip: Always spot-test cleaning products on a small inconspicuous area to avoid damaging the wall surface. More information on stain and mold removal can be found in EPA’s guide on mold cleanup.
• Repairing Damages and Imperfections
- Inspect and Repair Cracks or Holes: Inspect the wall for any visible cracks or holes that need repairing. For small cracks or nail holes, use a putty knife to apply a patching compound or lightweight spackling paste. For larger holes, you may need to use a wall patch kit with instructions. Allow the filler to dry, and follow the manufacturer’s instructions for proper drying time.
- Sanding the Surface: Once the filler is dry, use sandpaper (120 to 150 grit) to smooth the area and feather the edges to blend with the surrounding wall. Be sure to wear protective gloves and a dust mask, and always sand gently to avoid damaging the wall surface. To cover larger imperfections like seams or joints, consider using a high-quality drywall compound and sanding appropriately.
- Caulking Gaps: Inspect the walls for any gaps or crevices, particularly in areas where the wall meets trim or molding. Fill these gaps with a paintable acrylic latex caulk using a caulking gun. Smooth the caulk with a wet finger or a damp sponge, then allow it to dry according to the manufacturer’s instructions before proceeding.
• Preparing the Surface for Paint
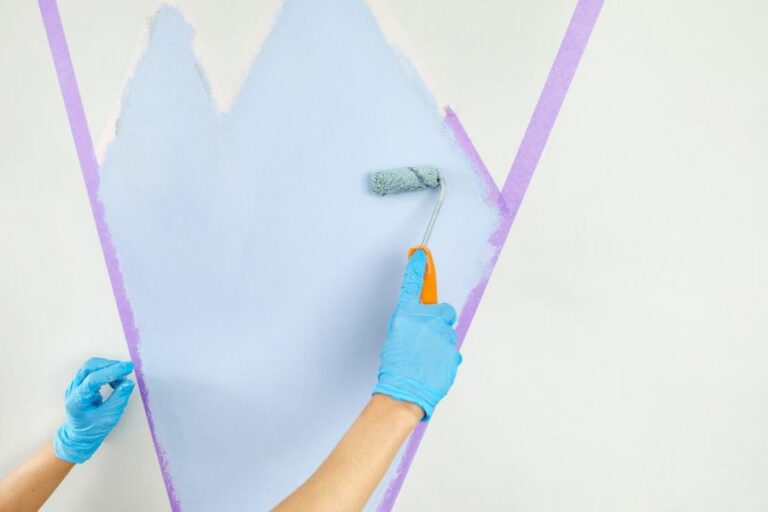
- Taping and Covering: Before you begin painting, protect the surrounding areas from paint splatters and spills. Use painter’s tape to mask off trim, window frames, baseboards, and light switches or outlets. Cover the floor with a drop cloth, and use a plastic sheet to protect nearby furniture or items.
- Priming the Wall: Priming is an essential step that ensures paint adhesion and a uniform finish. Choose a primer that is compatible with your chosen paint and the wall surface. Apply a thin, even coat of primer, starting at the top of the wall and working your way down in a “W” or “M” pattern. Allow the primer to dry completely, following the manufacturer’s recommended drying time.
Tip: Use a tinted primer for dark paint colors, as it requires fewer coats for full coverage and results in a more vibrant finished color.
• Final Tips Before Painting
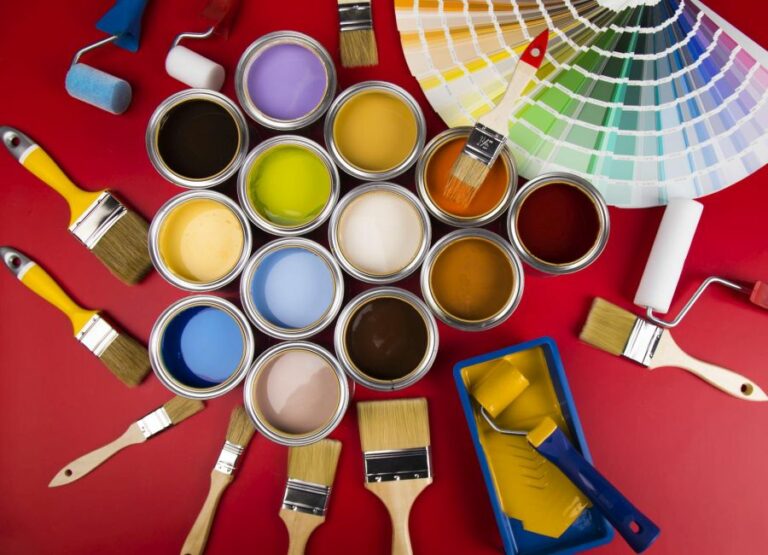
- Choose the Right Paint: Select a high-quality paint that is suitable for the wall surface and desired finish. Consider factors like durability, coverage, and resistance to fading or staining. Consult with paint specialists or read online reviews to make an informed decision.
- Gather Proper Painting Tools: Use quality brushes or rollers that are suitable for the wall surface and paint type. Invest in a paint tray or bucket with a grid for even paint distribution, and have extra roller sleeves or brushes on hand for different paint types and finishes.
Now that your wall is prepared, and you are equipped with the correct tools and paint, you are ready to tackle your painting project. By following these steps for proper wall preparation, you will ensure a smooth, even, and long-lasting paint job that will enhance the aesthetics and value of your home.
Step | Description |
|---|---|
1 | Inspect the wall for any damage or holes. If there’s any damage, patch it up with appropriate filler or repair materials. |
2 | Remove all nails, screws, and any wall accessories. |
3 | Clean the wall thoroughly with a cloth or sponge to remove any dirt, dust, or grime. |
4 | If necessary, sand the wall lightly to create a smooth surface. Make sure to remove any sanding dust afterward. |
5 | Apply painter’s tape to any areas that you don’t want to paint, such as molding, trim, and outlets. |
6 | Apply a coat of primer to the wall to help the paint adhere better and improve coverage. |
Interior Wall Cleaning: A Pre-Painting Must for Professionals
Professional painters understand the significance of preparing surfaces before applying paint. Experienced painters know that cleaning interior walls is a crucial step in ensuring a high-quality, long-lasting paint job.
• Reasons for Cleaning Walls before Painting
- Removing Dirt, Dust, and Grime: Over time, walls accumulate dirt, dust, and grime from various sources, including cooking fumes, heating systems, and general human activity. Painting over these contaminants can compromise paint adhesion and the overall appearance of the final paint job.
- Eliminating Grease Spots: Kitchens and dining areas are particularly susceptible to grease buildup from food preparation and cooking. Grease spots can cause paint to peel and bubble, reducing the durability of the paint job.
- Removing Mold and Mildew: Bathrooms, laundry rooms, and basements often harbor mold and mildew due to moisture and humidity. Painting over mold or mildew will not only fail to address the underlying issue but can also lead to paint peeling, discoloration, and unpleasant odors.
- Addressing Stains and Marks: Stains and marks, such as crayon, ink, or water damage, can bleed through new paint, causing unsightly blemishes on the wall. Cleaning and properly addressing these issues before painting will ensure a smoother, more consistent finish.
- Enhancing Paint Adhesion: Properly cleaned walls are more likely to provide a better surface for the paint to adhere to, resulting in a longer-lasting paint job.
• Cleaning Process for Interior Walls
– Step 1: Dust the Walls
Before washing the walls, it is essential to remove any loose dust and debris using a vacuum cleaner with a brush attachment, a microfiber cloth, or a soft broom. This step helps prevent dirt from becoming smeared onto the walls when they are washed.
– Step 2: Prepare a Cleaning Solution
Mix a mild detergent or wall cleaner with warm water according to the manufacturer’s instructions. Avoid using overly harsh chemicals, as they can strip the existing paint or damage the surface.
– Step 3: Test the Cleaning Solution
Before cleaning the entire wall, it is essential to test the solution on a small, inconspicuous area. This step ensures that the solution does not damage the wall or cause discoloration.
– Step 4: Wash the Walls
Using a sponge or soft cloth, wash the walls starting from the top and working downward. This method helps prevent unsightly streaks and drips. Be sure to wring out the sponge or cloth frequently to avoid over-saturating the walls.
– Step 5: Rinse the Walls
After washing the walls, it is crucial to rinse them thoroughly to remove any soap residue. Use a clean sponge or cloth and fresh water to gently wipe down the walls.
– Step 6: Dry the Walls
Finally, use a dry, lint-free cloth or towel to gently dry the walls. Allowing the walls to air dry can lead to streaks, so it is essential to be diligent in this step. Once the walls are thoroughly dry, they are ready for painting.
• Recommendations for a Successful Paint Job
- Choose Quality Paint and Primer Investing in high-quality paint and primer is essential for a durable, long-lasting paint job. A good primer will seal the surface and provide an ideal base for the paint to adhere.
- Address Stains and Damage Before painting, it is crucial to properly address any stains, marks, or damage on the walls. This may include using stain-blocking primer, patching holes, or treating mold and mildew.
- Allow for Adequate Drying Time Be sure to allow sufficient time for the walls to dry after cleaning and between coats of paint. Rushing the drying process can result in an uneven finish or poor adhesion.
- Use Appropriate Painting Techniques Implement proper painting techniques, such as using a roller in a “W” pattern or brush strokes in one direction, to ensure a professional-looking finish. Additionally, maintaining a wet edge while painting can help prevent visible lap marks.
- Consult a Professional if Necessary If unsure about any aspect of the painting process or dealing with potentially hazardous materials such as lead paint, it is recommended to consult a professional painter for advice or assistance.
In conclusion, professional painters understand the importance of thoroughly cleaning interior walls before painting to ensure a high-quality, long-lasting paint job.
While the process may seem time-consuming, proper preparation and attention to detail will result in a paint job that not only looks great but also stands the test of time. Further information on interior wall preparation can be found on the EPA website.
Washing Walls Before Painting: A Necessary Step?
Washing walls before painting is a crucial step often overlooked by amateur painters.
• The Importance of Washing Walls Before Painting
Dirty walls can result in uneven coverage and poor paint adhesion. Removing dirt, dust, and grime helps to create a smooth and clean canvas, ensuring the proper adhesion and longevity of your paint job.
– Preventing Paint Failure
Paint failure, including peeling, bubbling, and flaking, can be traced back to poor surface preparation. Thoroughly cleaning your walls will help stave off these issues.
– Improving Paint Finish
When painting over dirty surfaces, the final result may appear uneven, blotchy, or streaky. A clean wall provides a uniform surface, allowing for a smoother and more professional-looking finished product.
– Enhancing Paint Color
Dirt and buildup can alter the appearance of your chosen paint color, causing it to darken or appear muddied. Washing walls before painting helps ensure your color looks like it was intended to when applied.
• Cleaning Products to Use
Different cleaning products are more effective depending on the type of surface and the kind of dirt you need to remove. Here are some common cleaning agents:
– Warm Water and Mild Detergent
For general dirt and light stains, a mixture of warm water and a mild detergent like dish soap is sufficient.
– Trisodium Phosphate (TSP)
Tougher stains and greasy surfaces may require a more powerful cleaning agent. Trisodium phosphate (TSP) is widely used as a heavy-duty cleaner and often works effectively on oil and grease stains. You can find TSP in hardware stores or online.
Remember to wear gloves and goggles when working with TSP, as the substance is highly corrosive.
– Vinegar and Water Solution
For a more eco-friendly alternative, a mixture of white vinegar and water can be used. Vinegar is effective in breaking down mold, mildew, and other stubborn stains. Mix one cup of vinegar with a gallon of water for a potent cleaning solution.
• Washing Techniques
– Dusting Before Washing
Before applying water or cleaning solutions, it is essential to remove any loose dust and debris from the wall. Use a microfiber cloth or dry mop to go over the surface, effectively capturing dust without spreading it around.
– Washing Method
You can use a sponge, cloth, or soft-bristled brush to clean your walls. Apply your chosen cleaning solution, scrubbing gently to avoid damaging the existing paint. Be sure to work from the top down to prevent dirty water from running over the already-clean areas of the wall.
– Rinsing and Drying
It is important to rinse the walls thoroughly after washing to remove any residue from the cleaning solutions. Use clean water and a cloth, sponge, or mop to rinse the surface. Finally, allow your walls to dry completely before moving on to the painting process.
• When to Prime Your Walls
In some cases, washing alone may not be sufficient preparation. Prime the walls after cleaning if:
- You are painting over oil-based paint with a water-based paint
- The walls have hard-to-remove stains
- Your walls have been patched or repaired in several locations
- You are significantly changing your wall color
Priming walls ensure a smoother finish, prevent stains from bleeding through, and promote better paint adhesion. Always consult your paint store or a professional painter when choosing a primer, as various types may work better for specific situations.
• Conclusion
Taking the time to wash your walls before painting significantly improves the overall appearance and longevity of your paint job. Select the appropriate cleaning solution, apply proper washing techniques, and consider priming your walls to ensure a beautiful, long-lasting result.
For additional guidance on the painting process, this step-by-step tutorial from This Old House proves beneficial for beginners and experienced painters alike.
The Importance of Wall Preparation in Painting
A well-painted wall can greatly enhance the appearance of any space. However, achieving a flawless finish involves more than just applying a fresh coat of paint. In fact, the most critical step in the painting process is often overlooked: wall preparation.
• The Role of Wall Preparation
Before diving into whether painters usually prep walls, it’s essential to understand the role of wall preparation in the painting process. Wall preparation involves several tasks, including:
- Cleaning the surface
- Repairing any damage
- Smoothing and leveling the wall
- Priming the surface
These steps are necessary because they ensure that the paint adheres properly to the wall, minimizing the likelihood of paint failure (such as peeling, bubbling, or flaking) and giving a smooth, uniform finish.
Proper wall preparation also promotes the durability of the paint job and helps it to withstand daily wear and tear.
• Do Painters Usually Prep Walls?
In short, the answer is yes. Professional painters understand the significance of wall preparation and typically dedicate a considerable portion of the project timeline to this crucial step. Investing time and effort into prepping walls pays off in the long run by ensuring a high-quality paint job that lasts.
– Cleaning the Surface
Proper cleaning is the first and foremost task in wall preparation. Painters often use a solution consisting of water and mild detergent to remove dirt, dust, and grease from the wall surface. This step is crucial as contaminants on the wall can lead to poor paint adhesion, resulting in an uneven finish.
In some cases, a more robust cleaning method may be required, such as pressure washing for exterior walls. For interior walls with mold or mildew, a bleach solution may be applied to kill the fungi before proceeding with the cleaning process.
– Repairing Damage
Once the wall is clean and dry, the next step is to repair any existing damage. This may include filling cracks, patching holes, or addressing other imperfections on the wall surface. A variety of materials, such as spackle or joint compound, can be used for these repairs.
Painters must allow the repair materials to dry fully before proceeding with subsequent steps.
In some instances, more extensive repairs may be necessary, such as replacing damaged drywall or addressing water damage. In such cases, hiring a professional with experience in these areas is highly recommended.
– Smoothing and Leveling the Wall
After completing the necessary repairs, the next stage in wall preparation involves sanding the surface. This step is vital for achieving a smooth and level wall and ensuring that the paint adheres well to the surface.
Painters often use sanding sponges or electric sanders to achieve a consistent finish across the entire wall.
It is important to note that proper safety precautions should be taken during the sanding process, such as wearing a mask to avoid inhaling dust particles.
– Priming the Surface
The final preparation step before painting is applying a primer. Primers serve several essential purposes:
- They help the paint adhere better to the wall
- They seal porous surfaces, such as drywall or wood, preventing paint absorption
- They create a uniform surface, ensuring an even paint finish
Professional painters will typically select the appropriate primer based on the wall material and paint type. In some cases, tinted primers can be used to reduce the number of paint coats required for dark colors.
• In Conclusion
The significance of wall preparation in the painting process cannot be overstated. Professional painters recognize its importance and dedicate time and effort to ensuring walls are properly cleaned, repaired, smoothed, and primed.
By investing in thorough wall preparation, homeowners and business owners can expect a high-quality, durable paint job that enhances the beauty and value of their space.