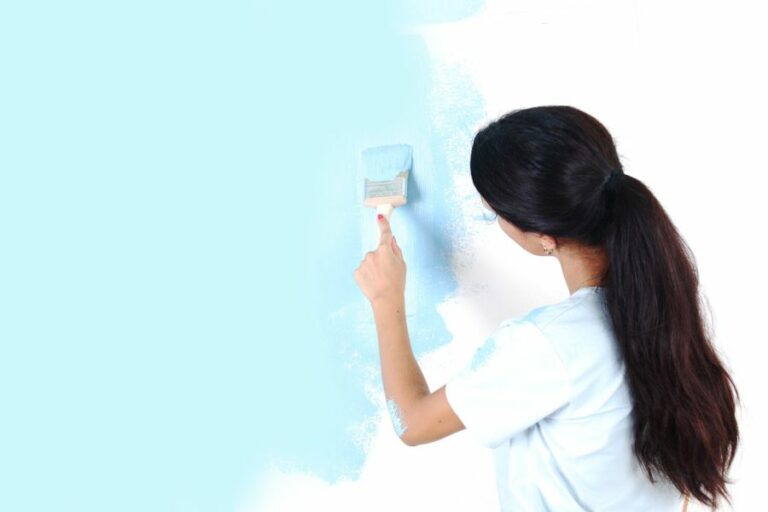
How To Apply Oil-Based Paints Indoors, 25 Things You Should Know
Are you ready to transform your indoor space with oil-based paint but unsure of the correct application techniques? Look no further because we’re here to guide you step by step in mastering the art of applying oil-based paints indoors. With our expert tips and tricks, you can confidently achieve a professional-looking finish that will leave your walls looking fresh and updated.
How to apply oil-based paints indoors:
To apply oil-based paints indoors, choose the right paint and supplies for the surface. Prepare your workspace by laying drop cloths and masking off areas with painter’s tape. Clean and repair the surface, then sand and prime it if necessary. Stir the paint and apply in long, smooth strokes, allowing it to dry between multiple coats. Finally, clean up and maintain the painted surface for longevity.

Looking to apply oil-based paint indoors like a pro? Read on to discover expert tips and techniques for achieving that perfect, durable finish. We’ve got a wealth of knowledge to share, so don’t miss out!
Contents
- 1 Applying Oil-Based Paints Indoors: A Step-by-Step Guide
- 2 Assessing the Safety of Indoor Use of Oil-Based Paints
- 3 Mastering the Application of Oil-Based Paints: Top Tips
- 4 Understanding the Duration of Harmful Oil Paint Fumes
Applying Oil-Based Paints Indoors: A Step-by-Step Guide
Oil-based paints provide a durable and attractive finish to various surfaces, making them an excellent choice for many indoor painting projects. However, working with oil-based paints can be a bit more challenging than their water-based counterparts.
• Choose the Right Oil-Based Paint and Supplies
Before starting your painting project, it’s essential to choose the right type and color of oil-based paint, as well as the necessary supplies. When selecting paint, consider the surface you will be painting (e.g., wood, metal, or drywall) and choose a paint specifically designed for that surface.
Some recommended oil-based paints include:
- Rust-Oleum Protective Enamel (ideal for metal surfaces)
- Purdy Pro-Extra Glide (best for woodwork)
- Benjamin Moore Impervex (excellent for interior and exterior use)
To properly apply oil-based paint, you’ll need the following supplies:
- Paint brushes (natural bristle brushes work best with oil-based paints)
- Paint roller (if applicable)
- Paint tray
- Paint thinner or mineral spirits (for cleaning brushes and rollers)
- Drop cloths or plastic sheeting
- Painter’s tape
- Sandpaper (80-220 grit, depending on the surface)
- Primer (if necessary)
• Prepare Your Workspace and Surface
Before you begin painting, it’s crucial to prepare both the workspace and the surface you’ll be painting. Protect your floors and furnishings by laying down drop cloths or plastic sheeting. Use painter’s tape to mask off any areas that should remain paint-free, such as trim and baseboards.
Surface preparation is a critical step in ensuring a professional-looking finish. Follow these steps to prepare your surface correctly:
- Clean the surface: Remove any dirt, dust, or grease from the surface using mild detergent and warm water. Allow the surface to dry thoroughly before proceeding.
- Repair any damage: If you’re painting a wall, fill in any cracks, holes, or other imperfections with a patching compound, and smooth it with a putty knife. For wood surfaces, use wood filler to fill in any dents or gouges. Allow the filler to dry, and then sand it smooth.
- Sand the surface: Lightly sand the entire surface using the appropriate grit sandpaper to remove any gloss or debris. Wipe away any dust with a damp cloth and let it dry.
- Prime: If necessary, apply a coat of primer to the surface. Priming is especially important for surfaces that are susceptible to stains or have never been painted before. Let the primer dry completely before moving on to the next step.
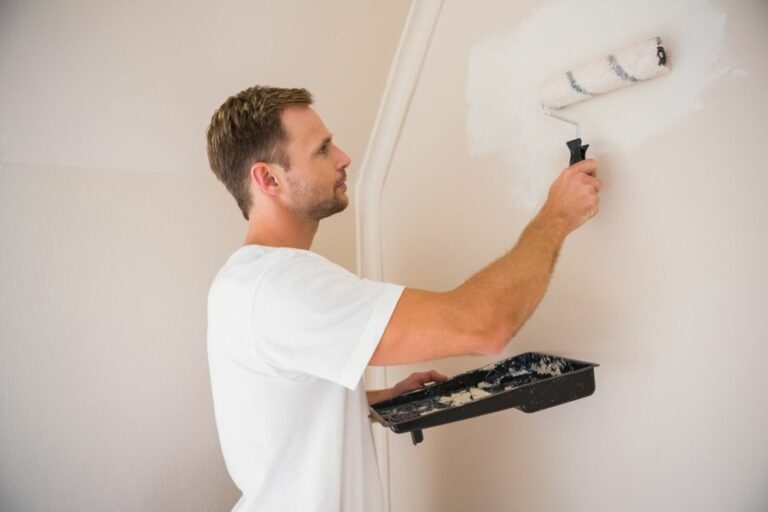
• Apply the Oil-Based Paint
With your workspace and surface prepared, you can now begin painting. Follow these guidelines for a smooth and even application:
- Stir the paint: Before painting, mix the paint thoroughly to ensure an even distribution of color and consistent viscosity. An expert guide on paint mixing is available from the United States Department of the Interior.
- Load your brush or roller: Dip your brush or roller into the paint and then gently tap or roll off any excess to prevent drips.
- Paint in long, smooth strokes: When applying paint to a wall, use long, vertical strokes, making sure to maintain a wet edge to prevent lap marks. For wood surfaces, brush in the direction of the wood grain.
- Apply multiple coats: Oil-based paints often require multiple coats to achieve the desired finish. Allow the paint to dry for at least 24 hours between coats (refer to the manufacturer’s guidelines for exact drying times).
- Inspect and touch up: Give the final coat ample time to dry, and then inspect the surface for any missed spots, uneven areas, or drips. Touch up as necessary, ensuring that the paint blends seamlessly.
• Clean Up and Maintain Your Painted Surface
Once you’ve finished painting and the paint has dried, it’s time to clean up and take care of your painted surface to ensure its longevity.
- Remove painter’s tape: Carefully peel away the painter’s tape, ensuring not to damage the fresh paint.
- Clean brushes and rollers: Immediately after finishing your painting project, clean your brushes and rollers with paint thinner or mineral spirits. Rinse thoroughly and allow them to dry before storing.
- Store leftover paint: Transfer any remaining paint back into its original container and seal tightly. Store in a cool, dry place away from direct sunlight.
- Maintain your painted surface: To keep your new paint job looking fresh and clean, dust or wipe the surface regularly with a damp cloth. Avoid harsh chemicals that can damage the paint, and touch up any scratches or dings as needed.
By following these steps and recommendations, you’ll have a beautiful and long-lasting oil-based paint finish to enjoy for years to come.
Step | Description |
|---|---|
1 | Choose the right type of oil-based paint for your project. |
2 | Ensure that the area is well-ventilated before starting the painting process. |
3 | Prepare the surface by cleaning it, removing any dirt or debris, and sanding it if necessary. |
4 | Apply a primer to the surface, allowing it to dry according to the manufacturer’s instructions. |
5 | Stir the oil-based paint thoroughly and pour it into a paint tray. |
6 | Use a paintbrush or roller to apply the paint, working in small sections and using long, even strokes. |
7 | Allow the paint to dry according to the manufacturer’s instructions before applying a second coat if necessary. |
8 | Clean all painting tools and materials with paint thinner or mineral spirits. |
Assessing the Safety of Indoor Use of Oil-Based Paints
When it comes to painting the interior of your home, there are a variety of options available in the market, with oil-based paints being one of the popular choices for many homeowners.
However, concerns surrounding the safety of using oil-based paint indoors have given rise to this crucial question: Is it safe to use oil-based paint indoors?
• Understanding Oil-Based Paints
Oil-based paints, also known as solvent-based or alkyd paints, are formulated with a drying oil, such as linseed or tung oil, which reacts with oxygen in the air to create a hardened surface.
They provide a durable and long-lasting finish, making them a preferred choice for surfaces like doors, windows, and trim. However, these paints contain volatile organic compounds (VOCs) and solvents, which release harmful fumes during the application process and while they dry.
– Health Concerns Linked to VOCs
VOCs are organic chemicals that have a high vapor pressure at room temperature, causing them to evaporate easily into the air.
Exposure to high levels of VOCs can result in health issues, such as eye, nose, and throat irritation, headaches, nausea, and damage to the liver, kidneys, and central nervous system. Long-term exposure can even lead to cancer.
These adverse health effects are a primary concern for those questioning the safety of using oil-based paint indoors.
According to a study by the United States Environmental Protection Agency, the concentration of VOCs indoors is up to ten times higher than outdoors. This is why it’s crucial to ensure proper ventilation when working with oil-based paints.
• Safe Usage of Oil-Based Paint Indoors
While the potential health risks associated with oil-based paints can be concerning, it is possible to use them safely indoors by taking the necessary precautions.
– Choose Low-VOC or VOC-Free Options
Several manufacturers offer low-VOC or VOC-free oil-based paints in the market today. These options provide the durability and finish of traditional oil-based paints while reducing the risk of health issues due to lower VOC content.
Be sure to read the labels and choose the right product for your specific needs.
– Adequate Ventilation
When working with oil-based paint indoors, ensure that the area is well-ventilated by opening windows and doors, using fans to promote air circulation, and using exhaust fans to remove paint fumes.
The American Industrial Hygiene Association recommends a minimum air exchange of four air changes per hour (ACH) for adequate ventilation.
– Wear Protective Gear
Using personal protective equipment (PPE) while painting can minimize exposure to harmful fumes. Be sure to wear gloves, long sleeves, and goggles to protect your skin and eyes from contact with paint.
A respiratory mask or cartridge respirator designed for protection against organic vapor exposure can also help filter out harmful fumes.
– Proper Storage and Disposal
Store oil-based paint in a cool, dry, and well-ventilated area away from heat sources and open flames. Keep the containers tightly sealed to prevent the release of fumes. Dispose of used paint containers and rags as per your local hazardous waste disposal guidelines.
Do not pour paint down the drain, as it can cause pollution and contaminate the water supply.
• Alternative Paint Options
While oil-based paints do have their advantages, there are safer alternatives available in the market, such as water-based paints.
Water-based paints, including acrylic and latex paints, have lower VOC content, less odor, and are easier to clean up. They also dry faster than oil-based paints, reducing the time of exposure to VOCs.
• Final Thoughts
To sum up, while using oil-based paint indoors can pose potential health risks, taking the necessary precautions and following safety guidelines can help ensure a safe painting experience.
Opt for low-VOC or VOC-free options, ensure proper ventilation, wear protective gear, and practice proper storage and disposal of paint materials.
However, if you still have concerns, consider using water-based paint alternatives that have lower VOC content and are generally considered safer for indoor use.
Mastering the Application of Oil-Based Paints: Top Tips
When working with an oil-based paint for your projects, it’s crucial to know the most effective techniques for a flawless finish.
• Preparation is Key
Before you begin any painting job, ensure you have a clean and well-prepared surface.
- Cleaning the Surface: Remove any dirt, dust, or grime that can interfere with the paint’s adherence. You can use a mild detergent solution and rinse thoroughly with water afterward. Allow the surface to dry completely before proceeding.
- Sanding: Sand the surface with medium-grit sandpaper in a circular motion to create a smooth and even finish. Be thorough to remove any imperfections or old paint, especially for areas that are chipped or peeling. Wipe away any dust with a tack cloth.
- Priming: Apply a high-quality oil-based primer to the surface, ensuring an even coat. Primer is crucial, as it provides better adhesion and coverage for the oil-based paint. Consider using a primer tinted to a similar color as your paint for optimal results. Allow the primer to dry according to the manufacturer’s instructions.
You may want to visit The United States Environmental Protection Agency website for useful information on using primers and other painting products safely, especially if you’re working with older surfaces that might contain lead-based paint.
• Gather the Right Tools
Choosing the appropriate tools is essential for achieving a professional finish with oil-based paint.
- Brushes: Opt for high-quality, natural bristle brushes designed explicitly for oil-based paints, as they offer better application and coverage. Avoid using synthetic brushes, as they can become limp in the presence of solvents.
- Rollers: For larger surface areas, use a fine-nap roller to ensure a smooth, even application. Choose one with a solvent-resistant core that won’t break apart or absorb the solvent in the paint.
- Paint trays and stirrers: Select a metal paint tray, as plastic trays can be damaged by oil-based paint solvents. Likewise, use a long-handled metal stirrer to ensure the paint’s pigments and solvents are well mixed before application.
• Application Techniques for Success
Now that you have prepared your surface and gathered the right tools, it’s time to apply the oil-based paint. Follow these expert tips for optimal results:
- Stir the Paint: Begin by stirring the paint thoroughly with a metal stirrer until it is well mixed and has a uniform consistency. To avoid air bubbles, do not shake the can.
- Loading the Brush: Dip only the bristles’ bottom half into the paint, tapping off any excess gently on the side of the container. This method helps prevent overloading the brush, allowing better control and ensuring smooth, even strokes.
- Applying the Paint: Apply paint in long, smooth strokes, working in the direction of the surface’s grain. Always maintain a wet edge by overlapping strokes, which helps prevent visible lines and ridges in the final result. I recommend working on smaller sections at a time for a more manageable process.
- Coverage: For the best results, apply at least two coats of oil-based paint, allowing each coat to dry according to the manufacturer’s instructions before applying the next one. To ensure proper coverage, lightly sand the surface with fine-grit sandpaper between coats, wiping away any dust with a tack cloth before continuing.
- Drying Time: Oil-based paints have longer drying times than water-based paints, usually taking 8-24 hours to dry. For optimal results and durability, allow the final coat to dry for at least 24 hours before applying any protective coatings or returning the surface to regular use.
• Clean Up and Safety Considerations
Finally, consider the following clean-up and safety tips when working with oil-based paints:
- Ventilation: Oil-based paints and solvents release strong fumes. Always ensure proper ventilation in your painting area by keeping windows and doors open and using fans to circulate air.
- Personal Protective Equipment: Wear gloves, safety glasses, and a mask when working with oil-based paints, as they can cause skin, eye, and respiratory irritation.
- Disposal: Dispose of any used paint cans, brushes, and rollers according to your local hazardous waste regulations. Never pour oil-based paint or solvents down the drain or into the environment.
In conclusion, applying oil-based paint as a professional requires proper surface preparation, the right tools, expert application techniques, and safety considerations.
By following the tips and recommendations shared in this article, you will master the art of oil-based paint application and achieve excellent results every time.
Step | Description |
|---|---|
1 | Ensure the surface is clean and free of grease, dirt or dust. |
2 | Sand the surface to improve adhesion and remove any loose or flaking paint. |
3 | Apply an appropriate primer if necessary. |
4 | Stir the oil-based paint well before use. |
5 | Load your brush or roller with an appropriate amount of paint. |
6 | Apply the paint evenly to the surface, using long, slow strokes in one direction. |
7 | Allow the first coat of paint to dry (time depends on the paint and environmental conditions). |
8 | If needed, lightly sand the surface and apply another coat for even coverage and desired finish. |
9 | Allow the paint to dry completely, and then enjoy your beautifully painted surface! |
• The Importance of Ventilation for Oil Painting
Oil painting is a popular medium for artists due to its versatility, richness in texture, and ability to blend colors beautifully. However, oil painting also involves the use of chemicals, solvents, and other materials that can generate fumes and toxins.
For this reason, it is essential to ensure proper ventilation in the workspace while working with oil paints.
– The Hazards of Oil Painting
One of the most common components of oil painting is the use of solvents such as turpentine, mineral spirits, or odorless mineral spirits. These solvents are used to thin the paint, clean the brushes, and create a variety of effects in the artwork.
Unfortunately, they can also emit toxic fumes, known as volatile organic compounds (VOCs), which can be harmful when inhaled in large quantities or over an extended period.
Exposure to VOCs can lead to a range of health issues, including respiratory irritation, headaches, dizziness, and fatigue. Long-term exposure to these fumes can also cause more severe health problems, such as liver or kidney damage and central nervous system disorders.
Moreover, oil paints themselves may contain potentially hazardous materials like heavy metals (e.g., cadmium or cobalt) and other chemicals that, although usually not harmful when used and stored correctly, could still pose a risk if not handled properly.
– Natural Ventilation: Windows and Doors
One of the simplest ways to ensure proper ventilation in your painting workspace is to make use of natural ventilation by opening windows and doors. This allows fresh air to enter the room, diluting and carrying away potentially harmful fumes.
However, it’s important to consider the direction and strength of the wind or air currents outside when using this method. Ideally, windows and doors should be positioned so that the incoming air will move across the painting area and then exit the room, helping to remove any fumes as efficiently as possible.
– Mechanical Ventilation: Fans and Air Purifiers
In cases where natural ventilation is insufficient, or if your painting workspace does not have access to windows or doors, it’s wise to invest in mechanical ventilation solutions. These may include exhaust fans, air purifiers, or filters specifically designed for removing VOCs.
When using an exhaust fan or an air purifier, place the unit near the source of the fumes, such as the easel or solvents. This will help capture and remove the fumes before they disperse into the air. Additionally, make sure the unit’s exhaust is vented outside to prevent recirculation of the fumes within the space.
An air purifier is another option, especially if it’s equipped with a HEPA filter and an activated carbon filter. These types of filters work together to remove both particulate matter and gaseous pollutants, providing a cleaner and healthier environment for artists working with oil paints.
– Recommended Precautions
Aside from ventilation, there are other precautions one can take to minimize the risks associated with oil painting. These include:
- Using solvent alternatives, such as water-miscible oil paints or citrus-based solvents, which emit fewer VOCs.
- Keeping solvents in closed containers when not in use to minimize evaporation and fume production.
- Limiting the use of solvents by employing alternative methods for cleaning brushes, such as using baby oil or vegetable oil.
- Wearing gloves when handling potentially hazardous materials to minimize direct skin contact.
- Reading and following the manufacturer’s instructions and safety guidelines for all materials used in the painting process.
– In Conclusion
While oil painting is a beautiful and expressive medium, it’s essential to be aware of the potential risks associated with its use. Proper ventilation is an essential part of maintaining a safe and healthy working environment for artists.
By utilizing natural and mechanical ventilation methods and employing safe practices and precautionary measures, painters can create stunning works of art without compromising their well-being.
| Do you need ventilation for oil painting? | |
|---|---|
| Oil Painting | Ventilation Requirement |
| Yes | Recommended |
| No | Not necessary, but nice to have |
Understanding the Duration of Harmful Oil Paint Fumes
The use of oil-based paints is widespread due to their durability and the high-quality finish they provide. However, oil-based paint fumes can be harmful to a person’s health, making it vital to understand the duration of these effects.
• Understanding the Composition of Oil-based Paint Fumes
To comprehend the duration of the harmful effects of oil-based paint fumes, it is essential to understand their chemical components. These paints consist of various volatile organic compounds (VOCs) that evaporate into the air when the paint is applied.
The VOCs include a mixture of chemicals like benzene, toluene, xylene, and formaldehyde, among others.
When these VOCs are released into the air, they produce the characteristic smell we associate with paint. The evaporation of VOCs can be accelerated by factors like temperature, humidity, and air movement.
As such, the amount of VOCs in the air varies extensively depending on the specific oil-based paint used, as well as the environmental conditions during and after application.
• Duration of Harmful Effects from Oil-Based Paint Fumes
The harmful effects of oil-based paint fumes generally persist as long as the VOCs are present in the air. High levels of VOCs typically last for around 24 to 48 hours after applying the paint. However, residual amounts of VOCs can linger for up to several days and may still cause irritation or discomfort.
A study published by the National Institute of Environmental Health Sciences states that emissions of VOCs from oil-based paint can continue for weeks or even months after application.
In well-ventilated spaces, these emissions will dissipate much more rapidly than in poorly ventilated or enclosed areas. Thus, the duration of harmful effects from oil-based paint fumes is primarily determined by air circulation, which ultimately affects how long VOCs remain in the air.
• Dangers of Prolonged Exposure to Oil-Based Paint Fumes
Prolonged exposure to oil-based paint fumes poses several health risks. These health hazards can range from short-term, mild symptoms to long-lasting, severe effects:
- Short-term effects: In the initial stage, exposure to oil-based paint fumes may result in symptoms such as headaches, dizziness, nausea, and eye, nose, or throat irritation. These symptoms generally subside once the individual is no longer exposed to the fumes.
- Long-term effects: Continuous exposure to VOCs may lead to chronic respiratory issues, central nervous system damage, and adverse effects on the liver and kidneys. According to the United States Environmental Protection Agency (EPA), some VOCs found in oil-based paint are classified as possible or known human carcinogens.
• Precautions and Recommendations to Minimize Exposure to Oil-Based Paint Fumes
To reduce the risks associated with oil-based paint fumes, it is advisable to follow these recommendations:
- Proper ventilation: Always ensure there is adequate airflow when applying oil-based paint. Open doors and windows, and use exhaust fans to promote air circulation. After completing the painting job, continue to ventilate the area for at least 48 to 72 hours to dissipate the VOCs.
- Use of protective gear: Wearing eye protection, gloves, and a respirator mask with an organic vapor cartridge can limit direct contact with the paint and help filter out harmful VOCs.
- Choose low-VOC or VOC-free alternatives: If possible, opt for low-VOC or VOC-free paint products, which emit fewer harmful fumes.
- Store paint properly: Keep paint containers tightly sealed when not in use and store them in a well-ventilated area, away from heat sources and flames.
- Follow the manufacturer’s instructions: Adhering to the recommendations on the paint label will facilitate safe handling and application.
In summary, the harmful effects of oil-based paint fumes can persist for several days or even weeks, depending on factors like ventilation and the specific paint product used. It is crucial to take adequate precautions to minimize exposure to these fumes and protect one’s health.
For more information on paint fumes and indoor air quality, visit the EPA’s Indoor Air Quality (IAQ) website.
Duration | Description |
|---|---|
0-2 hours | The least harmful period when the smell is less, but still avoid contact. |
2-48 hours | Fumes are harmful, and it’s best to avoid the area where paint is used. |
48 hours – 1 week | Fumes may dissipate after 48 hours. However, the harmful effects can last for 1 week in poorly ventilated areas. |
1 week+ | Regularly ventilate the area and check for the paint smell to ensure faster dissipation and minimized harm. |