Quick Tips For Indoor Wall Painting, 25 Things You Should Know
Are you looking to give your home a fresh look with some indoor wall painting? Have no fear! We’ve got you covered with quick and easy tips to make your painting project a success. With our guidance, you’ll transform your space into a stunning masterpiece in no time. So, let’s dive right into the world of colors and brushes and give your walls a new lease on life.
Quick tips for indoor wall painting:
Quick tips for indoor wall painting include preparing the room by removing furniture, cleaning walls, and repairing cracks; choosing high-quality paint and tools; using techniques like cutting in and maintaining a wet edge; and applying multiple coats for even coverage. Proper preparation and attention to detail will result in a professional-looking finish.

Unleash your inner artist and transform your living space with these quick tips for indoor wall painting! Say goodbye to streaks, drips, and uneven finishes. Read on to discover how to achieve those perfect results, just like a pro. Keep scrolling for valuable insights and tricks!
Contents
- 1 Efficient Indoor Wall Painting Techniques
- 2 Streamlined Methods for Interior Wall Painting
- 3 Simplified Guide to Interior Wall Paint Application
- 4 Common Mistakes to Avoid in Interior Wall Painting
- 4.1 • Using Inferior Quality Paint and Equipment
- 4.2 • Neglecting Wall Preparation
- 4.3 • Forgetting to Use Primer
- 4.4 • Rushing Through the Paint Job
- 4.5 • Ignoring Weather Conditions
- 4.6 • Skipping the Painter’s Tape
- 4.7 • Applying Thick Coats of Paint
- 4.8 • Overloading the Brush or Roller
- 4.9 • Not Maintaining a “Wet Edge”
- 4.10 • Neglecting Proper Cleanup and Storage
- 5 Achieving Optimal Results in Wall Painting Projects
Efficient Indoor Wall Painting Techniques
Indoor wall painting can be a daunting task, especially for beginners. However, with the right tools, techniques, and expert tips, you can achieve a professional-looking result.
• Preparing the Room and Surfaces
– Remove Furniture and Accessories
Before starting any painting project, it’s important to clear the area of any furniture or accessories that might become damaged or obstruct your work. This will not only make it easier to access the walls, but it will also prevent any accidents from occurring.
– Clean the Walls
Dirty walls can affect the adhesion and overall finish of your paint job. To ensure a smoother finish, clean the walls using a sponge or cloth and a mild detergent solution.
This will remove any dirt, dust, and grease buildup that could cause issues when you begin painting. For more information on cleaning walls, visit this helpful guide from Bob Vila.
– Make Necessary Repairs
Examine the walls for any cracks, holes, or dents that need to be repaired before painting. Use a putty knife and patching compound to fill and smooth out any imperfections. Once the repairs have dried, sand the area to create a smooth, even surface.
• Choose the Right Paint and Tools
– Selecting the Right Paint
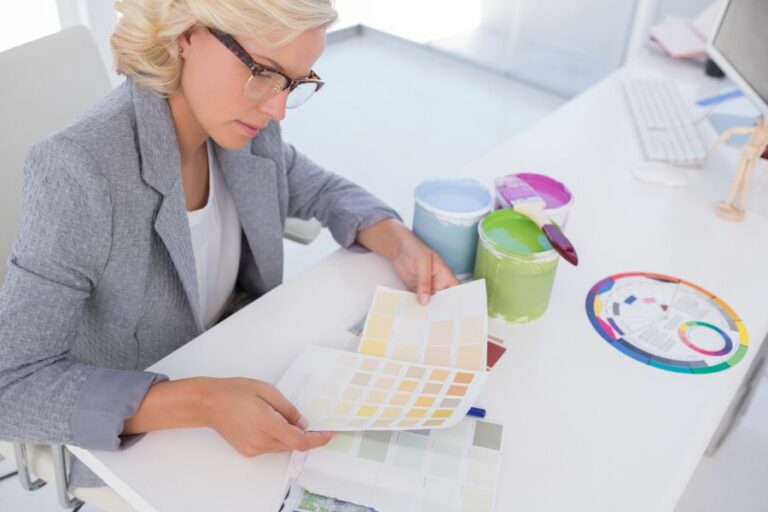
When it comes to choosing the right paint for your indoor walls, it’s important to consider factors such as color, finish, and quality. Keep in mind the room’s function, the amount of natural light, and the desired mood to determine the best color choice.
The finish, or sheen, of the paint, can also impact the final result; matte or flat finishes are great for hiding imperfections, while gloss or semi-gloss finishes are easier to clean.
– Quality Matters
Investing in high-quality paint can make all the difference in the final result of your project. Higher-quality paints have better pigmentation and binders, resulting in better coverage, improved adhesion, and a more durable finish.
– Essential Painting Tools
To achieve a professional-looking paint job, having the right tools is critical. Here are some essential tools to have on hand for your indoor wall painting project:
- Paint roller and extension pole
- Paint tray with liner
- Synthetic paintbrush (angled for cutting in)
- Painter’s tape
- Drop cloths or plastic sheeting
- Step ladder
- Sandpaper and a sanding block
- Putty knife and patching compound
• Techniques for a Professional Result
– Cutting In
Cutting in is the process of painting a straight edge where the wall meets the ceiling or adjacent walls. This technique requires a steady hand and patience. Using an angled paintbrush, apply the paint in a straight line, making sure not to overlap the ceiling or trim.
Start at the top corner and work your way down the wall in small sections.
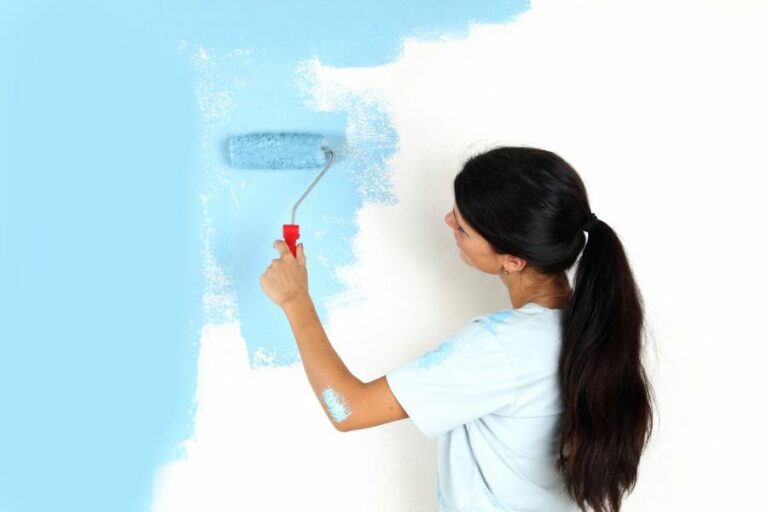
– Rolling the Walls
When using a paint roller, it’s important to use the proper rolling technique to ensure even coverage and avoid visible roller marks. First, load the roller with paint by dipping it into the tray and rolling it back and forth to evenly distribute the paint.
Begin by rolling a “W” or “M” pattern on the wall, then fill in the remaining areas by working in horizontal or vertical strokes. Make sure to overlap each pass slightly to ensure a smooth coverage.
– Use Multiple Coats
To achieve a professional-looking finish and even coverage, multiple coats of paint may be necessary. Make sure to let the first coat dry completely before applying a second coat. This will help prevent any lifting or peeling of the paint.
– Keep a Wet Edge
When painting, it’s important to maintain a wet edge to avoid visible seams where the paint has dried. To do this, work in small sections and be mindful not to let the edge of the painted area dry before applying more paint. This will help create a seamless, even finish.
• Final Thoughts and Recommendations
Achieving a professional-quality indoor wall painting project may seem intimidating, but with these quick tips and attention to detail, you can create a beautiful and durable result.
By investing time in proper preparation, using the right tools, and following proper techniques, you can transform your space and increase your home’s value.
Streamlined Methods for Interior Wall Painting
Painting interior walls can be a daunting task, especially if you’re looking for the fastest and easiest way possible to get a professional-looking finish.
• Prepare Yourself and the Workspace
Before you commence any painting project, ensure you have all the necessary tools and materials. Some items you may need include:
- Quality paintbrushes and rollers
- Paint trays and liners
- An extension pole for your roller
- Protective drop cloths and painter’s tape
- A sturdy ladder or step-stool
- Proper ventilation and lighting
As an experienced painter, I recommend gathering everything you need in a designated workspace. This organization will make the process smoother and faster.
Next, protect your flooring, furniture, and any nearby surfaces with drop cloths and painter’s tape. Proper preparation minimizes the risk of accidental paint spills and splatters.
• Choose the Right Paint for Your Walls
Selecting high-quality paint is essential for achieving an efficiently painted room. Low-quality paint may require multiple coats, leading to a time-consuming process. I recommend opting for quality paint with good coverage and durability.
It’s also important to choose the right paint finish for your room. A matte finish is ideal for low-traffic areas, while a glossy or satin finish provides increased durability and works well in high-traffic spaces like kitchens and bathrooms.
• The Importance of Priming Your Walls
Priming your walls creates a uniform and smooth surface for the paint to adhere to. This extra step may seem time-consuming, but it’s crucial for achieving a professional finish with minimal effort.
Many paints on the market include a built-in primer; however, if your chosen paint doesn’t contain a primer, be sure to apply one separately before painting.
• Get to Work with the Proper Painting Technique
For the fastest results, follow these tried-and-true painting techniques:
- Cut in edges: Use an angled brush to paint the edges and corners of the walls where the roller can’t reach. This is called “cutting in.” Do this before using the roller so you can fix any mistakes easily.
- Load up the roller: Dip the roller into the paint tray, then roll it back and forth in the shallow section of the tray to ensure even distribution.
- Paint in “W” shapes: Apply the paint with the roller in a “W” shape, then fill in the gaps without lifting the roller. This method ensures proper coverage and avoids streaks.
- Overlap and blend: As you move from one section of the wall to another, slightly overlap the paint to avoid laps and create a seamless finish.
- Keep a wet edge: Painting over partially dried paint can lead to an uneven texture. To avoid this, work quickly and maintain a “wet edge” by always painting with wet paint.
- Apply multiple coats if needed: Depending on the color and finish, you may need more than one coat for complete coverage. Allow the first coat to dry before applying additional coats, as per the paint manufacturer’s guidelines.
• Keep a Clean Workspace and Proper Maintenance
Clean any spills and splatters immediately to avoid them drying onto surfaces. Additionally, clean and store your tools properly after use. This ensures that they remain in good condition for future projects.
• Conclusion
There’s no fool-proof method to guarantee a speedy painting job, but with the right preparation, tools, and techniques, you can certainly make the process as fast and easy as possible.
By following these expert tips, you’ll be on your way to achieving a professional-looking paint job, so you can enjoy the beautifully transformed space you’ve created.
For more in-depth information on the painting process, check out the advice from the United States Environmental Protection Agency. This resource provides valuable insights and safety tips for painting projects.
Simplified Guide to Interior Wall Paint Application
Painting interior walls can be an enjoyable and cost-effective way to give your home a fresh new look.
• Materials and Tools You’ll Need
Before you start your painting project, gather the following materials and tools:
- Paint: Preferably water-based for easy cleanup and fast drying times
- Primer: To ensure proper adhesion of paint to the walls
- Paintbrushes and a paint roller: For even paint application
- Paint tray and tray liner: To hold the paint and aid in cleanup
- Painter’s tape: To protect areas you don’t want to paint
- Drop cloths: To protect your floors and furniture
- Ladder or step stool: For reaching higher areas
- Putty knife and spackle: To fill holes and repair damages
- Sandpaper: To smooth the walls before painting
- Damp cloth: For cleaning and dust removal
• Preparing the Room
Before you begin painting, it’s essential to prepare the room properly. Remove as much furniture as possible to create enough space for work. For any remaining furniture, cover with drop cloths to protect from paint spills and splatters. Do the same for the floors.
Next, remove any wall fixtures, such as outlet covers, light switches, and hanging decorations. Finally, use painter’s tape to protect baseboards, window sills, and other trim.
• Preparing the Walls
For the best results, your walls should be clean, smooth, and in good condition before applying paint. Start by cleaning the walls with a damp cloth, focusing on removing dirt, grease, and dust.
Inspect the walls for any damages or imperfections, like cracks or holes. Using a putty knife, apply spackle to fill them in, and then allow it to dry according to the manufacturer’s instructions. Once dry, sand the repaired areas until smooth using sandpaper.
After sanding, use a damp cloth to remove any dust created during the sanding process. This step is crucial, as dust can interfere with paint adherence.
• Priming the Walls
Applying primer before painting is strongly recommended, especially for dark or bright-colored walls, new drywall, or walls with repairs. Primer helps to:
- Provide a uniform base for the paint
- Improve paint adhesion, increasing durability
- Reduce the number of paint coats required
Use a brush or roller to apply the primer, working from the ceiling down to the baseboards. Allow the primer to dry according to the manufacturer’s guidelines.
• Painting the Walls
With your walls prepped and primed, it’s time to paint. Follow these steps for the best results:
– Step 1: Cut in the Edges
Before using a paint roller, “cut in” the edges of the room with a paintbrush. This means painting a 2-3 inch wide strip around the edges of the walls where the roller cannot reach, such as corners, ceilings, and baseboards. Doing this first ensures a smooth, even transition between the brushed and rolled paint.
– Step 2: Load Your Roller
Pour your paint into the paint tray, using the tray liner for easy cleanup. To load your roller, dip it into the paint, then use the ridges of the tray to remove excess paint. The goal is to have an even and thorough distribution of paint on the roller.
– Step 3: Roll on the Paint
Start painting by making a “W” or “M” shape on the wall, covering an area of about 3 to 4 square feet. Then, fill in the shape with even, parallel strokes. This method helps to distribute the paint evenly and prevent visible roller marks.
Overlap each stroke slightly to ensure even coverage and avoid visible lines. Always maintain a wet edge when painting; this helps to prevent streaks and marks that can occur when paint dries too quickly.
– Step 4: Apply a Second Coat
Allow the first coat of paint to dry according to the manufacturer’s instructions. For most water-based paints, this is about 2-4 hours. Once the first coat is dry, assess the coverage and determine if a second coat is necessary.
In most cases, it is, especially if you are using lighter colors or making a significant color change. Apply the second coat using the same method as the first, and allow it to dry completely.
• Cleanup and Care
Dispose of any used materials, such as tray liners, used paintbrushes, and roller covers. Clean reusable tools, like paint trays and brushes, using water for water-based paints or the appropriate solvent for oil-based paints. Carefully remove painter’s tape and reinstall fixtures, like outlet covers and light switches.
With your newly painted walls, it’s important to care for them properly, too. Avoid touching or cleaning the walls for at least two weeks to allow the paint to cure fully. After this time, clean the walls gently with a soft, damp cloth.
By following these steps, you can paint your interior walls easily and achieve professional, long-lasting results that enhance your living spaces.
Step | Description |
|---|---|
1 | Choose the right type of paint and color for your interior walls. |
2 | Prepare the room by placing drop cloths on the floor and removing any furniture, wall decorations, or outlet covers. |
3 | Clean the walls using a sponge and a mixture of water and mild detergent. Allow the walls to dry completely. |
4 | Apply painter’s tape around edges, electrical outlets, and any other areas you want to protect from paint. |
5 | Use a paint roller to apply a coat of primer to the walls, starting from the top and working toward the bottom. |
6 | Allow the primer to dry according to the manufacturer’s instructions, usually for at least 2-3 hours. |
7 | Apply the first coat of paint, following the same technique as with the primer. |
8 | Allow the first coat to dry for the recommended time, then apply a second coat if necessary for full coverage. |
9 | Once the paint has dried completely, carefully remove the painter’s tape. |
10 | Replace any wall decorations, outlet covers, and furniture, and enjoy your freshly painted interior walls! |
Common Mistakes to Avoid in Interior Wall Painting
Painting the interior walls of your home can be an exciting project, allowing you to revitalize a space and enhance its aesthetic appeal. However, there are certain mistakes you should avoid to ensure a professional-looking finish.
• Using Inferior Quality Paint and Equipment
Do not compromise on the quality of the paint or the tools you use for your project. Low-quality paint may not adhere well to surfaces, and it may require multiple coats to achieve proper coverage.
Similarly, cheap brushes and rollers will not give you a smooth finish and can leave brush marks on your walls. I recommend investing in high-quality paint and equipment to achieve professional results.
• Neglecting Wall Preparation
Wall preparation is a critical step that should not be overlooked. Do not start painting without filling in any holes or cracks present on the wall.
Additionally, ensure that the walls are properly cleaned and sanded before applying paint. Skipping this step can result in an uneven paint job and may cause the paint to peel off.
• Forgetting to Use Primer
Not using a primer before painting your walls is another mistake you should avoid. The primer acts as a foundation for the paint, providing better adhesion and durability. It also helps to cover any stains, dark colors, or patches on your walls, ensuring a consistent and vibrant finish.
• Rushing Through the Paint Job
Do not rush while painting your walls. Painting in haste can lead to drips, uneven coverage, and visible brush strokes on the surface. Instead, allocate ample time for each coat to dry before applying the next layer. This patience allows the paint to cure properly, resulting in a smooth and long-lasting finish.
• Ignoring Weather Conditions
Humidity and temperature can play a vital role in the drying time and overall appearance of your paint job. Do not paint your walls on extremely humid or cold days, as these conditions can cause the paint to dry slowly or unevenly. If possible, schedule your painting project during mild weather conditions.
• Skipping the Painter’s Tape
Not using painter’s tape when painting your walls is a mistake that can lead to messy edges and paint splatters on adjacent surfaces. To achieve clean lines and protect areas you don’t want to paint, I recommend using painter’s tape along the trim, ceiling, and other abutting surfaces.
Remember to remove the tape before the paint dries completely to avoid accidentally peeling off any paint.
• Applying Thick Coats of Paint
Applying too thick a layer of paint in a single coat can lead to dripping or sagging. Instead, it is best to apply multiple thin layers of paint, allowing each coat to dry before applying the next one. This technique ensures better coverage and a smoother finish.
• Overloading the Brush or Roller
Avoid loading too much paint on your brush or roller while painting. Overloading can cause paint to drip or create an inconsistent texture, detracting from the final result. Instead, dip your brush or roller in paint and then remove any excess by gently pressing it against the side of your paint tray or bucket.
• Not Maintaining a “Wet Edge”
When painting, it is essential to maintain a “wet edge” to avoid noticeable overlapping or streaks. This technique involves maintaining a consistent wet line of paint along the wall and painting the next section before the previous one dries.
Not following this practice can result in a patchy appearance, preventing your walls from looking uniform and polished.
• Neglecting Proper Cleanup and Storage
Do not forget to properly clean up after completing your paint job. Dispose of any used brushes, rollers, or other painting supplies appropriately. Also, store any leftover paint in airtight containers for future use, and clean your workspace to avoid accidents or mishaps.
By avoiding these common painting mistakes, you will be well-equipped to achieve a professional-looking finish when painting your home’s interior walls. Paying attention to the details and employing proper techniques can make all the difference in the final result.
Achieving Optimal Results in Wall Painting Projects
Painting walls can be a fun and rewarding task, whether you’re a professional painter or simply a homeowner looking to refresh your living space. However, achieving professional-looking results requires proper preparation, the right tools, and a solid understanding of painting techniques.
• Preparing the Surface for Optimal Results
– Cleaning the Walls
Before you begin painting, it’s essential to ensure your walls are clean and free from dirt, dust, and grime. Use a sponge or cloth with a mild detergent solution to clean the walls thoroughly.
For extremely dirty walls, consider using trisodium phosphate (TSP) solution, available at most hardware stores, for a deeper clean. For further information on TSP, visit the U.S. National Library of Medicine website.
– Repairing Damage and Imperfections
Professional-looking painted walls start with a smooth and even surface. Inspect the walls to identify and repair any cracks, holes, or other imperfections.
Use a putty knife and patching compound to fill small holes and cracks, and then sand the patched areas until smooth. For larger repairs, consider using a drywall repair kit or consulting a professional.
– Applying Primer
Priming walls is a crucial step for achieving a flawless paint job. Primer seals the wall, ensuring an even and consistent paint application while also improving adhesion. Apply one coat of high-quality primer to the entire surface, allowing it to dry completely in accordance with the manufacturer’s recommendations.
• Choosing the Right Tools for the Job
– Paint Brushes and Rollers
To get the best results, invest in high-quality brushes and rollers. Choose brushes with synthetic bristles for water-based paint and natural bristles for oil-based paint. For rollers, opt for a 3/8-inch to 1/2-inch nap (fiber length) for smooth surfaces and a long nap for textured surfaces.
A quality brush or roller will provide a smoother finish and are less likely to shed bristles or fibers during the painting process.
– Paint and Supplies
Selecting the proper paint type, finish, and color for your project is essential to achieving professional results. Consider the wall’s location, usage, and desired appearance when making your decision.
For example, a satin or semi-gloss finish may be more suitable for high-traffic areas or walls prone to dirt and stains. Quality paint will provide better coverage and durability in the long run, so it’s worth the investment.
Additionally, gather all necessary supplies before beginning your project, including painter’s tape, drop cloths or plastic sheeting, paint trays, and stir sticks.
• Application Techniques for a Professional Finish
– Cutting-In and Rolling
To prevent uneven paint coverage or visible brush strokes, employ a technique called “cutting-in.” Use a 2-inch angled brush to paint a strip approximately 3 inches wide along edges, corners, and areas adjacent to the trim.
Then, use a roller to fill in the larger areas, being sure to blend the cut-in paint before it dries.
For best results with a roller, start by loading it with paint and using a zig-zag pattern on the wall to distribute the paint evenly. Then, roll over the pattern in parallel, overlapping strokes to create a uniform finish.
– Applying Multiple Coats
Two or more coats of paint will provide better coverage, especially when painting over dark colors or applying a lighter shade. Allow each coat to dry completely before applying the next, following the manufacturer’s recommended drying times.
Along with more vibrant colors, multiple coats can also provide added durability and protection for your walls.
– Proper Cleanup and Maintenance
Cleaning your brushes, rollers, and other tools properly will extend their lifespan and ensure they are ready for use in future projects.
Remove excess paint with a brush comb or roller scraper, then rinse in water or paint thinner, depending on the paint type. Allow your tools to dry thoroughly before storing them.
• Final Thoughts
Achieving professional-looking results when painting walls requires preparation, attention to detail, and the use of quality tools and materials.
By following the steps and recommendations outlined in this article, you can transform your living space and enjoy a beautifully painted masterpiece in your own home.
Step | Description |
|---|---|
1. Prep the walls | Clean the walls and repair any damage. Remove any dirt, dust or grease. Fill any holes or cracks with spackle, and sand smooth when dry. |
2. Protect the room | Remove or cover furniture, and cover the floors with drop cloths. Protect baseboards, trim, and outlets with painter’s tape. |
3. Choose high-quality paint | Invest in high-quality paint that provides good coverage and is long-lasting. Choose a finish appropriate for the room (e.g., satin or eggshell for high-traffic areas). |
4. Prime the walls | Apply a coat of primer to create a uniform base for the paint, ensuring better adhesion and coverage. |
5. Use the right tools | Select the correct brush or roller for the wall texture and paint type. Use a quality angled brush for cutting in and a roller with an extension pole for the main wall area. |
6. Cut in first | Paint a 2-3 inch border around the edges of the room where the roller can’t reach, using the angled brush. |
7. Roll the walls | Roll the paint onto the walls in a “W” pattern, refilling the roller and overlapping the painted areas to ensure even coverage. Work quickly to keep a wet edge and avoid lap marks. |
8. Apply multiple coats | Allow the paint to dry completely before assessing whether additional coats are needed. Follow the manufacturer’s recommended drying time. |
9. Clean up | Remove painter’s tape and drop cloths, and clean brushes and rollers. Reattach outlet covers and return furniture to the room. |