Solutions For Wall Imperfections, 25 Things You Should Know
Are you tired of staring at those unsightly wall imperfections that just seem to stand out more and more each day? Rest assured. You’ve come to the right place to solve this common home headache. We have a variety of tried and tested methods that will help you achieve a smooth and flawless finish on your walls, all while saving time and effort in the process.
Solutions for wall imperfections:
To remedy wall imperfections, address cracks using caulk or joint compound depending on their size, fix holes with spackling compound or patch kits, repair dents using a rubber mallet and spackling compound, and remove stains by identifying their cause, cleaning respective areas, and repainting. Consult professionals for structural issues.

Don’t let wall imperfections ruin the aesthetics of your space! Dive into our comprehensive guide covering various solutions to effectively fix wall flaws. Read on to transform your walls and elevate your home’s visual appeal. Keep exploring for more!
Contents
- 1 Wall Imperfection Remedies
- 2 Methods to Repair Wall Flaws
- 3 Concealing Wall Texture Blemishes
- 4 Correcting Uneven Interior Wall Surfaces
- 5 Disguising Drywall Imperfections
Wall Imperfection Remedies
• Introduction
Walls are an essential element of any building, both structurally and aesthetically. However, over time, walls can develop various imperfections such as cracks, holes, dents, or stains. These imperfections can not only be unsightly but may also affect the structural integrity of the building.
• Types of Wall Imperfections
1. Cracks
Cracks are common wall imperfections that can occur due to age, settlement, or poor construction. There are several types of cracks, such as hairline cracks, which are barely visible, and larger, more noticeable ones.
2. Holes
Holes can develop due to various reasons, from accidents and impact to the removal of previously installed fixtures. Small holes might not be a significant issue, but larger ones can lead to structural damage if left unattended.
3. Dents
Dents can appear on walls due to various forms of impact, such as furniture bumping into them or children playing. They can make the wall look unkempt and are particularly noticeable in walls with glossy paint.
4. Stains
Stains can occur due to various reasons, such as water damage, mold growth, or surface dirt. They can be particularly noticeable on light-colored walls and can contribute to an overall unclean appearance.
• Solutions to Wall Imperfections
1. Repairing Cracks
For small hairline cracks, the easiest solution is applying a high-quality, paintable caulk. Apply the caulk with a caulk gun, then smooth it out using a putty knife or your finger, ensuring it fills the entire crack. Once dry, sand the area gently and repaint as needed.
For larger cracks, we recommend using a joint compound. Apply the compound to the crack and ensure it penetrates the entire depth of the crack. Once dry, sand the area smooth and repaint as needed.
In case of structural cracks, it’s essential to consult a professional to determine the underlying cause and repair it accordingly.
2. Fixing Holes
Small holes can be easily repaired using a premixed spackling compound. Apply the spackling compound to the hole, smoothly filling it completely, and then allow it to dry. Once dry, sand the area smooth and repaint as necessary.
For larger holes, you may need to use a patch kit for the repair. Cut a piece of the patch material to fit over the hole, ensuring it covers the entire hole and extends at least 2 inches beyond its boundaries.
Apply the adhesive-backed patch over the hole, then apply joint compound over the patch, feathering the edges, so it blends seamlessly into the wall. Allow it to dry, then sand smooth and repaint as needed.
3. Repairing Dents
Repair dents by gently tapping the area with a rubber mallet to flatten the dent as much as possible. Next, apply a high-quality, premixed spackling compound to the dented area, ensuring it fills the entire dent. Allow the compound to dry, then sand the area until smooth and repaint as needed.
4. Removing Stains
For water stains, first, identify the cause, such as a leaky pipe or roof, and fix the issue to prevent further staining. Once the cause has been addressed, you can use a stain-blocking primer to seal the area, followed by repainting the wall.
In the case of mold or mildew stains, it’s essential to address the root cause, such as excess humidity, to prevent future growth. Then, use a solution of one part bleach to three parts water to clean the affected area. Allow the wall to dry thoroughly before applying a stain-blocking primer and repainting as needed.
For general surface dirt or grease stains, clean the area using a mild detergent and water or a wall-cleaning solution. Allow the wall to dry thoroughly before repainting if necessary.
• Conclusion
Wall imperfections are a common occurrence in any building. Addressing them promptly and effectively helps maintain the overall appearance and structural integrity of your walls.
The solutions discussed in this article can be applied by anyone with basic DIY skills, but in cases where structural damage is suspected, it is always best to consult a professional.
Methods to Repair Wall Flaws
Walls are never perfect. They get dinged, scratched, and damaged by daily life. But that doesn’t mean you must live with unsightly imperfections. Many methods can help you repair and restore walls to their former glory.
Here are the best techniques for fixing wall imperfections, from minor blemishes to more significant issues.
• Addressing Small Imperfections: Using Spackle & Sandpaper
The easiest way to tackle small wall imperfections like nail holes, scratches, and dents is with spackle. Lightweight spackling paste and a putty knife are all you need for these minor repairs.
– Tools You’ll Need
- Lightweight spackling paste
- Putty knife
- Fine-grit sandpaper (120 to 150-grit)
– Steps to Fix Small Imperfections
- Clean the damaged area to remove dust and debris.
- Apply a small amount of spackle to the putty knife and spread it over the imperfection, filling in the hole or scratch.*
- Allow the spackle to dry according to the manufacturer’s instructions.
- Once the spackle is dry, lightly sand the area with fine-grit sandpaper until smooth.
- Wipe away any dust with a damp cloth.
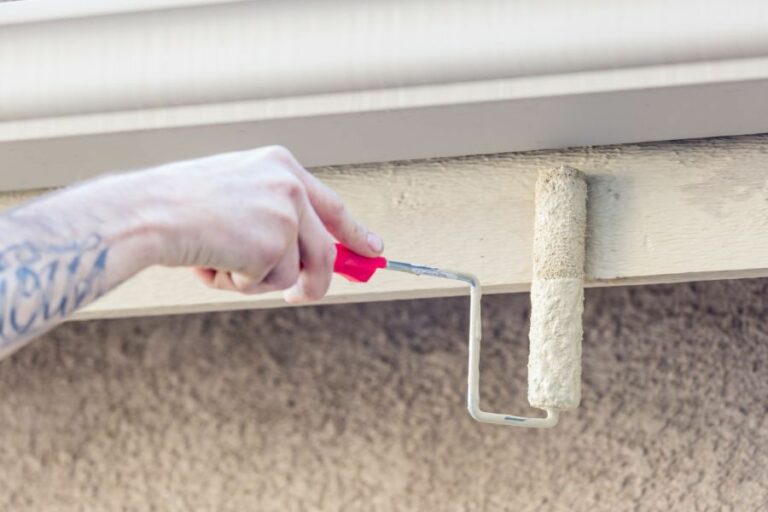
- Prime and paint the repaired area to match the surrounding wall.
*For deeper dents and holes, you may need to apply multiple coats of spackle, allowing each layer to dry before adding more material.
• Tackling Medium-Sized Imperfections: Drywall Patching
For medium-sized wall imperfections, like small holes and cracks, a drywall patch offers a more robust solution. Drywall patches consist of a metal or fiberglass mesh that provides support for layers of joint compound.
– Tools You’ll Need
- Drywall patch (metal or fiberglass mesh)
- Joint compound
- Putty knife
- Utility knife
- Fine-grit sandpaper (100 to 120-grit)
– Steps to Fix Medium-Sized Imperfections
- Clean the damaged area to remove dust and debris.
- Use a utility knife to trim any loose or damaged drywall around the imperfection.
- Cut a drywall patch slightly larger than the hole or crack.
- Apply a thin layer of joint compound around the imperfection using a putty knife.
- Press the drywall patch into place and smooth the joint compound for seamless edges.
- Allow the joint compound to dry according to the manufacturer’s instructions.
- Apply a second coat of joint compound, feathering it out over the edges of the patch.
- Once the joint compound is dry, sand the area with fine-grit sandpaper until smooth.
- Wipe away any dust with a damp cloth.
- Prime and paint the repaired area to match the surrounding wall.
• Fixing Large Imperfections: Replacing Drywall
For significant wall damages, such as large holes or extensive water damage, you may need to replace the affected drywall section. This process is more involved than spackle or patches but will result in a stronger repair.
– Tools You’ll Need
- Measuring tape
- Drywall saw
- Utility knife
- New drywall
- Drywall screws
- Screwdriver or drill
- Joint compound
- Drywall tape
- Putty knife
- Fine-grit sandpaper (100 to 120-grit)
– Steps to Replace Damaged Drywall
- Measure the damaged drywall section and cut a new piece of drywall to the same size.*
- Use a drywall saw to remove the damaged section from the wall, being careful not to damage any electrical or plumbing behind the wall.
- Secure the new drywall piece to the wall studs with drywall screws.
- Apply a thin layer of joint compound along the seams between the new and old drywall.
- Press drywall tape into the joint compound and smooth it with a putty knife.
- Apply a second coat of joint compound, feathering it out over the tape for seamless edges.
- Allow the joint compound to dry according to the manufacturer’s instructions.
- Sand the repaired area with fine-grit sandpaper until smooth.
- Wipe away any dust with a damp cloth.
- Prime and paint the repaired area to match the surrounding wall.
*When cutting drywall for a precise fit, consider using a T-square to guide your utility knife for straight cuts.
• Conclusion
Fixing wall imperfections can feel like a daunting task, but with the right tools and techniques, it’s a manageable project for any homeowner. Whether you’re dealing with small dents and scratches or more significant damages, these methods will help you restore your walls and keep them looking their best.
Method | Description |
|---|---|
Joint compound | A pre-mixed or drywall compound used to fill and smooth out cracks, dents, and small holes in walls. |
Spackle | A lightweight compound used to fix small holes and dents, typically used for faster repairs. |
Plaster | A mixture of sand, lime or gypsum, and water used to repair larger cracks and holes in walls. |
Paintable caulk | A latex or acrylic caulk that can be painted over once dry and used to fill small gaps and cracks. |
Wallpaper liner | A heavy-duty, blank wallpaper that can be applied to walls with imperfections, providing a smooth surface for wallpaper or paint. |
Textured paint | A type of paint that contains particles to create texture and can be used to cover minor wall imperfections. |
Concealing Wall Texture Blemishes
Uneven or poorly done wall textures can be an eyesore in any room. But fret not! Hiding imperfections in wall texture can be achieved with a few simple techniques.
• Prepare the Surface
Before you can effectively conceal imperfections on your walls, it’s vital to properly clean the surface. Remove any dust, dirt, or grease with a sponge or damp cloth. This will ensure that whatever material you apply to the wall will adhere without any issues.
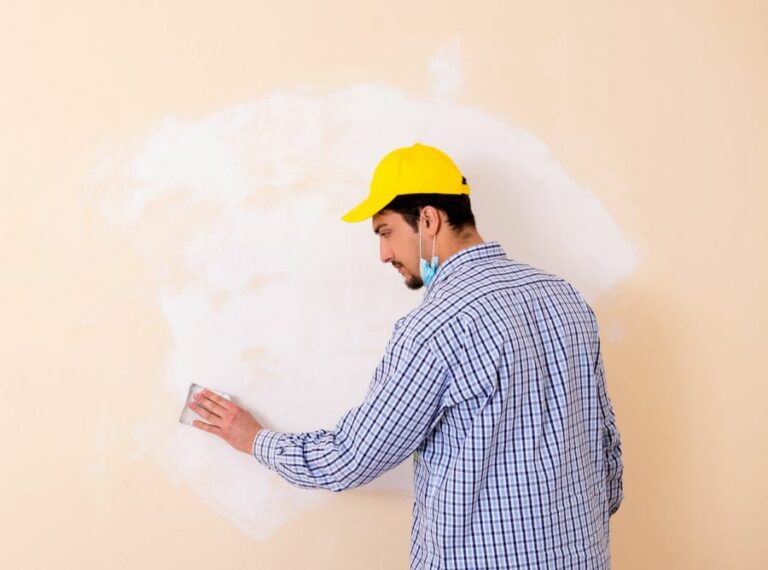
• Skim Coating for Smooth Walls
Skim coating is a process where you apply a thin layer of a mud product, such as a joint compound or plaster, over the entire surface of your wall. This method is efficient in hiding minor imperfections on your walls and giving them a smooth finish.
– How to Skim Coat a Wall
- Choose the right joint compound: For skim coating, it’s recommended to use a pre-mixed joint compound or a setting-type joint compound. These products offer a strong bond to the wall and are easy to work with.
- Apply the compound: Use a trowel or a wide putty knife to spread a thin layer of the joint compound across the entire wall surface. Use long, smooth strokes, and keep a consistent thickness to avoid creating new imperfections.
- Smooth out the compound: Once the entire wall is coated, go over it with a drywall knife or trowel to remove any excess compound and smooth out bumps.
- Allow to dry: Let the wall dry for 24 hours or as recommended by the manufacturer.
- Sand the surface: Once the compound is dried, lightly sand the surface with fine-grit sandpaper to remove any ridges and achieve a smooth finish.
- Apply additional coats if necessary: If you can still see imperfections after the first coat, repeat the process until you achieve the desired smoothness.
• Joint Compound for Larger Imperfections
Joint compounds can also be used to fill in deeper cracks, gouges, and other significant marks on your wall. This method works best for spot repairs rather than fixing the entire wall surface.
– How to Apply Joint Compound
- Clean and prepare the damaged area: Make sure the area you’re working on is clear of any dirt, debris, or loose paint.
- Apply the joint compound: Using a putty knife, apply a thin layer of joint compound over the imperfection. Make sure to extend the compound slightly beyond the edges of the damage to blend it in with the surrounding area.
- Smooth out the compound: Carefully smooth the compound with your putty knife, adding more as needed to fill in the imperfection fully.
- Allow to dry: Let the joint compound dry according to the manufacturer’s instructions.
- Sand the surface: Lightly sand the repaired area to blend it with the surrounding wall texture, but be careful not to sand too much, or you’ll undo your repair.
• Paint Techniques for Camouflaging Imperfections
Specific paint techniques can also help hide minor imperfections and uneven wall textures. Three popular techniques include:
- Textured paint: This type of paint contains particles that create a textured finish on the wall, making it effective for disguising uneven surfaces. Textured paint can be applied with a roller or a brush, and it comes in various finishes, such as sand, popcorn, or knockdown.
- Rag rolling: This technique involves applying a glaze or diluted paint over your base color, then using a rag to roll over the surface to create a textured pattern. The irregularity of the pattern can help conceal any imperfections on your wall.
- Sponge painting: Similar to rag rolling, sponge painting involves dabbing a glaze or diluted paint onto the wall with a sponge. This creates a unique, textured pattern that can help camouflage any unevenness on the surface.
• In Conclusion
Dealing with imperfections in wall texture can be frustrating, but don’t worry! With the methods outlined above, you can quickly improve the appearance of your walls and give them a fresh, smooth, and professional finish.
Step | Description |
|---|---|
1. Clean the wall | Remove any dirt, grease or old loose paint from the wall surface. |
2. Repair any damage | Fix any visible holes, cracks, or water damage and allow time for the repairs to dry. |
3. Apply an appropriate primer | Choose a primer that is suitable for the wall and paint type, and apply evenly to cover imperfections. |
4. Use a textured paint or wallpaper | Select a textured paint or wallpaper to add depth and hide minor flaws in the wall surface. |
5. Use faux finish techniques | Try faux finish painting techniques, such as sponging or rag rolling, to hide imperfections. |
6. Install wainscoting or paneling | Add decorative elements like wainscoting or paneling to cover damaged or uneven areas. |
7. Arrange wall dcor strategically | Hang large artwork or place shelves to cover imperfections and draw the eye away from problem areas. |
Correcting Uneven Interior Wall Surfaces
Uneven interior walls can be a nuisance for homeowners, especially when it comes to planning home improvement projects or decorating. There are numerous factors that can lead to uneven walls, such as poor construction techniques, the natural settling of a home, and water damage.
Regardless of the cause, fixing uneven walls is important for improving the overall appearance of your home and preventing any further damage to the structure.
• Identifying the Cause of Uneven Walls
Before beginning any repairs, it’s essential to identify the cause behind the uneven walls. This will not only help you determine the most effective repair method but will also allow you to address any underlying issues that may be causing the problem in the first place.
– Poor Construction
If your uneven walls are the result of poor construction techniques or subpar materials, you may need to address these issues before attempting any repairs. Consult with a licensed contractor or structural engineer for guidance on dealing with this situation.
– Natural Settling
Homes naturally settle over time, which can lead to uneven walls. If your uneven walls are the result of your home settling, you may need to address this issue to prevent future problems.
Consult with a licensed contractor or structural engineer for advice on how to deal with any structural or foundation issues.
– Water Damage
Water damage can cause a variety of problems, including uneven walls. If water has infiltrated your walls, you must first address this issue before fixing the unevenness. Consult with a licensed professional to remedy the water damage and ensure your home is adequately protected against future water intrusion.
• Repairing Uneven Walls
Once the underlying cause of the uneven walls has been identified and addressed, the focus is on repairing the walls and achieving a smooth finish. Below are some effective methods for fixing uneven walls.
– Patching and Filling
For smaller uneven spots or holes, patching and filling might be the best solution. Materials like joint compound, spackling paste, or wood filler can be used to fill the uneven surfaces before being sanded down for a smooth finish.
- Clean the areas: Before applying any filler, make sure the surface is clean and free of debris. This is essential for the proper adhesion of patching materials.
- Apply the filler: Use a putty knife to apply your chosen filler material to uneven areas. Be sure to follow the manufacturer’s instructions for proper application and drying times.
- Sand: Once the filler has dried, use fine-grit sandpaper to sand down the repaired areas, creating a smooth surface. Be sure to wear proper respiratory protection while doing this.
- Priming and painting: After the walls have been repaired and sanded, apply a primer to the surface to ensure proper adhesion of paint. Once the primer has dried, paint the walls to achieve a smooth, even finish.
– Skim Coating
If the unevenness of your walls is more extensive or severe, a technique called skim coating might be required. This process involves applying a thin layer of joint compound over the entire wall to create a smooth, even surface.
- Prepare the walls: Clean and remove any loose debris from the walls. Apply a coat of primer to ensure proper adhesion of the joint compound.
- Mix joint compound: Follow the manufacturer’s instructions to mix the joint compound to the proper consistency.
- Apply the joint compound: Using a taping knife or trowel, apply a thin layer of joint compound over the entire wall. Ensure that the compound is applied evenly and smoothly, feathering the edges to create a seamless surface.
- Sanding: Once the joint compound has dried, sand the walls using fine-grit sandpaper to ensure a smooth, even finish.
- Priming and painting: Apply a coat of primer to the entire wall, followed by the paint of your choice.
– Installing Wall Liner
For particularly uneven walls, you might want to consider installing a wall liner or paintable wallpaper to create a smooth surface.
- Prepare the walls: Clean and remove any loose debris from the walls. Apply a coat of primer to ensure proper adhesion of the liner.
- Measure and cut: Measure the walls and cut the wall liner to fit, leaving a small overlap at the edges for trimming.
- Apply adhesive: Apply a suitable adhesive to the wall liner, following the manufacturer’s instructions for drying times and coverage.
- Install the liner: Carefully align and press the wall liner onto the walls, smoothing out any bubbles or wrinkles as you go. Trim any excess material at the edges for a clean finish.
- Paint the wall liner: Once the adhesive has dried, paint the wall liner with your choice of paint to achieve a smooth, even wall finish.
• Conclusion
Fixing uneven interior walls might be a daunting task, but by identifying the cause, addressing any underlying issues, and choosing the right repair technique, you can achieve a smooth and professional-looking finish.
Being patient and paying attention to detail will ultimately result in a successful wall repair project that enhances the overall appearance of your home.
Method | Description |
|---|---|
Sanding | Use a sanding block or an electric sander to smooth out any high spots or rough areas on the wall. |
Plastering | Apply a thin layer of plaster over the uneven areas, smoothing it out with a trowel. Allow it to dry, then sand and repeat if necessary to achieve a smooth surface. |
Skim Coating | Mix a skim coat of joint compound and water, then use a trowel to spread it over the uneven areas in a thin, even layer. Allow the skim coat to dry, sand it, and apply additional coats if necessary. |
Drywall Installation | If the unevenness is severe, you may need to install new drywall. Remove any old or damaged drywall, attach new drywall panels to the wall studs, tape the seams, and apply joint compound to create a smooth surface. |
Wallpaper or Wall Liner | For minor unevenness, you can use wallpaper or wall liner to conceal the imperfections. Make sure the wall is clean and smooth before applying the wallpaper or liner, following the manufacturer’s instructions for installation. |
Disguising Drywall Imperfections
Drywall, commonly known as plasterboard or wallboard, is a widely used material for interior walls and ceilings. While it offers many benefits, such as affordability and ease of installation, it can sometimes display imperfections.
These can result from various factors, such as poor installation, damage, or natural aging of the material.
• Assessing the Imperfections
Before masking any blemishes, it is crucial to identify the type and severity of the imperfections in your drywall. Common issues can include:
- Dents and dings
- Nail or screw holes
- Cracks and seams
- Uneven surfaces
- Popped nails or screws
- Water damage
Once you have evaluated the extent of the flaws, you can choose the appropriate method to address them.
• Repairing Minor Imperfections
– Filling Dents, Dings, and Holes
For small dents and holes, you can use a pre-made joint compound or a patching compound, such as Fast ‘N Final. Apply the compound using a putty knife, filling the hole completely. After allowing it to dry, sand the area smooth and apply a coat of primer before painting.
– Patching Cracks and Seams
To repair existing cracks or seams, clean the area and remove any loose material. Apply a layer of mesh tape over the crack or seam, followed by a layer of joint compound. Smooth the compound with a trowel and allow it to dry. Sand the area smooth, then apply a coat of primer before painting.
• Repairing Major Imperfections
– Replacing Damaged Drywall
For significant damage, it may be more effective to cut out the affected drywall and replace it with a new piece. Start by removing any baseboards, crown molding, or other trim near the damaged area.
Then, use a utility knife to cut along the edges of the damaged drywall, taking care not to cut into studs or electrical wiring.
Once the damaged area is removed, cut a new piece of drywall to fit the space and secure it with screws or nails to the existing studs. Fill the seams and gaps with a joint compound, then apply mesh tape and add a layer of compound, smoothing it out as you go.
Once the compound is dry, sand the area smooth, apply primer, and paint.
– Skim Coating for Uneven Surfaces
For uneven drywall surfaces, a process called skim coating can be used to create a smooth, uniform finish. Skim coating involves applying a thin layer of joint compound over the entire wall or ceiling, smoothing out any bumps, dips, or other irregularities.
Before beginning the skim coating process, clean the area thoroughly and remove any loose material. Mix your joint compound to a thin, smooth consistency, then apply it evenly using a trowel or wide drywall knife.
Allow the compound to dry and lightly sand the surface before applying a second coat if necessary. Once the desired texture is achieved, apply a coat of primer and paint.
• Painting Techniques to Disguise Imperfections
– Use of Matte or Flat Paint
Choosing a matte or flat paint finish helps diffuse light, making it more difficult to notice imperfections in your drywall. Glossy paint finishes, such as semi-gloss or high-gloss, can highlight flaws due to their reflective properties.
– Textured Paints and Techniques
Applying texture to your walls can also help to hide imperfections. Options include using textured paint or applying joint compound using specific tools or methods such as a sponge, roller, or stomp brush. Textured walls can add interest to a room while simultaneously concealing minor flaws.
• Preventative Measures
To reduce the likelihood of future imperfections, take the following preventative steps:
- Proper installation: Ensure that your drywall is installed correctly, with screws or nails placed into studs.
- Adequate moisture control: Controlling humidity levels in your home can minimize the chance of mildew or water damage.
- Regular maintenance: Inspect your drywall regularly for signs of damage, promptly addressing any issues that arise.
In conclusion, repairing and concealing drywall imperfections can enhance the appearance and longevity of your walls.
By carefully assessing the issue, choosing the proper materials, and employing the appropriate techniques, you can effectively address any blemishes and restore your walls to a smooth, attractive finish.
Step | Description |
|---|---|
1 | Inspect the imperfections on the drywall and determine their type (e.g., holes, cracks, dents, or seams). |
2 | Choose the appropriate material and tools for the type of imperfection you’re fixing (e.g., joint compound, spackle, putty knife, or sandpaper). |
3 | Clean the area around the imperfection to remove any dust or debris which could prevent the repair materials from bonding properly. |
4 | Apply the chosen material to the imperfection using a putty knife or other appropriate tool. Be sure to feather the edges and blend them into the surrounding drywall for a seamless appearance. |
5 | Allow the repair materials to dry completely, as per the manufacturer’s recommendations. |
6 | Once the materials are dry, sand the area using fine-grit sandpaper to create a smooth, even surface. |
7 | Wipe away any dust or debris from sanding with a clean, damp cloth. |
8 | Prime and paint the area to match the surrounding drywall, effectively hiding the imperfection. |