Preparing Surfaces For Special Finishes And Effects
As artists and designers, we understand the importance of achieving that perfect finish or eye-catching effect for your project. It may seem like a daunting task, but fear not – we have the expertise and knowledge to guide you every step of the way. Preparing surfaces for special finishes and effects is a process that requires attention to detail, and we’re here to provide you with the best techniques, tips, and tricks to make your vision come to life.
Preparing surfaces for special finishes and effects:
Preparing surfaces for special finishes and effects involves proper surface preparation, including cleaning, repairing, and smoothing the surface. Techniques include removing dust, dirt, grease, and oil; filling holes and cracks; sanding; and priming the surface. Follow manufacturer instructions for specific finishes and effects for optimal results.

There’s an art to achieving the perfect surface for special finishes and effects. Uncover expert tips and tricks for preparing different surfaces, from drywall to wood, and explore a variety of finishes to elevate your space.
Whether you’re a beginner or a pro, you’ll find valuable insights and inspiration in the following sections. Don’t miss out. Read on!
Contents
- 1 Getting Surfaces Ready for Unique Finishes & Effects
- 2 Necessary Steps Before Applying Surface Finishes
- 3 Different Techniques for Surface Preparation
- 4 Understanding Surface Preparation & Finish Treatments
- 5 Surface Preparation Basics for Refinishing Tasks
Getting Surfaces Ready for Unique Finishes & Effects
• Understanding Surface Preparation
Before diving into the specific techniques for preparing surfaces for special finishes and effects, it’s essential to understand the importance of surface preparation. Proper surface preparation is crucial for achieving a professional, durable, and long-lasting finish or effect.
Surface preparation involves cleaning, repairing, and smoothing the surface to create a consistent, stable base for applying the finish or effect. Some helpful resources on this topic are available through non-commercial sites such as Surface Preparation and Pretreatment from NASA.
• Cleaning the Surface
– Removing Dust and Dirt
Start by thoroughly cleaning the surface to be finished or treated. This step is especially important as it ensures the proper adhesion of the special finish or effect.
Use a soft brush or vacuum cleaner to remove any loose particles of dust and dirt. For stubborn dirt, use a damp sponge or cloth, ensuring the surface is completely dry before proceeding.
– Removing Grease and Oil
To remove grease and oil, use a degreaser or a mild detergent mixed with warm water. Thoroughly scrub the surface and then rinse with clean water. Again, ensure the surface is completely dry before continuing with the preparation process.
• Repairing Surface Imperfections
– Filling Holes and Cracks
Inspect the surface for any holes, cracks, or other imperfections. Use an appropriate filler to fill any holes or cracks, following the manufacturer’s instructions. Some common types of fillers include:
- Pre-mixed all-purpose filler
- Two-part epoxy filler
- Lightweight spackle (for small holes and cracks)
- Joint compound (for larger holes and cracks)
After the filler has dried, sand the surface with fine-grit sandpaper to ensure a smooth finish.
– Fixing Uneven Surfaces
If the surface is uneven or has visible seams, use a leveling compound to create a consistent surface. Follow the manufacturer’s instructions for mixing and application, then use a wide, flat trowel to spread the compound evenly over the surface.
Allow the compound to dry, then sand it until it is smooth and level.
• Sanding the Surface
– Choosing the Right Grit
Sanding is crucial for ensuring proper adhesion of the special finish or effect to the surface. Choose sandpaper with the appropriate grit for the job:
- Coarse grit (40-60) for removing old paint or finishes
- Medium grit (80-120) for smoothing rough surfaces
- Fine grit (150-180) for preparing surfaces for painting or staining
– Sanding Techniques
Always sand in the direction of the grain, using even pressure and a back-and-forth motion. Sanding against the grain can cause scratches and create an uneven surface.
Sand the entire surface, including edges and corners, and ensure any previous finishes are removed. After sanding, remove any residual dust with a tack cloth or vacuum cleaner.
– Sanding Sponges vs. Sandpaper
While traditional sandpaper works well for most sanding tasks, consider using a sanding sponge for curved, intricate, or uneven surfaces. Sanding sponges offer increased flexibility and durability, making them better suited for these challenging surfaces.
• Priming the Surface
– Selecting the Right Primer
Primers are essential for providing a uniform, stable base for the special finish or effect. Choose a primer that is compatible with the material of the surface and the specific finish or effect you intend to apply. Some common types of primers include:
- Water-based or acrylic primer for drywall, wood, and metal
- Shellac-based primer for water stains, odors, or knots in wood
– Applying the Primer
Using a brush, roller, or sprayer (depending on the size and complexity of the surface), apply a thin, even coat of primer. Allow the primer to dry completely before proceeding, following the manufacturer’s recommended drying times.
• Additional Preparation for Special Finishes and Effects
Depending on the specific finish or effect, additional preparation steps may be necessary. For example:
- For metallic finishes, a base coat of a similar color may be required
- For textured effects, additional layers of primer or a specialized base coat may be needed
Always research and follow the manufacturer’s instructions for your chosen finish or effect to ensure optimal adhesion, durability, and appearance.
• Conclusion
Proper surface preparation is the foundation for achieving professional, long-lasting special finishes and effects. By following the steps outlined in this guide, you can create a stable, consistent base that enhances the final appearance and durability of your chosen finish or effect.
Always consult the manufacturer’s instructions and seek expert advice as needed to ensure the best possible results.
Necessary Steps Before Applying Surface Finishes
Surface finishing is a process that adds a thin layer or coating to the surface of a part or product. It enhances the final appearance, improves durability, and protects the surface against rust, moisture, and other external factors.
Before applying a surface finish, it’s crucial to prepare the surface properly to ensure a strong bond, even coverage, and a long-lasting finish.
• Clean the Surface Thoroughly
Before any surface finish is applied, the part or product must be cleaned thoroughly. Any dirt, grease, oil, or other contaminants can cause the surface finish to bond weakly or create an uneven appearance. There are several methods to clean surfaces, including:
- Degreasing: This process helps remove grease and oil from the surface by using an appropriate degreasing agent, such as a commercial degreaser or an aqueous cleaning solution.
- Vapor degreasing: This method works by heating the solvent to create a vapor that condenses on the part, dissolving contaminants and carrying them away as the vapor evaporates.
- Ultrasonic cleaning: Ultrasonic waves in a cleaning solution create pressure variances that break down contaminants and lift them from the surface.
- Abrasive blasting: Also known as sandblasting or grit blasting, this process uses high-pressure air to propel abrasive particles against the surface to remove contamination and roughen the surface for better adhesion of the finish.
After cleaning, always rinse the surface with clean water, and let it dry completely to prevent trapped moisture, which can lead to peeling or blistering of the finish.
• Inspect and Repair Defects
A surface with defects, like cracks, dents, scratches, or other irregularities, can compromise the quality and durability of the surface finish. Therefore, before you proceed to apply a finish, inspect the surface carefully to identify and repair any imperfections.
- Fill dents and scratches: For small dents and scratches, use a suitable filler material, such as body filler or epoxy putty. Follow the manufacturer’s instructions for proper mixing and application. Allow the filler to cure fully, and sand it smooth to match the surrounding surface.
- Repair cracks: If the surface has cracks, it’s important to address them before applying a finish. In most cases, you’ll need to remove the cracked portion and replace it with a new material or use a patch. For large or deep cracks, consult an expert to ensure structural integrity.
• Sand and Smoothen the Surface
Sanding is an essential step in preparing a surface for finishing, as it creates a smooth and uniform texture while also improving the adhesion of the finish. Depending on the type and condition of the surface, sanding can be done using various grit sizes and sanding tools. Follow these general guidelines:
- Remove roughness: Start with coarse grit sandpaper, such as 80 or 100 grit, to remove any rough spots or inconsistencies in the surface. Apply even pressure and sand in the direction of the grain, if applicable (e.g., for wood surfaces).
- Create a uniform texture: Progress to medium-grit sandpaper (e.g., 150 or 180 grit) to even out the overall surface texture. A random orbital sander can be helpful in achieving a more consistent finish.
- Final smoothing: Finish sanding the surface with fine-grit sandpaper, such as 220 or 320 grit, to create a smooth and defect-free surface.
Once sanding is complete, ensure that all dust and debris are removed using a soft brush, vacuum, or air compressor. Wipe the surface with a tack cloth or a clean microfiber cloth to eliminate any remaining particles.
• Choose the Right Surface Finish
There are numerous types of surface finishes available, from paint and clear coatings to plating and anodizing. Each offers different levels of protection, aesthetics, and performance characteristics.
Choose the most suitable finish for your project based on factors such as application, environment, and desired appearance. Consult manufacturers’ recommendations and industry standards (such as ASM International materials designations) to ensure that the chosen finish meets the required specifications.
• Apply a Primer (If Applicable)
A primer is a preparatory coating applied to the surface before the finish is applied. It enhances the adhesion of the finish, provides additional protection against corrosion and other environmental factors, and promotes a more uniform finish.
Not all surface finishes require a primer, but if your chosen finish does, follow the manufacturer’s guidelines for proper primer selection, application, and curing.
• Conclusion
By following these essential preparation steps, you can ensure that your chosen surface finish bonds strongly, looks great, and lasts a long time. Proper cleaning, defect repair, sanding, and finish selection are crucial to achieving a professional and high-quality final appearance.
Different Techniques for Surface Preparation
Surface preparation is a crucial step in many industrial processes, as it ensures the proper adhesion, performance, and longevity of coatings, adhesives, and other applied materials.
• Mechanical Surface Preparation Methods
– Abrasive Blasting
Abrasive blasting, also known as sandblasting or grit blasting, is a process where abrasive particles are forcefully propelled against a surface to remove contaminants, roughen a smooth surface, or smooth a rough surface.
Various types of abrasive media can be used, such as sand, glass beads, steel shot, or aluminum oxide. The choice of abrasive depends on the material being prepared and the desired surface finish.
- Advantages: Abrasive blasting is versatile, can remove various contaminants, and offers a range of surface finishes.
- Applications: This method is commonly used in industries such as automotive, aerospace, and shipbuilding for surface cleaning, corrosion control, and surface profiling.
– Grinding
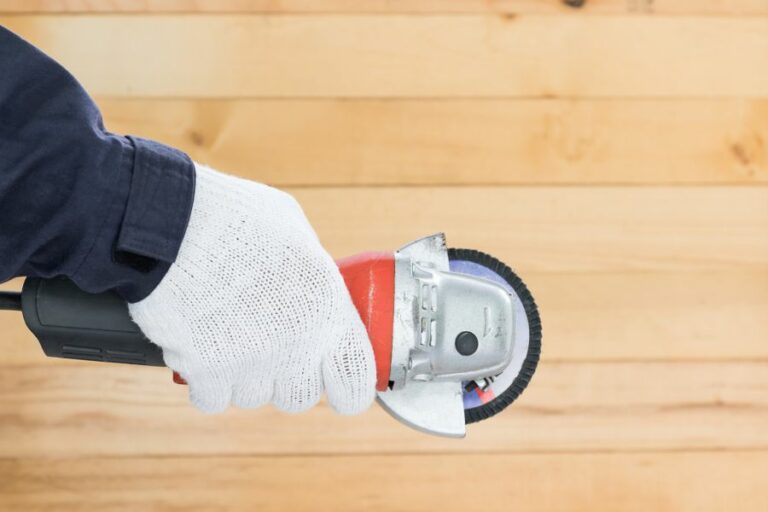
Grinding is a process that removes material from a surface by mechanical action with abrasive particles, typically bonded to a wheel. Grinding is widely used for surface preparation, as it can remove various contaminants and create different surface textures.
- Advantages: Grinding can be used on various materials, offers precise control, and provides a smooth, even finish.
- Applications: This method is commonly used in industries such as automotive, manufacturing, and metalworking for tool sharpening, preparation of weld edges, and surface conditioning.
Find more information on grinding techniques and applications from this ManufacturingET.org article.
– Shot Peening
Shot peening is a mechanical process in which small spherical media, such as steel or ceramic shot, are impacted onto a surface to create residual compressive stress. This process helps improve the fatigue life of materials, as well as their resistance to stress corrosion cracking and other types of failure.
- Advantages: Shot peening can improve the mechanical properties of materials, reduce the risk of fatigue-related failures, and extend the lifespan of components.
- Applications: This method is often used in industries such as aerospace and automotive to improve the durability of structural components, engine parts, and gears.
• Chemical Surface Preparation Methods
– Acid Etching
Acid etching is a chemical method in which acids, such as hydrochloric or phosphoric acid, are used to remove contaminants and create a rough surface profile. This method is often used for pre-treating concrete and metal surfaces that require strong adhesion.
- Advantages: Acid etching can remove contaminants from corroded surfaces and provide moderate roughness for better adhesion.
- Applications: This method is used in industries such as construction, manufacturing, and metalworking for surface cleaning, rust removal, and pre-treatment of materials.
– Pickling
Pickling is a chemical process that involves immersing a metal surface in an acidic solution, typically consisting of hydrochloric or sulfuric acid, to remove impurities, rust, and scale. This process helps create a clean and smooth surface, improving the material’s resistance to corrosion and enhancing the adhesion of coatings.
- Advantages: Pickling can effectively remove surface contaminants and improve the corrosion resistance of materials.
- Applications: This method is commonly used in industries such as steel manufacturing, food processing, and electronics for cleaning, descaling, and passivation of metal surfaces.
• Thermochemical Surface Preparation Methods
– Flame Cleaning
Flame cleaning is a process that involves the use of a high-temperature propane or acetylene flame to heat and clean the surface of metal components. The intense heat causes contaminants to burn off, leaving a clean surface for coating applications.
- Advantages: Flame cleaning is fast, economical, and can effectively remove contaminants such as rust and mill scale.
- Applications: This method is commonly used in the construction, shipbuilding, and mining industries for surface cleaning and conditioning.
– Plasma Treatment
Plasma treatment is a thermochemical process that involves the use of a low-pressure, high-frequency electrical discharge to generate reactive gas species which interact with the surface of a material.
This method can clean, activate, and modify the surface properties of various materials, such as polymers, metals, and ceramics.
- Advantages: Plasma treatment is a non-contact, environmentally friendly, and versatile surface preparation method that can be used on a wide range of materials.
- Applications: This method is widely used in industries such as electronics, automotive, and medical devices for surface cleaning, adhesion enhancement, and deposition of functional coatings.
In conclusion, surface preparation methods are essential components of many industrial processes, as they ensure the proper performance and longevity of applied materials.
By understanding the characteristics, advantages, and applications of these methods, you can select the most suitable one for your specific project requirements. Proper surface preparation will ultimately lead to better overall results in your work.
Method | Description |
|---|---|
Cleaning | Removal of dust, dirt, grease, and other contaminants from the surface using solvents, detergents, or other cleaning agents. |
Abrasive Blasting | Using high-pressure air or water to propel abrasive particles against the surface, removing rust, mill scale, or old coatings, and creating a rough surface for better coating adhesion. |
Hand and Power Tool Cleaning | Using hand tools (such as wire brushes) or power tools (such as grinders and sanders) to remove loose rust, mill scale, or old coatings and to create a rough surface for better coating adhesion. |
Chemical Stripping | Applying chemical strippers to remove old coatings or rust from the surface, followed by neutralization and cleaning. |
Acid Etching | Treating the surface with a mild acid solution to remove contaminants and create a rough surface for better coating adhesion. |
Ultrahigh-Pressure Water Jetting | Using water at extremely high pressure to remove contaminants, rust, mill scale, and old coatings from the surface. |
Understanding Surface Preparation & Finish Treatments
Surface preparation is an essential step in the process of applying different types of finishes to various materials, such as wood, metal, and concrete. A thoroughly prepared surface ensures better adhesion of the finish, improves durability, and enhances the overall aesthetic appeal of the surface.
• The Importance of Proper Surface Preparation
Before applying any finish, it is crucial to thoroughly clean and prepare the surface. Proper surface preparation ensures that the finish adheres to the material properly, significantly improving its durability and aesthetic appeal.
Several factors affect the outcome of a finish, such as the type of material, the condition of the surface, and the environmental conditions during application. These factors need to be carefully considered during each stage of preparation to achieve the desired result.
• Methods of Surface Preparation and Treatment
– Cleaning and Degreasing
The first step in surface preparation is cleaning and degreasing. This process involves removing all dirt, dust, grease, and other contaminants from the surface. For best results, use detergents or degreasing agents specifically designed for the material being cleaned.
High-pressure water jetting or steam cleaning may also be used to remove stubborn dirt and grime, particularly on large surfaces or in hard-to-reach areas. After cleaning, thoroughly rinse the surface with clean water and allow it to dry completely.
– Sanding and Abrasion
Sanding and abrasion are necessary for the removal of old finishes, the smoothing of rough or uneven surfaces, and the creation of a better bond between the new finish and the material.
These techniques entail the use of abrasive materials such as sandpaper, abrasive pads, or power sanders to manually or mechanically smooth the surface.
It is recommended to start with a coarse grit abrasive and gradually progress to finer grits for an even, smooth finish. Always sand in the direction of the grain, particularly on wooden surfaces, to prevent scratches and ensure a consistent appearance.
– Chemical Stripping
Chemical stripping is the process of removing old finishes using chemical agents in liquid or gel forms. This method is particularly effective in removing paint, varnish, or other coatings from surfaces without causing damage.
Ensure proper ventilation and personal protective equipment when working with chemical strippers, as these substances may pose health and environmental hazards. Follow the manufacturer’s instructions carefully and allow the stripper to work for the specified time before removing it, along with the old finish, using a scraper or a stiff-bristle brush.
– Surface Repair
After cleaning, sanding, and stripping, the surface may require repair to address any cracks, holes, or other imperfections. This step is critical to achieving a smooth and even finish, particularly on wood. Fill any gaps or cracks with a suitable filler, and allow it to dry before sanding the area smooth.
• Treatment of Specific Materials
– Wood
Wooden surfaces require special attention to ensure the best possible finish. After completing the surface preparation steps mentioned earlier, it is recommended to apply a wood conditioner before staining or painting.
This step helps prevent blotching and uneven absorption of the stain or paint, resulting in a more consistent finish.
– Metal
Metals, particularly ferrous metals such as iron and steel, may require additional steps to prevent corrosion. After surface preparation, the application of a suitable primer is essential to protect the metal, improve adhesion, and create a uniform base for the final coat of paint.
– Concrete
Concrete surfaces require unique treatments to ensure proper finish adhesion. These treatments may include acid etching or a surface hardener to improve the bond between the finish and the concrete surface.
• Conclusion
In summary, proper surface preparation and treatment play an essential role in ensuring the adhesion, durability, and appearance of different finishes.
By following the recommended processes and using the appropriate methods for specific materials, you can achieve professional-quality results with lasting effects.
Surface Preparation Basics for Refinishing Tasks
Surface preparation for refinishing is a crucial step in any refinishing project, whether it is the restoration of furniture, flooring, or other surfaces. The quality of the final product is often determined by the time and effort invested in proper surface preparation.
• The Importance of Surface Preparation
Proper surface preparation is key to achieving a lasting and flawless finish. A well-prepared surface ensures the following benefits:
- Adhesion: Adequately preparing the surface allows the refinishing material, such as paint or varnish, to adhere more effectively. A poorly prepared surface may lead to issues such as peeling or chipping.
- Durability: A well-prepared surface will also absorb the refinishing material better, giving the finished product more durability and longevity.
- Smooth finish: A surface with blemishes, imperfections, or inconsistencies will show through the refinishing material, affecting the final appearance. Surface preparation will help remove these imperfections so the end result looks professional and smooth.
- Customer satisfaction: Ultimately, investing in thorough surface preparation can lead to satisfied clients who are happy with the quality and finish of their refinishing project.
• Techniques for Proper Surface Preparation
There are several methods commonly employed for surface preparation, each with its own merits and drawbacks. Choosing the right technique will depend on the type of surface being prepared and the specific refinishing project at hand.
– Cleaning
Cleaning is the first and foremost step in surface preparation. The surface must be free of dirt, dust, grime, and grease. Using appropriate cleaning agents and tools, ensure that the surface is spotlessly clean and free of any contaminants.
For instance, degreasing agents may be used to remove oil or grease from metal surfaces, while wood surfaces may require the use of wood cleaners or mild soap and water.
– Sanding
Sanding helps remove imperfections such as scratches, dents, and old paint or varnish. It also promotes better adhesion of the refinishing material. There are various types of sandpaper available, with varying grit levels to accommodate different surfaces and purposes.
- For painted or varnished surfaces, medium-grit sandpaper (80-120 grit) is generally recommended. Sand the surface thoroughly, making sure to get into any nooks and crannies.
- For bare wood surfaces, start with a coarser grit (such as 60 or 80) and work your way up to a finer grit (150 or 180) for a smooth finish.
Always sand in the direction of the grain when working with wood, and wipe the surface clean with a tack cloth or damp rag to remove sanding dust.
– Stripping
Stripping may be necessary if the current finish on the surface is very thick or has failed. Chemical strippers or mechanical methods such as sanding or scraping can be used to remove the old finish, depending on the specific situation.
Follow the manufacturer’s instructions when using chemical strippers and take appropriate safety precautions, such as wearing gloves and ensuring proper ventilation.
– Patching and Repair
Inspect the surface for any damage, such as holes, gouges, or cracks. Depending on the material and extent of damage, appropriate fillers or repair compounds can be used to fix these imperfections. Allow the filler to dry completely before sanding it down to be level with the surrounding surface.
– Primer
Primers are commonly used as a preparatory coating for refinishing projects. They help with adhesion, enhance durability and provide a uniform base for the topcoat.
Different materials and surfaces may require specific primer types, so consult the manufacturer’s instructions and recommendations when selecting a primer.
• Ensuring Success
When embarking on a refinishing project, it is essential to invest time and effort in proper surface preparation. By following the techniques outlined above, you will set the stage for a successful refinishing job, resulting in a high-quality and durable finish that leaves lasting impressions.

