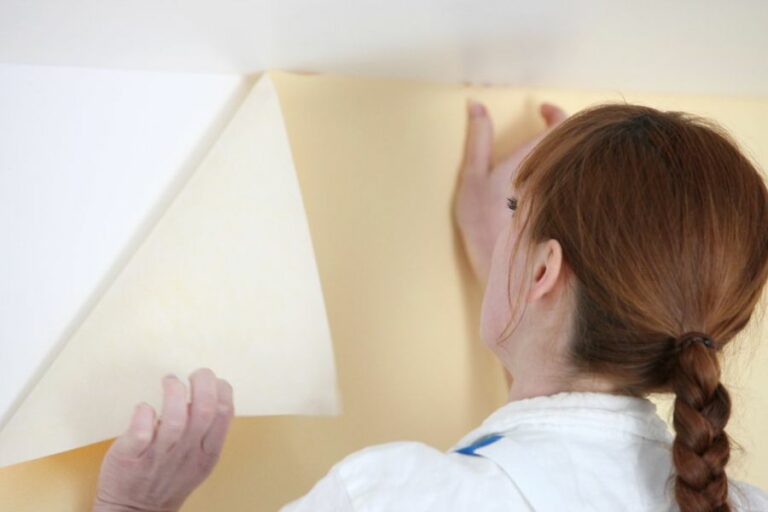
Ready Textured Areas For Paint Application. What Pros Say
Are you tired of uneven paint application on surfaces with inconsistent textures? We have the ultimate solution to prepare your surfaces for a smooth and flawless paint job. Our foolproof method of creating ready textured areas for paint application will leave you with astonishing results and an impeccable finish.
Ready textured areas for paint application:
Proper surface preparation is crucial for a professional and durable paint finish on ready-textured areas. It involves assessing the surface condition, cleaning, repairing imperfections, priming, and using the correct paint application method. Adequate preparation ensures better adhesion and increased longevity and prevents extra coats and costly repairs.

Discover the secrets to achieving beautifully textured surfaces primed for painting! Explore our expert tips on preparing various textures, suitable materials, and step-by-step techniques to create visually stunning artwork. Unleash your creativity and elevate your painting skills. Read on!
Contents
- 1 Pre-textured Surfaces for Seamless Paint Application
- 2 Techniques for Adding Texture Prior to Painting
- 3 Preparing Textured Walls for a Fresh Coat of Paint
- 3.1 • Assess the Wall Condition
- 3.2 • Gather Supplies
- 3.3 • Protect Floors and Furniture
- 3.4 • Clean the Wall Surface
- 3.5 • Sand the Wall
- 3.6 • Repair Textural Imperfections
- 3.7 • Apply Painter’s Tape
- 3.8 • Prime the Wall
- 3.9 • Choose the Right Paint
- 3.10 • Apply the Paint
- 3.11 • Remove Painter’s Tape and Clean Up
- 3.12 • Inspect and Admire Your Work
- 4 Exploring Textured Paint Options and Availability
- 5 Painting Directly onto Drywall Texture: A Guide
Pre-textured Surfaces for Seamless Paint Application
• Importance of Proper Surface Preparation
One of the most critical steps in achieving a professional and durable paint finish lies in the proper preparation of the surface.
This cannot be stressed enough as a well-prepared surface will not only result in a better finish but will also increase the overall longevity of the paint job. In addition, time spent on good surface preparation will save on extra coats of paint and costly repairs in the future.
For this reason, it is essential for DIY enthusiasts and professional painters alike to understand the importance of ready-textured areas for paint application.
• Types of Textured Surfaces
There are several types of textured surfaces that one might encounter when painting. Some examples include:
- Smooth surfaces such as drywall and plaster
- Textured surfaces, including knockdown, stippled, or popcorn textures
- Rough surfaces such as masonry, concrete, and stucco
Identifying the type of surface you are working with is crucial in determining the appropriate preparation techniques and choosing the correct paint products.
• Assessing the Surface Condition
Before you can begin preparing the surface for painting, it is crucial first to assess its condition. This involves closely examining the surface for any defects, cracks, or imperfections that might impact the paint adhesion and overall durability. Some of the common surface issues to look for include:
- Cracks
- Bubbles, blisters, or peeling paint
- Water stains or damage
- Mold and mildew
- Efflorescence on masonry surfaces
If you encounter any of these problems, they must be addressed before moving on to the next steps in the surface preparation process.
• Cleaning the Surface
Once you have assessed the surface condition, it is time to clean it thoroughly. Dust, dirt, grease, and other contaminants on a surface can prevent proper paint adhesion and should be removed before painting.
A clean surface will ensure a better bond between the paint and the substrate, leading to a more durable and long-lasting finish.
For most surfaces, a simple solution of mild dish soap and water will be sufficient to remove dirt and grime. In cases where mold or mildew is present, using a solution of 1 part bleach to 3 parts water is recommended.
Make certain always to rinse the surface with clean water after using any cleaning solution, and allow it to dry completely before moving on to the next steps.
• Repairing Surface Imperfections
Once the surface is clean and free of contaminants, it is time to address any imperfections or defects. This can include filling any cracks or holes with a suitable patching compound, sanding down rough areas, or repairing damaged sections of drywall or plaster.
For instance, on a textured surface like knockdown or stippled finishes, using a premixed texture compound like U.S. Gypsum SHEETROCK Textures will help to blend in any patched areas with the existing texture.
Make sure to follow the manufacturer’s guidelines while using these products, ensuring a seamless repair.
• Priming the Surface
Priming is an essential step in the surface preparation process, especially when dealing with ready-textured areas for paint application. If you are painting over a previously painted surface, applying a suitable primer is critical to ensure proper adhesion between the new paint and the existing finish.
Moreover, the primer helps to seal porous surfaces, facilitating a more consistent and even application of the topcoat. It can also aid in stain-blocking, preventing any imperfections from bleeding into the new paint job.
There are different types of primers available on the market, each formulated for specific surface types and requirements. Choosing the right primer for your surface will make a significant difference in the overall finish and durability of the paint job.
It is always advisable to consult the paint product’s label or seek professional guidance to select the best primer for the task at hand.
• Applying the Paint
With surface preparation complete, you are now ready to apply the paint. Make sure to follow the manufacturer’s guidelines for both the primer and paint, including ventilation, drying times, and ideal temperatures for application.
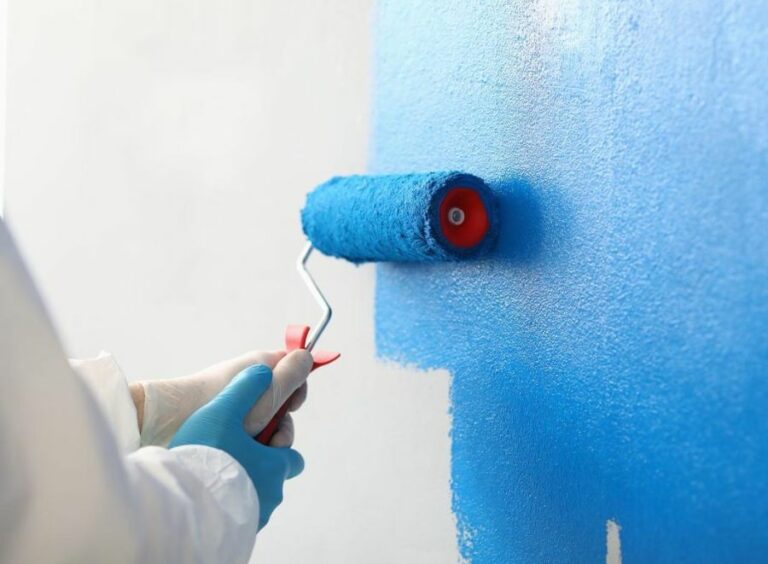
When applying paint to textured surfaces, choosing the proper application method is essential. Rollers with a thicker nap are often recommended, as they can better cover textured surfaces and get into the crevices more efficiently than a brush or sprayer.
Be sure to use the appropriate roller nap length based on the texture depth, ensuring proper coverage and an even finish.
• Conclusion
To sum up, proper surface preparation is key to achieving a professional and durable paint finish. By thoroughly cleaning, repairing, priming, and using the correct application method, you can ensure a successful paint job that will last for years to come.
Remember, time spent on adequate surface preparation will save on extra coats of paint and costly repairs in the future. So, take the necessary steps to properly prepare your ready textured areas for paint application to enjoy a beautiful, lasting result.
Techniques for Adding Texture Prior to Painting
• Understanding the Importance of Texture
Incorporating texture into your artwork adds depth and character, making the piece visually intriguing. Different textures evoke different feelings, and understanding how to add texture before painting can significantly enhance your work’s effectiveness.
• Preparing the Surface
It’s crucial to prepare your painting surfaces before applying texture. Proper preparation ensures that the texture adheres well and lasts longer. A well-prepared surface will also prevent the texture from deteriorating over time, thus helping maintain the piece’s integrity.
– Priming the Surface
Before adding texture, you should prime your surface, especially with porous surfaces like canvas or wood. Priming not only prevents the absorption of paint but also strengthens the surface and keeps the texture from sinking over time.
I recommend using a good-quality gesso for priming the surface. Apply one or more coats of gesso, depending on the porosity of the surface, and let it dry completely before moving on to the next step.
• Techniques for Adding Texture
There are numerous ways to add texture to your painting surface. Some popular methods include:
– Using Modeling Paste
Modeling paste, also known as molding paste or sculpting paste, is a thick, heavy acrylic gel medium that dries into a hard, matte finish. You can directly apply modeling paste to your surface using a palette knife, brush, or other texturing tools.
Experiment with different application techniques and layer thicknesses to achieve desired textures. Modeling paste can also be mixed with acrylic paint to create colored textures.
– Applying Collage Elements
Another technique for adding texture is incorporating collage elements onto the surface. Collage materials include paper, fabric, thin layers of wood and other textured materials that can be adhered to the surface using an adhesive like matte medium or gel medium.
Apply the medium to both the surface and the collage elements, allowing each layer to dry completely before adding the next one.
– Utilizing Texture Gels and Mediums
Texture gels and mediums are designed to create special effects when mixed with acrylic paint or applied directly onto the surface. These products come in a variety of forms, such as glass beads, pumice stones, and sand textures, to name a few.
By mixing these mediums with paint or using them alongside paint, you can create various surface textures and effects.
– Implementing Impasto Techniques
Impasto painting is a technique in which thick layers of paint are applied to create raised textures. To achieve impasto effects, use thick-bodied acrylic or oil paints and apply them generously to the surface using a brush, palette knife, or other tools.
This technique is closely related to the use of modeling paste, as explained earlier.
• Painting Over the Texture
Once you’ve added texture to your surface and allowed it to dry completely, it’s time to start painting. To create a cohesive artwork, consider the following tips:
– Creating Tonal Variations
Use your brush or palette knife to apply paint in varying degrees of thickness and opacity over the textured surface. This creates tonal variations that add depth and interest to your painting.
– Enhancing the Texture with Glazes
Glazing is a technique that involves applying thin layers of transparent or semi-transparent paint over the textured surface. This helps emphasize the texture and create a sense of depth. Use a soft, wide brush to apply the glazes, and let each layer dry before applying the next one.
– Dry Brushing
Dry brushing refers to the application of paint with a brush that has minimal or no solvent. This technique highlights the textured surface by leaving color only on the raised areas, creating a captivating contrast.
• Final Thoughts
Adding texture before painting is an exceptional way to elevate your artwork and create visually stimulating, engaging pieces. Experiment with various techniques and materials to discover the best approach to suit your artistic vision.
Remember to prepare your surface, choose an appropriate method, and utilize effective painting techniques to optimize the impact of the added texture.
Preparing Textured Walls for a Fresh Coat of Paint
Textured walls add character and charm to a room, but they can also present challenges when it comes to painting.
• Assess the Wall Condition
Before starting, examine the wall closely for any imperfections such as cracks, holes, or loose plaster. If the wall is heavily damaged, it may be necessary to repair or retexturize the surface before painting. The U.S. Department of Housing and Urban Development provides useful information on repairing walls.
• Gather Supplies
Collect the necessary tools and materials for prepping and painting your textured wall. These typically include:
- Drop cloths or plastic sheeting
- Painter’s tape
- Sandpaper or sanding block
- Primer
- Paint
- Paint roller and/or brushes
- Paint tray
- Ladder or step stool
- Extension pole for paint roller (optional)
• Protect Floors and Furniture
Begin by removing any furniture or movable items from the room. Lay drop cloths or plastic sheeting on the floor to protect it from paint spills or drips. If you have any delicate or valuable items in the room, cover them with plastic or sheets for added protection.
• Clean the Wall Surface
Use a vacuum cleaner or a soft-bristle brush to remove any loose dirt, dust or cobwebs from the textured wall. Next, mix a solution of mild detergent and warm water to clean the wall thoroughly. Rinse the wall with clean water and allow it to dry completely before moving on to the next step.
• Sand the Wall
Lightly sand the wall using medium-grit sandpaper or a sanding block to remove any loose or flaking paint.
This helps create a smoother surface for the new paint to adhere to. Be sure to wear a dust mask and safety goggles while sanding since the sanding process generates fine dust particles that can irritate your eyes and lungs.
• Repair Textural Imperfections
Fill any cracks or small holes in the wall using a suitable filler, such as spackling compound or joint compound. Refer to the manufacturer’s instructions for proper use and drying time. Once the filler is dry, lightly sand the repaired areas to blend them in with the rest of the wall’s texture.
• Apply Painter’s Tape
Use painter’s tape to mask off any areas you want to protect from paint, such as baseboards, window and door frames, and outlets. Make sure the tape is pressed firmly onto the surface for a clean, crisp edge when painting.
• Prime the Wall
Applying a primer to the textured wall is crucial for a professional-looking paint job. Primer helps the paint adhere better to the surface and ensures that the final color appears true and even.
Use a paint roller or brush to apply a coat of primer, paying attention to any recessed areas of the texture. Allow the primer to dry according to the manufacturer’s instructions.
• Choose the Right Paint
Select a paint that’s suitable for textured walls. Flat or matte finishes are recommended, as they help to conceal any imperfections in the wall’s texture. Paint with a higher sheen, such as satin or semi-gloss, will highlight any unevenness in the wall.
• Apply the Paint
Using a paint roller or brush, apply the first coat of paint to the textured wall. Move in small sections and apply even pressure to ensure consistent coverage. Pay special attention to any recessed areas of the texture, which may require a second pass with the roller or brush.
Allow the first coat of paint to dry, then inspect the wall for any areas that need touch-ups or a second coat. If necessary, apply a second coat of paint and allow it to dry completely.
• Remove Painter’s Tape and Clean Up
Carefully remove the painter’s tape from the wall, pulling it away at a 45-degree angle to avoid damaging the freshly painted surface. Dispose of the used tape, plastic sheeting, and drop cloths. Clean your brushes, rollers, and paint tray with soap and water, and store them properly for future use.
• Inspect and Admire Your Work
Once your textured wall is dry and everything is cleaned up, take a step back and admire the professional-looking results. Enjoy the new, fresh appearance of your textured wall, knowing that you successfully prepped and painted it yourself.
Step | Description |
|---|---|
1 | Clear the wall of any objects, remove any obstructions, and protect the surrounding area with drop cloths. |
2 | Inspect the wall for any damage or areas that need repair, such as cracks or peeling paint. Patch these areas as necessary. |
3 | Clean the wall using a damp cloth or sponge to remove dirt, dust, and grease. |
4 | Allow the wall to dry completely before proceeding. |
5 | Apply a coat of primer to the wall, ensuring that the textured surface is evenly covered. Allow the primer to dry according to the manufacturer’s instructions. |
6 | Apply the first coat of paint using a roller designed for textured surfaces. Move in different directions to ensure even coverage. Allow the paint to dry according to the manufacturer’s instructions. |
7 | Apply a second coat of paint if necessary, allowing it to dry completely before removing any protective materials and replacing any wall fixtures. |
Exploring Textured Paint Options and Availability
There’s good news for those who are looking to add some depth and character to their walls, ceilings or other surfaces. You can indeed buy paint with texture in it, and it’s a fantastic and easy way to add that extra dimension to your space.
• Types of Textured Paints
– Sand Textured Paint
As the name suggests, this type of paint has fine sand particles mixed in, which provides a rough, sand-like finish. Sand-textured paint is excellent for hiding imperfections on surfaces or for adding a rustic, beachy feel to your space.
– Venetian Plaster
This is a combination of plaster and paint that results in a smooth, polished and glossy surface reminiscent of the beautiful plasterwork found in historic Venetian homes. Venetian plaster is highly versatile and can be used to create various finishes, including marble and limestone looks.
– Knifed and Troweled Textures
These are thicker textured paints that are applied with a knife or trowel, resulting in a more heavy-handed and dramatic texture on your surface. They can be used to create a bold accent wall or to add a unique touch to your ceilings.
– Popcorn Paint
This is a thick paint with small, sponge-like particles that provide a bumpy, popcorn-like texture when applied to walls and ceilings. Popcorn paint is often used to hide imperfections and minimize echo in large rooms.
• Application of Textured Paints
– Surface Preparation
Like any paint job, the key to a successful textured finish is in the preparation. Ensure the surface is clean, dry, and free of any loose debris or old paint. Repair any existing cracks or holes and, for best results, prime the surface before applying the textured paint.
– Choosing The Right Tools
Based on the type of textured paint and desired effect, you’ll need to choose the appropriate application tools, such as brushes, rollers, trowels, or paint sprayers. For example, sand-textured paint can be applied with a brush or roller, while troweled textures require a trowel or a putty knife for application.
– Mixing and Applying Textured Paint
Follow the manufacturer’s directions for mixing the paint, and keep in mind the consistency you are looking for based on your chosen texture. For instance, a thicker consistency might be required for a troweled texture, while a thinner mixture works better for a roller-applied sand texture.
Start by applying the paint in small sections and use the appropriate techniques for your chosen texture. When working with troweled textures, try using a variety of trowel angles to create interesting patterns and designs.
For Venetian Plaster, apply the paint in thin layers, polishing each layer before moving to the next.
• Tips for a Successful Textured Paint Project
– Practice Makes Perfect
Before jumping into the main project, practice on a scrap piece of drywall or wood to get a feel for the texture and application process.
– Test Your Color Choices
Keep in mind that the texture itself can alter the perception of the color you’ve chosen, so always test the paint on a small section before committing to the entire wall or room.
– Work in Small Sections
Textured paint can dry more quickly than regular paint, so work in small, manageable sections to ensure an even application and finish.
– Be Patient with Drying Times
Textured paints often require longer drying times than regular paint, so be patient and allow the surfaces to dry fully before touching or adding any additional layers.
In conclusion, textured paint is a fantastic way to personalize your space and create unique finishes that add depth and character to your surfaces.
By understanding the types of textured paints available, using the right tools and application techniques, and following our helpful tips, you’ll be well on your way to transforming your walls and ceilings into works of art.
Question | Answer |
|---|---|
Can you buy paint with texture in it? | Yes, textured paint is available on the market. It contains additives that create a rough or grainy surface, which can be used for various effects and finishes. |
Painting Directly onto Drywall Texture: A Guide
Absolutely, you can paint directly on drywall texture. However, there are certain aspects to consider, such as the type of texture, the choice of paint, and the overall process, to achieve a professional and long-lasting finish.
• Types of Drywall Texture
Before starting your painting project, it is important to determine the type of texture on the drywall, as this will impact your choice of paint and application technique. Consider the following common types of drywall textures:
- Knockdown: This texture features tiny, irregular patterns created by knocking down thinned joint compounds over the drywall surface.
- Orange Peel: This texture resembles the skin of an orange, consisting of small, round bumps. High-quality acrylic-based paint is recommended.
- Popcorn: Also known as acoustic ceiling texture, it has a heavy, bumpy appearance. Avoid using high-gloss paints, as they can highlight the texture’s irregularities.
- Slap brush: This texture is made by slapping a brush or sponge on a wet joint compound, creating a random, stippled effect. Latex, acrylic-based paint is suitable for such textures.
• Choosing the Right Paint for Textured Drywall
Once you have identified the type of texture, selecting the appropriate paint is essential. Some recommendations include the following:
- Water-based paint: A good option for knockdown and slap brush textures, water-based paint is user-friendly and easy to clean.
- Acrylic-based paint: Ideal for orange peel textures, this paint adheres well to the surface and offers a durable finish.
- Low-sheen or matte paint: This paint is highly recommended for textured drywalls, as it does not emphasize imperfections.
Avoid using high-gloss paints on heavily textured surfaces, as they tend to highlight irregularities and can appear streaky.
• Prepare the Surface
Preparing the drywall texture is an important step to ensure a smooth and lasting paint finish. Follow the steps below:
- Cleaning: Ensure the surface is free of dirt, dust, and grease. Wipe down the textured surface with a damp cloth or sponge, and allow it to dry.
- Patching: Repair any visible cracks, dents, or holes in the drywall texture using a joint compound. Allow it to dry, and sand it lightly before painting.
- Priming: Priming the surface can enhance the paint’s adhesion, providing an even and durable finish. Use a roller or brush to apply a high-quality latex primer to the textured surface, and allow it to dry completely.
• Painting the Textured Drywall
With the surface prepared, it is time to paint your textured drywall using the following steps:
- Choose the Right Tools: Rollers are the most effective tool for painting textured drywalls, as they can distribute paint evenly across uneven surfaces. Opt for a roller with a 3/8-inch or 1/2-inch nap to ensure it can reach into the textured grooves. A paintbrush may be used in tight spaces or for touch-ups.
- Apply the Paint: The recommended technique to paint textured surfaces is to use a rolling motion in various directions to cover the uneven surface effectively. Start at one corner and work your way across the wall or ceiling, using a systematic approach.
- Use Multiple Coats: Depending on the type of texture and the color of the paint, multiple coats may be required to achieve satisfactory coverage. Wait for the paint to dry properly before applying additional coats.
- Finishing Touches: After the final coat of paint has dried, touch up any areas that require additional coverage using a paintbrush.
• Final Thoughts
In conclusion, painting directly on drywall texture is an achievable process. By identifying the type of texture, choosing the appropriate paint, preparing the surface, and using the right tools and techniques, you can create a professional and lasting finish.
Remember to take your time, work comprehensively, and follow the recommendations provided in this article for a satisfying painting project outcome.
Question | Answer |
|---|---|
Can you paint directly on drywall texture? | Yes, you can paint directly on drywall texture. However, it is recommended to prime the surface first to seal the texture and provide a better bonding surface for the paint. |