Removing Efflorescence For Masonry Paint Prep
Efflorescence can be frustrating when preparing your masonry surfaces for a fresh coat of paint. But worry not. This guide is here to help you tackle those pesky mineral deposits easily and confidently. With the right methods and precautions, you can effectively remove efflorescence, ensuring a smooth and lasting paint job on your masonry.
Removing efflorescence for masonry paint prep:
Efflorescence removal is vital for masonry paint preparation, ensuring a clean and sound surface. Efflorescence is a crystalline salt deposit that can damage masonry and compromise its appearance. Removal methods include dry mechanical removal using stiff brushes and chemical removal using masonry cleaners. Afterward, repair any damage, apply a masonry primer, and finish with high-quality masonry paint.

Discover our in-depth guide to removing efflorescence from masonry surfaces before painting. Don’t let this pesky white residue ruin your hard work. Read on for our expert recommendations and ensure a flawless finish. Keep reading for more valuable tips and techniques.
Contents
- 1 Efflorescence Removal: Preparing Masonry for Painting
- 2 Cleaning Efflorescence Prior to Masonry Painting
- 3 Is Efflorescence Removal Necessary Before Painting?
- 4 Eliminating Efflorescence Before Masonry Sealing
- 4.1 • Understanding Efflorescence
- 4.2 • Choose the Right Time to Remove Efflorescence
- 4.3 • Gather the Necessary Tools and Materials
- 4.4 • Step 1: Dry Brushing
- 4.5 • Step 2: Water Rinse
- 4.6 • Step 3: Using a Chemical Cleaner
- 4.7 • Step 4: Check for Recurrence
- 4.8 • Step 5: Sealing the Masonry Surface
- 4.9 • Final Thoughts
- 5 Masonry Efflorescence Removal: A Step-by-Step Guide
Efflorescence Removal: Preparing Masonry for Painting
• Introduction to Efflorescence
Efflorescence is a crystalline deposit of salts that forms on the surface of masonry and concrete structures. It occurs when soluble salts and water are drawn to the surface, leaving behind a powdery white residue.
This unsightly residue not only compromises the appearance of the surface but can also damage the integrity of the masonry, resulting in costly repairs in the long run. Therefore, it is crucial to remove efflorescence thoroughly before proceeding with masonry paint preparation.
• Causes of Efflorescence
- Water intrusion: The primary cause of efflorescence is the intrusion of water. It can occur due to poor construction techniques, inadequate waterproofing, or defective materials.
- Salt sources: The salts in efflorescence can come from various sources, such as mortar, brick, concrete, or even surrounding soil.
- Temperature and humidity: The appearance and severity of efflorescence are influenced by temperature and humidity levels. High humidity and fluctuating temperatures can trigger the formation of efflorescence.
• Methods for Removing Efflorescence
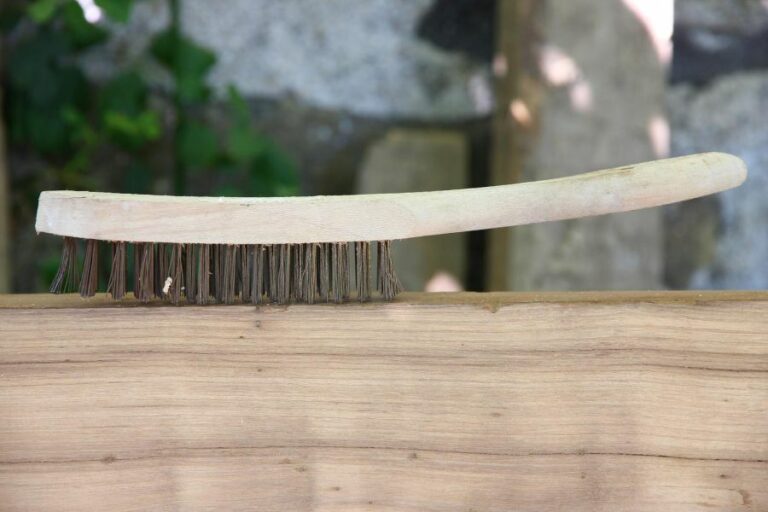
– Dry Mechanical Removal
This method involves using a stiff brush or scouring pad to remove the efflorescence from the surface physically. It is essential to do this activity when the surface is dry and follow the steps below:
- Start by protecting any delicate areas around the masonry, such as windows or trim, with a drop cloth or plastic sheeting.
- Use a stiff brush or scouring pad to scrub the efflorescence gently off the surface. Work in a circular motion, focusing on small sections to ensure thorough removal.
- Keep a vacuum or broom nearby to clean up the powdery residue constantly.
When opting for mechanical removal, it is crucial to avoid methods like sandblasting or the usage of power tools, as these can cause irreversible damage to the masonry.
– Chemical Removal
Chemical removal requires the use of a masonry cleaner or diluted muriatic acid solution to dissolve and remove the efflorescence. This method is more aggressive and can be more effective than mechanical removal in certain cases. Here’s how to go about this method:
- First, make sure to wear protective clothing, gloves, and safety goggles to protect yourself from any harmful chemical reactions.
- Next, select a masonry cleaner or prepare a diluted muriatic acid solution by adding one part acid to twelve parts water. Be sure to follow the manufacturer’s recommendations for proper dilution.
- Apply the cleaning solution to a small, manageable section of the masonry using a sponge or sprayer.
- Scrub the area with a stiff brush or scouring pad to help release the efflorescence from the masonry surface.
- Rinse the treated area thoroughly with clean water. It is essential to rinse quickly, in less than 5 minutes, to prevent any potential damage to the masonry and neutralize the cleaning solution adequately.
- Repeat the process on any remaining sections of the surface that require treatment.
It is important to note that chemical removal may change the color or appearance of the masonry. Be sure to test a small, inconspicuous area before proceeding with this method.
– Prevention Measures
Once you have successfully removed efflorescence, take preventive measures to keep it from recurring. The U.S. General Services Administration (GSA) recommends the following practices:
- Ensure proper installation and maintenance of waterproofing systems, such as building membranes and sealants.
- Properly design and install gutters and downspouts to direct water away from the building’s foundation.
- Control humidity and moisture levels within the structure to minimize water intrusion.
- Use water-resistant masonry materials and proper construction techniques to minimize the absorption and migration of water through the building materials.
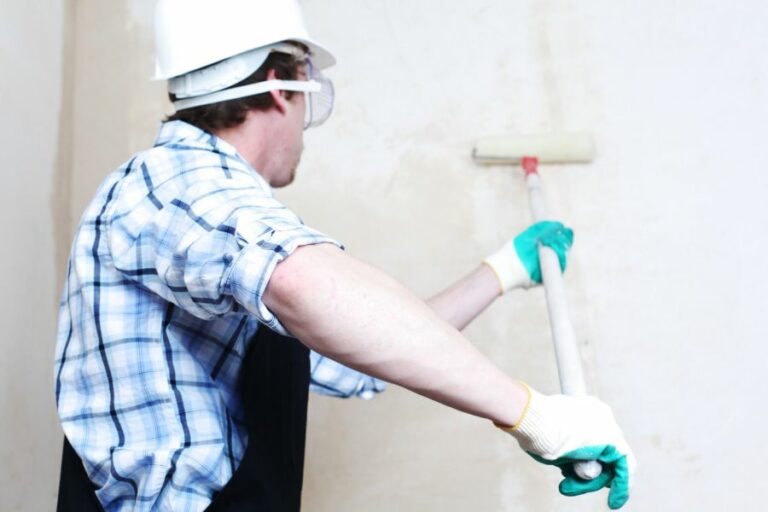
• Preparing Masonry for Painting
After removing efflorescence, it may be necessary to repair any damage to the masonry, such as cracks or holes, before proceeding with paint preparation. Once the surface is clean and sound, follow these steps for proper masonry paint preparation:
- Seal any cracks, joints, or surface defects using a suitable masonry patching compound or caulk.
- Apply a masonry primer to the entire surface, ensuring that it is thoroughly absorbed and allowed to cure for the recommended time.
- Finish the paint preparation process by applying high-quality masonry paint specifically formulated for the type of surface you are working with. Ensure even coverage and follow the manufacturer’s recommendations for the number of coats and drying time.
In conclusion, removing efflorescence is a crucial step in preparing masonry for painting. By following the recommendations outlined in this article, you can ensure a clean, sound surface for painting, providing lasting protection and an enhanced appearance for your masonry structure.
Cleaning Efflorescence Prior to Masonry Painting
Efflorescence is a common issue that affects various surfaces, especially masonry, concrete, and stucco. It refers to the white, powdery residue that forms on surfaces due to the migration of soluble salts to the exterior. Before applying a fresh coat of paint, it’s essential to remove these salt deposits.
• Identifying Efflorescence
Before removing efflorescence, it’s critical to identify it accurately. Efflorescence is usually characterized by a white, powdery substance that forms on brick, concrete, and other porous surfaces.
It’s often mistaken for mold or mildew but is actually caused by water-soluble salts that rise to the surface and crystallize as the water evaporates.
• Gather the Necessary Tools and Materials
Before starting the cleaning process, it’s essential to gather the necessary tools and materials. Here is a list of equipment you will need:
- Stiff-bristle brush or scouring pad
- Bucket of water
- Mild detergent or efflorescence cleaning solution
- Hose or pressure washer (optional)
- Safety gear, such as gloves and eye protection
• Dry Brushing the Surface
Dry brushing is the first step to remove loose efflorescence crystals from the surface. Using a stiff-bristle brush or scouring pad, scrub the affected areas vigorously. This will dislodge most of the surface efflorescence, making it easier to remove the remaining residue.
• Applying a Cleaning Solution
After dry brushing the surface, it’s time to apply a cleaning solution to remove any remaining efflorescence. There are specialized cleaners designed for this purpose, which can be purchased at most hardware stores.
Alternatively, you can create a mild cleaning solution by mixing water with a small amount of detergent.
To apply the solution, dampen the surface with water and then scrub it using a brush or scouring pad. Make sure to work in small sections, scrubbing vigorously to remove as much efflorescence as possible.
• Rinsing the Surface
Once you’ve applied the cleaning solution and scrubbed the surface thoroughly, it’s essential to rinse it thoroughly to remove any remaining residue.
You can use a garden hose or a pressure washer for this step. Ensure you rinse the entire surface, paying special attention to areas with heavy efflorescence buildup.
For particularly stubborn efflorescence deposits, it may be necessary to repeat the cleaning process using a more potent cleaner or a stronger solution.
There are commercial efflorescence removers available that contain acids specifically designed to dissolve efflorescence. Be sure to follow the manufacturer’s instructions and wear appropriate safety gear when using these products.
• Allow the Surface to Dry
Before proceeding with painting, it’s crucial to let the surface dry completely. This may require several days, depending on the nature of the surface and weather conditions.
High humidity and low temperatures can slow down the drying process, so be patient and wait for the surface to dry before applying paint.
• Preparing the Surface for Painting
Once the surface is completely dry, you may need to perform some additional preparation steps before painting. These steps include:
- Fill any cracks or holes with an appropriate filler
- Lightly sand the surface to remove any remaining residue and create a smooth surface for painting
- Apply a primer to the surface, especially if the surface is highly porous or if you’re skeptical about its condition
• Choosing the Right Paint
After preparing the surface, it’s essential to choose the right paint. Since efflorescence is a result of water intrusion, it’s crucial to select a paint that can resist water absorption.
Look for paints specifically designed for masonry surfaces, which often include additives that help to prevent efflorescence from occurring.
Follow the manufacturer’s instructions on the paint can for proper application techniques and the recommended number of coats.
In conclusion, before painting a surface affected by efflorescence, it’s crucial to clean and remove the efflorescence thoroughly. By following the steps outlined in this article, you can effectively address the issue and ensure a successful painting job.
| How do you clean efflorescence before painting? | ||
|---|---|---|
| Step | Action | Notes |
| 1 | Protect the area | Use drop cloths to protect the floor and surrounding surfaces from dust and debris. |
| 2 | Dry brush | Use a stiff-bristled brush to remove loose efflorescence from the surface. Do not use a wire brush, as it can damage the surface. |
| 3 | Apply a mild detergent solution | Mix a mild detergent with warm water and apply it to the surface using a sponge or cloth. This helps to dissolve the efflorescence. |
| 4 | Scrub the surface | Using the same stiff-bristled brush, scrub the surface thoroughly to remove any remaining efflorescence. Rinse the brush frequently to avoid re-depositing the efflorescence on the surface. |
| 5 | Rinse the surface | Use a clean cloth or sponge to rinse the surface with clean water and remove all traces of detergent and efflorescence. |
| 6 | Let it dry | Allow the surface to dry completely before proceeding with painting. This may take up to 24 hours or more, depending on the humidity and temperature of the area. |
| 7 | Apply a sealer | If necessary, apply a sealer specifically designed to prevent efflorescence from returning. This will help protect the surface and ensure the paint adheres properly. |
| 8 | Paint the surface | Once the surface is clean, dry, and sealed, proceed with painting using high-quality paint designed for use on the specific surface type. |
Is Efflorescence Removal Necessary Before Painting?
Efflorescence is a common problem that affects both new and old constructions. It is characterized by the appearance of white, chalky powder or crystalline deposits on the surface of concrete, masonry, and stucco walls.
These deposits consist mainly of water-soluble salts, primarily calcium carbonate, which are brought to the surface by moisture or water vapor as the material dries, and subsequently left behind as the moisture evaporates.
• Why Removal of Efflorescence Before Painting is Important
Effectively dealing with efflorescence before applying a fresh coat of paint is essential for various reasons:
– Aesthetic Appeal
The presence of efflorescence can detract from the visual appeal of a building or structure. Painting over these deposits without properly addressing the issue could result in the paint being unable to bond with the substrate, ultimately leading to unsightly, uneven surfaces and potential paint failure.
– Longevity of Paint Application
Efflorescence can compromise the longevity of the paint job. If left untreated, these deposits can continue to form beneath the paint, causing it to peel or blister over time.
Consequently, it is crucial to address efflorescence before painting to ensure that your paint application lasts and maintains its integrity.
– Structural Integrity
In extreme cases, ongoing efflorescence can indicate deeper structural issues within the construction material, such as excessive moisture or poor construction practices.
Addressing efflorescence and the root cause behind its formation can help prevent further deterioration of the material and preserve the overall structural integrity of the building or structure.
• Methods for Removing Efflorescence
There are various techniques for removing efflorescence before painting. The appropriate method depends on the severity of the deposits and the type of surface being treated.
– Dry Brushing
For mild cases of efflorescence, simply using a stiff-bristled brush to scrub the affected area may suffice. Be sure to brush firmly and consistently to remove as much of the residue as possible. Exercise caution when brushing delicate surfaces, as aggressive brushing may cause damage.
– Washing with Water
In some cases, it may be necessary to use a mixture of water and a mild detergent to remove stubborn efflorescence. Use a sponge or soft-bristled brush to gently scrub the deposits, being cautious not to saturate the surface excessively.
Thoroughly rinse the treated area with clean water and allow it to dry completely before proceeding with painting.
– Chemical Removal
For severe cases of efflorescence or especially tenacious deposits, chemical removal methods may be required. There are commercially available efflorescence removers or weak acid solutions, such as diluted muriatic acid, that can be applied to the surface to break down and dissolve the salts.
Before using such chemicals, it is vital to follow the manufacturer’s instructions and adhere to proper safety protocols, including wearing appropriate personal protective equipment. Thoroughly rinse the surface with clean water after applying the chemical treatment and allow the area to dry before painting.
• Addressing the Root Cause of Efflorescence
As previously mentioned, it is essential to address the underlying cause of efflorescence to prevent its recurrence after painting. Efflorescence is commonly linked to moisture problems, inadequate construction practices, or defective materials.
To mitigate these issues, consider consulting a professional to assess the situation and recommend appropriate solutions. Potential strategies may include improving ventilation, sealing and waterproofing the surface, or correcting drainage problems.
• Properly Preparing the Surface for Painting
Once efflorescence has been effectively removed and the root cause addressed, it is crucial to prepare the surface appropriately for painting. Ensure that the surface is clean, dry, and free of any residual dust, dirt, or debris.
In cases where moisture problems are identified and resolved, it is prudent to wait for an adequate drying period before applying paint.
Finally, depending on the paint type and the specific surface being treated, it may be necessary to apply a primer or sealer to ensure proper adhesion and performance of the paint. Consult the paint manufacturer’s guidelines for best practices and recommendations.
In conclusion, removing efflorescence before painting is essential for both aesthetic and practical reasons. By addressing efflorescence and its underlying causes, you can ensure that your paint application remains durable, visually appealing, and protective for years to come.
| Do you have to remove efflorescence before painting? |
|---|
| Yes, it is important to remove any efflorescence (chalky, crystalline deposits on masonry surfaces) before painting. Efflorescence can prevent the paint from adhering properly and may lead to peeling or blistering paint. |
Eliminating Efflorescence Before Masonry Sealing
• Understanding Efflorescence
Efflorescence is a common issue faced by homeowners and construction professionals. It is the white, powdery substance that forms on the surface of concrete, bricks, and other masonry materials.
Efflorescence occurs when water-soluble salts in the masonry material dissolve in water and are brought to the surface, where they crystallize as the water evaporates.
Before sealing any masonry surface, it is essential to remove efflorescence, as it can prevent the sealer from properly bonding to the surface, leading to reduced protection and durability.
• Choose the Right Time to Remove Efflorescence
Efflorescence removal should be done when the surface is completely dry, as the presence of water can cause the salts to dissolve and penetrate deeper into the masonry material. Ideally, choose a day with low humidity and no rain in the forecast.
• Gather the Necessary Tools and Materials
To remove efflorescence, you will need:
- A stiff-bristled brush
- A bucket of clean water
- Mild dish soap (optional)
- A garden hose or pressure washer
- A chemical cleaner specifically designed for efflorescence removal (optional)
- A sealer compatible with your masonry surface
- Safety gear such as gloves, goggles, and protective clothing
• Step 1: Dry Brushing
Begin by using the stiff-bristled brush to remove as much loose efflorescence as possible. This is best done by brushing in a circular motion, applying firm pressure. Be sure to cover the entire affected area, and avoid using a wire brush, as it can damage the masonry surface.
• Step 2: Water Rinse
Once the loose efflorescence has been removed, use a garden hose or pressure washer to rinse the surface. This will help remove any remaining efflorescence particles that were loosened during the dry brushing step. Start from the top of the surface and work your way down, rinsing thoroughly with water.
If using a pressure washer, be sure to use a low-pressure setting to avoid damaging the surface.
The Portland Cement Association recommends using only water for the initial efflorescence removal, as doing so will not introduce any additional salts or chemicals to the masonry.
• Step 3: Using a Chemical Cleaner
If the efflorescence remains after dry brushing and rinsing, you may need to use a chemical cleaner specifically designed for efflorescence removal. These cleaners often contain mild acids, such as phosphoric or hydrochloric acid, which help dissolve stubborn salts.
Always follow the manufacturer’s instructions and safety precautions when using a chemical cleaner. Typically, these cleaners are applied to the surface, allowed to sit for a short period, and then thoroughly rinsed off with water.
• Step 4: Check for Recurrence
After cleaning the surface, allow it to dry completely, and then inspect for any remaining or recurring efflorescence. In some cases, efflorescence may continue to appear as the salts within the masonry material leach to the surface.
If efflorescence persists, repeat the cleaning process as needed until no more efflorescence is visible.
• Step 5: Sealing the Masonry Surface
Once the efflorescence has been removed and the surface is dry, apply a sealer compatible with your masonry surface. A sealer will help protect the surface from future efflorescence, as well as from water and other contaminants.
It is crucial to select a sealer that is breathable, allowing moisture vapor within the masonry to escape, as trapped moisture can lead to additional issues such as spalling and freeze-thaw damage.
Follow the sealer manufacturer’s instructions for application and drying times. Typically, a sealer will need to be reapplied every few years to maintain its protective properties.
• Final Thoughts
Removing efflorescence can be a time-consuming process, but it is essential for maintaining the appearance and integrity of your masonry surfaces. By properly cleaning and sealing the surface, you can prevent future efflorescence and protect your investment for years to come.
| How do you remove efflorescence before sealing? | |
|---|---|
| 1. Dry brushing | Use a stiff brush to remove the loose efflorescence from the surface. |
| 2. Pressure washing | Use a pressure washer to clean the surface, but remember to be careful, as high pressure may damage the surface or drive water further into the substrate. |
| 3. Chemical cleaning | Use a diluted acid solution (muriatic or phosphoric acid) to dissolve the efflorescence. Always follow the manufacturer’s instructions for safety and proper dilution rates. |
| 4. Sandblasting | For stubborn efflorescence, use sand blasting technique to remove it from the surface. However, it may damage the surface and is usually recommended for professionals only. |
| 5. Properly drying the surface | Make sure that the substrate is completely dry before applying the sealer to prevent any future efflorescence. |
Masonry Efflorescence Removal: A Step-by-Step Guide
Efflorescence is a common problem that affects various types of masonry surfaces such as brick, concrete, and natural stone. This phenomenon manifests as a white, powdery deposit on masonry surfaces due to the migration of salts to the surface as the masonry dries.
This guide outlines different methods for removing efflorescence from masonry, the necessary precautions, and measures of prevention to keep your masonry surfaces in excellent condition.
• Understanding the Causes of Efflorescence
Before diving into the process of removing efflorescence, it’s essential to understand the factors that contribute to its formation. This helps to determine the appropriate removal method and prevent recurrence.
Efflorescence is primarily caused by three factors:
- The presence of water-soluble salts within the masonry
- Excess water within the masonry that allows the salts to migrate to the surface
- The evaporation of water from the masonry surface leaves the salts behind as deposits.
To remove and prevent efflorescence, it’s crucial to address these factors effectively.
• Method 1: Dry Brushing
A simple and non-invasive method for removing efflorescence is dry brushing. This technique involves using a stiff-bristled brush to gently remove the salt deposits.
Step-by-step process:
- Ensure that the masonry surface is completely dry before you begin.
- Use a stiff-bristled brush (preferably a nylon brush for gentler scrubbing) to remove the salt deposits.
- Sweep or vacuum the residue from the surface.
- Inspect the surface for any remaining efflorescence, and repeat the brushing process if required.
- Apply a sealant or water repellent to the clean masonry surface to help prevent water infiltration and future efflorescence.
• Method 2: Chemical Cleaning
If dry brushing does not yield the desired results, chemical cleaning with specialized efflorescence removers can be a more effective solution. These removers are typically acid-based solutions that dissolve the salt deposits, making it easier to clean the surface.
Acid cleaning precautions:
- Always perform a patch test in an inconspicuous area before applying the solution to the entire surface.
- Wear proper protective gear, including gloves and safety glasses.
- Ensure proper ventilation before applying chemical solutions to the masonry.
Step-by-step process:
- Choose an efflorescence remover specifically designed for masonry surfaces. The Brick Industry Association has a list of recommended products.
- Follow the manufacturer’s instructions, including dilution ratios and application methods.
- Apply the solution to the affected masonry surface with a brush or sprayer.
- Allow the solution to dwell on the surface for the recommended time (usually around 5-10 minutes).
- Scrub the surface with a stiff brush to remove the dissolved efflorescence residues.
- Thoroughly rinse the surface with clean water, taking care not to saturate the masonry.
- Allow the surface to dry completely.
- Inspect the area for remaining efflorescence and repeat the process if necessary.
- Apply a sealant or water repellent to the clean masonry surface.
• Method 3: Pressure Washing
Pressure washing is another viable method for removing efflorescence from masonry surfaces. However, it’s crucial to approach this method with caution, as high-pressure water can potentially damage the masonry, especially if the surface is already compromised by efflorescence.
Step-by-step process:
- Choose a pressure washer with adjustable pressure settings, and opt for a low to moderate pressure range suitable for masonry cleaning.
- Test the pressure washer in an inconspicuous area to ensure that it won’t damage the masonry surface.
- Use a sweeping motion when spraying the surface, maintaining a consistent distance to avoid uneven cleaning.
- If necessary, use a stiff-bristled brush to tackle stubborn efflorescence deposits.
- Rinse the surface thoroughly with clean water to remove any residue.
- Allow the surface to dry completely.
- Inspect the area for any remaining efflorescence and repeat the process if necessary.
- Apply a sealant or water repellent to the clean masonry surface.
• Preventing Efflorescence
Effective prevention of efflorescence lies in addressing its root causes. Some preventive measures include:
- Properly compacting and grading the soil beneath the masonry to ensure adequate drainage.
- Using water-resistant barriers in the masonry construction process to reduce water penetration.
- Sealing the masonry surface with a high-quality sealant or water repellent to keep water out.
- Regularly inspecting and maintaining the masonry surface to address any potential water infiltration issues before they cause efflorescence.
In conclusion, removing efflorescence from masonry can be achieved through various methods, including dry brushing, chemical cleaning, and pressure washing.
By correctly identifying the cause of efflorescence and implementing preventive measures, you can keep your masonry surfaces in excellent condition for years to come.
Step | Description |
|---|---|
1 | Allow the masonry to dry completely before cleaning. Efflorescence is often a temporary issue that will disappear once the masonry stops absorbing moisture. |
2 | Brush the surface with a stiff brush or broom to remove loose efflorescence. Avoid using a wire brush, as it can damage the masonry surface. |
3 | Apply a mild dish soap solution on the affected area and let it sit for a few minutes. Rinse the area thoroughly with clean water. |
4 | If efflorescence persists, step up to a specialized cleaner designed for masonry surfaces. Follow the manufacturer’s instructions carefully. |
5 | For stubborn efflorescence, consider using a muriatic acid solution. Follow the manufacturer’s instructions, ensuring proper safety precautions including wearing rubber gloves, safety goggles, and a respirator. |
6 | Rinse the treated area thoroughly to ensure no acid residue is left behind. This will prevent any damage to the masonry surface. |
7 | Consider applying a water-repellent sealer to the masonry surface after cleaning to help reduce efflorescence in the future. |